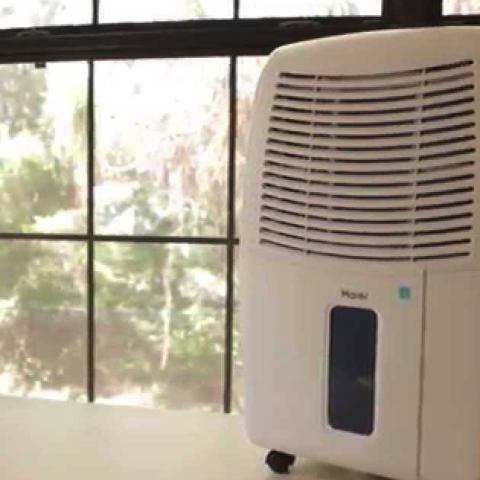

If you live in an environment with varying humidity levels, then owning a humidifier is one of the best investments you can make for your home. Dehumidifiers control humidity levels and make the humidity more tolerable. The perfect humidity in your living space increases comfort and keeps you and your home healthy.
However, figuring out the best settings for optimal humidity, knowing how to troubleshoot your dehumidifier, and learning the different settings can be a bit of a challenge. Keep reading to learn all you need to regarding fixing and using your Haier dehumidifier.
Why is my Haier dehumidifier not working?
Below are some reasons why your humidifier is not working;
Defective Bucket Switch
When the water bucket reaches its capacity, the bucket switch opens to shut off the dehumidifier. If the bucket switch fails while it is open, it will prevent the dehumidifier from running.
To determine if the bucket switch is defective, use a multimeter to test it for continuity. If the bucket switch does not have continuity, replace it.
Defective Humidistat
The humidistat monitors the level of moisture in the air. When the moisture level is too high, the contacts in the humidistat close to allow the dehumidifier to run. If the humidistat contacts fail, the dehumidifier will not run.
To determine if the humidistat is defective, use a multimeter to test it for continuity. If the humidistat does not have continuity, replace it.
Defective Control Board
The control board monitors the level of moisture in the air. When the moisture level is too high, the contacts in the humidistat close to allow the dehumidifier to run. If the control board is defective, the dehumidifier will not run.
Defective Humidity Sensor
The humidity sensor monitors the level of moisture in the air. When the moisture level is too high, the contacts in the humidity sensor close to allow the dehumidifier to run. If the humidity sensor is defective, the dehumidifier will not run.
Defective Compressor
The compressor is a pump that compresses the refrigerant and circulates the refrigerant through the evaporator and condenser coils. If the compressor is not working, the dehumidifier won’t cool. However, this isn’t usually the case.
Before replacing the compressor, first, check all of the more commonly defective components. If all of the other components are working properly, use a multimeter to test the compressor for continuity. If the compressor does not have continuity, replace it.
Power Problem
The electrical outlet might not be getting power. To determine if the outlet is getting power, plug an electrically-powered unit into the outlet and see if the unit turns on. If the outlet does not seem to be getting power, check the circuit breakers or fuses to identify the problem.
Why does my Haier dehumidifier keep shutting off
Ideally, when you turn your dehumidifier ON, it should run until the selected humidity level is achieved. And if your dehumidifier keeps shutting off before desired relative humidity is attained, chances are there is an underlying problem. So why is your dehumidifier turning on and off constantly during operation?
The Temperature is Too Low for Dehumidification
Most of the dehumidifiers available in the market operate on a vapor compression cycle. This means they use refrigerant for the dehumidification process, just like air conditioners. Airflow is established through the dehumidifier by using a fan. Air comes in contact with the cool evaporator coils of the dehumidifier.
These coils are at a temperature lower than the due point of the air. Due point is the temperature below which water condenses from air and dehumidification is carried out.
The lower the temperature of the room, the lower is the dew point temperature and the lower is the temperature required by evaporator coils in your dehumidifier in order to extract humidity from the air.
However, when the temperature of ambient air is very low, it results in icing of the coils. It is also referred to as the frosting up of the dehumidifier. The ice buildup will cause inhibition of airflow through cooling coils. As a result, the airflow rate will be reduced, leading to a reduction in dehumidification.
Note: For optimal dehumidifier operation, the ideal room temperature is between 70°F and 90°F (21°C to 32°C). Refrigerant dehumidifiers should not be used below 60°F (about 15°C). You should never use a refrigerant dehumidifier below 41°F (5°C)
If you operate it at sufficiently lower than the prescribed temperature, your evaporator coils will slowly develop ice. This will deteriorate the dehumidification process and eventually stop it.
However, some modern dehumidifiers have auto-defrosting or anti-icing features. This allows them to automatically turn off the compressor and keep the fan running until ice melts.
Solutions
- Increase the temperature of the room to be greater than the prescribed limit i.e., 60-degree Fahrenheit. This will prevent frosting of dehumidifier and keep your room at comfortable temperature.
- Use a different kind of dehumidifier. Go with a desiccant humidifier or a LGR (Low Grain Refrigerant) dehumidifier. Desiccant dehumidifiers are not dependent on room temperature, so you are entirely going to get rid of that problem.
Note: Heating the room is suitable if you live in the room. In other locations of your home, like crawl space, connecting room, basement, etc., I recommend you use a desiccant dehumidifier. To save you the trouble of finding it, I selected one for you. Click here for specifications.
Dirty Blocked Filter
Air that passes through the dehumidifier is cleaned by an air filter. Some dehumidifiers have two filters for that purpose, one at the intake and the other at delivery/exhaust. When the filters are unclean and mucky, airflow through them is restricted.
As a result, the compressor has to work harder in order to sustain the airflow. This causes more energy consumption and heat generation. This may also cause your compressor to heat up more than it should.
However, a more probable event due to a clogged filter that causes reduced airflow that could, in turn, lead to frosting. When the flow rate becomes inadequately low, quantity of air coming in contact with cooling coils will be reduced. As a result, the temperature of the coils will go very low to cause ice buildup.
The dehumidification will be reduced and the dehumidifier compressor will shut off, going into defrosting mode, to melt the ice. If your dehumidifier keeps going when on defrosting mode and you have not checked your filters for a while, it is likely that an unclean filter is the problem.
Solutions
Clean your filters and replace them when needed. If you use your dehumidifier regularly, you may need to clean the filters every few weeks.
Inadequate Fan or Blower Speed
Fan is the component of dehumidifier that pushes air through it. The term ‘blower’ is also used interchangeably with fan, mainly depending upon the design. However, both perform the same function i.e., generating forced airflow.
When air comes in contact with cool evaporator coils, heat is taken up by the coils, temperature of air is reduced below dew point and humidity is extracted from it. The flowrate of air through the dehumidifier needs to be adequate.
With less airflow rate, insufficient air comes in contact will cooling coils. As a result, less cooling will be used up from evaporator coils. This will cause their temperature to reduce to drastically low levels, causing ice buildup in the coils.
Causes and Solutions of Slow or Non-Operational Dehumidifier Fan
Faulty Blower Motor
This is one of the main causes of a slow blower, especially if it does not start, is a damaged blower motor. Motor needs to be checked for shortages and continuation. In case motor is the culprit you have two solutions. Either get it repaired or get a new one.
Damaged Fan/Blower Blades
Another reason why required airflow could not be established may be damaged blower blades. This is where the motor and blower are running at the required RPM but not enough air is being pulled by the blades.
If you see a broken fragment or any other damage to blower blades, you will have to get it replaced.
Faulty Electronic Components Associated with Running of Fan
There are so many factors involved in running your dehumidifier fan. For example, controlling fan speed, variable switching, operating it with/without compressor etc. One of the reasons why your fan is running at a slow speed, or not running at all, could be electronic components like switch, capacitor, relay etc.
Lack of Refrigerant Due to Leakage
If your dehumidifier keeps turning OFF and ON, then one of the problems could be low amount of refrigerant. Dehumidifiers are supposed to keep the same amount of refrigerant in them for life.
The refrigerant during the dehumidifier operation shifts between liquid and gaseous state but never reduces in quantity. So low quantity of refrigerant in dehumidifier is almost always due to leakage of refrigerant. Poor construction or impact directly to lines could cause leakage in your dehumidifier.
Refrigerant leak causes reduction in pressure in refrigerant lines. Pressure is reduced to the extent that compressor turns off before the completion of cooling cycle. After sometime when pressure in lines increases, compressor kicks back ON.
This working in short incomplete cycles causes high energy usage and may damage your dehumidifier components. Another indication of leakage is icing on evaporator coils despite adequate room temperature and air flow.
Solution
Hire a certified HVAC technician to determine if there is a leak and fix it
Note: Check your dehumidifier for other reasons first and rule out the convenient causes, then consider getting your dehumidifier checked for refrigerant loss.
Clogged Dehumidifier Coils
When air moves through your dehumidifier, it comes in contact with cooling coils. As a result, its temperature drops below due point, and humidity in it is extracted and collects in drain pan.
For proper and consistent dehumidification, air needs to come in contact with the evaporator coils at a sufficient flow rate. If you have clogged evaporator and condenser coils, air passage will be blocked partially. As a consequence, airflow rate will drop to the extent to cause frosting.
Dust and dirt keep accumulating in coils over time and it is advisable thet you clean them regularly.
Solution
Clean your dehumidifier coils by using a soft brush. Ensure you clean them in the direction of tubes. Clean debris and dirt carefully, with a suitable brush, in gentle upward and downward motion. Then you could either use a solution like warm water and detergent or dish washer liquid to clean your dehumidifier coils.
Malfunctioning Dehumidifier Humidistat
Humidistat or humidity control is one of the core components of dehumidifier. It is what decides when your dehumidifier needs to start and when it should stop. The humidistat continuously detects percentage humidity in the vicinity of dehumidifier. When humidity reaches selected value, it signals the compressor to turn off.
When humidity increases sufficiently again, it restarts cooling cycle again by switching ON the compressor. The electronic humidity sensor is at the inlet of your dehumidifier and it is exposed to adequate flowrate of air. This allows the most reliable, accurate, and instantaneous measurement of overall humidity in the room.
If your dehumidifier’s humidistat is faulty, it will measure inaccurate relative humidity level. This will cause your humidity control to shut off compressor before desired value of humidity is achieved. As a result, you will have incomplete dehumidification.
Note: One of the most probable indications of a faulty humidistat is that you will have to select somewhat lower value of humidity than required in the controls to achieve the required dehumidification.
Solution
Replace the humidistat or hire a certified professional to replace the humidistat if you are not into DIYs.
Faulty Compressor Unit
The most important component required for your dehumidifier operation is compressor. It is in fact the only necessary moving component in cooling cycle. Compressor is what pressurizes refrigerant, then heat is taken out from it and it is expanded, before it goes in to cooling coils.
Not very common cause of your dehumidifier short cycling, but a possible one is malfunctioning compressor. If your dehumidifier keeps shutting off after regular small intervals, it could be due to compressor overheating.
If there is a buildup in your dehumidifier compressor that is restricting the flow of refrigerant, it will overheat and shutdown. The compressor will restart its operation after it cools down sufficiently. However, it will overheat again in no time and turn off.
Due to this, your dehumidifier will operate in short cycles and keep turning off, without achieving desired dehumidification.
Solution
Call a certified AC technician to resolve this problem for you by replacing the compressor as it cannot be repaired.
Obstructions in Airflow
As I discussed earlier, your dehumidifier needs consistent and sufficient airflow to operate properly. When it is lower than required you will face two problems with it.
- Frosting in the cooling coils. The reason is enough heat not transferred from air to coils. This causes their temperature to go very low.
- Overheating of the compressor. It has to perform higher magnitude of work to maintain essential airflow.
Both of these problems can cause your dehumidifier to turn Off before completing the required operation. Anything that causes blockage or serves as an obstruction in the path of air through dehumidifier may cause frosting and overheating of the compressor.
Solution
- Keep enough space in the surroundings of your dehumidifier to cause active airflow.
- Air from your living space to dehumidifier and vice versa must not be prohibited in any way.
- Plants, furniture, decoration pieces or any hindering material should be at sufficient distance from your unit.
Problems with Float Switch and Bucket Placement
A dehumidifier collects water from air in your home and stores it in the drain bucket. When the bucket is full, it needs to emptied and reattached again. When your bucket fills up, internally fitted float switch signals to the dehumidifier control board to interrupt the dehumidifier operation.
If this doesn’t happen, the quantity of water collected will get higher than the capacity of drain bucket and spill on the floor. If your float switch is faulty, it will trip and signal dehumidifier compressor and fan/blower to turn off while the bucket is not full.
Diagnosing this problem is usually easy;
- If your dehumidifier doesn’t turn ON or turns OFF after running for a short while, look for bucket full indicator light.
- If it is indicating that the bucket is full by blinking or is constantly ON, you know that equipment that detects water level is defective. It is restricting the unit to continuously perform dehumidification to complete the process.
Dehumidifier Bucket Placement
When you place the drain bucket back in the dehumidifier after emptying or cleaning, there is a push switch that is pressed and your dehumidifier starts working. you should always push the switch to ensure proper bucket placement.
If the bucket is not properly fitted, your dehumidifier will keep on running and cause the water to spill on the floor. The loose connection will prevent your dehumidifier from turning ON, or working continuously, to carry out required dehumidification. It is also possible that push switch or water container fixture is damaged.
If disturbing the bucket or applying pressure on it slightly causes your dehumidifier to start or stop working, then there is a good chance that push switch might be at fault.
Solutions
- If bucket full indicator light is ON, then this is what is prohibiting the operation of your dehumidifier. Take following measures to resolve this:
- Take off the bucket. If it is full, empty it and reattach, your dehumidifier will start running.
- If it is empty and your dehumidifier is indicating a full container, this means there is a problem with float valve. Either it needs adjustment, repairing or replacement.
- If problem is with the placement of bucket container;
- Check to see if something is obstructing proper fixing of the container.
- If it fixes properly and entirely, then try to apply pressure on push switch, by hand, without bucket. If this turns dehumidifier ON, then that switch needs replacement.
Note: In case push switch is faulty, you will not necessarily know that by using pressure in different directions on it. In case it is electrically failed, you will need to test continuity when it is turned ON.
Incorrect Settings on the Dehumidifier Control Panel
It is not necessary that your dehumidifier keeps shutting Off because it is defective. There are various options and modes you can select in dehumidifier controls. It is possible that your dehumidifier performs incomplete operation due to the settings you have selected in its control panel.
If you do not have the idea of the relative humidity you want to achieve, it is possible that you have chosen a value close enough to the present humidity conditions, or even above the humidity already present. This causes your dehumidifier to shut down after a while.
Solutions
- Check the settings in dehumidifier control panel.
- Ensure timer or any other restricting modes are disabled.
Note: It is not necessary to know the exact value of relative humidity by a hygrometer. As long as you know the ideal humidity range you are fine. If you are overwhelmed by the settings, you can always reset the dehumidifier to primary default settings.
Malfunctioning Electronic Components
Most dehumidifiers are based on vapor compression cycle. In this cooling cycle, basic fundamental operations include compression, condensation, expansion and evaporation.
However, for desired functionality according to our requirements, there are several electronic components that assist components associated with these fundamental processes.
If your dehumidifier keeps turning On and Off, runs in short cycles, or is unable to start, it is possible that one or more of these electronic components are defective or damaged.
The other electronic components include;
Capacitor: Stores and releases electrical energy. Dehumidifier generally has two capacitors. One associated with compressor startup and second one creates magnetic flux to rotate the fan/blower.
Relay: Works as a low power switch to control high power switch. Allows safe switching of dehumidifier components.
- Switch: Controls power and speed of fan
- Control Board: All electronic components link to it. Contains multiple lines with different voltages.
- Fuse: Prevents burning of dehumidifier components due to electrical surges.
Note: There can either be defect in electrical wiring or electronic components. For instance, if your dehumidifier runs for short durations, with incomplete operation, it is usually due to a faulty capacitor.
Solutions
- Inspect the external and internal electrical wiring and make sure everything looks fine. There should not be any burnt or damaged section.
- Also check for any loose connections.
- check for faults in various components of your dehumidifier.
- Trace current through the circuit. All electronic components (including compressor) connect to control board.
- Look for discontinuation in the circuit, especially before and after components.
- Also check resistors for continuity.
Note: different components require a different kind of testing. For example, for capacitor, current should slowly reduce from maximum to minimum when testing on multimeter. However, for relay, after it is switched on, before and after is theoretically same.
How to empty a Haier dehumidifier bucket
There are two main ways to handle tank emptying. These include;
Empty The Tank Manually
When the water tank is full, the red Bucket Full indicator light will come on.
- Turn the power off to the dehumidifier.
- Wait several minutes to allow the water to stop dripping from the coils into the tank.
- Use both handles to lift and remove the bucket.
- Empty water through the tank opening into a sink or tub.
- Reinstall the tank.
- Make sure the drain cap (used if draining through a hose) is tightened before turning the unit back on.
Automatic emptying for Drain Pump Models
When the drain tube is connected and the water level inside the bucket reaches the correct level, the drain pump automatically pumps the water to the drain. The 16 ft supplied drain tube is stored in the bucket and attaches to the drain pump connector on the back of the dehumidifier.
The drain pump can pump up to 14 vertical feet. Do not use a longer length of tubing than the 16 ft provided.
- Remove the drain tube from inside the dehumidifier bucket.
- Insert the drain tube fitting into the drain pump connector on the back of the dehumidifier.
- Push the drain tube fitting in as far as it will go. The fitting will snap into place.
- Place the other end of the drain tube into a suitable drainage location, like a drain, sink, or sump.
- To remove: Press the button above the drain pump while pulling the drain tube fitting away from the drain pump connector.
How to reset a Haier dehumidifier
To reset your Haier dehumidifier, disconnect the power cord from its electrical outlet and wait five minutes before plugging the dehumidifier back in. The appliance should reset, clearing any settings programmed into the controls. Set the controls and start the dehumidifier as normal.
Haier dehumidifier not collecting water
If the dehumidifier is not collecting water, the unit is not operating properly. Try to reset the dehumidifier by disconnecting power for 30 seconds and re-connecting the power. If the unit is still not collecting water, please refer to the model’s warranty located in the Owner’s Manual
Haier dehumidifier recall – what models and why
In cooperation with the U.S. Consumer Product Safety Commission, New Widetech Industries Co., Ltd. (NWT) announced a voluntary recall of certain older Haier brand dehumidifiers manufactured by NWT.
The Haier models are one of over 20 brand dehumidifiers included in this recall. The recall includes approximately 30,750 Haier brand dehumidifiers manufactured from 2009 until 2017 and sold by retailers and distributors in the US.
The following Haier brand models are included in the recall:
- HM50EP
- HM70EP
- HEN70ETFP
- HEN70ETFP-E
Why were the models recalled?
The dehumidifiers can overheat and catch fire posing fire and burn hazards. However, there are no reports of injuries associated with Haier brand dehumidifiers.
What You Should Do
- Immediately stop using your recalled dehumidifier.
- Unplug the dehumidifier.
- Register for a refund by going online at https://www.recallrtr.com/nwtdehumidifier/ or by calling 877-251-1512 toll free.
Note: You will need the unique serial number found on the humidifier.
Haier dehumidifier not draining through hose
If your dehumidifier is not draining properly, it is recommended that you thoroughly inspect the drain setup / options that have been outlined in your usual manual. General instructions are listed below.
Note: When the water bucket is full, the unit will not continue to operate regardless of what drain method is being used. what this means is that even if the unit is setup for continuous gravity drain or drainage by way of an internal pump, the unit will not operate is the internal water bucket is full (or not installed properly).
Check Gravity Drain Setup
Check and verify that the drain hose is running in a downhill manner all the way to the drainage port / sink / floor drain. A drain hose that bends or that has been routed to drain water uphill will not work. This drain setup relies on gravity to work properly.
Check to make sure that your drain hose is free from bends and kinks, clogs or other damage that may prevent water from flowing freely. If the drain hose has been routed into a drain, such as a standpipe or down into a standard sink.
Ensure that the hose end is not resting in standing water. This will prevent water from draining due to the pressure created by the standing water. Adjust the hose end positioning accordingly.
Check to verify that the drain hose adapter has been installed properly. Improper installation of the drain hose adapter may result in the unit continuing to drain into the bucket, or not draining at all.
Other tips:
You may want to cut off or remove excess drain hose to allow how to extend with fewer curves and bends.
If the bucket full indicator is on, check to make sure that the bucket is empty as the unit is designed to shut off regardless of drain method being used if / when the water bucket is full.
Also, check to make sure the bucket has been properly reinstalled into the unit. There is a safety switch that engages when the bucket is removed that is active until the bucket is re-installed properly.
Check to verify that the float switch located inside the water bucket (foam block attached to rotating arm) is free from obstruction and is not stuck in the up (full) position.
Check Pump Drain Setup
At the drain port on the back of the unit where the pump drain hose is attached is a sensor that detects if the pump drain hose has been properly connected. If the sensor is not properly engaged, the unit will not activate the pump.
The pump will only be activated if the pump drain hose has been connected properly. The pump drain hose attachment when properly connected will “click” into place.
Haier dehumidifier not shutting off when full
If the unit will not shut off when bucket is full or when air reaches desired set point then it is not operating properly. You may try to reset the dehumidifier by disconnecting power for 30 seconds and re-connecting the power.
Haier dehumidifier fan not working
Broken Fan Blade
The fan blade might be bent or broken. To check the fan blade, try turning the fan blade by hand. Ensure that the blade is not rubbing against the fan housing as it turns. If the fan blade does not turn freely or is rubbing against the fan housing, this indicates that the fan blade is defective and should be replaced.
Additionally, wiggle the fan motor shaft to see if the motor shaft is loose. If the fan motor shaft moves even slightly, this indicates that the fan blade is loose. If the fan blade…
Defective Fan Motor
First, try turning the fan blade by hand to ensure that it spins freely. Make sure that the fan blade is not rubbing against the fan housing. If the fan blade spins freely and is not rubbing against the fan housing, use a multimeter to determine if the fan motor is getting power.
If the fan motor is getting power, but the dehumidifier fan won’t run, the fan motor is likely defective. If the fan motor is defective, replace it.
Damaged Blower Wheel
Try turning the blower wheel by hand. If the blower wheel does not turn freely, or is rubbing against the fan housing, replace the blower wheel. In addition, if the blower wheel wobbles as it turns, this indicates that it is loose on the motor shaft. If the blower wheel is loose, tighten or replace it. Finally, if the blower wheel is physically damaged, replace it.
Defective Humidity Sensor
The humidity sensor monitors the level of moisture in the air. When the moisture level is too high, the contacts in the humidity sensor close to allow the dehumidifier to run. If the humidity sensor is defective, the dehumidifier fan will not run. If the humidity sensor is defective, replace it.
Haier dehumidifier pump not working
If your dehumidifier has an internal pump and is not draining the water, check the following:
- Ensure the pump is turned on.
- The bucket must be in place for the unit to drain.
- The bucket must be full in order to start draining.
- Make sure the drain hose does not exceed 16 ft.
Note: If the unit is still not draining then is not operating properly, please refer to the model’s warranty located in the Owner’s Manual.
Haier Dehumidifier freezing up
Below are the main reasons your dehumidifier is freezing up;
Defective Fan Motor
Try turning the fan blade by hand to ensure that it spins freely. Make sure that the fan blade is not rubbing against the fan housing as it turns. If the fan blade spins freely, test the fan motor with a multimeter to determine if the motor is getting power. If the fan motor is getting power, but the dehumidifier fan won’t run, the fan motor is likely defective. If the fan motor is defective, replace it.
Damaged Blower Wheel
Try turning the blower wheel by hand. If the blower wheel does not turn freely, or is rubbing against the fan housing, replace the blower wheel. In addition, if the blower wheel wobbles as it turns, this indicates that it is loose on the motor shaft. If the blower wheel is loose, tighten or replace it. Finally, if the blower wheel is physically damaged, replace it.
Faulty Fan Blade
Try turning the fan blade by hand. Ensure that the blade is not rubbing against the fan housing as it turns. If the fan blade does not turn freely or is rubbing against the fan housing, this indicates that the fan blade is defective and should be replaced. In addition, wiggle the fan motor shaft to see if the motor shaft is loose.
If the fan motor shaft moves even slightly, this indicates that the fan blade is loose. If the fan blade is loose, tighten the set screw. If tightening the screw doesn’t work then consider replacing it.
Dirty Air Filter
If the air filter becomes clogged with dirt, it will restrict the airflow over the evaporator coils. If the airflow is restricted, the evaporator coils will get too cold. Then, as humid air passes over the evaporator coils, the air will condense on the coils and freeze. Eventually, the entire evaporator coil assembly will frost over. If the air filter is dirty, clean or replace it.
Air Flow Problem
Most standard dehumidifier models require the room temperature to remain above 65 degrees Fahrenheit. If the room temperature is below 65 degrees Fahrenheit, the dehumidifier coils will frost up. If the temperature in your home regularly drops below 65 degrees, you will need to obtain a model that is specifically designated for lower temperature operation.
How to set the timer on a Haier dehumidifier
If the dehumidifier has a Timer feature, the unit can be set to turn on or off after a set amount of time. If the unit is ON, it can be set to turn off a set number of hours. By the same token, if it is OFF, it can be programmed to come on in a certain amount of hours.
Note: The Timer feature does not allow you to create an on/off schedule; it is one-time programming.
If you want the unit to turn off:
- While unit is on, press Timer.
- The Off light should come on above the Timer pad.
- Adjust time with the up or down arrows.
- The Timer is adjustable in 1 hr increments up to 24 hrs.
- Once off, the unit will not come back on until you press Power to turn it on.
If you want the unit to turn on:
- While unit is off, press Timer.
- The On light should come on above the Timer pad.
- Adjust time with the up or down arrows.
- The Timer is adjustable in 1 hour increments up to 24 hrs.
Haier Dehumidifier is loud or noisy
Modern dehumidifier units have an average sound level of 40 to 50 dB. If the noise produced by your dehumidifier is sufficiently louder than that for extended period of times, it will cause interruption in your daily activities and affect your wellbeing.
Loose Internal Components
Dehumidifier has static as well as moving components that include compressor and fan. Every mechanically moving component has some vibration. You can reduce it but it is impossible to eliminate it entirely.
For example, the role of compressor is to compress refrigerant before it goes in condenser coils. During this process there will be slight shaking of the unit. Similarly, vibration is bound to happen during rotation of blower fan, installed to develop airflow through dehumidifier unit.
With time, repeated vibration cycles may cause components of dehumidifier to become loose. This will increase magnitude of those vibrations which obviously will result in more noise by your dehumidifier.
Solution
- Tighten loose components and replace any corroded and broken bolts
- Replace any defective parts causing the dehumidifier to vibrate
- Check all fixtures and fitting and ensure they are properly assembled and fitted
The Dehumidifier is Placed on An Uneven Surface
One of the reasons why your dehumidifier may be making noise during operation is because it is tilted or inclined at an angle. You should always keep your dehumidifier in vertical upstanding position, especially when it is running. This is crucial for your dehumidifier to work properly and consistently.
Generally, this noise is due to the oscillation of dehumidifier unit during operation. But it can have far more drastic effects. Slanting your dehumidifier causes displacement of oil and drying of certain areas of compressor. Moreover, this oil can also affect refrigerant state changes that are required for refrigeration.
Solution
Check the level of the dehumidifier anyways and make sure it is in the upstanding default position. You don’t need high-precision instruments for that, just observe the straightness of the unit by your eyes, relative to ground and wall.
Also, place your hand on the unit to see if it stops making that noise and there is no play or movement by that. If you feel surface is not straight, adjust legs of your dehumidifier. If that is not possible, consider packing, that will not compress after sometime, due to weight of the dehumidifier, to keep it straight.
Imbalanced Dehumidifier Blower Fan
Dehumidifier blower or fan pushes air from the room through the cooling coils. This air comes in contact with the low temperature coils that are maintained below dew point and cause condensation.
An imbalanced dehumidifier fan could also be the reason for loud noise from dehumidifier. There are several reasons for this including following:
- Loose fixture of dehumidifier fan on motor shaft that is making it wobble.
- The fan is imbalanced causing collision with housing.
- There is dirt or debris inside dehumidifier fan.
Solution
If there is vibrating noise, sort of a quick oscillating sound from inside the dehumidifier, that sustains during its operation, it is highly likely its source is either a fan or compressor.
- Diagnosis of compressor is not easy. Do not attempt to repair the compressor as this may void the warranty hire a certified professional to repair the dehumidifier instead.
- If the cause of the vibration and noise is the dehumidifier fan, you can determine this by taking a look at the dehumidifier while it is running;
- If it is clearly wobbling, then this is probably due to its loose fitting on motor shaft.
- If it’s mostly making loud sounds, then there are two problems that are most likely:
- Fan bearings are worn out and should be replaced.
- There is dirt on fan blades and they should be cleaned.
Lastly, inspect the fan blades for any damage in case there is some prominent damage hire a certified technician to replace them.
The Water Bucket is Not Fixed Properly
Continuous noise when the dehumidifier is running can also be caused an improperly fixed water bucket. This can cause any external loose components to vibrate like dehumidifier bucket or even its casing.
Solution
Check to see if bucket placement is the problem and remedy the issue. Put pressure on it when dehumidifier is running. If vibrating sound stops, adjust the placement.
However, if a part of your bucket is damaged or defected, you could either use glue, in case of broken fragment, to reattach it. If that is not possible, you will need to get that bucket replaced.
The Dehumidifier Unit is Set to Continuous Mode
Fan and compressor are the most noise generating components of your dehumidifier. The compressor generally consumes most of the energy taken up by the unit. Thereby in order to reduce noise and energy consumption these components, especially compressor, run or dehumidifier intermittently.
When your dehumidifier unit is on continuous mode, compressor and fan will operate continuously and both noises will couple together to increase average dehumidifier noise.
This mode has a special purpose. It is useful when you have water damage or flooded basement. But for normal operation keep the unit in automatic mode.
Solution
If you observe dehumidifier running continuously, especially compressor, you should give a look to your settings in the control. In case continuous mode is selected, opt for the automatic mode with relative humidity from 30 – 50 %.
Your Dehumidifier Has a Faulty Compressor
Noise from your dehumidifier’s compressor is inevitable. However, if you hear sufficiently loud noise, screeching, grinding or banging sound, this could be an indication of a faulty compressor.
The sound level from your dehumidifier may differ in intensity and type depending upon the type of compressor it uses. The most common is the piston compressor. The scroll compressor is also becoming more common in dehumidifiers due to their quiet nature and efficiency.
You may also need to check if the loud noise is coming from outside the compressor. Like around it or its sides. In that case, you may have loose compressor mounting, fittings or fixtures.
Solution
Determine where the noise is coming from. If the noise is coming from inside of compressor, sufficiently loud, screeching, banging, collision etc., it is time to call a certified technician.
By the way, if compressor is faulty, the best solution is to replace it.
Note: If anything is damaged or needs replacement, diagnosis is as far as you should go. Unless you have experience, always contact a certified professional to handle the repair work to avoid damaging the dehumidifier.
The Blower Fan Motor Bearings Are Worn Out
If you hear an abnormally loud sound from fan and may be some vibration too, you should check for debris and dirt on it. It that is not the case, there is high possibility that that sound is not generated by the blower itself. It is probably due to worn out bearings or a loose fan.
Solution
- Try to listen closely for the type of noise that is generated by your dehumidifier. A wobbly sound is more likely from a loose blower fan.
- Open the dehumidifier casing and observe it from a safe distance, you should be able to see a loose fan making oscillating sounds.
- If you hear a growling or whooshing sound, first check for any foreign contaminant that may be causing it.
- If there are no contaminants, inspect the bearings and call a certified professional to replace them if they are worn out.
The Dehumidifier Compressor Model and Type is Noisier
During operation, if your dehumidifier compressor is loud, this may simply be due to the type of compressor you are using. There are several types of compressors used in dehumidifiers.
Piston compressor generally are most common but scroll compressors are becoming more and more popular due to their quiet and efficient operation. Additionally, older dehumidifiers are less noise-optimized.
Solution
All dehumidifiers running on ‘Auto’ mode will turn their compressor ON and OFF. So noise from compressor will not be continuous, regardless of its type.
- If you have already bought the unit, and feel that compressor sound is annoying, you can always get it replaced if return policy makes it possible.
- Alternatively, you can take some steps to quiet it down;
- Use a carpet below dehumidifier that will damp vibrating noise through the floor.
- Keep it as far from you as possible to reduce noise intensity relative to you.
- Keep filters clean for smooth operation of compressor.
- Leaving enough room surrounding dehumidifier unit to reduce air suction noise.
Not Enough Clearance Around Dehumidifier Unit
Every dehumidifier has inlet and outlet vents. They may be located on sides, back, and even on top of the unit. Air flows inside the dehumidifier through the inlet, after which it is dehumidified and finally dried air comes out of the outlet.
If airflow through the dehumidifier is blocked, either by objects in front of vents, or inlet or outlet of unit being too close to the wall, blower fan will have to pull air harder to maintain airflow. As a result, you will hear loud rushing suction noise from your dehumidifier.
A congested room can also lead to other problems like frosting, due to less air flowing over cooling coils. Lower airflow will result in dehumidifier coils to freeze up which will cause compressor to turn Off before the completion of cycle. During this, fan will keep rushing air through dehumidifier coils.
As a result, not only will the compressor repeatedly turn ON and Off, this may cause the fan to never turn OFF, to melt ice on coils. The ice on dehumidifier coils adds to more noise generated by your dehumidifier.
Solution
- Fix for this problem is very easy. First, look for any objects that may be blocking airflow through your dehumidifier.
- Plants, furniture, decoration pieces or any hindering material should be at sufficient distance from your unit.
- Consider replacement of your dehumidifier if its inlet or outlet does not have enough clearance with the wall of your room
- The required clearance is usually six inches from walls or any other objects.
The Fan Blades Are Rubbing Against Housing
The dehumidifier fan has to be balanced and aligned with the motor shaft to rotate properly. Otherwise, it will make loud continuous sounds due to rubbing during operation and deteriorate with time.
This could happen due to several reasons;
- It can be as simple as loose fan on motor shaft, displaced mounting, or a loose or missing screw.
- Other times it may be due to deformed or damaged fan or a less likely problem like bent motor shaft.
- In case fan is damaged, and in this case your only option is to replace it.
Solution
- The first step of course would be identification if fan blades are actually rubbing against exterior housing.
- Rule out any other reasons, that may be causing loud sounds from this area, like worn out bearings, debris in blower etc.
- Then check the alignment of blower fan, when running, at a safe distance. It must be straight, perpendicular to the height of the unit, aligned directly towards dehumidifier coils.
- Check for deformation, damage or any contaminant piece on fan blade.
If you don’t find anything, while the unit is unplugged, try turning the blower fan by hand, to know if it is easily movable. If it collides with something, it needs readjustment.
After diagnosis and confirmation, if the fan is good enough, it can be realigned. In case it is damaged you will have to replace it.
Note: Make sure you use a blower fan of the same specification as installed by default. If the fan is damaged or needs replacement, diagnosis is as far as you go, unless you have experience.
The Dehumidifier Filter is Clogged
A common and recurring reason for a loud dehumidifier, as well as many other problems, is ignoring cleaning of your dehumidifier’s filter. Due to dirt and dust in the air, filters become dirty and clogged.
Due to this, airflow is restricted and you may find your dehumidifier making more noise than it is supposed to. An unclean filter adds to the noise made by your dehumidifier.
Solution
Clean the filters regularly. Filters in dehumidifiers are almost always reusable. No need to change them, except when damaged. Use lukewarm water to wash the air filter gently. Allow it to dry properly before inserting it back.
Wrong Fan Settings on the Dehumidifier Control Panel
Most dehumidifiers allow you to select target humidity in a confined space. Usually, they also have an option to select the speed at which you want to attain target humidity.
Generally, dehumidifiers have two fan speed modes, low/normal and high. The goal of this functionality in different units is the same i.e., to adjust fan speed and eventually dehumidification speed.
An increase in fan speed will increase dehumidification but also noise from it. Higher fan speed can also be a reason for relatively louder dehumidifier sound.
Solution
- Depending on your dehumidifier manufacturer and model, you will have to identify if it allows control of fan speed.
- If it does, it is best to keep fan at low speed, this would reduce noise generated by your dehumidifier and increase its efficiency.
Haier Dehumidifier is leaking water
If the dehumidifier is leaking water, the water bucket might be cracked, causing water to leak from the bucket. Alternatively, the bucket might be positioned incorrectly. Inspect the bucket for cracks and ensure that it is positioned correctly.
If the dehumidifier is equipped with a drain hose, make sure that the hose fitting is equipped with a gasket and that the gasket is properly sealed.
How to clean the filter in a Haier dehumidifier
To clean the filter:
- Turn off and unplug the unit.
- Remove the filter by grasping the filter handle and pulling straight out. It will slide out easily. Never operate the unit without the filter installed.
- Wash the filter with dish soap and warm (not hot) water. DO NOT use any chemical cleaners.
- Allow the filter to dry completely before reinstalling.
- To reinstall the air filter, slide the filter back inside the tracks and push inward.
How to set humidity on your Haier dehumidifier
Below are some basic steps for setting humidity. Refer to your user manual for specific steps as this vary from model to model.
- Plug the dehumidifier into a grounded wall socket.
- On models that do not automatically turn on when you plug them in, press the “On” or “Power” button on the control panel.
- Locate a dial or a set of buttons labeled “Dryness Setting,” “Humidity Level” or something similar.
- Turn the dial to the right to increase the dryness and to the left to increase the humidity; press the “Humidity Level” button repeatedly until the display indicates that the machine is set to your desired humidity.
- Higher values mean higher humidity, not more power from the machine.
- Look for a button labeled “Power Level,” “Fan Speed” or something similar.
- Press the button repeatedly to cycle through the power options, from lower power to higher power.
- Select your desired power level.
- A higher level dehumidifies the room faster but is louder and uses more energy.
- Press the “Time” or “Timer” button repeatedly to preset a time of day for the dehumidifier to turn on, if your model has such a function.
- The timer cycles through the hours of the day as you push the button.
- Look in your owner’s manual for additional details on setting the timer.
Note:
The recommended setting for your dehumidifier is 30 percent to 50 percent humidity in warm weather and 30 percent to 40 percent humidity when you are running your heater. Hang a humidity measuring device, called a hygrometer, near the dehumidifier if the dehumidifier does not measure the humidity in the room.
Warning
Never use an ungrounded outlet for a dehumidifier. Follow all the safety instructions in the manual precisely. As electrical appliances that process water, dehumidifiers pose a risk of electric shock and fire when used incorrectly.
How to hook up a hose on your Haier dehumidifier
Dehumidifiers have a drain connection mounted on the lower portion of the cabinet which can be connected to a standard garden hose fitting (non-pump models) or the included drain tube (pump models).
Units without a drain pump use gravity to drain the accumulated moisture.
- Attach a garden hose (not supplied) to have the bucket empty continuously.
- Remove and save the plastic and rubber drain cap at the rear of the unit. Set aside the rubber insert for later.
- Screw a new garden hose onto the direct drain opening.
- Position the dehumidifier as close as you can to the floor drain.
- Position the end of the drain hose over the floor drain and start the unit.
What is the best setting on my Haier dehumidifier?
Ideally 40% humidity is best for healthy breathing; however depending on the room environment you might find a slightly higher humidity percentage will be a better balance of comfort and efficiency.
Check this too: Best humidity sensing bathroom fan
How do I set the timer on Haier dehumidifier 70 pint?
If the dehumidifier has a Timer feature, the unit can be set to turn on or off after a set amount of time. If the unit is ON, it can be set to turn off a set number of hours. By the same token, if it is OFF, it can be programmed to come on in a certain amount of hours. The Timer feature does not allow you to create an on/off schedule; it is one-time programming.
If you want the unit to turn off:
- While unit is on, press Timer.
- The Off light should come on above the Timer pad.
- Adjust time with the up or down arrows.
- The Timer is adjustable in 1 hr increments up to 24 hrs.
- Once off, the unit will not come back on until you press Power to turn it on.
If you want the unit to turn on:
- While unit is off, press Timer.
- The On light should come on above the Timer pad.
- Adjust time with the up or down arrows.
- The Timer is adjustable in 1 hr increments up to 24 hrs.
Why won’t my Haier dehumidifier turn off and on automatically
If the dehumidifier is not working or coming on, check the following:
- Ensure the plug is pushed completely into the outlet.
- Check the power outlet to ensure it is working properly by plugging another item into the outlet. Also check the house fuse/circuit breaker.
- The bucket may be full. The unit will not run once the bucket is full.
- The bucket may be out of position or not pushed in all the way. Take out the bucket and reinstall.
- Remove the bucket and make sure the float is snapped into place.
Note:
- When the ambient temperature is above 95F or below 41F, the unit will shut off. This protects the compressor. to restart the dehumidifier, wait three minutes and turn the unit back on.
- The unit may be in Auto Defrost mode. When the room temperature is below 60F, there may be ice forming on the coils. The unit will stop and go into Auto Defrost Mode to remove the ice before dehumidifying again.
Haier Dehumidifier is Displaying An Error Code
If your dehumidifier is displaying a message or code, check the following:
| Code | Description/Reason | Solution |
| ON | Audible alert is enabled. When the water reservoir is full, the red Bucket Full indicator will flash an alert will signal 5 times every fifteen minutes until the reservoir is emptied. | Press and Hold the SIGNAL Button for 2 seconds to toggle this feature On or Off. |
| LO | Indicates the measured humidity is less than 30% | This is normal |
| E1 | Indicates a stuck button on the access panel. | Gently push each button in and out to ensure none of them are stuck. |
| E2 | Indicates the air filter is dirty and needs cleaning. | Clean filter in warm water (NOT HOT) with a mild detergent. DO NOT use any chemicals cleaners. Allow the filter to air dry and reinstall in the unit. Never use the unit without the filter installed. |
| E3 | Indicates a problem with the humidity sensor | Requires service |
If you continue to have problems, please contact Haier Appliances at 1-877-337-3639.