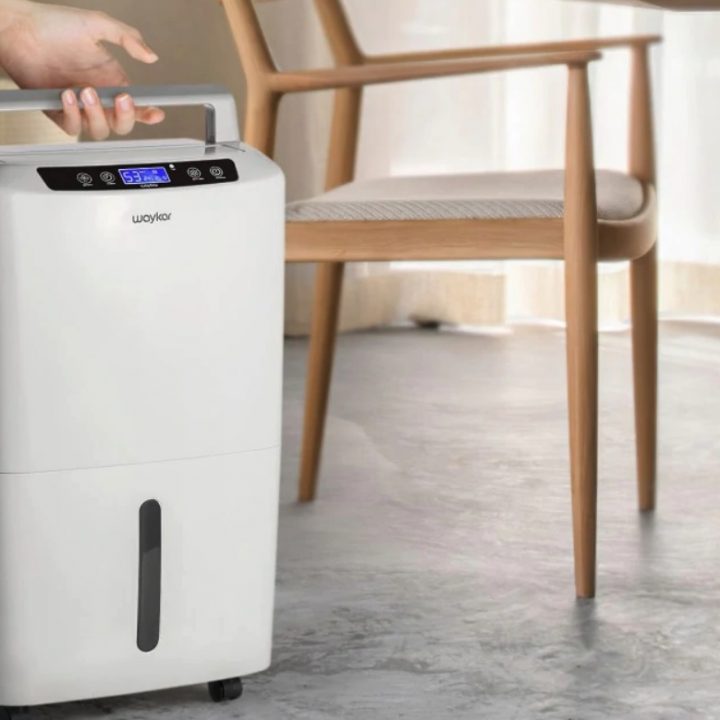
As dehumidifiers go Waykar is definitely amongst the best and it is the way to go if you want an easy to use almost fully automated dehumidifier. It features easy to use and set programs that make using it customize to your needs. however, even with its guaranteed caliber it can malfunction from time to time.
This troubleshooting and how-to guide seeks to educate you on the issues associated with Waykar dehumidifiers and how to fix them. And how to better use your Waykar dehumidifier for optimal dehumidification of your home.
Why is my Waykar dehumidifier not lowering humidity?
If the dehumidifier is plugged in and the outlet is working, the problem lies within the appliance itself. Below are some reasons why your dehumidifier may be malfunctioning.
Full water tank
Most dehumidifiers come with a shut-off switch that turns the appliance off if the water in the collection tank reaches the top. If the dehumidifier has a drain line that runs to a floor drain, a full tank could indicate that the line has become kinked or is clogged.
Manually remove the collection tank, dump it, and then remove the drain line (it screws on like a hose) and ensure it’s not blocked. If it is and you can’t easily remove the clog, replace the drain line.
High humidity level setting
Most dehumidifiers allow the user to select the desired level of humidity in the room—typically 30 to 40 percent. When the humidity rises above that level, the dehumidifier turns on and removes moisture from the air.
If someone inadvertently turned up the humidity level on the dehumidifier, it might not be coming on because the room’s humidity level is not high enough. Check to see that the desired humidity level is set no higher than 40 percent, and turn it down if it is.
Broken humidistat
If the desired humidity level isn’t too high, the problem could be with the humidistat. The humidistat is the actual component in the dehumidifier that turns the appliance on when moisture in the air reaches the preset level. It’s a small module often located just beneath the dehumidifier’s cover (check the owner’s manual for the exact spot).
If the humidistat no longer works, it can’t turn the dehumidifier on. Those familiar with testing electric currents can use a multimeter to test the humidistat for continuity (ohms). Or you can ask a professional electrician or technician to test the humidistat. If the component has gone bad, ordering a new one from the manufacturer and replacing it is a relatively simple task.
Low room temperature
Warm, moist air flows into the dehumidifier where it comes into contact with ice-cold evaporator coils, causing the moisture in the air to condense and then drip down to a collection tank. However, if the room is cooler than 65 degrees, the moisture on the coils can turn to frost rather than condense and drain.
When frost forms on the evaporator coils, it keeps the appliance from working efficiently. Unplug the unit and lift the cover to check for frost. If you see it, leave the dehumidifier unplugged and allow the frost to melt, which can take a few hours, depending on how thick it is. Once the coils are clear, turn the unit back on and turn up the temperature in the room to keep frost from forming again.
Low refrigerant fluid
The evaporator coils on a dehumidifier remain cold because they’re filled with pressurized refrigerant fluid, and a compressor pumps the fluid continuously through the coils. The coil system seals tightly to keep the fluid in, but tiny cracks can form over time, causing the fluid to leak out slowly.
if the dehumidifier has insufficient refrigerant fluid, the evaporator coils will not become cold enough to draw moisture from the air. When this happens, unfortunately, it’s not an easy fix. A plumber or HVAC technician can recharge the coils with more refrigerant fluid, but the cracks can be difficult to seal, and the liquid could leak out again. Unless the dehumidifier is a pricey, whole-house unit, it’s usually more cost-effective to buy a new dehumidifier.
Defective fan
The fan in a dehumidifier doesn’t blow air out—instead, it draws air into the appliance so the moisture in the air comes into contact with the ice-cold coils. If the fan isn’t pulling in the air, the dehumidifying process can’t work effectively. The culprit could be a dirty fan or a broken fan blade.
If comfortable checking inside the unit, unplug it and then remove the cover, then turn the fan blade by hand to see if either debris or a broken blade is keeping the fan from turning. Manufacturers carry replacement blades, which users can order and install, usually with the help of just a screwdriver.
If a broken fan motor is at fault, however, the fix is more complex. Replacing a fan motor is a job for a professional technician. Depending on the existing dehumidifier’s value, it might be more cost-effective to purchase a new unit.
Blocked airflow
If the fan is in good shape, something could be blocking airflow into the unit. This could be as simple as lint, dust, or pet fur buildup on the grill that covers the fan. A dehumidifier placed against a wall or next to an upholstered chair might not be able to draw in enough air. Position the dehumidifier at least a foot away from walls, furniture, curtains, clothing, and other items.
If a dirty or clogged grill is reducing airflow, unplug the unit, remove the grill cover, take it outdoors, and spray it clean with a hose. While you’re at it, if you see lint and debris in the interior of the dehumidifier case, consider taking the entire unit outdoors and cleaning away the mess with compressed air, either from a can or from the nozzle end of an air compressor hose.
Damaged Electrical parts or connections
Dehumidifiers contain electrical components that can go bad, in addition to internal wiring that can short or come loose from connection terminals. Models made within the past decade or so might contain electronic control boards that can burn out and stop working.
Only someone familiar with electronic circuitry should test a dehumidifier’s wiring and electrical components. Some of the tests require that the dehumidifier remain plugged in during the test, so the best option in this case is to take the dehumidifier to a small appliance repair shop or have a technician come out and take a look.
Overloaded compressor
The dehumidifier’s compressor is the core of the unit, and it circulates refrigerant liquid through the coils. If the compressor is struggling to operate or if heavy frost develops on the coils, the compressor can become overheated.
Most dehumidifiers have an overload switch that will shut an overheated compressor down to keep from damaging it. If the dehumidifier doesn’t make a sound when turned on, the overload switch might have flipped. If the compressor overheated due to frost buildup, you can try resetting the overload switch (check the owner’s manual for location) once the frost has melted.
Unfortunately, other problems can cause an overload switch to flip, and some of them are related to short-circuiting of the appliance’s wiring. If this is the case, the overload switch will continue to flip even after resetting, and a technician will likely be required to pinpoint the cause. Some users might opt to instead purchase a new unit at this point.

Waykar dehumidifier not collecting any water
Below are some of the top reasons your dehumidifier will stop collecting water with these types of systems.
Frozen Coils
When the temperature becomes too low, moisture will freeze on the coils, which can decrease or stop water collection. It’s an issue that’s usually solved by an auto-defrost feature on most machines. If you have that feature and see ice on your coils, the defrost feature could be malfunctioning.
Low Refrigerant
If a dehumidifier has coils, a compressor, and a fan, it also uses refrigerant. In most cases, it’s something you’ll never have to deal with, although these units can develop leaks. Leaks can be fixed, and refrigerant can be refilled, but the repair job may not be worth it compared to the cost of another dehumidifier.
Fan Motor
When the humidity level is where it should be, and your filters are clean, but you don’t feel any air coming from the unit, it could be an issue with the fan. It may be blocked or restricted, although a hum with no movement typically means the fan is defective or that there is an issue with one of these next two areas.
Faulty Capacitor
If you have a bad capacitor in the system or if it fails, the compressor won’t run, and your system can’t collect water– if you have been having issues with the overload tripping recently, there’s a good chance there could be an issue with the capacitor in your dehumidifier… if not, it’s time to think about overload protection itself.
Faulty Overload Protection
If a unit has overload protection and it fails, the compressor won’t start or collect water. Extension cords can be the source of this problem, and while you can test it out yourself with a multimeter, it’s usually best to call in a professional when you are tinkering with circuits or wiring inside a dehumidifier.
Damaged Control Board
When all else fails, and nothing on our checklist has solved your problem, the issue could come from the control board or PCB assembly. Unfortunately, this is another area where you’ll want to call in a professional, which may not be worth it if it’s a budget-friendly or midrange dehumidifier.
How do you clean a Waykar dehumidifier?
You Waykar dehumidifier will require a certain amount of upkeep in order to continue functioning properly. To keep your dehumidifier working effectively, an occasional cleaning is always appreciated.
Cleaning Your Dehumidifier
A dehumidifier has many parts that can develop build-up. Regular cleaning of each of these parts can prevent problems that can lead to the death of your appliance.
Wipe down the water tank about every 2 weeks and wash the air filter once a month using a soft cloth and water. When storing the device, first clean the base, water tank, and air filter, then cover the dehumidifier with a plastic bag and place upright in a well-ventilated.
The Water Collection Tank
Your dehumidifier’s water collection tank needs to be emptied frequently, but it also needs to be cleaned with soap and warm water or a disinfectant. Mold and mildew can build up quickly, and when inside a dehumidifier tank, it gets dispersed into your air, causing illness.
The Air Intake and Exhaust Grilles
At least once per season, use a vacuum with a brush attachment to clean the intake and exhaust grilles. Dust and debris build-up can cause blockages that can lead to the deterioration of the appliance.
Maintaining Your Dehumidifier
The proper use of the dehumidifier and replacement of older parts can keep it running smoothly for many years. this entails;
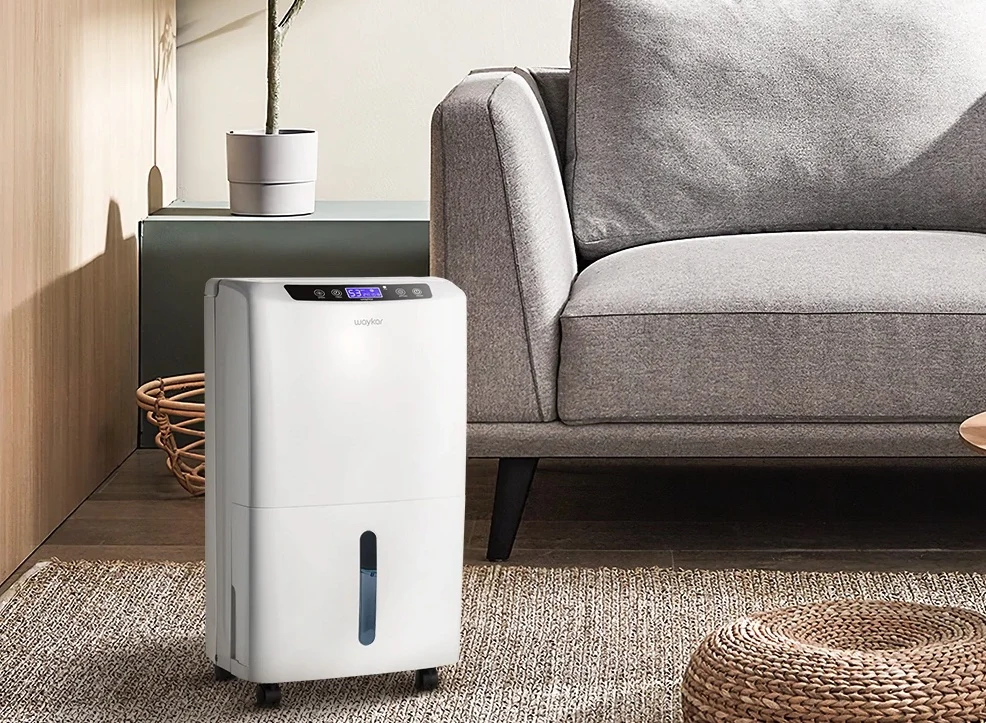
Dehumidifier Placement
Your dehumidifier should not be placed closer than 6 inches to any wall so that the air intake and exhaust are not blocked. The temperature of the room or area being dehumidified should be at least 65° so that it does not freeze up or burn up the motor, unless the dehumidifier is specifically designed for lower temperatures.
Adjusting the Humidistat
The humidistat is the device that controls the humidity level in the room. The ideal humidity is typically between 40 and 50 percent for optimal comfort and efficiency.
Protect the Compressor
When a dehumidifier is turned off and then back on too quickly, the compressor may overheat. Give the machine at least 10 minutes after it is turned off to allow pressure in the system to be equalized.
Filter Replacement
The dehumidifier’s air filter is designed to clear dust and allergens from the air to protect the appliance’s insides as well as to improve quality of the air in the room. The owner’s manual of your dehumidifier will tell you how frequently to replace the air filter in order to ensure the appliance’s best performance.
Waykar dehumidifier water symbol meaning
The three water drops icon blinking means the humidity in your room has reached the point you set at, and the machine is in stand-by condition but monitoring temperature and humidity. It will turn back on to remove moisture when humidity gets above set point.
All Waykar dehumidifier error codes, their meaning and fixes
The error codes below serves to warn you of various issues plaguing your dehumidifier;
- E1 – Humidity Sensor Failure – Please unplug the machine and restart. If the failure still exists, please contact the customer service for support.
- E2 – Defrosting Sensor Failure – Please unplug the machine and restart. If the failure still exists, please contact the customer service for support.
- E4 – Temperature Sensor Failure – Please unplug the machine and restart. If the failure still exists, please contact the customer service for support.
- E7 – Full Tank Alarm. Please empty the water tank.
Why isn’t my Waykar dehumidifier control panel working
Below is a list of reasons why your dehumidifier’s control panel is not working;
Faulty Sensor
If your dehumidifier’s control panel is not working, it may be due to a faulty humidity sensor. This dehumidifier part is used on electronic control models, and signals the control board when it senses the relative humidity in the air. The control board signals the compressor to turn on.
If the sensor is not working, the compressor won’t cycle on because of an inaccurate reading of the humidity. To troubleshoot this part, inspect the harness connections to the control board to make sure they are in working order. If they appear to be damaged, replace the sensor.
Damaged Electronic Control Board or PCB
If your dehumidifier won’t work, and it is an electronic control type, the issue may be the control board or PCB. The control board supplies the compressor and fan motor circuits with power, and will result in the dehumidifier not working if this part is faulty.
To troubleshoot this issue, use process of elimination to make sure none of the other dehumidifier parts are causing this issue. If everything is working normally, the control board will likely need to be replaced.
Why does the Dehumidify light keep flashing?
Flashing green
When the power indicator light is flashing green, it simply means that the dehumidifier is in standby mode. Standby mode occurs when the humidity is below the set point, and there is no need for the dehumidifier to run.
Flashing red
This happened when the bucket is full or if the bucket is not properly installed. You can remedy this issue by placing the bucket properly or emptying it. Depending on the issue at hand.
Why does my Waykar dehumidifier say bucket is full when it isn’t?
If your dehumidifier keeps notifying you to empty the bucket only for you to find that it is empty, it could be as a result of one of these issues;
Damaged Sensor Assembly
If the bucket full light stays on when the bucket is empty, there may be an issue with the sensor assembly, which is the dehumidifier part that monitors the humidity and evaporator temperature. On electronic control models, the sensor assembly tells the control when to begin the compressor cycle, when the fan motor should turn on and off, and when a defrosting cycle is needed.
When the sensor assembly fails, the bucket full light stays on. To troubleshoot the dehumidifier, use process of elimination to find out which part has failed. If the float assembly and float switch are working normally, it is likely that the sensor assembly is faulty and needs to be replaced.
Damaged Float Switch
If the bucket full light is blinking or stays on when the bucket is empty, there may be an issue with the float switch. The switch can be found near the bucket, and is activated by the float mechanism when the bucket is full of water. This dehumidifier part is important because it also functions as a safety mechanism, to keep the appliance from overflowing with water.
When the float switch is tripped, it signals the compressor and fan motor to stop working until the water is emptied from the bucket. To check the float switch, first make sure it isn’t manually tripped by the float assembly. If everything appears normal, test the switch continuity using a multi-meter.
Damaged Float Assembly
If the bucket full light stays on when the bucket is empty, there may be an issue with the float assembly. This dehumidifier part can be found near the bucket. It kicks in when the bucket fills with water to trip the float switch so the bucket doesn’t overflow. When the float switch is activated, it stops the compressor and fan motor from working until the bucket can be emptied.
To check the float assembly, check that it is moving freely and not being blocked by any other dehumidifier parts from coming in contact with the float switch. If you see any signs of damage, replace the float assembly.
Faulty Control Board (PCB)
If the dehumidifier bucket full light stays on but the bucket is empty, there may be an issue with the control board, also known as the PCB. This dehumidifier part is used in electronic control models to turn off the compressor and motor circuits when the bucket is full, via the float switch.
If the control board is faulty, it may not accurately indicate when the bucket is full, meaning the light stays on even when the bucket is empty. Troubleshoot your dehumidifier by process of elimination, first making sure the issue is not the float assembly or switch before concluding the control board is faulty.
Why is the fan on my Waykar dehumidifier not working?
If your dehumidifier fan is not working, it could be as a result of the issues below;
Broken Fan Blade
The fan blade might be bent or broken. To check the fan blade, try turning the fan blade by hand. Ensure that the blade is not rubbing against the fan housing as it turns. If the fan blade does not turn freely or is rubbing against the fan housing, this indicates that the fan blade is defective and should be replaced.
In addition, wiggle the fan motor shaft to see if the motor shaft is loose. If the fan motor shaft moves even slightly, this indicates that the fan blade is loose. If the fan blade is loose, tighten the set screw. If tightening the screw doesn’t solve the problem, replace the fan blade
Defective Fan Motor
First, try turning the fan blade by hand to ensure that it spins freely. Make sure that the fan blade is not rubbing against the fan housing. If the fan blade spins freely and is not rubbing against the fan housing, use a multimeter to determine if the fan motor is getting power.
If the fan motor is getting power, but the dehumidifier fan won’t run, the fan motor is likely defective. If the fan motor is defective, replace it.
Damaged Blower Wheel
Try turning the blower wheel by hand. If the blower wheel does not turn freely, or is rubbing against the fan housing, replace the blower wheel. In addition, if the blower wheel wobbles as it turns, this indicates that it is loose on the motor shaft. If the blower wheel is loose, tighten or replace it. Finally, if the blower wheel is physically damaged, replace it.
Defective Humidity Sensor
The humidity sensor monitors the level of moisture in the air. When the moisture level is too high, the contacts in the humidity sensor close to allow the dehumidifier to run. If the humidity sensor is defective, the dehumidifier fan will not run. If the humidity sensor is defective, replace it.
How to use timing function in Waykar dehumidifier
Most Waykar dehumidifiers feature the 24-hour Timer Setting for preset operation and reduced energy consumption. They also have similar setting functions.
To set the timing function in your dehumidifier;
- Press the Timer button to select the timer 1 hour increments
- You can set the timer up to 24 hours and it usually starts to do the countdown when you start the timer.
- To select faster, press and hold the Timer button for several second.
- If the timer is set to 00. This is invalid time.
- If the timer is set correctly, the Clock light will light up and the LED screen will show time for several seconds before reverting to the current humidity.
To cancel the timing function of the PD253B dehumidifier;
- Please set the timer to “0”.
Why is the air from my Waykar dehumidifier smelly?
In most cases, this happens when the dehumidifier is not properly maintained. This will cause it to acquire a musty smell that spreads throughout your home. The odor results from not cleaning the grills, bucket and air filter regularly; which causes bacteria and mold to accumulate.
A buildup of pathogens in the dehumidifier such as mold and bacteria will eventually cause the dehumidifier to smell musty. Additionally, the ambient air contains a multitude of different types of odor from our day to day activities, such as cooking, clothing, healthcare products (such as hairspray, deodorant, fragrances), dirt and dust.
These odors are absorbed by the dehumidifier and they are concentrated within the dehumidifier. Excessive dust and particle buildup on the filters and grills of the dehumidifier will over time seep into the internal parts of the dehumidifier. This will aggravate the odor further. If left for longer periods, it may cause overheating and failure.
Cleaning your dehumidifier regularly and properly storing it are the best ways to keep this musty smell at bay. Prevention is better than cure rings true. Prevention is really easy, routine maintenance and an annual service will help keep your dehumidifier hygienic.
How to clean a smelly dehumidifier
Follow the steps below to eliminate the smell coming from your dehumidifier;
Cleaning the Exterior and Grills
While the exterior of the dehumidifier is not likely to cause a musty smell, if it is not cleaned regularly mold and bacteria can accumulate on the grill and potentially cause a smell or accumulate debris so that air cannot properly flow through the unit.
Wash the exterior of the dehumidifier with warm water and a mild detergent. Vacuum any debris that has accumulated on the air intake and outtake grills with a small vacuum attachment or wire brush.
Cleaning the Bucket
The bucket is a likely culprit for a moldy smell arising from your dehumidifier. Unless you clean the bucket every several weeks, mold, bacteria and mildew can quickly accumulate. To clean the bucket, fill it half to two-thirds full with clean water. Add detergent until suds appear.
Rotate the bucket to help the solution clean the sides of the bucket, empty it and rinse it with clean water. Do not use bleach in the bucket unless the manual for your particular brand and model explicitly states that bleach is safe to use.
Cleaning the Air Filter
Air filters should be cleaned once a month or more to prevent the accumulation of bacteria, mold and mildew that can cause a musty smell.
How to clean the dehumidifier filter
- Pull out the filter (refer to user manual for exact location)
- Use a vacuum on a gentle setting to remove dust
- Use a wet cloth or a sponge dipped in warm soapy solution to clean the filter
- Rinse the filter in clean water and allow it to dry completely before replacing it in the unit.
- Once it is completely dry, re-insert it back into the dehumidifier
How to store your dehumidifier
Improper storage can cause biological growth inside the unit that creates a musty smell. This is often due to storing the dehumidifier with water still inside.
To properly store your dehumidifier;
- Turn it off and wait 24 hours
- Then empty the tank.
- Clean the exterior, bucket and filter as described above,
- Allow the unit to fully dry and cover it in plastic to keep damp air out.
- Remember to allow the hose to drain completely.
Some units may be flushed with a bio fungicide prior to storage, but it must be safe for materials such as aluminum, polyethylene and copper that the units are often constructed of.
To flush your dehumidifier;
- Take out the air filter and pour 2 cups of bio fungicide into the reservoir
- Drain the bio fungicide manually or by pressing the button that typically drains the unit.
Note: Avoid storing the dehumidifier in a basement or other damp location. Keep it in a dry area with good air circulation. Clean the unit again before you use it next.
How to Disinfect a Humidifier
Humidifiers are great for restoring moisture into dry air and can help in so many ways, but if your humidifier isn’t clean, it can also disperse germs and bacteria into the air without your even realizing it.
You should clean your dehumidifier at least once per week if it is being used regularly, and then one more time before putting away in storage. Here are easy steps on how you can clean and disinfect a humidifier.
Items needed
- 2 tablespoons of distilled white vinegar
- 1/2 gallon of warm water
- Microfiber cloth
Steps
Clean the water tank
To begin, unplug the humidifier and remove the water tank. Add the vinegar and warm water to the water tank and allow it to sit in the tank for at least 30 minutes. After 30 minutes, cover the opening and shake the solution in the tank. Rinse with warm water and dry using a microfiber cloth.
Clean the water basin
Use the same steps as above, allowing the vinegar and water solution to sit in the water basin for at least 30 minutes before shaking well and drying with a microfiber cloth.
Clean the outside of the humidifier
Use a mixture of equal parts distilled white vinegar and warm water to clean the outside of the humidifier. Spray or moisten a clean cloth with the vinegar mixture and thoroughly wipe down the outside of the humidifier, including any air vents and crevices.
Note: It is best to use distilled water in your humidifier. Tap water can contain mineral deposits that can cause build-up over time that promote bacteria growth and can deter the humidifier from working properly
Why is the red light on my Waykar 160B dehumidifier on?
The tank must be properly located in order for the ‘water full’ light to go out and for your dehumidifier to start operating again. Please note, if the water tank has not been positioned/located correctly, the water full indicator will stay red and the product will not operate.
- Check if the water tank placed correctly and adjust it if necessary.
- Ensure the magnet is placed correctly and shake the machine with 45° angle to reset the magnet. If this does not work, contact the Waykar customer service for support.
What is the ideal Humidifier setting?
The most comfortable relative humidity is between 30%-60%; The recommended range is between 45% – 55% to manage health effects and illnesses. Our Waykar 70 Pints Dehumidifiers are designed with adjustable humidity range between 30-80% and intelligent humidity control functions, you can manage ideal indoor humidity for maximum comfort effortlessly.
How to empty collected water
There are two ways to remove collected water:
1. Use the bucket
- When the bucket is full, remove the bucket and empty it.
- Hold the top and bottom center of the water tank with both hands and pull it out gently
- Discard the collected water
- Return water tank to its original position. The Tank Full indicator will go off
Replace the empty bucket back into the unit and once seated correctly, the unit will start up again. You should hear a click when the bucket is in the correct position. Do not remove the float in the bucket. As the sensor will not be able to sense the water level and the water will overflow.
2. Continuous Drainage
This entails using a water pipe to continuously drain water from the dehumidifier. To set up this drainage;
- Turn off the dehumidifier before you start.
- Take the water tank out and open the drain cover.
- Then insert th water pipe into the continuous drain port and push it back into the water tank.
- Then plug the dehumidifier back into the power outlet and turn it on.
Note: the water outlet of the water pipe should be lower than the continuous drainage port by 3.9 inches or more. additionally, the water pipe should not be bent.
How to Set your Waykar Dehumidifier
Fortunately, Waykar dehumidifiers are designed to be user-friendly and they feature a control panel with a dial to turn or buttons to press. Do this to setup your new dehumidifier;
- Plug the dehumidifier into a grounded wall socket.
- On models that do not automatically turn on when you plug them in, press the “On” or “Power” button on the control panel.
- Locate a dial or a set of buttons labeled “Dryness Setting,” “Humidity Level” or something similar.
- Turn the dial to the right to increase the dryness.
- And to the left to increase the humidity.
- Press the “Humidity Level” button repeatedly until the display indicates that the machine is set to your desired humidity.
- Higher values mean higher humidity, not more power from the machine.
- Look for a button labeled “Power Level,” “Fan Speed” or something similar.
- Press the button repeatedly to cycle through the power options, from lower power to higher power.
- Select your desired power level.
- A higher level dehumidifies the room faster but is louder and uses more energy.
- Press the “Time” or “Timer” button repeatedly to preset a time of day for the dehumidifier to turn on, if your model has such a function.
- The timer cycles through the hours of the day as you push the button.
The Energy Star website recommends setting your dehumidifier to 30 percent to 50 percent humidity in warm weather and 30 percent to 40 percent humidity when you are running your heater. Hang a humidity measuring device, called a hygrometer, near the dehumidifier if the dehumidifier does not measure the humidity in the room.
Check this too: Carrier Infinity Thermostat Troubleshooting & How to Guide
Safety Warning
Follow all the safety instructions in the manual precisely. As electrical appliances that process water, dehumidifiers pose a risk of electric shock and fire when used incorrectly. Never use an ungrounded outlet for a dehumidifier.
Waykar Troubleshooting and solutions
Below is a summary of general issues you may experience while using your Waykar dehumidifiers and possible solutions to the problems.
| Problem | Reason | Solution |
| Dehumidifier does not dry the air as it should | The air filter is dirtyThe air inlet/outlet is blockedThe dehumidifier is too smallPoor air circulationEnough time has not passedThe room is not air tightRoom temperature is too low | Clean the air filterRemove the obstruction form the air inlet/outletChange the dehumidifierLeave at least 7.9 inches of room around the dehumidifierBe patient. It might take at least 3-4 days for the dehumidifier to reach optimal humidity levels after installation.Ensure all doors, windows, and other openings are closed properly.Ensure the temperature is 50C and above |
| The dehumidifier is noisy when operating | The dehumidifier is not levelThe air inlet is blockedThe air filter is cloggedThe air filter has not been installed correctly | Ensure the machine is placed horizontallyClean up the air inletClean up the air filterEnsure the filter is installed correctly |
| The dehumidifier is operating continuously | The dehumidifier is on CONTINOUS MODEThe room’s humidity is too highThe doors and windows are open | Set the humidity settings to range between 40 and 50 %Change the humidity settingsEnsure all doors are closed |
| There is overflow of water on the floor | The hose connection is looseThe water bucket is not placed properlyThe eater tank’s float is stuckThe magnet on the float is displaced | Ensure the hose is connected tightlyInstall the water bucket properlyMove the float so it can swing freelyPlace the magnet in the correct position |