A burning smell from a dryer can cause panic, and it’s an indicator of a fire hazard. The smell can be from lint buildup, a failing thermostat, motor, or belt. AS per US Fire Administration, clothes dryers have started fires around 2900 annually, and a third of the fires resulted from lint buildup inside the dryer. Therefore, if you sense a burning smell from the dryer after cleaning, it’s time to investigate the cause.
First, unplug the dryer and remove all clothes from the drum as a precaution. This step is a sure bet of preventing the dryer from catching fire. Next, remove the top control bar, top panel, and the front panel of the dryer housing. Later, carry out a troubleshooting procedure to pinpoint the cause of the smell.
Why does my dryer smell like it is burning?
There are various causes of the burning smell in your dryer. After disassembling your dryer, you should be in a position to spot the reason. Here are the leading causes of the dryer smell like burning rubber;
- Lint buildup– clean your dryer using a vacuum hose attachment. Ensure you are cautious when cleaning the motor and heating element. Remember to vacuum inside the housing walls and the floor. You can also pull out the vent hose and shake all the debris and lint inside. After a thorough cleaning process, reassemble the dryer and run an empty cycle. Check if the burning smell goes away.
- Faulty thermostat- if your dryer still has the smell, then the thermostat may be failing.A defective thermostat makes the dryer fail to sense or control the temperature inside. The temperatures can thus become too hot and cause smells. First, disconnect the dryer from power to cool and test the thermostat. Next, use an ohmmeter to test the component; replace the thermostat if the tool reads another figure besides zero.
- Failing drive belt- it’s another cause of smells in a dryer.Most dryers, especially the old models, have a rubber belt that turns the drum. If the belt slips out of place, it can melt or even burn b coming into contact with the heating element. Inspect if there is a rubber belt tightly wrapped around the drum. Check if the rubber has any signs of wear and tear and replace it.
- Bad dryer motor- an old motor can cause burnt smells. If your engine is aging, let it be replaced.
- Your clothes may have gas on them- clothes with gas or other flammable chemicals can create a strong smell after exposing them to heat.
- Power surge- a one-time burnt smell may occur due to power surge causing the heating elements to fail.
- Jammed clothing- stuck clothes can have a burnt smell due to friction or because they have gained access to the heating element. Someone should carefully remove the clothing before they literary burn.
Check this too: How To Reset an LG Electric Dryer
Is a dryer supposed to smell burnt?
No, your dryer shouldn’t have a burnt smell. If you sense the smell, it’s an alarm of fire hazard. You should inspect your dryer to find the cause and fix a smelly dryer. Other smells you may notice in your dryer include;
- Mildew smell– it’s a typical smell in dryers, but you can fix it. The smell occurs due to leaving wet clothes in your dryer for too long. Again, check if there is lint built up and have gotten mildly. Dampen the towels with vinegar and run the dryer with the towels inside; the odor will disappear.
- The gas smell– is a sign that the igniter is going bad. The problem can result from a dirty filter or an exhaust system breach.
How to fix a dryer that smells like it’s burning
The burning smell in your dryer can be horrifying, especially if it’s the first time. However, there are various tips you can fix the smell;
- Check the clothes you are drying. Detergents can’t dissolve many flammable solvents like gasoline mineral spirits. Thus, clothes stained with these solvents release strong smells after being heated in the dryer. Again, the solvents are flammable, and therefore, stained clothes should be air-dried on the clothesline.
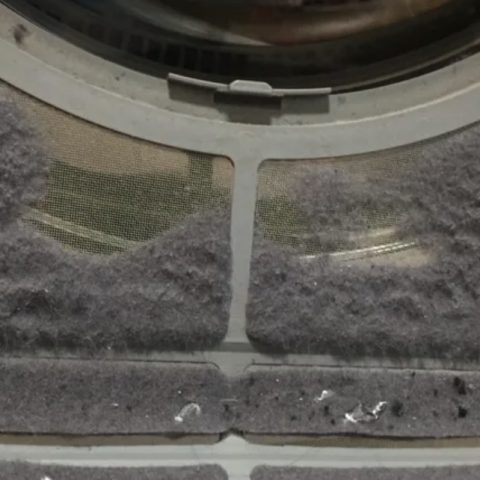
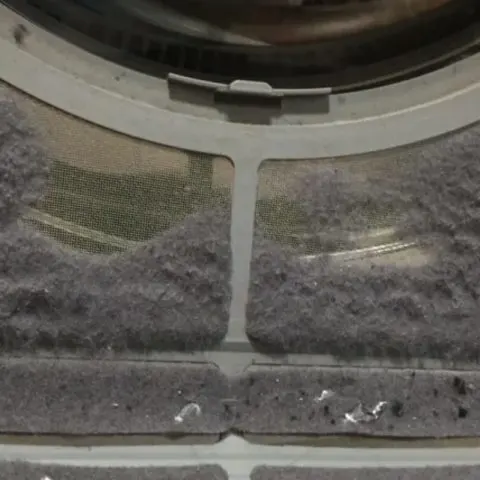
- Remove trapped in the dryer’s lint trap. The fine lint that collects at the trap is highly flammable. It’s best to clean your trap after every load as the lint may escape and accidentally settle on the heating element and give off a burnt odor. Vacuum up any loose fragments with a nozzle attachment.
- Investigate the vent for a blockage. Always clean the ventilation hose for hot air to exhaust freely. A blocked pipe causes hot air back up, which pushes the lint around the trap sides and into the dryer cabinet, causing the smells.
- Allow a brand-new dryer to off-gas. A new dryer’s cabinet usually gets hot when running, and its internal parts contain oils or coatings that off-gas on first use. Ensure you open the window when operating the new dryer, and the smell should go away after some time.
- Inspect the malfunctioning belt. Call a repair person to correct the issue if you notice it has slipped from the drum and has some tears.
- Have your drier inspected by a professional at least once a year to ensure all components are functioning correctly.
Why does my new dryer smell like burning plastic?
A new dryer burning smell is common when using it for the first time. It shouldn’t cause anxiety if the dryer is functional, and the scent should reduce as time goes by.
A new dryer produces an oily, burning smell for the first few times of running it. The odor results from the coatings of the internal components of the dryer but goes away with time.
Check this too: How to Fix a Squeaky Dryer
However, you can eliminateit by running it for 20 minutes without any clothes to burn off the oils causing the smell. Again, try to open the windows to ensure fresh air is getting inside as you run the unit.
Tips on How to Clean Your Clothes Dryer
You have probably noticed that your dryer is not drying your laundry as fast or thoroughly as it used to and you are wondering if you purchased the best appliance or you were shortchanged on your purchase. The answer could be that your dryer has slowed down and become inefficient as a result of a clogged vent which can also be a big fire risk in your home.
It is important to know your appliance well before getting into the tips so you can be proactive in cleaning your dryer in good time. This information can be obtained from the appliance’s user manual that is specific to the machine that you have.
Get to know the lint screen and trap which are commonly located at the top part of the dryer just at the inner side of the door. The lint screen should be cleaned after every load and the lint trap cleaned as frequently as possible to avoid lint build-up in the vent.
The vent is usually found at the backside of the dryer and should be cleaned after every 6-12 months depending on how frequently you use your dryer. The dryer will show signs that the lint vent is clogged.
This may include; clothes failing to dry completely, the drying cycle taking longer than usual, there is a damp smell coming from the dryer immediately you open the door, large quantities of lint accumulating on the lint screen, and the dryer generally becomes hot to the touch.
After equipping yourself with the above information you can easily diagnose your appliance and carry out a thorough cleaning that will help your machine run efficiently, avoid costly repairs in the long run as well as reward it with a longer lifespan.
Simple Steps on How to Clean the Lint Screen and Trap
- Make sure the dryer is turned off and unplugged from the power source.
- Lift out and clean the screen by wiping out the lint using your fingers. Discard the lint into a dustbin. You can also use a brush to get rid of all lint on the screen.
- Use a long-handled brush to clean the lint trap. Work around the trap until all debris is removed.
- You can use a vacuum with an attachment for easier and thorough removal of all debris in the trap.
- Replace the lint screen.
Cleaning the Dryer Vent
- Switch off the dryer and unplug from the power source. In the case of gas dryers, you will have to turn off the gas valve at the main supply.
- Move the dryer so you can get access to the vent at the back and remove the clamp holding the vent to the opening on the wall by unscrewing the screws. You can also release it by squeezing it a bit.
- Inspect the vent for wear and tear, be keen to notice cracks if any so you can organize for a new vent if there is significant deterioration.
- Inspect the vent for any clogs and lint that can be removed by hand. Take caution as you do this or better still consider wearing gloves as there may be sharp objects in the vent.
- Use a special tool meant for cleaning a clothes drier or a vacuum with a crevice tool attachment to properly clean the vent tube without damaging it. Remove as much lint as you can from the vent and ensure almost all lint has been removed from the accessible part.
- Inspect and unclog the exterior vent on the outside. Carefully remove any debris and lint you can reach with your gloved hands. use the tools previously used to clean the inner vent to clean the exterior vent.
- Attach the vent back to the dryer and fasten it using the clamp and screws.
- Plug in the dryer and turn the power on. Run it for 5-10 minutes to loosen any remaining lint and debris after air goes through the appliance. Repeat the above steps 5 and 6 in case there is debris after running the dryer.
Cleaning the Inside Parts of Your Dryer
It is worthwhile to take a few more minutes to clean the dryer on the inside to avoid messes from chewing gum, lipstick, crayons, pens, and candy that may have accidentally found their way into your dryer.
Removing ink stains
Warm up the drum by running the dryer for 10 minutes then unplug the dryer. This makes the ink easier to remove using isopropyl alcohol and a white rug. Clean until there is no more visible ink on the rug and the dryer interior.
Removing crayon stains
You will need wd-40 and a scrapping tool like an expired credit card or a plastic spatula. Scrape any crayon marks and spray wd-40 on a soft rug (not on the dryer) and wipe the drum to remove all the stains. Unplug your dryer and wash the inside with warm water and soap. Rinse and wipe it dry with a clean cloth.
Removing chewing gum and candy
Use a plastic spatula or an expired credit card to scrape out hardened gum or candy. Switch off the dryer and blow hot air on the stains using a blow-dryer. This will soften the remaining candy or gum, making it easy for you to scrape it off. Use a rug and a multipurpose cleaner to scrub the affected parts. Wipe dry using a dry cloth.
Removing lipstick stains
Warm the drum and unplug the dryer for easy removal of the lipstick stains. Use a soft cloth to remove as much lipstick as you can. Dampen a piece of cloth with rubbing alcohol then wipe out the remaining stains.
Cleaning the Exterior Parts of Your Dryer
To maintain your dryer looking great and all new you will be required to clean the outside after a week or two. Use a damp soft cloth dipped in soapy water to wipe down the dryer surfaces followed by removal of soap traces using a clean damp cloth dipped in clean water. Wipe the surfaces dry using a soft microfibre cloth to avoid leaving fluffs on your appliance.
Conclusion
A dryer requires proper maintenance to avoid foul odors and especially a burnt smell. You can make the dryer smell better by routine cleaning and inspection. Ensure that you always vacuum up the lint that has collected inside.
Again, inspect if the dryer has any blockage, damaged heating elements, and belt that leads to a burnt smell. Also, always dry the clothes free from solvents stains and avoid pilling up so many clothes to prevent friction or heat buildup.