Air conditioning is a great way to keep modern houses cool during those hot and sunny summer days. They become even more critical if you have a heatwave or live in a home that doesn’t have sufficient passive cooling.
So, you can imagine how frustrating it would be setting the thermostat to a reasonable 78F to notice the house keeps getting hotter as the sun peaks.
When this happens, it means that there is a fault in the system. One or more things in your air conditioning system aren’t working well as they should (or has failed completely)
Note: The AC won’t be cooling well if you have to lower the thermostat very low and still don’t get the desired temperature, or it takes longer than it used to attain and maintain the desired temperature.
Why Is the AC Not Blowing Cold Air?
Your air conditioning system is more than the condenser unit or heat pump sitting outside and the vents in the house.
Typical split systems have other moving parts, evaporator coils for heat exchange, air filters, ducts, and actuators to shuttle conditioned air to the right spot in the house.
Anything that impairs the performance of one or more of the AC system components could lower your system’s cooling efficiency or make it not cool at all.
Basic Causes Cutting Across the Board
Regardless of what system you are running, two simple things could stop your air conditioning from cooling. These are:
Blocked Filters
Clogged filters are the most common cause of restricted airflow from your AC system. Clogging is common if you have pets or live in a pollen-prone area.
Pollen, pet hair, and dust will jam up the filter over time. The filter loses its ability to let air through. Inspecting and changing your air filters often will make your AC work less hard, meaning it will cool your rooms faster and efficiently.
It also guarantees that you get fresh air and do away with that annoying musty smell that is problematic to people with allergies or asthma.
No Power to the AC System
A simple power cut to the AC unit, especially the heat pump or the condenser unit, will prevent your air conditioning from pushing cold air.
After all, the condenser unit is in charge of cooling ambient air before using compressors and fans to move air into your house.
The power cut could be accidental or intentional. Some of the things to check for include:
Confirm that the AC circuit breaker didn’t trip
AC condensers run straight from the distribution panel on a dedicated circuit breaker. Open your panel and confirm that the circuit breaker isn’t in the off position.
If it is in the off position, chances are:
- Someone put it off during repair and maintenance ( of the AC or the electrical system) and forgot to flick it on
- A brief overload made the circuit breaker trip
- A fault in the wiring made the circuit breaker trip
If you remember someone working on the distribution panel, you can flick the circuit breaker on. Chances are nothing is damaged, and the system was accidentally turned off.
Otherwise, there must be a problem somewhere down the line that was one-off or persistent. You can flick the circuit breaker on and:
- Wait and see if it trips immediately. If it does, there is a problem with the wiring or condenser unit, and it should be inspected as soon as possible.
- If it doesn’t trip, confirm that the AC condenser or heat pump is running. Cold air should start flowing soon. Monitor the system closely and have it inspected if the circuit breaker trips again within a day or hours
ProTip: Sometimes, everything could be fine, but your AC system is overloading its circuit breaker. Ensure that there aren’t any extra loads on the system and that your system is perfectly matched to the circuit (and circuit breaker) it’s connected to
Confirm there is power to the AC unit
If the circuit breaker is on and the compressor unit isn’t running, chances are power isn’t getting to it.
Some electrical know-how and a multimeter are all you need to check this. Electricity can be dangerous. Don’t try this if it is your first time testing terminals for current and you don’t know how to protect yourself.
Otherwise, use a multimeter to probe the power terminals on the outdoor unit. If you don’t get any power (120V and 240V), there is a fault with the wiring.
Some AC systems combine the different phases at the distribution box and only deliver 240V to the outdoor unit. In this case, you should probe for the two-phase availability at the distribution box.
ProTip: If you only get 120V on one phase and the second one has no power, chances are you have one phase out. Confirm that other equipment that runs on 240V is working. If they are not, you have lost a power phase. The problem could be with your utility provider.
If there is no power to the outdoor unit at all and the circuit breaker has not tripped, it could mean:
There is a cable cut between the distribution box and the outdoor unit
Your AC unit receives 240V, and one of the phases to your house is down to the combiner box can’t deliver 240V
Either way, troubleshooting and fixing electrical problems in your air conditioning unit needs some skill. If you are not conversant with high voltage electrical systems, call in an expert to troubleshoot and fix the problem for you.
A Faulty Thermostat (Or Wrong Setting)
Another simple problem that could mess up your air conditioning’s cooling system is the wrong setting on the thermostat.
Just crosscheck and confirm that the thermostat is set to the desired temperature. Go through your manual, especially if you are dealing with a smart thermostat.
Some smart thermostats self-learn and configure the most energy-efficient settings, while others stick to a program. You will want to override the temperature setting and fan control and bring it as low as possible to get your system blowing cold air.
If this doesn’t work, perhaps your thermostat is not giving the AC unit the proper control instructions because it is faulty.
- Confirm that the thermostat has power and displays something on the screen
- Confirm that the thermostat’s screen responds to operation
- If it works on a battery, confirm that there is no battery low warning
- Confirm that the thermostat displays the right indoor temperature
- Confirm that all wires are connected to the thermostat and the AC unit. Any loose cables could create miscommunication, making cooling and fan fail to work
- Get the wiring jumper wiring combination that triggers cooling in your system and try it to check if the unit starts cooling. If it does, the thermostat is the fault.
ProTip: Jumping a thermostat wiring is a professional troubleshooting procedure that seeks to isolate faulty thermostats or faults in the system quickly. Don’t try it if you aren’t skilled. Getting (or borrowing) a thermostat is a safer way to troubleshoot your thermostat.
Blocked Vents
Split systems blow cool air into rooms via vents. In most efficient systems, the vents sit low while others place them somewhere along the wall.
Placing anything in front of these vents will reduce their efficiency. For instance, a heavy piece of furniture could completely block a vent preventing it from releasing air into the room. You will feel like your air conditioning isn’t cooling the affected space.
Blocked Ducts
Conditioned air flows to different rooms through ducts in the wall. Over time, these ducts can clog up with lint, dust, and dirt. This is why experts recommend cleaning your ducts at least once a year.
If your ducts haven’t been cleaned for ages, chances are they are blocked and are restricting some of the air, if not all of it.
You can quickly inspect your ducts by opening a vent and peering in. If you see a solid mass of lint and debris, it is time to call in the experts.
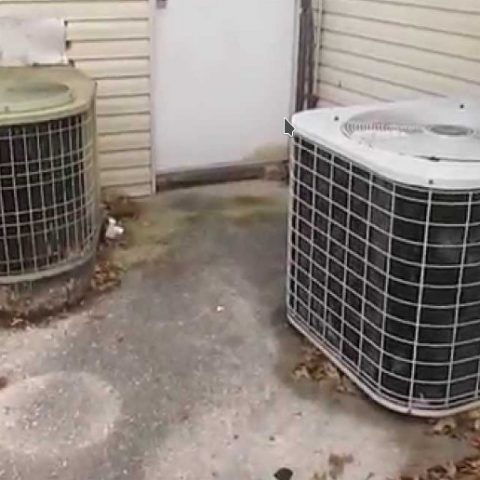
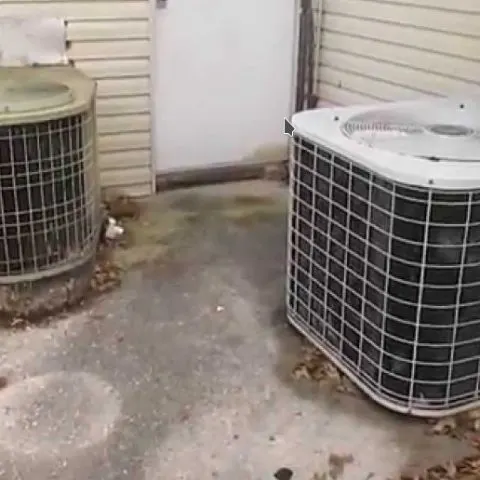
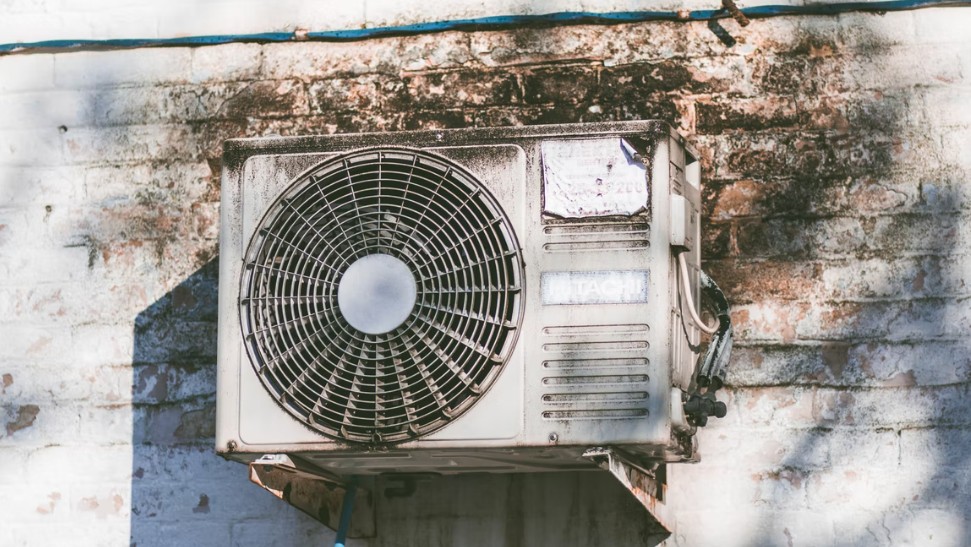
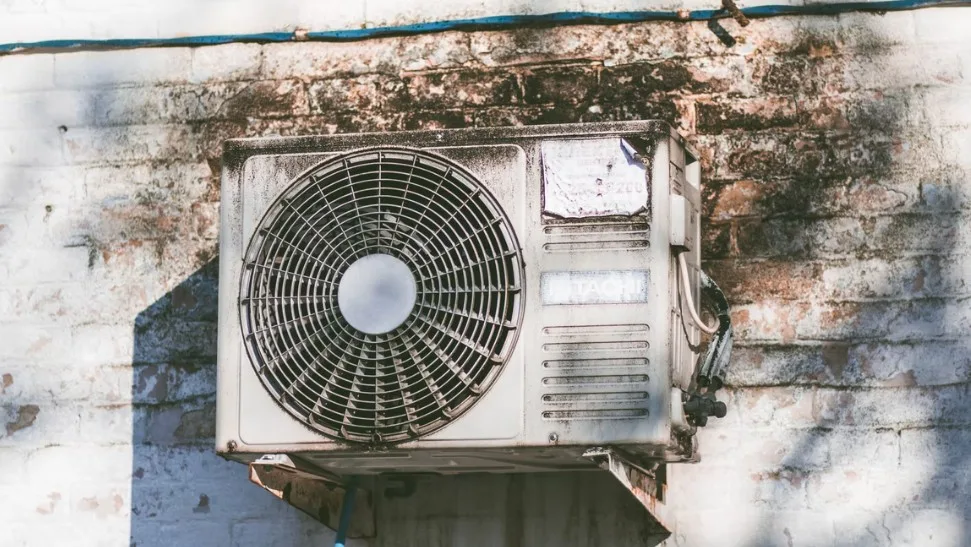
A Dirty Outdoor Unit
The outdoor unit (condenser or heat pump) does all the heavy lifting when it comes to cooling your home. It cools all the incoming air ensuring that only cool air gets into your house.
To do this, it needs free-flowing air over its fins and cooling fins. Any dirt that clogs or blocks it partially will affect its efficiency. Common blockage includes:
- Leaves from nearby trees
- Moss
- Tiny bits of mud and dust
- Tallgrass, or climbing vines on the unit
Keeping the condenser unit improves efficiency and saves power, and ensures you never lose cooling power in the middle of summer.
How Do I Clean My Outdoor Condensing Unit?
Cleaning your outdoor condenser unit is simple. You can do it yourself with the right tools.
What you will need:
- Air conditioner coil cleaner
- Vacuum cleaner
- A soft brush
- A water hose with a sprayer
Procedure
- Turn your thermostat off.
- Find the electrical disconnect to the AC unit and turn it off. It could be on the exterior wall next to the AC unit or in your distribution box. If you can’t find it, turn the power off by flipping off the circuit breaker at the distribution box.
- Trim any tall grass, shrubs, or vines around the AC condenser. Ideally, you should give the unit a two-foot clearance for perfect airflow.
- Use your hands to remove any big chunks of debris on, in, or around your AC unit.
- Use the soft brush to loosen the dirt on the unit’s condenser fins while holding your vacuum hose close so that it sucks in the loose debris. Alternatively, you can use a vacuum with a soft brush attachment.
- Be careful not to apply too much pressure that could bend the fins
- Use the water hose spray to rinse off and eliminate any other loose debris on or around the unit. Avoid wetting any visible wires or the center hub of the fan
- Apply the coil cleaner to the outside of the unit, the coils, and on the fins
- Give it 20 minutes to form and loosen the remaining dirt and grime
- Rinse off the coil cleaner with fresh water from the hose
Clean your outdoor AC unit twice a year, Once in spring and summer, for maximum efficiency.
How Do You Clean Dirty Condenser Coils?
Ideally, you should clean your condenser coils while cleaning the rest of the AC outdoor unit. After following the above steps, you can do deeper cleaning by following these steps.
- Remove the now clean outer cover. Some covers will slide off, while others have some screws.
- Vacuum the fins further if you did not have proper access with the cover in place. If you notice any bent fins, use an HVAC fin comb to straighten them or call an HVAC technician to sort them out.
- Remove the top grille and fan by loosening any screws. It has wiring and some circuits. Be keen not to snag them. You can also leave it on as long as you don’t directly hose it down.
- Apply the condenser coil cleaner and wait for around 15 minutes before using a soft brush to clean the fragile fins gently.
- Use the garden hose to rinse off
- Reassemble your condenser unit
Can I Spray Water on My AC Condenser?
Most AC condensers are waterproof. After all, they sit outside in the rain. You can hose them down gently as long as all covers are on. However, you should be careful where you direct the water once you take one or more covers off for deeper cleaning.
Avoid directly hosing any terminals or visible circuit boards. If you get such terminals wet, wait for around two hours for the water to evaporate before powering on the AC unit again.
Can You Pressure Wash an AC Condenser?
No. You cannot pressure wash an AC condenser unit. While a gentle spray of water from a garden hose with a rainfall head is safe, the intense stream from a pressure washer could damage fins, condenser pipes, and other fragile parts.
Too Much Heat on the Outside AC Unit
Condenser units work better when the temperature differential is at their advantage. This means they will cool better if the air they take in is already cooler than the indoor temperature.
This is almost guaranteed if you place your condenser unit in an open space with free-flowing air.
You will sabotage its performance if you place it next to a hot air vent. This could be anything, from a commercial oven outdoor vent to setting up your barbecue next to the condenser.
Moreover, the units will do a better job when shielded from direct sunshine. Some bit of shade could save you power making your air conditioning cool faster and consume less electricity.
Serious Problems Stopping Your AC from Cooling
The above basic problems rarely cost a lot to fix. If your system checks out and does not have any of the above issues, you have to look deeper and troubleshoot other problems. These problems need a technician to handle.
Additional advanced issues that could prevent your system from cooling include:
Low Refrigerant Levels
Just like your refrigerator, your AC system uses a refrigerant flowing through finned tubes (the one you spend time cleaning above) for heat exchange. The refrigerant removes heat from intake air hence cooling it drastically.
The cool air will then flow through the ductwork into your rooms to cool them.
If this refrigerant is low, the ducts won’t have enough of it to shuttle away heat as fast as possible. This means your condenser unit won’t cool down air as much as it should before sending it into the house.
Under severe conditions, when you have little to no refrigerant, your air conditioning will run but won’t cool at all. Chances are, your compressor pump will also burn out since it isn’t designed to circulate air.
You lose coolant when:
- There is a coolant leak somewhere in the system
- The person who charged the system didn’t charge it fully
Refrigerant is dangerous. Only certified people should handle it. If you have checked all other problems and suspect that you have low refrigerant levels, call in an expert to inspect your system, repair it and recharge it when necessary.
Some of the most common symptoms of low refrigerant levels include:
- Your house takes very long to cool down
- Vents are not blowing cold air at all
- Your house never reaches set temperature
- Hire than usual electricity bills in summer
- Ice and condensation on the evaporator coils
- Hissing and bubbling as the refrigerant leaks out
- An unexplained pool of water around the condenser unit
Damaged Coils and Fins
The coils shuttle around the refrigerant while the fins create an increased surface area through which the refrigerant in the coils loses or gains heat.
Any damage to the coils will either block refrigerant from flowing or make it leak out, creating the low refrigerant problem.
When the fins bend, on the other hand, the fan cannot draw air through them as efficiently as before. Consequently, they won’t lose the heat from the refrigerant fast enough, slowing down the entire process.
Bent fins have to be replaced or straightened. If most of the fins are bent and damaged, your AC unit won’t cool well enough. In severe cases, it might seem as if it isn’t doing anything at all.
Air Leakage
Sometimes, everything might be working fine, but the cooled air isn’t getting to the right rooms. A leak in the ductwork will make the pressurized cooled air leak into the attic before it gets into the house.
All the cooling effects will be lost, and it will feel like your AC fan and cooling aren’t working.
A good way to infer leaks is by monitoring how much airflow you are getting from your vents with the fan on. Little to no airflow might mean:
The ductwork, filters, or vents are clogged.
There is a leak somewhere in the system, making your cooled air escape before it gets into the different rooms.
In most cases, leaks and blockages will isolate rooms. Some rooms will be cooling just fine, while others will get little to no airflow at all.
A Damaged or Blocked Outside Fan
A fan sits at the top of most condenser units. As it spins up, it draws fresh air through the fins. The forced airflow makes heat exchange between the refrigerant and ambient air faster.
This makes the AC unit cool down the air it’s sending into the house faster than it would if it relied on a natural breeze.
A damaged outdoor fan is easy to diagnose. It will not spin at all. Physical damage could also break off one or two fan blades leaving a few to spin. The remaining few ones will not create enough airflow for sufficient cooling.
Note that dirt and gunk on the fan blades could affect how much air it can move hence its efficiency.
Check this too: How to Clean a Window Air Conditioner
A Faulty Compressor
The compressor is a pump that shuttles the refrigerator around under pressure in the copper tubes.
The compression and expansion of the refrigerant make it hold and lose heat differently. It is the work of the compressor to compress it before sending it into the finned tubes.
A faulty compressor means no refrigerant is circulating. There will be no heat exchange, and the fan will blow temperature air outdoors into the house. This might not be enough to cool down your house.
Compressors make a tell-tale noise when cycling. It is hard to miss it. A technician will troubleshoot your existing compressor, find why it’s not working, and determine if it can be repaired or needs to be replaced.
ProTip: Compressors are the most expensive part of an AC unit. Letting a professional troubleshoot ensures you don’t void your warranty. If your AC unit is out of warranty, it might be wise to replace the entire unit instead of buying a replacement compressor.
Your Air Conditioner is Undersized
Sometimes, everything could be working just fine, only that your air conditioner isn’t big enough to sufficiently cool your house under the prevailing weather conditions.
While an undersized air conditioner is easy to note even after installation, recent changes in weather or a heatwave could strain a system that was working well before.
If your unit is just enough for your home and was installed over five years ago, you might consider this as the problem – especially if you are experiencing warmer than usual summers.
Unfortunately, the permanent solution would be getting a better-sized unit. Alternatively, you could block the vents to unused rooms so that your AC unit cools a smaller section of the house that it can handle just fine.
How to Clean Your Air Conditioning Unit
An efficiently working air conditioning unit is an essential part that transforms your home into a relaxing abode. You will notice that over time your air conditioning unit begins working harder and will take a longer time to achieve similar cooling levels as before, therefore the need to clean your unit. This is a critical procedure in maintenance, a procedure that will keep the unit working efficiently for longer as well as avoid high-cost repairs and very high electricity bills.
If you use your air conditioning regularly, you will be more like to have the air filters clogged after some while. It’s advisable to clean the unit once every two to three weeks to avoid impaired performance. With some time, patience and concentration, you can clean your unit for better performance. The cleaning process is likely to take time (about 6 hours) to perform a good job coupled with an alert mind and dexterity.
Before getting into the cleaning procedure, you should keep in mind the following tips so you can perform this type of maintenance job yourself, however, if you find that the motor skills and patience required for the task are quite complicated you should consider giving the job to an expert.
You should also have an expert work on your air conditioner if it is extremely dirty or has signs of wear and tear.
You should arm yourself with some technical knowledge on how the air conditioner system works so you perform the tasks with ease. Air conditioning units have two distinct components that will need to be cleaned; an outdoor component and an indoor component, and each uses a different type of coil.
Lastly, you may consider masking up if you’re prone to allergies, as you’ll be exposed to allergens such as fur, dust, and pollen trapped in the unit.
The following step-by-step guide will help you carry out a proper and thorough cleaning job.
Cleaning the Indoor Component.
- Power down the air conditioner from the breaker box. This will interfere with your lighting so may need to have backup lighting if your house is dark.
- Open up the air conditioning unit. How you open depends on the model you have. For most models, you may have to remove a foil duct tape then remove the screws or bolts holding the door in place.
- Clean the evaporator coils using a soft brush to remove dust, hair, and any dirt particles present in your house. Apply a cleaning solution that is a no-rinse coil cleaner. This you can purchase at your local home store. The spray is more effective as it foams up and then drips into the unit’s drain pan, taking dust and dirt with it. Spray the foam in the small unreachable areas and evenly on all the parts.
- To clean and sanitize the drain you’ll need warm water, soap, and bleach. Mix one part water and one part bleach and run the solution down the drain until it becomes clear. You could consider buying AC drain pan tablets to keep off mold and algae.
- Close the access door and fasten it using the screws or bolts you removed while opening the unit.
Cleaning the Outside Component
Unlike cleaning the indoor unit and the condenser coils, the outdoor unit may prove to be a lot of work because of its constant exposure to dust, and other elements that make the system get extremely dirty in no time. Some specialized equipment and these steps will be needed to keep your outdoor unit properly cleaned and functioning at its best.
- Shut down and disconnect the outdoor component then remove the air conditioner’s grille by taking out the metal screws on top and lifting the fan unit and grille. Remove the pre-filter from the hook tape on the grille, and place it aside.
- Remove dirt and debris from the bottom pan. Note that the amount of dirt will depend on your type of air conditioner unit. Some types will guard the unit against seeds, leaves, and twigs while others won’t.
- Scoop the dirt using your hands or better still use a vacuum to clear it all out. Use a damp cloth to thoroughly wipe both sides of the grille
- Clean the coils and fins using a cleaning solution specifically meant for the condenser coils. It is important to note that this cleaning agent must not be used to clean the indoor coils as it is extremely corrosive and can cause burns. Dilute the solution following the given instructions and use a sprayer to spray onto the coils then rinse it out using a hose on low pressure.
- Carefully comb the fins back in place using a fin tool that can be purchased inexpensively from your local hardware. Remember that bent fins make the air conditioning inefficient because they reduce airflow into the unit.
- Place the pre-filter back to the grille and secure it firmly using the hook tape then reinstall the grille.
You need to know that air conditioning filters will need to be replaced and this comes with a not-so-cheap financial investment. The good news is that filters can be washed so you can have yours thoroughly cleaned after a couple of weeks and make the most out of the existing ones.
You can clean the filters by vacuuming using a brushless attachment, carefully not to damage the filter. You may have to vacuum a few more times if you have pets to get out as much hair as possible before soaking the filter in a large container or preferably a bathtub filled with water and regular detergent and moving it back and forth to remove dirt and dust. Rinse it off with a hose until the water runs clear.
Sanitize the filter using vinegar by mixing one part vinegar to one part water and spraying both sides. Let it sit for 10-15 minutes then rinse it out. Air-dry the filter for at least three hours or until they have no moisture in them then reinstall it on the air conditioning unit.