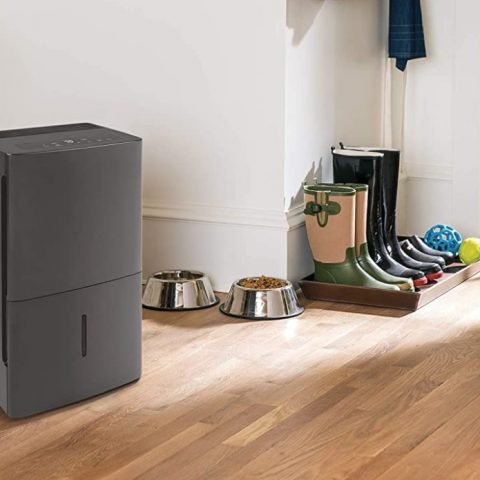
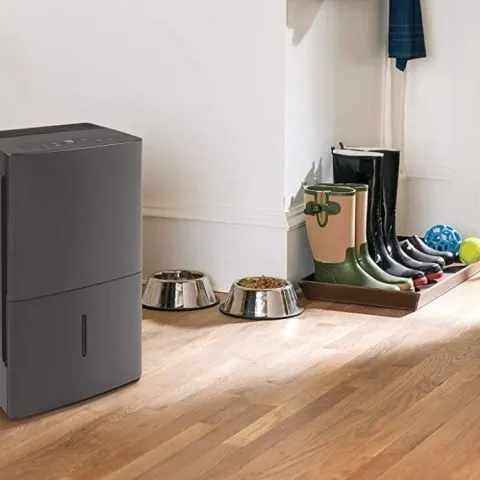
GE is one of the most reputable brands for home appliances in America. They have manufactured a variety of appliances for over 100 years and are renowned for their all-around performance. GE has about half a dozen dehumidifier models of various sizes currently in the market.
GE dehumidifiers are efficient in pulling moisture from the air. Typically installed in basements, it’s easy to forget you have a dehumidifier working continuously to ensure your home stays comfortable and moisture-free until the house develops a must smell.
As with most electric devices, GE dehumidifiers may fail to work correctly and efficiently, affecting the air quality in your home. However, there are preventive steps and troubleshooting procedures you can take t maintain and improve the efficiency of your unit.
Continue reading our article for common GE dehumidifier problems, how to troubleshoot them, and maintenance tips.
How to set up the GE dehumidifier
Due to its simplistic setup process and user-friendly controls, you can quickly learn to set up and use the GE dehumidifier in the following steps.
- Choose a suitable location to place your dehumidifier. It should be on a level surface in an enclosed area of your home. Also, make sure there are at least 12 inches of clearance on all sides of the unit.
- Plug the GE dehumidifier into a grounded 115-volt AC power outlet.
- Press the power button to switch on the dehumidifier.
- Set your dehumidifier control settings to ensure it performs as your desire.
- Filter timer
- The “Clean Filter” indicator line will turn on automatically after 250 hours to remind you to wash the filter.
- Press the clean filter button to turn it off.
- Humidity settings
- Press the “-” or “+” humidity buttons to change the dehumidifier’s humidity setting in 5-percent increments.
- Long press the “-” humidity button until NS(Nonstop) appears on the LED to set the unit for continuous operation. The unit will run continuously at its maximum dehumidification settings, whether attached to a hose or until the bucket is full.
- When using a dehumidifier in your space for the first time, set the humidity level to 45% or 50%. Then allow the unit to run for at least 24 hours to achieve the humidity level. If the space is still damper than desired, set the humidity level to a lower setting or select Nonstop for maximum dehumidification.
- Fan speed settings
- Press to select “High,” “Medium, or “Low” fan speed settings; the indicator light above the “Fan” button indicates which fan speed setting is currently activated.
- Set the fan speed at the high setting for maximum dehumidification. Once the humidity is sufficiently low, set the fan speed to low or medium.
- Delay-off
- Press the “Delay Off” button when the unit is running to turn off the operation automatically in two or four hours.
- Filter timer
- Empty the water bucket when the “Bucket Full” indicator light illuminates. Press on the clips on the sides of the bucket to disengage it, then pull the bucket out to remove it from the dehumidifier. Pour out the water, replace the dehumidifier bucket, and press gently on it until you hear the clips engage.
Check this too: How to Clean Between Double Pane Windows
How do you reset a GE dehumidifier?
You can reset your GE dehumidifier by disconnecting power to the appliance, waiting 30 seconds, and reconnecting the cable. Then adjust the control setting and see if it runs properly.
Why does my GE dehumidifier keep stopping
Below are several reasons your GE dehumidifier keeps shutting off during operation.
External temperatures are too low.
The GE dehumidifiers use the vapor compression cycle and a refrigerant to dehumidify the air. The dehumidifier fan pulls in the air from the room, which comes into contact with the cool evaporator coils. Due to this low temperature of the coils, the water condenses from the air, and dehumidification occurs.
However, if the incoming air temperature is lower than that of the evaporator coils, it results in frosting up of the coils. The GE dehumidifier will keep shutting off due to its auto-defrosting feature that automatically shuts off the compressor while the fan runs until the ice melts.
The best solution is to move the dehumidifier to a warmer room or shut it off to speed up the defrost process. You can also increase the room temperature to above 65°F.
For the dehumidifier to operate at optimum, the ideal room temperature should be between 70°F and 90°F (21°C to 32°C). But you should not use refrigerant dehumidifiers below 60°F (about 15°C).
Dirty air filter
The GE dehumidifiers have an air filter that traps dirt from the air that passes through the unit. Over time, the dirt builds up and blocks the air pores, restricting airflow.
As a result, the compressor will strain to sustain airflow and overheat. So to protect the unit, the dehumidifier automatically shuts off to protect the compressor from overheating and failing.
In another scenario, a clogged air filter can cause frosting of the evaporator coils due to reduced airflow through the unit.
As a result, the unit will reduce dehumidification, and the compressor will shut off during defrost mode to melt the ice.
Check the filter indicator light on the controls. If it is glowing, it means it’s time to clean the filter. First, use lukewarm water to wash the filter, and air dry properly before putting it back into the unit.
Wrong fan speed
The fan in the dehumidifier is the part that pulls in air from the room. The dehumidifier runs better with adequate airflow in the unit. Reduced airflow will cause ice buildup in the coil, forcing the unit into defrost mode.
The compressor will start again when the ice melts, and due to reduced airflow, frost will continue building up. These short cycles consume more energy for less output and reduce the unit’s lifespan.
To fix the issue, you need first to identify what’s causing the low fan speed. They include:
Faulty fan motor
Check the fan motor for shortages and continuation. If the motor has internal electrical faults, replace the entire fan motor.
Damaged fan blades
Damaged blades will not pull enough air into the unit. Inspect the fans for broken fragments or warping and have them replaced.
Faulty electronic components of the fan
Faulty electronic components such as the switch, capacitor, and relay can cause the fan to run at a low speed. Use a multimeter to test for continuation. If one of the components is faulty, you may need professional assistance to replace it.
Insufficient refrigerant
Low refrigerant levels will cause your dehumidifier to keep turning on and off. This is because low refrigerant causes reduced pressure in the refrigerant lines, which leads to the compressor turning off before the cooling cycle completes.
After some time, the pressure in the lines increases, and the compressor kicks on, causing your unit to work in short cycles.
Ideally, the refrigerant in your dehumidifier is supposed to last forever. Therefore low refrigerant means there is a leakage in the system.
However, detecting the source of the leak may be a bit difficult. Consequently, you will need to take your unit to a professional for repair.
Clogged coils
For proper and continuous dehumidification, air needs to come in contact with the evaporator coils at a reasonable rate. However, dust and dirt can accumulate on the coils and partially block the air passage. As a result, the airflow will drop and cause frosting on the coils.
Expose the dehumidifier coils and clean them with a brush. You can also use warm water and dishwasher liquid to clean off the gunk.
Faulty humidistat
The dehumidifier humidistat detects relative humidity in the air close to the unit. When the humidity reaches a specific level, the humidistat signals the compressor to turn off. When humidity increases, the humidistat signals the compressor to switch on to restart the cooling cycle.
A defective humidistat will register inaccurate humidity levels causing the compressor to shut off prematurely. Install a hygrometer near the dehumidifier to test if the humidistat is working. The hygrometer will measure the relative humidity accurately, and you can compare it with the reading on the humidistat.
If you have to lower the control setting to keep it running and the room’s relative humidity is consistent, you have a faulty humidistat that requires replacing.
GE dehumidifier pump is not working
You should inspect the drain setup if your dehumidifier is not draining. Here is how to troubleshoot this issue to get your dehumidifier pump working again.
- Check the connection where the hose attaches to the drain port at the back of the unit. Ensure the connection is secure and the rubber washer is seated correctly. If the connection is loose, detach it and reconnect it properly until it clicks into place.
- The sensor at the drain port detects if the pump drain hose is securely connected. If the humidity sensor is not correctly engaged, the unit will not activate the pump. Reposition the sensor correctly to fix the draining issue.
- If none of the above solutions work, try resetting the pump function. Fill the drain bucket with water and reinsert it back into the unit. Turn on the dehumidifier, and the “Full bucket” indicator light will light up. Press the pump button for about 5 seconds and see if it starts working.
- Check the pump for voltage using a multimeter. If there is no voltage reading, the pump is defective, and you will need to replace it. If there is continuity, then the issue is elsewhere.
GE dehumidifier is not turning on and off automatically
In regular operation, the dehumidifier doesn’t run continuously. It contains certain features and components that communicate with the circuit board, which runs the compressor to achieve the desired humidity levels. So if your unit will not shut on and off automatically, there are a few things you can check to remedy the issue.
Bucket switch
The bucket switch opens and shuts off the dehumidifier when the water bucket becomes full. The unit then turns on the bucket indicator light to let you know it’s time to drain the bucket. The unit will stay off until the bucket has emptied.
But if the bucket switch fails when it is open, the unit will not start automatically even after draining the bucket. To determine if the bucket switch is faulty, use a multimeter to test for continuity. If the bucket switch has no continuity, replace it.
Humidistat
The dehumidifier humidistat controls when the unit runs and stops depending on the room’s humidity level. When the humidity is high, the humidistat contacts close to allow the dehumidifier to run. Once the humidity reaches the set level, the contacts open, and the dehumidifier switches off.
If the humidistat contacts fail, the unit will not restart; or it will run continuously even after it reaches the desired humidity. Use a multimeter to check the humidistat for continuity. If there is no current detected, replace the humidistat.
Control board
The dehumidifier has an electronic control board that powers the compressor and fan motor circuits. If the control board is defective, your unit may not start.
The control board is difficult to diagnose without any expertise. You should only consider replacing it after checking other components.
Reset the dehumidifier
If the unit does not shut off even when the bucket is full or has reached the set humidity level, try resetting the unit. First, unplug it from power for about 30 seconds and reconnect it.
GE dehumidifier is not making water
A working dehumidifier will always drain water as long as the relative humidity is high. So if the room temperature is over 65 degrees Fahrenheit and the humidity is high, but there is no water draining, the problem lies within the unit. Below are some of the top reasons your dehumidifier will stop making water.
Blocked airflow
Before troubleshooting the unit, check if something is blocking airflow to the unit. Ensure clearance of at least 18 inches on all sides of the unit. Furniture and walls can restrict air from flowing around the unit. Then inspect the grill cover of the dehumidifier for lint, dust, or pet fur that could be blocking air from entering the unit.
The solution is to unplug the unit and remove the grill cover. Then spray the grill clean with a garden hose. While the grill dries, inspect the inside of the unit. Use a can of compressed air to remove dirt from the coils and other parts of the unit. Replace the grill, then test if the unit is collecting water.
Humidistat is set too high
The GE dehumidifier has humidity set controls that allow you to select the humidity level within a range of 35% to 80%. When the relative humidity rises above that level, the dehumidifier turns on automatically to remove moisture from the air.
If you turn up the humidistat, the dehumidifier may not turn on because the room’s humidity level is not high enough for extraction. Set the humidistat at a lever no higher than 40% to fix the issue.
The room temperature is too low
When the ambient temperature is lower than 65°F, the moisture from the air freezes on the coils, which decreases or stops water collection. The unit will then turn on its auto-defrost feature to melt the ice. If you see the ice on the coils, the defrost feature is malfunctioning.
You will have to turn off the unit and increase the room temperature to about 65°F to help defrost the coils manually. You will need a professional technician to help restore the defrost feature.
Broken humidistat
If the humidity level is correct and the unit is not making, the problem could be with the humidistat. The humidistat is the component that automatically turns the dehumidifier on and off depending on the room’s relative humidity.
So if there is no water draining in the bucket or drain, then the humidistat is probably defective and is not turning on the unit. Use a multimeter to check if it’s working and replace it if necessary.
Low refrigerant
GE dehumidifiers have pressurized refrigerant fluid that keeps the evaporator coils cool. The coil system is air-tight, but sometimes it might develop cracks causing the refrigerant to leak slowly. The coils will not become cold enough to draw moisture from the air without sufficient refrigerant and pressure.
Unfortunately, this is not an easy fix without expertise. First, contact an HVAC technician to fix the cracks and refill the refrigerant. In most cases, all the cracks may be difficult to fix, and you may have to replace the entire unit.
Defective fan
The fan draws air into the unit so that the moisture can come into contact with the coils. If the fan is broken or dirty and isn’t pulling in the air, the dehumidifier will not work; therefore, it will not make any water either.
If comfortable, unplug the unit and check inside it. Turn the fan blade by hand to test if it has clogged with dirt or a broken blade prevents the fan from turning. If it’s dirty, use a damp cloth to clean it. And order a new fan blade from your GE dealer has broken, and replace it.
If the fan motor has broken down, you will need a professional to fix the issue, or you might have to purchase a new unit.
Overloaded compressor
If the ambient room temperature is above 65°F and your unit is no longer producing water, the compressor may not be running. The compressor acts like a pump that circulates the refrigerant through the coils to remove moisture from the air.
The compressor has a device called an overload that acts as a fuse. It protects the compressor motor from damage by shutting down when overheating. If the overload switch flips, the compressor won’t start.
Test the compressor with a multimeter. If there is continuity, the problem is elsewhere. But if there is no current, the overload has tripped and needs replacing. Note that a common cause for the overload to fail is running the dehumidifier on a long or undersized extension cord.
Short-circuiting can also cause the overload switch to flip, and you will need a technician to pinpoint the wiring issue.
Not enough moisture in the air
If the relative humidity of the air in your home is low enough, the dehumidifier will not collect any moisture. This can happen after the first few weeks of using your unit for the first time. When you use a dehumidifier, it will collect a lot of moisture in the first few weeks or months.
After the humidity is low enough, the dehumidifier will stay only to maintain and regulate the humidity, and it will collect little to no water in the drain.
The temperature is too low.
When temperatures are below 65°F, the coils inside will freeze. But if the temperature in the room is about 65°F but below 80°F, it will be too low, making it harder for the unit to collect any water. If the humidistat is at 60°F, the humidity will not be lower than 60%.
For basements, attics, and other rooms with generally low temperatures, you can install a dehumidifier that runs on temperatures as low as 30°F.
Wrong size dehumidifier
GE dehumidifiers come in various sizes, determined by how much water they can extract from the room. For example, suppose your dehumidifier has a greater water removal capacity than you need; in that case, it will eliminate more water in a day and run the rest of the day without collecting any water.
On the other hand, a smaller dehumidifier will also collect less water than expected. Therefore sometimes, it will run won’t accumulate moisture.
Malfunctioning parts
All the parts in a dehumidifier work together to ensure it extracts as much moisture from the air and drains it out. Therefore if one part fails, it’s likely to affect the unit’s functioning. Here is a list of the components that may break down and need a replacement.
- Compressor: if the compressor fails and the unit is running, you will hear a buzzing sound, but it won’t collect any water.
- Coils: Sometimes, the condenser coils develop cracks that cause the refrigerant to leak out gradually. As the refrigerant level reduces, the amount of water the unit collects also reduces.
- Air filter: Over time, the air filter will become obstructed by dust and debris from the air, leading to reduced airflow. If there isn’t much air flowing into the unit, it won’t collect any moisture. You will have to wash the filter to improve airflow into the unit.
- Humidistat: When the humidistat fails, it will show the wrong humidity level or not signal the unit to work. Therefore you may notice the unit running, but no water is collecting. Replacing the humidistat should fix the issue quickly.
GE dehumidifier is not draining through the hose
All GE dehumidifiers allow you to connect a garden hose to the drain port on your unit so that it automatically empties into a floor drain. This way, you don’t have to remember to drain the water bucket constantly. If your dehumidifier is not draining through the hose, check the following for troubleshooting:
- First, check the bucket and ensure it is empty. Sometimes the water could leak into the bucket.
- Check the connection to the drain port and ensure the rubber washer is seated correctly. If the connection is loose, gently tighten it with pliers.
- Verify that the drain hose adapter is correctly attached to the drain port. Improper installation of the drain hose adapter will result in the unit continuing to drain into the bucket or not draining at all.
- Make sure the hose is not pushed too far into the drain. If the hose is touching the water, it will not drain. Pull out the hose and then reposition it where the hose outlet is above the waterline.
- Make sure the drain hose runs downhill as it relies on gravity.
- Cut off any excess hose to drain the water in a straight line. A very long hose will have too many kinks that block the draining.
- Check the drainage and ensure the other end of the hose is not in standing water. When the drain becomes blocked with standing water, the water from your unit will not drain out due to the pressure difference formed by the standing water.
- Clean the dehumidifier drain and hose. Sometimes gunk and dirt from inside the unit can clog the drain. Unplug the unit and use a baby bottle brush or pipe cleaner to clean the drain and the drain hose. Then reinstall the hose drain routed downward as less material will accumulate in the hose and drain.
How to clean and maintain a GE dehumidifier
Routine cleaning and maintenance of your dehumidifier are necessary to ensure it works efficiently to remove moisture from your home, reduce breakdowns and prolong its lifespan. Here are our tips for cleaning and maintaining your GE dehumidifier.
Cleaning your GE dehumidifier
All the parts of the dehumidifier can build up dust and dirt. Therefore regular cleaning of these parts can prevent problems that can lead to premature failure of your unit.
Water bucket
- Turn off the unit and unplug it from power.
- Take out the water bucket and empty it.
- Wash the bucket over the sink with dish soap and warm water. You can also make a mixture of 90% water and 10% bleach to remove odor and prevent mildew. Do not clean the bucket in the dishwasher.
- Rinse the water bucket.
- Wipe the tank with a clean cloth or allow it to air dry completely before reinstalling it.
Air intake and exhaust grilles
- Turn off and unplug the dehumidifier.
- Take out the grilles.
- Clean the grilles with liquid dish soap and warm water. Do not use bleach or abrasive cleaners on the grilles.
- Rinse the grilles properly.
- Wipe them dry or allow them to air dry entirely before placing them back onto the unit.
Air filter
- You should clean the air filter at least every 250 hours of operation. However, that may vary depending on the quality of the air. For instance, if you stay in a dusty area, the filter may need more regular cleaning. The filter indicator light will also glow when it’s time to clean the filter.
- Turn off and unplug the dehumidifier.
- Hold the filter handle and pull it straight out of the unit. Do not run the unit without the filter.
- HM50 and HM70 models; remove the bucket first, then pull the air filter down below the front louvers.
- Use a wet/dry vacuum cleaner to clean the air filters if they are mildly dirty. If they are too dirty, wash the filter with dish soap and warm water. Do not use any chemical cleaners.
- Rinse the filters thoroughly.
- Allow the air filter to dry completely, then install it into the unit.
- Check the filter every 2-3 weeks to see if it needs cleaning.
Air intake and exhaust vent
- Turn off and unplug the dehumidifier from power.
- Use a vacuum to remove dust and debris from the air intake and exhaust vent.
Condenser coils
- Turn off and unplug the dehumidifier from power.
- Over time the parts of the condenser coils directly behind the filter will develop a residue.
- Use a soft brush to clean the evaporator coils regularly.
- The reside can harden n the coils and require special cleaning by an HVAC expert.
The unit housing and interior
- Use a clean dry to wipe off dirt and grime from the unit’s exterior. If the grime is sticky, slightly dampen the cloth and clean the surface.
- After using the unit for a while and depending on the air quality, the unit’s interior parts will also accumulate dust. Use a vacuum or compressed air to clean all the components inside the unit, including the fan blades.
- Ensure no water comes into contact with electrical parts, and then wait for the unit to dry completely before plugging to power.
Maintaining your dehumidifier
The proper use of your dehumidifier and replacing older or faulty parts as soon as possible ensures the unit runs smoothly for longer.
Unit location
- Your dehumidifier should not be installed closer than 12 inches from any object or wall so that the air intake and exhaust are not blocked.
- The temperature of the room the dehumidifier is in should be at least 65°F so that the coils do not freeze or burn up the motor. However, some dehumidifiers function correctly in lower temperatures, like the GE dehumidifier AHR30LM model.
- On the other hand, do not use your dehumidifier in a room with temperatures above 90°F.
- Close all doors and windows and other outside openings to the room with the dehumidifier.
Adjust the humidistat
- Set the unit at the ideal humidity of between 40 and 50 percent for optimal comfort and efficiency.
Protect the compressor
- Do not turn off the dehumidifier and then back on too quickly; otherwise, the compressor may overheat. Instead, give the unit at least 10 minutes after turning it off to allow the pressure in the system to equalize.
Filter replacement
- The filters in GE dehumidifiers are washable; however, they may need replacing over time for optimum performance. Replacing the air filter is dependent on the nature of the environment and how frequently you use the dehumidifier.
- You should expect to change the air filter more frequently than usual for very dusty environments, perhaps once every two to three months.
- While You could change the filters for dehumidifiers in relatively less humid or dusty regions once every 6 to 12 months.
Power source
- You should plug the unit into an individual electrical outlet with a voltage rating of 115 volt 60 Hz.
- Do not plug the unit into an extension cord; it might cause a short circuit that may blow electrical components in the unit.
Where is the filter on a GE dehumidifier?
All dehumidifiers have an air filter that traps dirt and cleans the air entering the unit. If the air filter is clogged, it will reduce its performance. The air filter is usually behind the front grille on all GE dehumidifier models.
However, the process of accessing the filter varies between models: for some models, you’ll have to remove the water bucket and pull the filter from underneath the front grille, while for others, you’ll take out the front grill to access the filter behind it.
How to clean mold from your GE dehumidifier
When the dehumidifier extracts water from the air, it dumps it in a water bucket. If not emptied regularly, the stagnant water can cause mold and mildew to form inside the water bucket.
If not removed, the mold in your dehumidifier is a health hazard for anyone in the room, and it may also produce a foul odor. Follow the step below to remove the mold from the bucket.
Things you’ll need
- Rubber gloves
- Dust mask
- Liquid dish soap
- Water
- Soft-bristle brush
- Chlorine bleach or white vinegar.
Instructions
- Put on rubber gloves to protect your hands from the chemical and the mold. In addition, wear a dust mask to avoid inhaling the mold spores for those with mold allergies.
- Remove the water bucket from the dehumidifier and drain it.
- Fill the bucket with water, add some liquid dish soap and scrub the inside of the bucket.
- Empty and rinse out the soapy water from the bucket.
- Mix half a cup of bleach for every gallon of water and bleach fill the bucket with the solution to the brim. Alternatively, you can mix equal parts of white vinegar and water, then add a few drops of dish soap.
- Allow the bucket to soak in the solution for 15 minutes to remove the mold and kill the mold spores. After soaking, scrub it with a soft brush to remove the grime.
- Empty the bucket and rinse it several times with clean water. Let the bucket dry entirely, then place it back into the unit.
How to set up the hose option in a GE dehumidifier
There are three ways water drains out of your GE dehumidifier; one with a pump and two methods for non-pump models. If you use your unit often, it is best to install the hose drain for convenience. The hose option will allow the collected water to continuously empty to the floor drain through a garden hose.
Hose draining for both pump and non-pump models
- Ensure your unit is off and unplugged.
- Remove the water bucket from the front of the unit.
- Open the drain cover on the side of the dehumidifier.
- Insert one end of the garden hose onto the nozzle, cut the excess length with a utility knife, and direct the other end to the floor drain.
- Ensure the hose lies flat because the draining of water depends on gravity.
- Replace the drain cover and the bucket into the unit.
Hose draining for pump models only
- Your pump model will always come with a 16-foot long pump drain hose that connects to the unit. When the water bucket is full, the drain pump automatically pumps water to a drain.
- Locate the drain port at the back of the dehumidifier.
- Push one end of the tube into the connector or drain port.
- Then direct the other end of the hose into a suitable drainage location.
- Switch on the unit.
- Activate the pump feature. Press and hold the pump button on the control panel for three seconds. The pump indicator light will flash and have a steady glow once the pump option is active.
- Check the bucket and ensure it is securely in place.
- Note that regardless of what draining option you have, the bucket has to be securely installed for the dehumidifier to work.
Signs that your GE dehumidifier capacitor has failed
Your dehumidifier has a capacitor in the compressor circuit that helps the compressor motor start. However, when the capacitor fails, the compressor won’t run. This is because a faulty capacity limits the sufficient voltage the compressor motor needs to start and run.
One of the most common reasons the capacitor fails is when the compressor grill accumulates too much dust and dirt. Other less common reason the capacitor fails includes; a damaged overload device, faulty fan motor, and a bad control board.
The best way to test a bad capacitor is using a multimeter. However, before testing the capacitor, there are a few signs to look out for that indicate a failed capacitor.
- The overload continually trips, or the unit short-cycles.
- The compressor has stopped running and won’t start.
- The fan is running, humidity is high, but the unit makes little to no water.
- There are burnt wires connected to the capacitor due to over-current.
- The compressor overheats and causes the capacitor to deform.
- The dehumidifier vibrates louder than usual.
GE dehumidifier fan is not working
If the fan in the dehumidifier stops working or you don’t hear the fan sound, there will be no air for the unit to dehumidify. Although the unit doesn’t run continuously, the fan runs throughout as long as the dehumidifier is on. During dehumidification, it propels air into the unit for moisture removal.
Then, after the appropriate humidity level is achieved, the fun runs to distribute dehumidified air around the room. Here are the most common reasons why your fan is not working and how to repair the issue.
Humidistat
The humidistat signals the unit when to start running depending on the humidity levels in the air. If the fan doesn’t run, the humidistat is probably defective and not communicating with the control board which powers the fan. Test it for continuity with a multimeter. If it has no power, replace it.
Fan blade
A broken or bent fan blade will prevent the fan from working. Access the fan and try turning the blades by hand. Check if the fan blades are rubbing against the fan housing as it turns. The dehumidifier fan must be balanced and aligned with the motor shaft to rotate correctly.
So if the blade is not turning freely or is rubbing against the housing, then the fan blade is probably defective and needs a replacement.
Before replacing the fan blade, try to wiggle the fan motor shaft to see if the fan blade is loose. If the blade is loose, tighten the set screw or replace a missing screw. If tightening and alignment don’t fix the problem, replace the fan blade.
Check this too: Why Is My Ceiling Fan Humming & How Do I Stop It?
Fan motor
Sometimes the fan motor will rotate slowly or hum but not spin, indicating a fault.
Turn the fan blade by hand. If the fan blade rotates freely without rubbing against the fan housing, use a multimeter to check if the fan motor is getting power.
If there is a reading, the motor is working, and the problem is elsewhere. But if it’s getting power but won’t run, the fan motor is defective and needs a replacement.
Blower wheel
Turn the blower wheel by hand. If it doesn’t turn freely or is rubbing against the fan housing, replaces the blower wheel. Also, if the blower wheel wobbles as it spins, it is loose on the motor shaft. Try tightening it onto the motor shaft. But if it is physically damaged, replace it.
Buttons are not working on GE dehumidifier
Typically, if the dehumidifier buttons are not responding, there could be an electrical issue inside the unit, or the unit has turned off for one reason or another. Here’s how you can troubleshoot the problem.
Check power to the unit
The electrical outlet might not be getting power. To check if the outlet is getting power, plug another electronic device into it and see if the device powers on. If the electrical outlet is not getting power, check the circuit breakers and fuses.
Reset any tripped breakers and replace any blown fuses. If the breakers keep tripping repeatedly, it means there is an electrical issue in your house that needs a professional to identify and fix.
Check the unit’s cable and plug
If there is power in the outlet, the cable or plug of the dehumidifier could be faulty. Inspect the cord for any breaks or burns; if it is damaged, replace the cable. The unit’s plug usually has a fuse inside it that protects the dehumidifier from damage by power surges and over-current.
Check if the fuse in the plug has blown. If it has blown, replace it with a fuse with the same amperage rating.
Check the compressor
If there is dirt buildup in the dehumidifier compressor restricting the flow of the refrigerant, the compressor will overheat and shut off the unit. While it is off, the unit button will not work until the compressor cools down efficiently. Test the compressor for continuity. If it doesn’t have current or keeps shutting off, replace it.
Check the control board
The control board receives signals from the humidistat on when to power or shut down the unit depending on the humidity levels. However, if the humidistat is functioning, but the control board is not turning on the unit as necessary, it could b faulty.
The control board has multiple lines with different voltages; a power surge or over current can render the control board defective. Control board issues require expertise to diagnose and fix. It is best to contact an HVAC expert to resolve the issue.
GE dehumidifier compressor does not start
The compressor is the core of your dehumidifier’s functioning. It circulates the pressurizes and the refrigerant to ensure it extracts water from the air are required. If the compressor is not starting, it is best to check other components that communicate with the compressor before condemning the compressor itself.
The compressor relies on other components such as bucket switch, float assembly, humidistat, humidity sensor, electrical contacts, control board, and compressor capacitor. If any of these parts fail, the compressor won’t start. Go through our troubleshooting guide to identify the faulty component.
Float assembly
The float assembly moves when the bucket fills with water to trip the float switch to that bucket doesn’t overflow. When the float switch trips, it stops the compressor and fan motor from working until the bucket is emptied. The switch then activates the full bucket light.
However, if the bucket indicator light is on, but the bucket is empty, the problem may be a faulty float assembly. Check the float assembly to ensure it moves freely and is not restricted from contacting the float switch. If there are signs of physical damage, replace the float assembly.
Humidistat
The humidistat signals the control board to supply power to the compressor when the humidity level in the air warrants it. If the humidistat is faulty, it will not communicate with the control board; therefore, the compressor will never start.
Additionally, signals in the unit pass via electrical contacts. The compressor will not turn on if these electrical contacts become welded shut, corroded, or broken. To diagnose the issue, turn the dial on the humidistat and listen for a clock sound that indicates it’s working.
If there is no click sound, replace the humidistat. You can also test the contact with a multimeter. If there is no continuity, the contacts will need professional assistance to repair or replace them.
Sensor
The dehumidifier has a sensor that monitors relative humidity then relays that data to the control board. The control board then uses that data to power the compressor and fan motor. Therefore if the compressor doesn’t start, the sensor has a problem and is not functioning correctly.
To troubleshoot the sensor, inspect the harness connections to the control board to ensure they are working. If there are damaged, replace the sensor or the harness connections.
Compressor
The compressor’s task is to compress the refrigerant and circulate it throughout the condenser coils so that they can extract moisture from the air. If other parts are functioning, the compressor motor, relay, capacitor, and overload switch could be the problem.
Here are a few things to check when diagnosing a failing compressor in your dehumidifier.
- Check the capacitor. A failing capacitor will prevent the compressor from starting after a shutdown. Replacing the capacitor should fix the issue.
- The compressor can become overheated and shut down if frost develops on the coils and the unit fails to defrost them.
- Check the overload device. The overload detects excess current overload or lead. If the overload trips, the compressor shuts down and resets itself after it cools down. Sometimes the overload device may refuse to reset. If it shows no continuity, replace it.
- Check the condenser. If the condenser coils are dirty, they will cause the compressor to overload and shut down. The solution is to clean the evaporator coils with a shop vac.
- Check the air filter. If the air filter is clogged, the compressor will strain and shut down eventually.
- Check and ensure the compressor rotates freely. It should move freely so that it comes into contact with the refrigerant. If it has clogged with dirt, some dry cleaning with a brush should sort the issue.
- If there is no blockage, test for continuity with a multimeter. Consider replacing the compressor if there is no continuity because repairing it is costly.
Electronic Control Board
The control board powers the compressor. Therefore if the control board is the issue, the compressor will not cycle back on. If other unit components are in good working condition, replace the control board.
Conclusion
GE dehumidifiers have a simplistic design, making them easy to run and troubleshoot. Using our article, you can troubleshoot common GE dehumidifier problems by elimination process before resorting to replacing the entire unit.
Additionally, you should keep up with the unit’s maintenance routine to ensure it performs efficiently for longer and save on repair costs.