Carrier Infinity Thermostats are good quality and reliable units that effectively manage humidity levels, airflow, ventilation, and indoor air quality among other things. But these systems can also experience issues from time to time. Other users may have challenges with their setup and operation.
To help users set up, operate and resolve problems they may have with their Carrier Infinity thermostats, here is a clear troubleshooting and how-to guide addressing some of the commonly-reported issues with these controls.
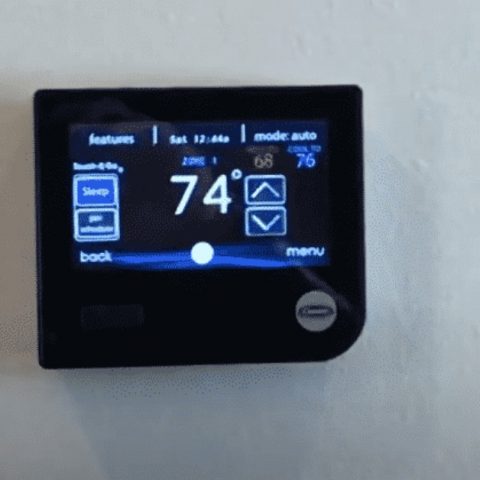
How to Set Up and Operate a Carrier Infinity Thermostat
To set day, timer and desired humidity:
- Flip down the door at the base of the Infinity Control.
- Press the BASIC button.
- Adjust the highlighted HOUR setting using the TIME (+/-) button.
- Press SCROLL to highlight MINUTE. Adjust the MINUTE setting using the TIME (+/-) button.
- Press SCROLL to highlight DAY. Adjust the current DAY setting using the TIME (+/-) button, until the correct day is displayed.
- Press SCROLL to highlight HUMIDITY.
- Press the red HEAT button to set the heating humidity. Adjust the desired heating humidity using either (+/-) button.
- Press the blue COOL button to set the cooling humidity. Adjust the desired cooling humidity using either (+/-) button.
- Press BASIC or close the door to exit.
To adjust Heating temperature:
- Press the red HEAT button. Heating is confirmed when the red LED adjacent to the red HEAT button is lit.
- Press the ZONE button until the name of the zone you wish to control appears on the upper left screen. Selecting “ALL ZONES” allows you to select one temperature for the entire home. Press the ZONE button for three seconds to activate the “ALL ZONES” feature.
- Use the TEMP (+/-) button to select your desired temperature, which will be displayed on the lower right. An override time will be displayed on the lower left. Note that an override time will not appear if programming has been turned off.
- You can change the override time in 15-minute increments by pressing the TIME (+/-) button until the desired override time is selected. Or, press the HOLD button to override the schedule indefinitely.
Check this too: Common Honeywell Thermostat Problems and How to Fix Them
To adjust cooling temperature:
- Press the blue COOL button. Cooling is confirmed when the blue LED adjacent to the blue CL button is lit.
- Press the ZONE button until the name of the zone you wish to control appears on the upper left screen. Selecting “ALL ZONES” allows you to select one temperature for the entire home. Press the ZONE button for three seconds to activate the “ALL ZONES” feature.
- Use the TEMP (+/-) button to select your desired temperature, which will be displayed on the lower right. An override time will be displayed on the lower left. Note that an override time will not appear if programming has been turned off.
- You can change the override time in 15-minute increments by pressing the TIME (+/-) button until the desired override time is selected. Or, press the HOLD button to override the schedule indefinitely.
Carrier Infinity Touch Thermostat Troubleshooting
If Infinity control does not power up:
- Recheck wiring to ABCD on all devices.
- Make sure all colors match for every terminal.
- Make sure power is supplied to the indoor unit, and the amber LED is lit on indoor control circuit board.
- Check for 24VAC between the C and D terminals at Infinity Control terminal connector and Damper Control Module.
- Check fuse on indoor unit’s circuit board.
If Display says “Indoor Unit Not Found:”
- Recheck wiring to ABCD on all devices.
- Make sure all colors match for every terminal,
- Press left-side button to try again.
- If display still reads “Indoor Unit Not Found”, disconnect accessories and all devices from ABCD and connect User Interface directly to indoor unit with a short piece of thermostat wire. Add other devices one at a time to determine where the communication issue exists.
If display says “Outdoor Unit Not Found” (two-stage communicating outdoor unit):
- Recheck wiring to ABCD connector on outdoor unit.
- Make sure all colors match for every terminal.
- Check for 24VAC between the C and D terminal connector of outdoor unit.
How to Program Carrier Infinity Thermostat
One Schedule for All Days
To create one comfort schedule that will repeat every day follow the instructions below:
- Flip down the door at the bottom of the control.
- Press the SCHEDULE button to access the schedule screen.
- Press the ZONE button until the name of the zone you wish to program appears on the upper left screen. Selecting “ALL ZONES” allows you to create one schedule for the entire home.
- Press either the LEFT or RIGHT button repeatedly until “ALLDAYS” is displayed.
- The WAKE time period will be highlighted. Set the start time for this time period using the TIME (+/-) button.
- Press the red HEAT button. Heating temperature will begin flashing.
- Set the heating temperature using the TEMP (+/-) button.
- Press the blue COOL button. Cooling temperature will begin flashing.
- Set the cooling temperature using the TEMP (+/-) button.
- Set the remaining periods, “DAY,” “EVENING,” AND “SLEEP” by using the SCROLL button to select a time period, then follow steps 5-9 to select temperature and time settings.
- Exit the scheduling mode by either closing the door or pressing the SCHEDULE button.
- Or, to create a custom schedule for the remaining zones, press the ZONE button to select the next zone you wish to program. Then repeat steps 4-10 in this section.
Daily Schedule
You can program a different schedule for each day of the week by using the SUNDAY, MONDAY, TUESDAY, WEDNESDAY, THURSDAY, FRIDAY, and SATURDAY screens.
- Flip down the door at the bottom of the control.
- Press the SCHEDULE button to access the schedule screen.
- Pres the ZONE button until the correct zone name that you want to program appears on the upper left screen. Selecting “ALL ZONES” allows you to simultaneously program one day across all zones.
- If the word “SUNDAY,” “MONDAY,” “TUESDAY,” “WEDNESDAY,” “THURSDAY,” “FRIDAY,” or “SATURDAY” appears at the top of the screen, you are ready to start.
- If not, press either the LEFT or RIGHT button repeatedly as necessary until the day of the week you want to select is displayed. The WAKE period will be highlighted.
- Set the start time for this time period using the TIME (+/-) button.
- Press the red HEAT button. Heating temperature will begin flashing.
- Set the heating temperature using the TEMP (+/-) button.
- Press the blue COOL button. Cooling temperature will begin flashing.
- Set the cooling temperature using the TEMP (+/-) button.
- Set the remaining periods, “DAY,” “EVENING,” AND “SLEEP” by using the SCROLL button to select a time period, then follow steps 5-9 to select temperature and time settings.
- Repeat steps 5-11 in this section for each day you would like to schedule or use the COPY DAY function to copy a daily schedule to another day.
- Exit the scheduling mode by either closing the door or pressing the SCHEDULE button.
Similarly, you can create weekdays and weekend schedules by repeating steps 1-3 as described in the previous procedures, then selecting WEEKDAYS or WEEKEND respectively before proceeding.
Programming Fan Speed
You can select a different fan speed for each time period of your comfort schedule. Scheduling the fan speed follows similar basic steps as programming the time and temperature settings.
Follow these steps to program the fan speed:
- Flip down the door at the bottom of the control.
- Press the SCHEDULE button to access the schedule screen,
- Press the ZONE button until the name of the zone you wish to program appears on the upper left screen. Selecting “ALL ZONES” allows you to create one schedule for the entire home.
- Press the FAN button to access the Fan Speed programming screen.
- Press the LEFT or RIGHT button to select the days you wish to program- ALLDAYS, WEEKDAYS, WEEKEND, or chose a specific day (MON, TUESM WED, etc.).
- Using the TIME (+/-) button to select your desired fan speed- LOW, MED, HIGH or AUTO.
- Use the SCROLL button to highlight the next period, then repeat steps 5 and 6 to select settings for DAY, EVENING and SLEEP.
- Press the FAN button to return to the standard scheduling screen.
- Or, you can exit the scheduling mode by either closing the door or pressing the SCHEDULE button.
- Or, to create a customized fan speed schedule for the remaining zones, press the ZONE button to select the next zone you wish to program. Then repeat steps 5-7.
Carrier Infinity Thermostat Battery Replacement Guide
To replace batteries in a Carrier Infinity thermostat:
- Locate the latch at the top of the thermostat. It is at the center of the top rim.
- Press it down. This will disconnect the thermostat from the top of the wall plate.
- Remove the thermostat from the wall bracket completely by bringing it slightly toward you and lifting it up and off the lip on the lower edge of the wall bracket.
- Set the thermostat face down on a flat surface. You will see the batteries in the lower right corner.
- Remove and discard the batteries.
- Install new batteries by matching the polarity with the indicators in the space where the batteries sit.
- Snap the batteries into place.
- Put the thermostat back on the wall bracket.
- Bring the thermostat back wall. Line up the latch at the top of the thermostat with the corresponding lip on the wall bracket.
- Lightly push the thermostat toward the wall, until the latch and lip are line up properly.
- Close the door.
Carrier Infinity Touch Thermostat Reset System Malfunction
The functions of the Carrier Infinity System thermostat include monitoring your air filter, humidifier pad, and UV lamps.
When any of these parts need maintenance, an alert will appear on the thermostat. To remove the alert from the screen, you need to reset the thermostat.
Follow these steps to reset a carrier Infinity system thermostat:
- Hold the button next to the left arrow for several seconds until the “Accessory Status” screen is displayed. The names of the accessories appear on the screen.
- Press the SCROLL button to scroll through the accessories. Choose “Filter” for the air filter, “Hum” for the humidifier pad, or “UV Lamps” for the UV lamps.
- Reset the setting by pressing the button next to the right arrow.
- Repeat the process with the remaining accessories by following steps 2 and 3.
- Press the button next to the left arrow to exit the “Accessory Status” screen.
Carrier Infinity Indoor Unit Communication Fault
If a communication error exists, or equipment cannot be found by the user interface, this may be due to a wiring problem with any of the components or accessories of the system.
An indoor unit communication fault is displayed when the user interface has lost communication with the indoor unit.
To troubleshoot the problem:
- Check voltages and wiring.
- Perform communication bus troubleshooting to isolate the problem to the appropriate piece of equipment. Following these steps:
- If cannot find indoor unit, disconnect outdoor unit and all other devices on ABCD bus except indoor unit and user interface. Cycle system power.
- Is indoor unit found? If yes, reconnect one device at a time to ABCD bus. If a device is not found, check the device wiring and correct the wiring and reinstall the system if the there is a problem with the wiring. If the device wiring is okay but the device is not found, measure the voltage on ABC terminals at the device. It is possible the device has a problem.
- If indoor unit is not found, connect user interface to the indoor unit at the indoor unit. Check if the indoor unit is found now. If yes, check the wiring to the user interface mounting location.
- If the indoor unit is still not found, try another user interface and check if the indoor unit is found. If yes, check wiring to user interface mounting location. If no, measure voltage on ABC terminals at the indoor unit. It is possible the indoor unit has a problem.


Carrier Thermostat Error Codes
Fan coil generated system malfunction events:
- Code 37- Heater output sensed On when not energized (User interface will only display the pop-up message, modifications to fan/staging operation will not occur)
- Code 44- Motor Communication Fault (ventilator, humidifier, dehumidifier, outdoor unit will be turned off)
- Code 41- Blower Motor Fault (ventilator, humidifier, dehumidifier, outdoor unit will be turned off)
- Code 45- Control failure
Furnace generated system malfunction events:
- Code 13- Limit Circuit Lockout
- Code 14- Ignition Lockout
- Code 21- Gas Heating lockout
- Code 22- Abnormal Flame Proving Signal
- Code 23- Pressure Switch Did Not Open
- Code 24- Secondary Voltage Fuse Open
- Code 33- Limit Circuit Fault AND high heat only is active
- Code 45- Control Circuitry Lockout
- Code 41- Blower Motor Fault (cooling mode only) (ventilator, humidifier, dehumidifier, outdoor unit will be turned off)
For codes 13, 14, and 21, the system will use heat pump heating exclusively if available. When the error code is cleared or disappears, furnace heating will resume if still requested.
Outdoor unit generated system malfunction events:
- Code 25- Invalid Model Plug
- Code 45- Control Failure
- Code 47- No 230V at unit
- Code 48- Loss of Inverter Communications
- Code 69- Inverter Internal Fault
- Code 73- Contactor Shorted
- Code 74- No High Voltage at Compressor
- Code 76- Low Stage Didn’t Start Three Times
- Code 78- High Stage Didn’t Start Three Times
- Code 81- Thermal Lockout in Low Stage- 4 Hrs
- Code 82- Thermal Lockout in High Stage-4 Hrs
- Code 83- Low Pressure Lockout- 4 Hrs
- Code 84- High Pressure Lockout- 4 Hrs
- Code 85- Low Contactor Open
- Code 86- Low Contactor Shorted
- Code 87- High Contactor Open
- Code 88-Inverter Temp Lockout or High Contactor Shorted
- Code 96- VDC Under Voltage Lockout
- Code 97- VDC Over Voltage Lockout
- Code 99- High Torque Lockout
User Interface generated system malfunction events:
- Temp sensor failed, loss of communication with the smart sensor, smart sensor fault. “NO SENSOR DATA” shown
- Indoor unit communication fault
- Outdoor unit communication fault
- Packed product communication fault
- NIM communication fault
- SAM communication fault
- Possible Frozen Coil
- High Room Temp Alert, when 100oF exists for at least 10 minutes, and removed when less than or equal to 98oF exists
- Low Room Temp Alert, when 38oF exists for at least 10 minutes, and removed when greater than or equal to 40oF exists
- High Humidity Alert, when 80% Rh exists for 30 minutes, and removed when less than or equal to 78% Rh exists
Carrier Infinity Fault Code 178
Code 178 indicates Indoor unit printed circuit board, or 24-volt control circuit is non-functional. The issue may be caused by a bad thermostat, printed circuit board, or an oxidized wire connection.
To troubleshoot the issue:
- Recheck wiring to ABCD connector on outdoor unit.
- Make sure all colors match for every terminal.
- Check for 24VAC between the C and D terminal connector of outdoor unit.
If all checks out with the wiring, the outdoor circuit board could be faulty. This needs a professional to troubleshoot and fix.
Carrier Infinity Fault Code 44
A fault code 44 is a blower calibration fault. This fault indicates that the calculated blower motor speed is below 250 or above 1300 RPM.
- Turn power off, wait 30 seconds, then restore power. Reset thermostat. Observe operation of furnace through 1 heating cycle.
- If unit operate in low fire while flashing code 44, you have excessive restriction in air delivery system. Check filter(s) and duct work. If the problem still persists, replace furnace control board. Fix the problem.
- Turn off power, wait 30 seconds, then restore power. Reset thermostat. Observe operation of furnace through 1 cooling cycle.
- If fault code 44 occurs, you have excessive restriction in air delivery system. Check filter(s) and duct work. Furnace will operate in cooling mode at default speed. Check outdoor unit suction pressure and verify charge to determine if indoor airflow is sufficient.
- Turn off power, wait 30 seconds, then restore power. Reset thermostat. Observe operation of furnace after it goes to high fire.
- If the unit operates in high fire while flashing fault code 44, you have excessive restriction on air delivery system. Check filters and ductwork. Furnace blower will operate in high-fire speed at 1200 RPM. Check temperature rise of furnace and make sure the unit does not trip primary limit.
Carrier Infinity Fault Code 196
The fault code 196—auxiliary input (G) shutdowns could indicate a few different things, basically, it is whatever the installer wired up the auxiliary alarm for, typically it is a backed-up drain (float switch or drain pan switch).
Carrier Infinity Fault Code 41
A fault code 41 indicates a blower motor fault. 41 codes may show up in fault history, but if the system is operating properly, this can be ignored.
If motor LED is lit and flashing and the motor does not run:
- Check status LED. If status LED is indicating status code 41, motor control has detected that the motor will not come to speed within 30 seconds of being commanded to run or that the motor has been slowed to 250 rpm for more than 10 seconds after coming up to speed. Motor wiring harness and fan coil control are operating properly, don’t replace.
- Check to be sure that the blower wheel is not rubbing the housing.
- Check the motor to be sure that the motor shaft is not seized (Motor Control Module must be removed and electronics disconnected from windings to perform this check properly).
- Check motor windings. If all these checks are normal, the Motor Control Module may need replacement.
Carrier Infinity Fault Code 179
If a fault code 179 appears on your Carrier Infinity thermostat, it indicates an outdoor unit communication error.
To clear the error:
- Check the wiring. Make sure the wires are installed correctly and are not loose.
- If the wiring is okay, check float switch on inside unit of the drain line. If it is tripped it will cause the unit not to communicate.
Carrier Infinity Not Cooling
Check the thermostat settings
Check the thermostat settings:
- If the thermostat is set for heating instead of cooling the air simply adjust the thermostat so it is set to cool or change the setting to auto so it will automatically change between cooling and heating as temperatures change.
- If the fan is set to “on”, the fan will run constantly even when the system isn’t cooling the air. This could result in warmer air blowing from the registers when the AC unit is not operating. Changing the fan setting to “auto” will resolve the issue by turning off the blower when the system is not actively cooling. If it is set to “off”, simply select “on” or “auto”.
- Check the temperature setting to make sure somebody else didn’t change it to a higher setting.
- If you have a programmable thermostat, review your “comfort schedule” for any issues, and make sure your programmed settings still match the times and temperatures you expect when you are home, away and asleep.
- Air filter is dirty
Lack of maintenance can lead to a clogged filter and blocked airflow. These can lead to loss of efficiency, discomfort, or even system failure.
Before checking your air filter, be sure the thermostat is set for cooling and that the temperature setting is correct. If you still suspect the problem is a dirty filter, remove and clean or replace your air filter.
Refrigerant level is low
The refrigerant in your air conditioning system could be below. If your thermostat settings are correct and your air filter is clean, you may have a leak or other issue that is causing the refrigerant levels to drop.
If you suspect low refrigerant levels, contact your local Carrier dealer to troubleshoot the air conditioner for refrigerant-based issues.
Evaporator coil is frozen
Excessive buildup of dust, dirt, or other pollutants on the evaporator coil, excessively dirty or clogged air filter, excessive buildup of dirt, dust, or debris on the outdoor condensing unit, and low refrigerant levels are some of the issues that can lead to a frozen evaporator coil.
As the evaporator coil is typically not easily accessible and troubleshooting an AC’s refrigerant levels should be handled by a professional, you should shut down the system and contact your local Carrier dealing when you have a frozen evaporator coil.
Electrical panel issues
If there is no air coming from the registers, the house is too warm, and the system is not running at all, you might have lost power to the system.
To troubleshoot, locate your home’s electrical panel (breaker box). Look for a blown fuse or a tripped circuit breaker that is not in the ON position.
Check this too: How to Change Batteries in Honeywell Thermostat
Faulty or broken condensing unit
A condensing unit might have an excessively dirty coil or refrigerant leakage. Other issues with the outdoor condensing unit might include a failing condenser fan motor, a faulty compressor, or a faulty run capacitor, Most of these AC problems require a professional.
Carrier Infinity Thermostat Replacement
Before installing, modifying, or servicing the system, the main electrical disconnect switch must be in the OFF position. There may be more than 1 disconnect switch. Lockout and tag switch with a suitable warning label.
To install a Carrier Infinity thermostat replacement:
- Turn off all power to equipment.
- Remove existing control from wall.
- Disconnect wires from existing control.
- Discard or recycle old control.
- Select Infinity Control mounting plastic.
- Route wires through large hole in mounting plastic. Mark wall through two mounting holes.
- Drill two 3/16-in mounting holes in the wall where marked.
- Secure mounting plastic to the wall using two screws and anchors provided.
- Adjust length and routing of each wire to reach each wire entry on the connector backplate. Strip 1/4-in of insulation from each wire.
- Match and connect thermostat wire to proper terminals on User Interface backplate.
- Push any excessive wire into the wall. Seal the hole in the wall to prevent any air leaks. Leaks can affect operation.
- Attach Infinity Control to the mounting plastic by lining up the plastic guides on the back of the control with the opening on the mounting plate and push on.
- Perform installation of all other system equipment.
- Turn on power to equipment.
Thermal Lockout Code 82
If your outdoor unit generates a fault code 82, it means a Hi capacity thermal lockout. Thermal cutout occurs in three consecutive high cycles in new platform outdoor units. On older platforms, 2-stage units, or a combination of 3 hi and low cycles will cause this event.
Carrier Air Conditioner Reset Button
You may find your Carrier air conditioner needs resetting if it starts to malfunction, or refuses to respond to input via the control panel or remote.
Resetting the AC restarts the internal computer and often restores the unit to normal working order. The exact instructions will vary depending on your Carrier AC model.
- Locate the Reset button on the AC’s control panel. The button is sometimes very small but is usually labeled. In some cases, the button can be found beneath the digital display.
- Press and hold the Reset button down for 3 seconds and then release the button. The unit may not respond to this step.
- Press and hold the Reset button down for another 3 seconds. A light should flash on the display this time.
- Wait a moment while the unit resets. Minor technical issues should be cleared.
Check this too: York Furnace Troubleshooting & How to Guide