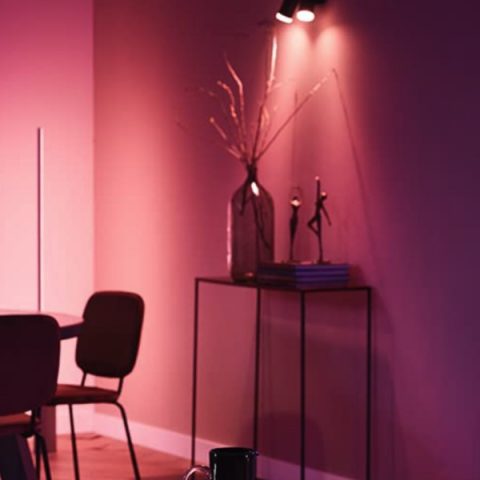
Due to their ability to produce 16 million different colors, Philips Hue are the most popular smart lighting product in the market. they also feature a wide range of products with a myriad of interesting features that make them worth it.
And like any other smart product, they are bound to malfunction every now and then. This articles seeks to educate you on the tips and tricks for using your Philips Hue efficiently. And troubleshooting any issues that may arise while using your smart lights.
How to setup Philips Hue bulb
- First, make sure the Philips Hue Bridge is all set up.
- Go to Settings > Light setup > Add light.
- Hit Search or manually add the serial number listed on the bulb.
- Follow the setup instructions, from which point you can name your light and put it into Rooms.
How to set up Philips Hue without bridge
A Philips Hue system generally consists of the Hue Bridge and at least one Hue bulb. It is not mandatory to have a Philips Hue Bridge. You can just use a Hue Dimmer switch or connect using Bluetooth on the newer bulbs. However, you can only use the dimmer with up to10 bulbs.
If you’ve got an Echo Plus, Echo 4th-gen or one of the newer Echo Show devices, which all act as Zigbee hubs, you also won’t need the Hue bridge to use your bulbs.
Without a Bridge, you’ll be missing out on key features such as lights coming on or off automatically when you enter or leave your home, smart switches and sensor controls, wake up and sleep routines, custom scenes, syncing your lights with music, video and gaming, and access to third-party apps.
How to set up Philips Hue bridge
- Plug the Hue Bridge into a power socket and hook it up to your router via ethernet cable.
- Proceed once the four lights on the Bridge light up.
- Go to Settings > Hue Bridges > Add Hue Bridge in the Philips Hue app.
- Follow the setup instructions.
How to install the Phillips Hue App
Follow the steps below to install the app on your android or iOS phone;
iOS App
- Open App Store.
- Type in “Philips Hue” in the search bar.
- Select Philips Hue in the search results.
- Choose GET and install the app.
- Open the app to proceed with the setup.
- The app will begin searching for nearby Hue bridges.
- When your bridge has been found, tap Set up.
- To pair your app to the bridge, you must press the sync button on the bridge.
- Go to your Philips Hue Bridge and press the center sync button.
- Next, it’s time to set up HomeKit and Siri if you’re an iOS user. Tap on Pair bridge at the bottom.
- Tap on My home at the bottom and give your home a name. Home usually works just fine in this case. Tap on Create home when finished.
- Next, you’ll need to scan the accessory setup code that’s on the back of the Hue Bridge. Hold your phone up to this code and it will detect it automatically. If you need to, you can enter the code manually.
- It’s now time for your Hue Bridge to detect all of your Hue light bulbs, so tap on the + icon in the bottom right corner.
- Tap on Search.
- It will take several minutes for it to find all of your bulbs. If it doesn’t find all of your bulbs, you can tap on the + icon again and then select Add serial number to manually add the bulbs to your setup.
- Philips Hue app with a list of detected bulbs. The next button is selected in the upper right.
- Once all of your Hue bulbs are found, the app will prompt you to group them into rooms for easier control. Tap on the + icon in the bottom-right corner on the next page.
- Tap on the text box at the top and give your first room a name. Tap Save when done.
- Tap on Room type and select the type of room it is.
- Under Light selection, check or uncheck any bulbs that you don’t want associated with this room. Tap Save when done.
- Add more rooms if you want by tapping on the + icon at the bottom. Otherwise, tap on Next.
- The initial setup is complete. Tap on Let’s go to begin controlling your Hue lights.
Android App
- Open Play Store.
- Type “Philips Hue” in the search bar.
- Select Philips Hue in the search results.
- Click Install to start downloading the app.
- Once installed, click Open to proceed to the setup. Accept any prompts.
- Tap to open the Philips Hue app.
- The app will begin searching for nearby Hue bridges.
- When your bridge has been found, tap Set up.
- To pair your app to the bridge, you must press the sync button on the bridge.
- Go to your Philips Hue Bridge and press the center sync button.
- Any rooms that have previously been set up can be seen. You can control the lighting for your rooms here. If you wish, tap the gear icon to begin creating a new room, add new lights or accessories.
- To create a new room, tap Room setup.
- Existing rooms will be shown. Tap the + symbol to add a new room.
- Give your room a name, select some lights to add to this room and then tap SAVE.
- Your new room will now show up in the room list where you can now control it.
How to reset a Philips Hue bridge
A factory reset will reset the Philips Hue bridge back to default settings. This is typically done when there is a problem that can only be fixed with a reset or if you want to sell or give it away.
Factory Reset steps;
- Ensure the Bridge is powered on.
- Remove the Ethernet cable from the Bridge.
- Turn the Bridge up-side down.
- Using a pointed tool, press and hold the reset button for 5 seconds.
- The LED on the front will blink to show that the reset is in progress.
- Once the LED stops blinking, the reset is done and you can proceed to set up the device again.
Note: A factory reset on your Philips Hue Bridge will delete all lights and scenes, and then start your setup again from scratch.
How to connect Philips Hue to Alexa
Before you get started, ensure you have;
- The Hue app installed on your smartphone or tablet
- Your Philips Hue system setup with at least one light installed
- Your Amazon Alexa setup and working
To establish the connection;
- Open the Alexa app on your mobile device.
- Select the Menu in the top-right corner.
- Select Skills & Games.
- Select Search at the top right.
- Search Hue and select the Hue skill.
- Select Enable to Use.
- Type in your Philips account credentials and select Sign In.
- Select Discover Devices.
- Once authorized, Alexa will search for your bulb.
How long do Philips Hue bulbs last?
Phillips Hue bulbs have ab average lifespan of 25,000 hours. Bulb replacement depends on how many hours a day it is used.
How to sync Philips Hue with TV
The Philips Hue Sync Box is a great way to make your TV content more immersive if you pair it with your existing Philips Hue lights or the Philips Hue Gradient Lightstrip. Follow these steps to link the sync box;
- Download the Hue Sync app for your iPhone, iPad, or Android device.
- Keep in mind that this is different from the regular Philips Hue app.
- Once you open the app for the first time, you’ll be greeted with a welcome screen. Select “Get Started.”
- Tap “Get Started”
- Next, it will ask you whether your Hue Bridge is set up.
- Go ahead and tap “Yes.” If it isn’t, check out our guide on how to set up your Philips Hue lights.
- Tap “Yes” if your Hue Bridge is already set up.
- The app will then ask you whether your Hue Sync Box is set up.
- To set it up; plug the Sync Box into power, make sure that all the HDMI inputs that you’d like to use are plugged in, and ensure that the Sync Box is then plugged into your TV via HDMI. Once all that is done, tap “Yes.”
- If your Hue Sync Box is already set up, tap “Yes”
- If it’s set up correctly, your Hue Sync Box’s front LED should be blinking blue.
- If it is, tap “Yes.” If it’s blinking a different color, select “No,” and the app will guide you through some troubleshooting steps.
- Tap “Yes”
- Accept the Terms and Conditions by selecting “Accept.”
- Next, make sure that your mobile device’s Bluetooth connection is turned on, hold it close to your Sync Box, and tap “Search.”
- With Bluetooth on your mobile device turned on, tap “Search”
- The app will then search for the Sync Box to pair. A Bluetooth notification should appear asking you to confirm whether you’d like to pair your phone with the Sync Box. Tap “Pair & connect.”
- When the notification appears, tap “Pair & Connect”
- If it’s set up correctly, you’ll see a success confirmation. Next, we’ll set up Wi-Fi by tapping “Set up Wi-Fi.”
- Tap “Set up Wi-Fi”
- Select your home Wi-Fi network. You’ll be asked to input your password on the next screen. Do that and press enter.
- Choose your home network from the list and input your Wi-Fi password to continue.
- Next, you’ll be prompted to confirm the connection. Press and hold the power button on the front of the Sync Box until the LED on the front flashes green, and then release.
- Confirm the connection by pressing and holding the power button on the Hue Sync Box.
- It will then automatically check for updates, and update if needed. While the update is installing, the Sync Box may restart. Once it’s finished, it will inform you that the update was successful. Select “Continue.”
- Tap “Continue”
- Next, we’ll have to connect the Hue Sync Box to the Hue Bridge. This is easy. Select “Search for Hue Bridge.”
- Tap “Search for Hue Bridge”
- It will search for a Bridge on your network. Then, when prompted, press the center button on the Hue Bridge.
- Press the center button on the Hue Bridge
- Once it’s connected, tap “Next.”
- Tap “Next”
- Next, the app will ask you what room or entertainment area you’d like to set the Sync Box in. If you have an entertainment area already set up in the Philips Hue app, simply select it. If you don’t, tap “Create Entertainment Area.”
- Tap “Create Entertainment Area”
- Tap “Create Area.”
- Tap “Create Area”
- Select the lights that you’d like to use in the Entertainment Area—only color-capable lights will show up here. Once you’ve selected your lights, tap “Continue.”
- Select the lights you’d like to use, then tap “Continue”
- Determine the position where your lights will be located. Tap and drag the lights to the correct areas in your room. For this example, I’ve positioned my Philips Hue Lightstrip behind my TV and my lamp to the right of my couch. Once you’re done, tap “Next.”
- Position your lights, then tap “Next”
- Next, you can change the height of the lights by tapping on the light you’d like to edit. Once that’s done, tap “Test Area.”
- Adjust the height of your lights, then tap “Test Area”
- Your entertainment area has been created! Select “Got it.”
- Tap “Got it”
- Now, it will take you back to the original screen where it searched for Entertainment Areas. Now that we’ve created one, give it a moment and it will take you to a new screen. Select the Entertainment Area that you just created.
- Select your Entertainment Area
- Name your HDMI inputs. If you tap the HDMI icon, you can even select presets like “Xbox,” “PlayStation,” or “Chromecast.” Then tap “Next.”
- Name your HDMI inputs, then tap “Next.”
- Your area has been set up! Tap “Let’s Go!”
- Tap “Let’s Go!”
- The app will now take you to the Home screen of the Hue Sync App. You can select different modes, intensities, and brightness. Your lights won’t immediately sync to the contents of the screen. To begin syncing, select “Start” at the bottom of the app.
- To begin syncing, tap “Start”
- Now your lights should match the video on your TV! From this menu, you can also adjust the intensity of the lights, change inputs on the Hue Sync Box, and alter brightness and sync mode. To stop, simply press “Stop” at the bottom of the app.
How to sync Philips Hue with music
There are three ways to sync your lights to your music, so choose the one that fits your audio setup best — and all you need are color-capable Philips Hue lights and a Hue Bridge.
Philips Hue + Spotify
Have a Spotify account? Just go to the Sync tab in the Philips Hue app to let your lights react to music playing from the Spotify app.
You only need a few things to use Philips Hue + Spotify: a Hue Bridge, color-capable lights, and any audio device.
Create your space
You’ll need color-capable lights grouped into an Entertainment area in the Philips Hue app. Don’t have an Entertainment area yet? You can set it up when you link your accounts.
Link your accounts
Open the Sync tab in the Philips Hue app and follow the on-screen instructions to sign in to your Philips Hue and Spotify accounts.
See the sounds
Tap Start sync in the Sync tab and start listening to a song or playlist on any device that’s logged in to your Spotify account — a phone, tablet, or even your computer.
Philips Hue Play HDMI sync box
Connecting your HDMI devices to a Hue sync box doesn’t just give you surround lighting — it gives you sync with music, too.
Hue Sync desktop app
Sync music directly from your PC or Mac with the free Hue Sync desktop app.
How to connect Philips Hue bulb to Alexa without bridge
Here’s how to set up Philips Hue smart light bulbs without using a Hue Bridge.
To set up your Philips Hue bulbs, screw them into a light socket and download the Philips Hue Bluetooth app. Then follow the on-screen instructions to set up your account and discover your bulbs. Finally, tap the Lights tab to control your Philips Hue bulbs.
Install your Philips Hue bulbs and turn them on. Screw your Philips Hue bulbs into your light socket just like you would screw any other light bulb into a socket.
Then download the Philips Hue Bluetooth app. You can download the Philips Hue app from the Apple App Store or the Google Play Store. Make sure not to download the regular Philips Hue app.
Next, open the app and select Get Started.
Then tap Yes. If you select No when asked if your lights are Bluetooth compatible, you will be asked to set up a Philips Hue Bridge.
Next, set up your account. You will be required to enter your name and email address. Plus, you will have to accept the terms and conditions by tapping the slider at the bottom.
Then select whether you use a voice assistant. You should only select Yes if you use Alexa or the Google Assistant. Otherwise, select Not right now. You can always connect your Philips Hue bulbs with your voice assistant later.
Note: You can only Philips Hue smart light bulbs without the Hue Bridge if you have the Bluetooth models. So, before you try to set up your Philips Hue bulbs, make sure that they have the Bluetooth icon on the box or at the base of the bulbs.

How to Set Up Philips Hue with the Hue Bluetooth App
Turn on your light switch and tap Add light. The app will immediately start searching for your Hue lights.
Note: If you are connecting to a dimmer switch, make sure that it is turned all the way up.
Next, tap Pair. You will see a pop-up prompt asking you to allow the app to access your device’s Bluetooth.
Then tap Next or Search for more. Once your device finds one of your bulbs, you can tap Next to continue. If you are installing more than one bulb, tap Search for more. You can find out which bulb your device paired by tapping Hue bulb. This will cause your light to turn off and on quickly. Once you have paired all your bulbs, tap Next.
Note: If you are not able to connect to a bulb, try turning your lights off for 10 seconds and then turning them back on. Also, try moving your device closer to the light. Then select Retry. Philips recommends moving your device within 3 feet of the bulb, so it can connect.
Then select which voice assistants you want to use. You can only choose between Alexa and the Google Assistant. If you don’t have a smart assistant, or you want to set up a voice assistant with your Philips Hue bulbs later, you can also choose Setting up a voice assistant later.
Assign a name to the Hue bulb. Tap the text box at the top of your screen to change a bulb’s default name. If you are using a voice assistant, it is a good idea to name your smart light bulb something that your smart speaker can recognize.
Finally, tap Next to finish the setup process. Now you can control your Philips Hue Bluetooth light straight from the app. To dim your lights or change their color, simply tap the Lights tab in the bottom-left corner of the app.
Note: You can change the name of your bulbs by tapping the Settings icon in the bottom-right corner of the app. Then go to Lights and choose which bulb you want to name. Finally, tap the bulb’s default name to enter a new one.
Once you set up your Philips Hue bulbs with the app, you can then connect them to your Alexa and Google devices. Here’s how:
How to Connect Philips Hue to Alexa without a bridge
- Install your Philips Hue bulbs and turn them on.
- Open the Amazon Alexa app. If you don’t have the Alexa app, you can download it from the Apple App Store and the Google Play Store.
- Then tap More. You will see this tab in the bottom-right corner of the app under the three-line icon.
- Next, tap Add a Device. This will be at the top of the app.
- Then tap Light. If you see the Philips Hue option on your screen, you can also select that and skip the next step.
- Next, select Philips Hue.
- Then select Yes. If you select No when asked If your bulbs are Bluetooth-enabled, Alexa will try to connect to your Hue Bridge.
- Next, select Discover Devices. Alexa will start looking for nearby devices automatically. Move your mobile phone as close to your Philips Hue light as possible while the app looks for devices. You only have to hold your device near the bulb until you see it flash once.
- Then wait for Alexa to connect to your Philips Hue bulbs.
- Next, tap Set Up Device. If some of your smart bulbs didn’t connect, you can also tap Add Another and repeat the process.
Note: If Alexa was not able to connect to your Philips Hue bulbs, repeat steps 1-7 above and select tap here instead of Discover Devices.
The Alexa app will ask you for permission to access the Bluetooth on your device. Then tap Next and follow the instructions on the following screen. The Alexa app will ask you to turn your lights off for 10 seconds and turn them back on. Also, you should move your device within 6 inches of your smart plugs. You can also check your Devices tab to make sure your bulb isn’t already connected.
Then tap Choose Group. If you connected multiple bulbs, you will have to tap Choose Device and set them up individually. You can skip the remaining steps and start using your Philips Hue bulbs without adding them to a group. If you tap Skip, you can start using Alexa to control your smart lights. However, that means you will have to use voice commands to turn each smart light off individually.
Next, select the room where the light is. If you don’t see the group you want to add your bulb to, tap Skip. You can always add your lights to groups later.
Once you have connected Alexa to your Philips Hue bulbs, you can use voice commands to control them. Simply say, “Alexa turn off the lights in the kitchen,” or “Alexa, dim the lights in my bedroom to 50%.” If you have colored lights, you can also say, “Alexa, turn the lights in the living room red.”
If you want to make any changes, you can open the Alexa app and tap the Devices tab at the bottom of your screen. Then scroll down to select the group you want to add more bulbs to. Or tap the plus icon in the top-right corner to add a new group.
You can also tap Lights on the Devices page and select a bulb to change its color and brightness. Or you can select Create a Routine at the bottom of your screen or tap the gear icon in the top-right corner to change your bulb’s name.
How to Connect Philips Hue to Google Home
To connect Philips Hue to Google home;
- Install your Philips Hue bulbs and turn them on.
- Then open the Google Home app. If you don’t have the app, you can get it on the Apple App Store or the Google Play Store.
- Next, tap the plus sign. You will see this in the top-left corner of the app home screen.
- Then tap Set up device.
- How to Connect Philips Hue to Google Home
- Next, select Set up new devices.
- Then choose a home and tap Next. Google Home will start looking for available devices to connect to.
- How to Connect Philips Hue to Google Home
- Next, tap Light bulb.
- Then select a bulb and tap Set Up. Your bulb should start to blink on and off. If it doesn’t, select Light didn’t blink. If you don’t see your bulb listed, tap Don’t see my light.
Note: If you are not able to connect your Philips Hue bulbs to Google Home, try moving your Google smart speaker close to your bulbs. Then turn your lights off for at least 10 seconds and turn them on again. Also, try disconnecting your bulbs from any other apps or voice assistants.
Next, choose a room where your device is. Then click Next.
Finally, choose a name for your bulb. If you have multiple smart lights, you will have to repeat the final few steps for each bulb.
Note: If you can’t control your Philips Hue lights, make sure that the Hue and your Google smart speaker are on the same WiFi network. Also, check that you’re using the same Google account for your Google Home app and Google Nest smart speaker. To do this, go to Settings > Linked Accounts in your Google Home app.
How to put Philips Hue bulb in pairing mode
To put a light bulb in pairing mode, turn it on and off until it starts blinking then follow the directions in the app you are using. When it is paired it will change back to its original state.
How to connect Philips Hue to Wi-Fi
The Hue Bridge must be connected directly into your router with an Ethernet cable. This is because the Hue Bridge does not have Wi-Fi built in. Connect it to your Wi-Fi router using the network cable provided. And wait for the three lights to come on. Once this happens, you are good to go.
How to factory reset Philips Hue bulb
If you’re dealing with a single Philips Hue bulb or standalone lamp, and you want to reset this on its own, you need to go through the Hue app for Android or iOS — which is most likely how you set up the bulb in the first place.
- From the main screen of the app, tap Settings (bottom right corner), and choose Lights.
- Tap on the light you want to reset, then tap Delete.
- The device will get forgotten by the app, and is ready to be added again or used in a completely different system.
Note: If you’re not using the Hue Bridge and Hue app, check inside the app you are using. For example, Hue bulbs can be removed from an Echo Plus, or other Zigbee-enabled Echo smart speakers, and reset by tapping on Devices in the Alexa app; choose the room group, then the bulb, then the settings cog (top-right), then the trash icon (top-right again).
Bulbs can also be reset if you have an official Philips Hue Dimmer Switch at home. With the light in question powered on, hold the Dimmer Switch close to it and hold down the On and Off buttons together for 10 seconds or so. When the light blinks and then stops blinking, the bulb is reset.
How to make Philips Hue lights strobe
You can turn your Philips Hues into party lights that can strobe and groove along with any music using the Philips Hue Disco app. The app also lets you choose what kind of colors you want to strobe.
Steps to make your Hue lights strobe;
Buy and Download the App
The first step to having those strobe lights on your Philips Hues is to buy and download the app. Unfortunately, the app is not for free. You would have to spend money to download it, but the good news is that it is cheap and is compatible with both IOS and Android. So check your app stores on your smartphones and download it.
Choose the Lights
Once you downloaded the app, open it, and familiarize yourself with the sliders and options in the app. The app may be intimidating because of the number of options to choose from. So relax and start with the basics first, choose which of your existing lights will you manipulate and control. You can include as many bulbs as you want.
Choose between Disco Mode and Mood mode
To have strobe lights, pick the disco mode. The disco mode is more tailored to have disco effects as compared to mood mode. Mood mode is more on the ambiance and mood lights and not necessarily party lights. Under the disco mode, you have so many options and sliders to choose from, such as Beats per Minute, Strobe, and Basic disco mode.
Disco Mode vs. Mood Mode
In the Disco Hues app, there are two modes to choose from. The disco mode is the mode better suited for parties because it allows you to have fast-paced strobe lights and other party effects. Even the pace of changing colors is faster in disco mode than in mood mode.
Mood mode, on the other hand, is the mode better suited for relaxation and binge-watching. The pace of the light changes is slow and deliberate. It is designed to create serene ambiances. So if you want to party at home, better stick to the disco mode.
Types of Disco Mode
Beats Per Minute
Beats Per Minute, or BPM, as indicated on the bottom part of the app, is the mode that will allow you to cycle colors based on a set rhythm. It is called Beats Per Minute because you can actually control how fast the lights will change colors. The quicker you tap the BPM button, the faster the rhythm goes.
With this button, you can set your color cycle to match the music you are currently playing. Make sure that your phone microphone is properly functioning as it may not detect the music being played. Another downside to this mode is that every time the music changes, you will have to manually change the BPM, thru tapping it again, so that the color cycle matches with the new music.
Strobe Disco Mode
This type of disco mode is specifically for purposes of producing strobe lights. By just tapping on the lightning button on the bottom part of the app, you can have strobe lights that will flash white. White is the standard strobe light.
However, as mentioned before, strobe lights can only be produced by full-colored light bulbs. You also have the option to have colored strobe lights, which is cool too! Lastly, you can also change them into faux black lights.
Basic Disco Mode
This is the last type of disco mode, which can also produce strobe effects. It can be found on the right-bottom portion of the app, near the strobe disco symbol. Click on the blue play button, and you can set up a default disco mode. The difference between BPM and Basic Disco mode is the fact that the color cycle and strobe effects depend on the volume in the room, not on the number of taps you do on the button.
This allows you to have the light automatically adjust to the music. Many have complained that this mode does not have the lights perfectly sync with the music. For those too lazy or too drunk to use the BPM, just click on the basic disco mode and let the microphone do the rest.


How to make Philips Hue change colors
Below are some ways to make your Philips Hue lights change color automatically
ColorLoop Lab formula
The Hue ColorLoop lab formula is one of my favourites – it’s what I used in the YouTube video towards the start of this post. As its name suggests, it loops through all the different colors – making it awesome for mood lighting (especially if dimmed down a bit – it can be a little overpowering at 100% brightness!).
- It can be accessed by launching the Hue app, going to “Explore” and then “Hue Labs”:
- Hue app phone screenshot, showing the ‘Hue Labs’ option on the ‘Explore’ tab.
- The ‘Hue Labs’ option on the ‘Explore’ tab of the Hue app.
- Click on “Formulas” and search for “colorloop”. Click “Try it!” to enable it:
- You can configure the lab formula for one of your Hue bulbs (or lightstrips, in my case). Once this is done, just click on “Hue Labs Controls” and click the toggle button to activate the formula:
LivingScenes Lab formula
A slight twist on the ColorLoop formula is the LivingScenes formula. This is also accessible via the Explore -> Labs route on the app, but this formula allows you to loop between a slightly more cohesive set of colors.
What I mean by that is that you can choose “evening sunset” colors or “dinner party” vibe colors. The formula will then slowly switch between these pre-set color choices at an interval of 15 seconds to 2 hours:
Having a more specific color pallete (compared to ColorLoop which gives you everything from bright orange to pink and white colors) is the benefit of the Living Scenes – and its variants such as the Autumn and Christmas Living Scenes.
Using the OnSwitch app
Moving away from Hue Lab formulas for dynamic color changes, whilst I mention that the Hue app itself is lacking for this (compared to the LIFX app, for example), there are some great third party apps.
Hue lights all have an easy to use software API, which is just a fancy way of saying that people can write programming code to change how the Hue bulbs work.
These can then be packaged up into convenient smartphone apps, such as the OnSwitch app which is available on both the Play (Android) and App (Apple) stores.
This ships with over “30 professionally designed light scenes”, and allows you to do things like simulate candle light, disco lighting, fireworks and a whole lot more. In other words, the scenes in this app aren’t like Hue scenes: the OnSwitch scenes actually change between different colors, hence working as some great mood lighting.
The big downside of this app, however, is that many of the better scenes are paid-for. Some are as cheap as $0.99, but some cost as much as $9.99.
Hue Dynamics app
An alternative to the above app is the better-known Hue Dynamic app – available on Android and Apple smartphones.
Hue Dynamics is actually a full-blown alternative to the official Hue app, meaning that you can also use it to configure your Hue lights and accessories. For example, you can use it to enhance the Hue dimmer and tap switches so they work exactly how you would like them to.
But just like the OnSwitch app, Hue Dynamics also has a bunch of professional scenes that allow your Hue lights to switch between a range of RGB colors automatically:
There are a range of free features in this app, but there’s also a paid upgrade to hue Dynamics Pro (costing around $5, depending on where you live) which offers a much bigger range of features and scenes.
If you’re looking for a single third-party app to use with your Hue system, this is probably the one to go for.
Thorlight (app store)
An alternative to hueDynamic is the Apple-only Thorlight app which contains over 50 animations which switch between a range of pre-chosen colors to deliver some great mood lighting effects.
There’s also the possibility of using music to enhance some of the animations – for example, it can listen to playing music and change your Hue bulbs to be in-sync with this.
Whilst the app is free, a few of the animations do cost money:
- Party mode – $3.99
- Flow – $3.99
- Ambiance – $3.99
- Lounge – $3.99
- Sky – $2.99
Match sunset and sunrise
Ring Doorbell footage capture showing lens flare at 9am in the morning.
One of the awesome features of smart lighting is the ability to have natural alarms. Instead of being woken up by the blaring of some rubbish smartphone alarm, you can instead be gently woke up by your smart lighting that slowly go from 0% to 100% brightness.
This matches sunrise, and is quite nice to do. The Hue Labs formula ‘Sunset to sunrise‘ offers this feature, however it’s not always the most dynamic in terms the color changes – it’s more focused on changing the brightness of bulbs.
Thankfully, the Hue Lights app supports a more dynamic wakeup alarm. This is the “Perfect Sunrise” feature, and it changes through thousands of colors to more accurately match the different color hues that a natural sunrise actually has.
Sync to music with iLightShow and Hue Disco
If you liked the sound of Thorlight’s music sync, the free iLightShow app is even better. It connects to Spotify and Apple Music and syncs with Philips Hue bulbs in a really clever way:
Whilst other apps (including the LIFX app) sometimes just listen to music via the smartphone microphone – thereby delivering a slightly delayed and primitive smart lighting sync experience – iLightShow can also analyse the music that is playing on the phone and delivers a “a perfectly synced light show!“.
Hue Disco is another rival that delivers smart lights that sync to music – although some of the recent reviews have been a bit critical, and it costs around $4-5 depending on the app store you use.
Sync to TV/movies
You may have seen some truly awesome smart lighting effects via Philips Hue when people are watching movies on Netflix or Hulu. This is usually made possible with the Philips Hue Play Bars and Sync Box (along with products like the Hue Gradient lightstrips which stick to the back of the TV).
These work really well but they are an expensive solution. What if you just want your ceiling (or side lamp) Hue bulbs to change depending on what’s on TV? Well thankfully, there are a range of third party apps which support this:
Hue Matcher, which is installed on your phone and then uses your phone’s camera lens to work out the average color of what it sees. In other words, you point your smartphone at your TV or PC monitor, and it’ll then send a signal to your Hue bulbs to automatically change color based on what it sees. This costs $0.99 on the Android store at the time of writing.
Hue TV is a similar idea on the AppStore: point your Apple smartphone at your TV or monitor, and it’ll sync your Hue bulbs based on what it sees.
If you don’t like the idea of using your smartphone’s camera to drive this (it will drain your battery very quickly, and probably require a tripod too), ScreenBloom is worth checking out. It runs on PC and Mac meaning that it won’t work for ordinary TVs (but it will for computer-based media TVs).
This program will determine the average color of what’s on your computer, and again it’ll send this to your configured Hue bulbs – meaning that your Hue bulbs will automatically sync to what you’re doing on the computer. This is great for movie watching, although some people have reported that it’s a bit temperamental for full-screen gaming.
Why is my Philips Hue light unresponsive?
Below are some cause of the unresponsiveness and how to fix them.
Problems
The bulb is too far from your bridge
The fix is to bring the bulb closer to the bridge, or adding another Hue bulb between the first bulb and the bridge. If the bulb is closer to the bridge and cannot be found, the bulb can be added manually by entering the serial number through the Hue app.
This can be done through settings then adding the serial number. mHue creates its wireless network by using Zigbee. Each bulb helps in linking the network, so the more number of bulbs you have the more reliable and better the Hue network.
The bulb is too far from other Hue bulbs
If you have few Hue bulbs in your home and are working fine except for some addition, then it might be too far from other Hue bulbs or the bridge. This is usually common with the new outdoor hue lights where there is a considerable distance between these and other bulbs.
The fix for this is to add in another bulb to link them together or to bring one of the bulbs closer to the other to help in bridging the gap in the network.
Wi-Fi interference
Your Hue bulbs maybe all close together, working but says unreachable for no reason at all. The leading cause of this could be as a result of your home wireless network interference. It can also be worse if your Wi-Fi router and the bridge are close to each other.
The Hue Bridge using Zigbee to create a wireless network and the home internet Wi-Fi both broadcast on 2.4 GHz. It is because of this that there could be a conflict with each other while using the same channel. The simple fix here is to change the channel that your bridge uses.
To do this, open your Hue app:
- Go to settings
- Then to Hue bridges
- Then select your bridge by clicking the ‘i’.
- Navigate to ‘ZigBee channel change
- Change the channel and make sure your lights are on while doing this.
There are many channels to choose from. If the first channel doesn’t work, do not hesitate to choose from another channel range.
The Main Bulb Switched Off
Sometimes it can happen, you forget to turn on the main switch of the light. When your main switch of light is off, the power supply is not working. That is the reason for your unresponsive hue light bulb.
Solutions
1. Turn On the Main Bulb Switch
You may forget to turn on the main light switch. When your main light switch is turned off, the power supply is turned off as well. That’s why your hue light bulb isn’t working or responding.
If the bulb is shut off at the mains, make sure it is turned on there first. The bulb glows bright white when the switch is turned on.
2. Set-Up Bulb and Bridge Nearby
If your bridge is too far away from the hue light bulb, it may cause the hue light bulb to become unresponsive.
To fix this issue, you need to set up the light and the bridge nearby. If you’re having a problem setting up your hue bulb and bridge nearby, you can add another Hue bulb between the first and the bridge.
Sometimes, the bulb not found through the bulb is closer to the bridge. If this issue occurs, it can be manually added to the Hue app settings by providing the serial number.
You can add bulbs as much as you can. When you add more bulbs, each bulb contributes to the network’s connectivity. Therefore, the more bulbs you have, the more stable and more robust the Hue network develops.
3. Set-Up All The Hue Bulbs Nearby
If you have multiple hue bulbs and one of them isn’t working correctly, it could be a problem with your light bulb configuration. Unresponsiveness occurs when one light bulb is too far away from the other or bridge.
The solution is to add another bulb to connect them or move one of the bulbs to the other nearby to bridge the network gap.
4. Fix Wi-Fi Interfering
There is another way to fix the hue lightbulb not responding is fixing your Wi-Fi interfering. If you hue bulbs and the bridge are set up nearby, but you face your hue lightbulb not responding correctly, then it’s your Wi-Fi issue.
Your home wireless network interference could be the root of the problem. When your Wi-Fi router and bridge are set up nearby each other, that issue is created.
Both the Hue Bridge and the home internet Wi-Fi use Zigbee to form a wireless network. As a result, while using the same channel, there may be conflict. Changing the channel that your bridge utilizes is an easy solution.
Follow these steps to change the channel:
- Open your Hue app on your phone or tablet device.
- Open your Hue app Settings.
- Select and open Hue bridges settings.
- Choose your bridge.
- Go to ZigBee channel change.
- Select any channel in the list.
Note: You must ensure your hue lightbulbs are turned on when you modify or change the channel. You can choose from a variety of channels. If the initial channel fails to operate, try a different range of channels until you solve your problem.
Philips Hue bridge not connecting
The Hue Bridge gives you seamless connectivity in integrating your Hue devices through Wi-Fi. However, like any other piece of technology, it also has its shortcomings.
You sometimes can’t access your Hue Bridge due to several reasons that include bad internet connection, faulty bridge, or proximity issues. When issues arise, having the proper technical knowledge can help you figure out how to fix them.
The primary reasons why your Philips Hue bridge is not connecting to the internet or the app are the following:
- Poor internet connectivity.
- The Ethernet cable may be faulty.
- You’re not using Hue lights or bulbs.
- You need to clear the Hue app’s cache.
There are problems in connecting to Alexa.
For example, if you can’t find all your lights automatically through the app, you need to configure it manually by following a few simple steps:
- Turn all the lights on and ensure their connectivity.
- Open the Hue app, and go to the settings.
- Click the ‘Add serial number’ button.
- Enter the six-character serial number needed to introduce the lights to the system. Then, click ‘OK.’
- Now, all the lights are connected to the Hue bridge.
If the above doesn’t work, there are different methods you can try to ensure connectivity.
Restarting the Hue Bridge
When the Hue Bridge is unable to connect to your Wi-Fi, first you will have to restart the Hue Bridge. Also, note that when you restart it, it also erases all the history of connectivity. As a result, you will have to reconnect. Follow these steps when restarting the Hue Bridge.
- Turn on the Hue Bridge.
- Make sure to unplug the Ethernet cable.
- Then, turn the Hue Bridge upside down.
- You will then find the reset button. Use something pointy and press it for five seconds. The device resets afterward.
- You know that the device is resetting when the LED on the front blinks. Reset is done once the blinking stops.
Restarting the Router
The router can sometimes be the culprit for any connectivity issues you experience. You can address this by restarting your router by following a few simple steps:
- Turn off your router and unplug it from the power outlet.
- Wait for three minutes, and plug it again.
- Restart your router.
Make sure to check the proximity of the router from the Hue bridge. If it’s too far from your Hue Bridge, bring them closer together for improved connectivity.
Connecting the Ethernet Cable to Your Router
Using an Ethernet cable is typically better and faster than using a Wi-Fi connection. If there is an Ethernet port on the router, it enables you to connect to the Hue bridge. The connectivity becomes more secure and stable, and you might notice that it begins working once more.
To use the Ethernet cable, follow these steps:
- Connect the Ethernet cable to the router, and insert the second end to the Hue Bridge.
- The four lights on the Hue Bridge will light up and continue setting up.
- Make sure that the cable is securely inserted. Otherwise, it might cause connectivity issues.
You need to use the Hue app found on your phone or computer to connect the Hue lights. Make sure also that the app and router use the identical network.
Bringing the Bulbs Closer Together
Ensure that there isn’t too much of a gap between the Hue bulbs to make connecting to the Hue bridge and other bulbs easier. Otherwise, it might be the reason for connectivity issues. You can add another bulb in between to link them together or bring them closer to help reduce the gap.
Update the Hue Bridge to the Latest Firmware
Generally, this step solves most connectivity issues you may experience. If you are facing errors such as ‘Hue Bridge not found’ or ‘Hue Bridge connection lost,’ try to update the Hue Bridge and follow these steps:
- Open the Hue app and click on the setup icon.
- Read and accept the conditions and terms.
- Click the ‘Update’ icon to update your Hue Bridge to the latest firmware.
- Find your pin code on the box or under the Hue Bridge. Use your phone to scan it. Alternatively, you can manually enter the pin.
- Afterward, add the Hue lights and click on ‘Hue wall switch module.’
- Finish the setup.
- Finally, select the room or zone you want to control.
The Hue Lights Unreachable Error
Even after successfully trying all the methods mentioned above, there might still be some issues, such as Hue lights failing to connect. If you experience a Hue bulb is unreachable, the primary issue could be the settings.
What to do:
To solve this problem, turn on all the Hue lights at the same time. After a few seconds, switch all of them off. You can also use the Hue app to solve the issue.
- Open the Hue app and go to settings.
- Find and click the ‘Set up’ for lighting. Click the ‘info.’
- Remove the Hue bulb and re-add it afterward.
Aside from the settings, the light switch could also be the reason for the unreachable error. Hue lights only function if you turn them on from the main switch. So, the light switch must be turned on to fix the issue.
Another possible reason for the ‘Hue Light not found’ error is possible interference. If so, go to the settings of the Hue app and tap the ‘i’ icon. While doing this, all the lights must be turned on. Then, tap the channel change button.
Note: If you’re using a short network mesh, it can make some of the bulbs unreachable. Thus, if you have many Hue bulbs, you also need a larger network mesh.
You can fix this by placing your Hue bridge at the center. You can also place an active bulb close to an inactive bulb to link and resolve the issue.
The Hue Bridge Keeps Disconnecting
If your Hue Bridge keeps disconnecting, it can be due to poor internet connectivity or a faulty Ethernet cable. Thus, there’s a need to troubleshoot your internet configuration. To fix this issue, follow these steps:
- First, ensure that the Hue Bridge directly connects to the router.
- Turn off the Hue Bridge, and wait for a few seconds before restarting.
- Restart it. As mentioned, restarting the device deletes the history of the connection, allowing for a new reconnection.
If the problem is the faulty router, make sure that the Ethernet cable is securely fit between the Hue Bridge and the router. Remember that the Hue Bridge can function without a Wi-Fi connection. However, it should connect using an Ethernet cable to the router.
The router sends signals to the Hue lights in the system. Thus, if the line is defective, the system won’t work. If it’s already faulty, you should replace it. Alternatively, you can use your Wi-Fi connection to make the lighting system operate as usual.
The Hue Bridge Lights Are Blinking
If you can’t connect to the Hue Bridge, you need to verify the following first:
Ensure the Hue Bridge directly connects to the router. If it connects via a switch, bypass it for now.
The lights on the Hue Bridge must be solid and not blinking.
If the lights are blinking, the issue can be fixed when you troubleshoot the network configuration. First, understand what the lights on the Hue Bridge represent:
- The first light indicates that the Bridge is turned on. If the light isn’t solid, ensure that the power adapter connects to the main outlet.
- The second light indicates that the Hue Bridge is connected to a network. If it’s blinking, there is no connectivity, or it’s connected to the wrong device.
- The third light indicates the internet connection. If it’s blinking, there is no internet connection. It could be that Philips is undergoing maintenance resulting in the unavailability of the portal.
Usually, connectivity issues arise when the third light is flashing. Learn how to reconnect the Hue bridge to fix this issue and do the following steps:
- Unplug the adapters of the Hue Bridge and router from the main outlet.
- Wait for 30 seconds. Then, turn them on and reconnect. If the issue persists, try to move the Ethernet cable to another port on the router.
- Wait for another five minutes, and check if there’s a connection.
If using a Wi-Fi connection, disable all the other networks except for the main one you want to use. Then, reconnect. If it connects, re-enable the other networks to see if you still remain connected.
Philips Hue bulb not connecting to Alexa
Do the following to connect Alexa;
Power cycle the Hue Bridge
First, it’s worth checking that your Philips Hue Bridge has an internet connection. All three lights at the top of the Bridge should be on. In order, they are the power button, network connection button and internet connection button.
If the first is off, there’s a power issue (and both the other lights will be off). If the second light is off, then it means that you have a problem with the connection to your router, so check the cabling (this will also mean that the third light is off). Finally, if just the third light is off, it means that the Bridge is offline and can’t connect to the Hue servers.
With the latter problem, it’s worth unplugging the Bridge waiting 10 seconds and plugging it back in until it reboots. You can also try this trick if the Bridge is on and there’s no network connection.
Disable (and re-enable) the Alexa skill
Sometimes the Alexa Skill can lose its connection to the Hue, and the easiest way to fix it is to remove and re-add. To do this, go to the Alexa app, tap More, Skills & Games, then tap Search. Enter Hue, and then tap Disable Skill. Then tap Enable To Use to reconnect the Skill, and log back in to your Hue account.
Fix Alexa issues
Alexa is a little strange in how it brings in lights from your Hue account. It shows each bulb individually, but it also brings in the Hue Room groupings. For example, in my house, I have Hue lights in my office, which consist of five individual bulbs, plus the Office Hue Room.
I’ve had issues where the Hue Room is not in the same group as the individual bulbs, which has meant that Alexa will fail (at random) to control one or more bulbs. Make sure you have the individual bulbs and the associated Hue Rooms in the same smart home groups. My guide on how to create Alexa smart home groups explains how you go about this.
Fix unresponsive lights
If you have only one light that won’t respond, it could be the result of a couple of issues. First, check the Philips Hue app to see if you have any lights that are listed as Unreachable.
If this doesn’t fix your problem, or you don’t have any Unreachable lights, then one method that often addresses grouping problems is to simply remove the glitchy light and re-add it.
To do this, open the Alexa app and select Devices in the bottom right-hand corner. Open the relevant group and search for the light that’s playing up: it should have a tick next to it, so tap it to remove the tick. Hit Save, then select the group again, tap on the light so that the tick appears and hit Save again.
Try asking Alexa to turn on the group and your missing light should now be back in action.
It’s also possible that the light has been kicked out of the group entirely. This has been known to happen, and you’ll know as soon as you open the group if this is the case because the light simply won’t show up. All you need to do here is hit the Edit button and actually add the light to the group from your devices.
Be careful of third-party tools
Things can get messy when you end up with duplicate lights in your Alexa set up. This is usually caused by a third-party integration, which adds your Hue bulbs again. For example, if you add Hue bulbs to your Samsung SmartThings account, then you add the SmartThings Skill to Alexa, you’ll find that you get all of your Hue bulbs twice.
Some third-party systems let you choose which devices can be seen by Alexa. In fact, SmartThings used to allow this, but since the company has changed apps and created a new Alexa Skill, this feature has been removed. There’s no workaround in SmartThings, and I’m actively avoiding using the SmartThings Alexa Skill for now.
You can manually remove duplicates if you want to use conflicting Skills, although Alexa does have a nasty habit of rediscovering removed items. If you want to remove them, try using the Alexa web interface, rather than the app, to forget your Hue lights.

Philips Hue routines not working
Use these tips to remedy the problem;
Make Sure They Are Connected to The Same Wi-Fi Network
The second thing you might want to check is that your Phillips Hue and the device you are using to control the bulbs are connected to the same Wi-Fi network. Only when they are connected to the same network, is when they should work properly.
This does not just apply to the Phillips Hue bulbs. You need to make sure all of your smart home devices are always connected to the same network. If not, then they will simply not work. You may also want to change your channels by simply going to the Hue Zigbee Channel Settings in the Hue app.
Check for Any Interference
You will want to check for any possible interference. First, make sure that you have set everything properly. A wrong time zone is one of the reasons why you may be facing this issue. In either case, double-check everything.
The next thing you might want to do is to manually check all of your routines. There may be a weird routine that is causing this issue to surface. Alternatively, you can try to remove all of the routines and then read the ones that you need.
Contact Customer Support
If none of the above-mentioned steps aren’t working for you, then there isn’t much you can do all by yourself. You may want to try contacting the customer support of Phillips Hue.
Philips Hue bridge not connecting to internet
To remedy the issue;
Connect your Hue bridge directly to your router
Your Hue Bridge will be unable to connect to the internet if it isn’t plugged directly into your primary router. You can’t connect it through a second router, a switch, or a power line adapter. If the internet light is blinking on your Hue Bridge, make sure the bridge is connected correctly.
If you are using a gateway (modem/router combo) instead of a modem, you need to plug the Hue Bridge into the gateway, even if you have a separate Wi-Fi router. If you received a modem from your internet provider, it’s probably a gateway rather than just a modem.
Update your Hue Bridge Firmware
If all the Hue Bridge indicator lights are on and the app still gives you an “Unable to Connect” error message, your firmware might be outdated.
- Open the SETTINGS tab from the bottom menu bar in the Hue app.
- Select Software update from the list.
- If you see a message that says “Everything is up to date”, your firmware is fine. Otherwise, select the update and follow the on-screen instructions to install it.
Along with technical fixes, these firmware updates have essential security patches. So while you’re in the Software update menu, I strongly suggest turning on automatic updates to keep your Hue network safe.
Restart your Hue Bridge
A simple restart can fix many Hue issues, including network connectivity and unreachable Hue lights. Unlike a factory reset, this process won’t erase any of your configuration settings, so you can easily quickly and easily repeat it when new issues occur.
To restart your Philips Hue Bridge, just follow these steps.
- Unplug the power cord from the bridge.
- Wait 10 seconds.
- Plug the power cord back in.
- Wait until the bridge boots up.
Then check to see if the process has fixed your connection issues. I always recommend trying this before moving on to more advanced measures.
Restart your router
Restarting your router can help if your Hue Bridge is unable to connect to your network or the internet. However, it won’t fix problems between the bridge and your Hue lights as that connection relies on Zigbee rather than Wi-Fi or ethernet.
Some routers have a restart option in their web interface. You can use that or try the following steps.
- Unplug the power cord from the router.
- Wait 30 seconds.
- Plug the power cord back in
- Wait a couple of monuites for the router to boot.
Like restarting your Hue bridge, this process won’t delete any configuration settings, so it’s largely safe. Remember, though, that this step will drop your entire household’s internet connection for roughly five minutes. So it’s probably best to warn your partner unless you want bigger problems than a Hue error.
Test Your Ethernet Cable
Some Hue Bridge network connection problems can be caused by a faulty ethernet cable between your bridge and your router. If you have an extra ethernet cable, try swapping it out to see if that fixes the problem. You can also test your current ethernet cable on a computer—any ethernet cable that works properly on one device should work fine on another.
I recommend always keeping an extra ethernet cable around for testing or to sub in if needed. You can buy an ethernet cable reasonably cheaply, and it can save a lot of time when troubleshooting network issues.
Check Which Network Your Hue Bridge Is On
To access the full functionality of your Hue Bridge, the device (probably a smartphone) you are running the Hue app on needs to be on the same network as your bridge.
The easiest way to check this is by going to discovery.meethue.com on the same device you use for the Hue app. You should see the ID and IP address of your bridge. If you just see “[ ]” then your device and your bridge are not on the same network. Make sure your device is on Wi-Fi, not cellular, and that it’s using the Wi-Fi network from the same router your bridge is connected to.
Extend the Range of Your Hue Bridge
Connectivity issues between Hue bulb and Hue Bridges are some of the most common Hue problems. When that happens, you should try testing the connection by temporarily moving the bulb as close as possible to the bridge.
If the bulb connects once you move it closer, the problem was either interference or distance. Zigbee has a range of about 100 feet (30 meters) indoors if there’s no interference. (I’ll cover how to deal with interference in the next section)
Hue bulbs extend that range by acting as repeaters, even when they’re turned off. Each Hue bulb extends your Zigbee network by about another 100 feet. Keep in mind, though, that a bulb needs to receive power for this to work. So turning your Hue bulb off by a standard wall switch—rather than by the app, voice command, or a Hue Switch—may decrease the range of your Zigbee network.
Hue plugs are probably the cheapest and easiest ways to extend your Zigbee network range. Each one reinforces your network just like a Hue bulb. And you can always check out my list of smart plug uses for ideas on how to make use of your plug to save energy or make your home even smarter.
Change Your Hue Bridge Zigbee Channel
When the Hue Bridge can’t find one or more of your Hue lights, the problem can sometimes be caused by interference on a specific Zigbee channel. Zigbee operates in the 2.4 GHz frequency range, just like many Wi-Fi routers, phones, microwaves, baby monitors, and a lot of other household devices.
Fortunately, Hue has four Zigbee channels to choose from, each on a slightly different frequency. Here’s how you can select a new Zigbee channel in the Philips Hue app.
- Turn on all of your Philips Hue lights.
- Open SETTINGS from the bottom menu bar.
- Click Bridge settings from the List.
- Select Zigbee channel on the Bridge settings page.
- Click Change channel and wait for Hue to process the change.
- Press the Blink lights button and make sure that all of your Hue lights respond. If they don’t, try turning them off and on manually and pressing the Blink lights button oen more time. If it still doesn’t work you may need to change the channel again.
- Click DONE to finish the process.
Re-add a Philips Hue bulb
Sometimes, a single Philips Hue light is unreachable from the app. This frequently happens when you turn a Hue light off using a standard switch instead of using the Hue app, Alexa, or another connected smart home service.
When this happens, the best fix is to remove and re-add the bulb, which you can easily do from the Hue app. First, follow these steps to remove the bulb.
- Open the SETTINGS tab from the bottom menu bar in the Hue app.
- Click Lights on the Settings page.
- Select the unreachable Hue light from the list.
- Click Delete at the bottom of the page.
- Select Delete light on the confirmation popup. You’ll want to stay in the lights menu for the next steps.
- Now that the unreachable bulb has been deleted, we’ll re-add it.
- Click the plus sign in the upper-right corner of the Lights page. If you left the lights page, you can get back to it from the Settings page as shown in the light deletion steps above.
- Click Search to let the app automatically find the bulb.
- If the app finds your light, click Start configuration. If it doesn’t find the bulb, you can try again or hit the back button and add it manually by serial number.
- On the Configure page, edit the name and light type then click SAVE. You can also change these settings later on from the Lights page.
- Place the light in the appropriate room by dragging its icon into the room box.
- Click Done to complete the setup process.
Your Hue light should be reachable now. If it isn’t, you may need to try some of the other fixes on this page.
Factory Reset Your Hue Bridge
Warning: You should save this option for use as a last resort. It will erase all of your Hue lights, scenes, and settings.
We’ve exhausted all of our easy fixes. When all else has failed, it’s time to fully reset your Hue Bridge to its factory default settings. This can be required if, for example, your Philips Hue is unable to connect after a firmware update.
If you’re looking for a reset button in the app, you won’t find it. Instead, the reset button is on the Hue Bridge itself.
- Make sure your Hue Bridge is turned on.
- Remove the ethernet cable, but leave the power cable in place.
- On the back of the bridge, you’ll find a small pin-hole with a label that says “restore factory settings”. Press a pin or other pointed object into that hole and hold it for at least 5 seconds.
- You can find the reset button on the back of your Philips Hue Bridge.
- The three smaller LEDs on the front of the bridge will flash during the reset process. Once they stop blinking, you can proceed to set up your Hue Bridge again.
Contact Philips Hue support
Sadly, not every problem is fixable without a call to tech support. Defects occur, and some failures are due to software or hardware issues outside of our control.
The Hue app includes a support page with links to contact Philips through Facebook or Twitter. There are additional contact options on the Hue support page. Hue is fairly good at responding to any of these channels.
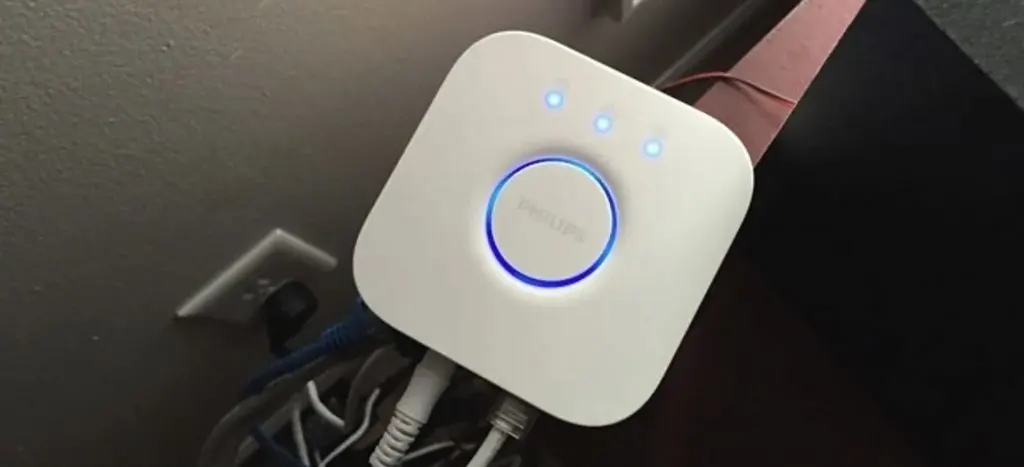
Note: The Hue Bridge has four blue lights, and you’ll need all of them for troubleshooting Hue Bridge connection problems.
- Power light: The top-left light glows when the Hue Bridge is receiving power.
- Network light: The top-middle light glows when the bridge is connected to your local network and blinks when it isn’t properly connected to the router or network.
- Internet light: The top-right light glows when the bridge is connected to the internet and blinks when the internet connection is offline or when meethue.com is unreachable.
- Link light: The large middle light (around the button) glows when the Hue Bridge is controlling your lights
Make a note of which lights are blinking (or off) and what error message you are receiving in the app, as that will help you decide which fixes to try.
Philips Hue tap switch not working
Below are the reasons why the tap switch is not working;
1) Internet Connection
The first thing that you need to do if your Philips Hue Switch is not working is to check on your Internet connection. Basically, all the transmission of data and commands is essentially taking place through the bridge and your Wi-Fi router so you need to access the Wi-Fi router settings and check if the bridge is connected without any issues.
You will also need to step down your Wi-Fi network to 2.4 GHz if it is running at 5 GHz to ensure a smooth connectivity and a better experience over your Philips Hue switch.
Make sure that there are no VPN or proxy settings enabled on your router as they can cause you to have the issues at times and your Philips Hue Switch will not be able to work as it is supposed to. Once you have checked on all these factors, you will be able to use the Philips Hue switch without facing any issues.
2) Try out a Soft Reset
Although network plays an important role, but sometimes the problem is not with the network but the bulb might have developed some sort of error, causing it to have this sort of issues that can cause hinderance in your experience with the switch. To have that fixed efficiently, you can try a soft reset and that would help you get the switch fixed.
A soft reset is easy to perform on the Philips Hue series switches as there are no patterns or anything like that involved. All you will need to do is to press all the four buttons simultaneously and keep them pressed until the LED indicator on the switch turns green.
Once the LED indicator is green, it will automatically be resetting and after the switch restarts automatically, you will be able to use it without facing any issues at all.
3) Contact Support
If you have tried all the troubleshooting steps above and are still not able to make it work as it should, you might need to have your system checked with a technician from Support Department. A technician will be able to efficiently check not only your wiring but the switch as well and get you the best possible solution for this issue that will not void your warranty and get rid of the problem as well.
Philips Hue light strip not connecting
Ensure the light strip is plugged in to a power source. When the Lightstrip shines bright white, you can connect it to the Hue Bridge the same way you would add a light to your Hue system.
If the Hue app cannot find the light strip even when entering the serial number in place of the automatic search, the Lightstrip may be out of reach of the Hue Bridge. To fix this, you can move the light strip closer to the Hue Bridge or move other Philips Hue smart lights between the Bridge and the strip lighting; Hue smart lights conveniently extend the wireless signal of the Hue Bridge.
You also need to make sure that your lights are reachable in the Philips Hue app. Lastly, ensure that your phone is updated to the latest version of its operating system
Philips Hue light strip not sticking
These are the reasons the light strip is not sticking and how to fix the issues;
- Wrong surface
- Dirty surface
- Wrong adhesive
Solutions
1) Choose the right surface
You need to ensure that you are choosing the right surface that you want to stick your light on. The surface should have right friction to get the light sticked up properly and right design as well. A surface with too many bends and curves or something that is way too smooth and resilient might not be fit for you to stick your Philips Hue light strip on it and this will cause you to have some errors.
2) Clean the surface
Another factor that plays the key role in getting your Philips Hue light strip to be loose and not stick up properly is the surface cleanliness. If there is dirt or grease on the surface that you are trying to stick your Philips Hue Light strip to, it will not be sticking up properly and will come off after some time.
To fix up such issues, you will need to ensure that you clean the surface with a damp cloth properly and then let it dry. You can stick up the light strip once the surface is dried up and it will stick properly without having any issues at all.
3) Choose the right adhesive
While there are different sorts of surfaces that you might want to stick your LED strip on, such as wood, ceramic, tiles or plain walls with concrete on them. So, the regular sticking tape that comes with the LED strip might not be enough to hold the strip, especially if you are trying to stick it beneath a surface.
You can add the right amount of adhesive over the sticking tape to ensure that it stays sticked properly to the surface. You just have to know that for different types of surfaces, you will need to have different types of adhesives and choosing the right adhesive will do the job for you without any problems.
Note: If you have tried all the steps above and you are still not able to make it work, you might need to go old-school and try out a familiar method. A clear packing tape will do the trick for you and you just have to use it over the strip to make it work.
Philips Hue bulb not turning on
This could be as a result of;
- Damaged or malfunctioning bulbs.
- The bulb is too far from the bridge.
- The lights are turned off on the main switch.
- Poor internet connectivity.
- The app is malfunctioning.
To remedy the issues;
- Reset the bulbs.
- Fix the internet issue
- Move the bulb closer to the bridge
- Reinstall the app
- Replace the damaged bulbs
Philips Hue not working with google home
This could be as a result of 3 issues;
- The lights are not synced to google home
- The lights are faulty
- You have internet connection problems
To remedy the issues;
- Connect your mobile device to the same Wi-Fi network that your speaker or display is connected to.
- Make sure your speaker or display and Philips Hue bridge are on the same Wi-Fi network.
- Make sure you’re using a mobile device that has the same Google Account that is currently linked to your speaker or display.
- Make sure you’re using the same Google Account as the primary account from within the Google Home app.
- Open the Google Home app.
- At the top right, tap your account.
- Verify that the Google Account shown is the one linked to your speaker or display. To switch accounts, tap another account or Add another account.
- Verify Philips Hue light bulbs are linked in the Google Home app.
- If your lights don’t appear, force close the Google Home app and try again. If your Philips Hue light bulbs are still not listed under “Devices” then follow these steps to relink your account.
- Go to the Philips Hue mobile app and confirm you’re able to control your lights via the Philips Hue mobile application.
- Try the following voice command word-for-word:
- Voice command: “Hey Google, turn on the lights.”
Why are my Philips Hue lights unreachable?
If the app says that your Hue lights are “unreachable” it means that they are turned off. And you should turn them on or you won’t be able to control them through the app.
Why are my Philips Hue lights flashing?
Below are the causes of flickering lights;
Dimmer Switches
Hue lights can be flickering and buzzing due to incompatible dimmer switches. If you attached your Philips Hues on a bulb socket controlled by a hard-wired dimmer switch, chances are you are going to get some flashing and flickering lights. Philips Hues are known to be problematic with hard-wired dimmer switches. This is why it is better to attach the Philips Hues Dimmer Switch to match the Philips Hues LED bulbs you are using.
To be sure that it is the dimmer switch that causes the flickering problem, check for the ratings of your Philips Hue bulbs. See if they match with the ratings of the dimmer switch. Incompatible switches and bulbs cause a majority of flashing problems.
Knowing when to replace old dimmer switches may prevent you from suffering that annoying flashing of your Philips Hue bulbs. Replace your old or mismatched dimmer switch before it damages your bulbs and incur you more expenses.
Power Surges
Watch out for power surges as they can also damage your dimmer switches and circuit breakers. Lightning strikes may enter homes and damage electronic devices, including dimmer switches.
Damaged Bulbs
Damaged bulbs are possible causes for your Philips Hues to flash and buzz. Although smart LED bulbs, like Philips Hue, are generally reliable and consistent, there are still instances when you may have gotten a defective bulb or perhaps one that is damaged.
LED bulbs are not supposed to flicker because they do not have filaments, so to have one flicker, you must check if your bulbs are actually still in good condition.
To check if your bulb is the actual problem, remove the flashing Philips Hue light bulb and replace it temporarily with another bulb, preferably another LED bulb. If the new bulb works perfectly fine, you might want to start contacting customer support. Since the new bulb works, then the problem could not have been dimmer switches, faulty wiring, or interfering signals.
If the replacement bulb works perfectly fine, then the flickering bulb is damaged. The best solution to this problem is replacing it with the substitute bulb or buying a new Philip Hues Bulb, if you are not protected by the warranty period.
Regardless, if it’s not the dimmer switch, the wiring or anything serious, the problem has to be the bulb. You will have to replace it to avoid having those random flashing that is bugging you.
Loose bulb sockets
It may sound ridiculous, but there are times when the bulbs are actually not correctly hooked up on the bulb sockets causing the intermittent flashing. If you think that your dimmer switch is perfectly fine because it’s rather new, turn off the power and check if the bulb is properly making contact with the bulb socket.
When the bulb does not properly make contact with the bulb socket, chances are the bulb is getting disrupted electrical currents. When the electric current that powers your Philips Hues is disrupted, you are going to end up with flickering and flashing LED lights. So to avoid headache and discomfort, always make sure to attach your Philips Hue, or any kind of bulb, properly.
Faulty Wiring
Wiring is also a problem that may cause your Philips Hues to flash. Improper wiring and even old wiring can cause not just flickering light bulbs but also fires. If you have tried solving both the dimmer switch and the light bulb, and still the flickering persists, consider calling an electrician to have your house’s wiring checked.
Do not attempt to fix wiring problems on your own, unless you’re an electrician or a technician. It would be too hazardous for you and your family. To be safe, call an electrician and have him inspect for faulty wiring, faulty circuit breakers, or even overloaded voltages.
Overloaded Circuits
Connected with wiring problems, your flickering Philips Hues may be caused by an overloaded circuit. If you have high-powered appliances in the same circuit as your Philips Hues, then you might be having an overloaded circuit. In overloaded circuits, the bulbs may not be getting enough voltage.
If you notice that the flickering is triggered by the number of electrical appliances, such as washing machines and air conditioners, then the circuit is most likely overloaded. Be preemptive and start calling for an electrician to check on your electrical circuits because you either might have an overloaded circuit or a faulty circuit breaker, which can cause not just flashing light bulbs, but even fire.
Voltage Fluctuation
Slight voltage fluctuation is not much of a problem as long as the range is between 115 to 125 volts. You would need a voltmeter to check your house’s voltmeter. Voltage fluctuation is similar to overloaded circuits; the flashing of the bulbs is triggered by appliances being turned on.
The difference between overloaded circuits and voltage fluctuation is that in voltage fluctuation, there is no overloaded circuit, just the fact that there is insufficient flow of electricity. Either way, you would need to call an electrician to solve this dilemma. Again, do not attempt to fix wiring problems all by yourself.
Radio signal interferences and faulty power service utility
These problems are way out of your control. If you feel that your neighbors are draining the local transformers with their massive power usage, contact your power provider.
Signal interferences can be noticed because not only does it affect your LED bulb, but also your television and radio. The problem is, if you do not have radio appliances, but your neighbor does, a nearby radio tower or mast can affect your Philip Hues because the hues communicate with the Hue bridge through electronic signals.

Philips Hue bridge not found
If you can’t find your Hue Bridge:
- Make sure it’s powered on: Connect your Hue Bridge to power using the supplied cable. You should see lights appear on the bridge when it turns on.
- Connect it to your router: Use an Ethernet cable to connect your Hue Bridge directly to your router, allowing it to connect to the internet.
- Connect to the same network: Make sure the device you’re using connects to the same network your Hue Bridge is plugged in to. You typically need to connect over Wi-Fi even though the bridge connects with a cable.
- Restart the Hue Bridge: If you still can’t find the Bridge to pair with it, unplug the power cord and wait for 30 seconds before plugging it back in. Then wait two minutes for the bridge to start up before trying to pair again.
Alexa says Philips Hue is not responding
Below is a list of the most commonly reported causes of connection and signal drops between Philips hue and Alexa.
1. Faulty Alexa Application
If the Alexa app doesn’t function properly or corrupt data, we suggest you reinstall the app and try again.
2. Bad internet connectivity
If Philips hue doesn’t respond via Alexa commands, there’s a high possibility that your internet is bad.
3. Temporal malfunction
Sometimes the signal between both of your devices can glitch. In similar situations, you can try re-adding Philips hue to your Alexa.
If Alexa isn’t running its latest firmware version, there could be connectivity drops between your Philips hue and Alexa.
5. Enabled skills
Sometimes enabled skills could cause conflict between the signal of your Alexa and Philips hue. You can try toggling the feature to see if that will help.
6. Hardware Issue
The last thing that could cause conflict in the signal between your Alexa and Philips hue is a hardware issue of course.
If one of the devices simply refuses to work no matter what efforts you put in, the only choice you will be left with is perhaps, purchasing a brand new device.
However, a hardware problem is quite rare so first, you shall do everything possible at home before making any conclusions.
After a quick tour of what might have gone wrong with one of your devices, it is now time to start troubleshooting.
Solutions
Restart/Power Reset Devices
Before sharing with you anything that is more advanced, we have to first make sure that the issue is not a temporary power glitch.
To power reset your Philips hue effectively, you must be in possession of an official Philips Hue dimmer switch. If you do, simply hold the switch down for up to 15 seconds and then let your device restart.
If you don’t own a dimmer switch, then you will be left with the simpler part which involves dismantling the bulb and mounting it again.
After having Philips Hue aside, it is now time to take a look at your Alexa. It is healthy for Alexa to restart it at least twice a week to avoid unwanted device complications.
Otherwise, you can feel free to perform it every time your device has gone bad or it is just having issues.
Turn off Alexa and wait for it to cool down. Unplug the power adapter from the power source. Wait for another 5 minutes. Plug the power adapter back in. Check if Philips Hue is now responsive to Alexa.
Note: Plug Alexa directly into a wall outlet for this step of the solution.
This is the only way you will make sure that you are directly testing the device and not the power divider/strip.
Update Alexa’s Firmware
Another reason that could be causing Alexa to lose connection with your Philips hue bulb, is outdated firmware. The new interface, features, and options they add with new updates support the connectivity of Alexa with other devices.
Open the Alexa app on your smartphone or visit alexa.Amazon.com Choose settings and select the feature called your device. Compare the device software with the current latest release.
If the version matches, your Alexa is all good, otherwise you have to contact Amazon to update your device to the newest firmware available.
Check Alexa App
If you were somehow unable to open the Alexa app whenever you were reviewing the previous method, the app might be guilty of disconnecting with your Philips hue.
Keep in mind that to perform a full re-open, you must first remove the app from the RAM memory of your smartphone and then open it. To reinstall the app, follow the steps we’ve provided you with down below.
Close the Alexa app and remove it from your RAM memory. Go to the settings of your smartphone and enter the Apps Tab. Locate the Alexa app and click on it to access a specific window. Click on clear cache and wait for all logs to be deleted.
Finally, click on uninstall the app and let your smartphone erase the Alexa app.
Disable and Enable Skills Features
Another possible reason for Alexa says Philips hue is not responding is all-enabled skills. To disable them, you need to make sure that your mobile device is running the latest version of the Alexa app.
Once inside the Alexa app, enter the options and then navigate yourself to the skills tab. Disable all skills you see on the screen, close the app and erase it from the RAM memory of your device.
Then open the Alexa app again and enable all skills back. This solution should perform at its finest if your Alexa app is working correctly and there is nothing wrong with the data, logs, and files of the app.
The whole problem could be due to inappropriate pairing or bad connectivity In that regard you should pair your devices over and check if that solves the problem. Now your Philips Hue should respond to Alexa and accordingly configure the lightning.
On the other hand, configurations remain a fragile part of both devices’ functionality so this is the other thing to pay attention to. In case your issues continue to persist after reading this post, feel free to reach out to Philips or Alexa customer support for additional assistance.
Note: Alexa Skill can lose its connection to Philips hue and may not respond. So, the best way to fix this is to remove the Hue Bulb and re-add it to Alexa App.
Fix internet speed
Seeing as your internet connection is powering both your bulbs and Alexa, it is somewhat likely that this is what’s letting the team down. Check that your speeds aren’t terrible. You can do this in seconds by simply searching “internet speed test” in your browser and choosing one.
If the speed turns out to be okay, the next thing to check for is Firewalls and VPNs. If you are currently operating either of these, switch them off. They can play havoc with smart device connectivity.
Check this too: LG Fridge Ice Maker How to & Troubleshooting Guide
Insect both your router and your smart phone for these. Once you have made any changes, remember to restart the device that you are using Alexa on. This will give it a much better chance of working to its full potential.
Update Alexa
It is pretty easy to miss an update or two along the way. And as a result, the performance of the app will begin to suffer. Try checking for any updates you may have missed. To do this, go into the app store that you are using.
Then click on Alexa to see if there is a more recent version available. If there is one, download it and update Alexa.