

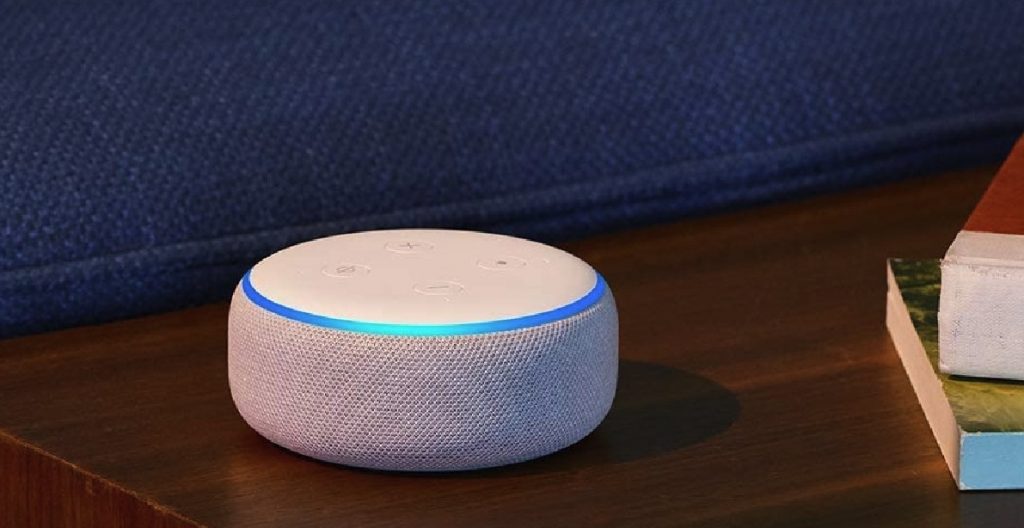
While voice activated virtual assistant are now a common thing, Amazon Alexa still takes the cake in terms of functionality and compatibility. And while you can use it with other types of smart gadgets, most tend to use it with a wide range of Echo devices also manufactured by Amazon.
But every once in a while your Echo based Amazon Alexa may malfunction. Keep reading to learn how to troubleshoot and fix the issues. And tips to help your use your Amazon Alexa with ease.
How to set up Amazon Alexa
Use the Alexa app to set up your Echo, Echo Dot (4th Generation), Echo Dot (4th Generation) with clock, or Echo Dot Kids Edition.
Setting Up Your Echo
Tip: Before setup, download or update the Alexa app in your mobile device app store.
- Plug in your device.
- Open the Alexa app .
- Open More and select Add Device.
- Select Amazon Echo.
- Select Echo, Echo Dot, Echo Plus and more. Follow the instructions to set up your device.
How to play music on Amazon Alexa
The first thing you have to decide is how you want to play your music through Alexa. You have two choices:
Use a music service provider. This is a third-party service that supplies you with music, sometimes for a fee. Examples include Amazon Music and Spotify.
Use your mobile device music. If your music is stored on a smartphone or tablet, you can stream that music through your Alexa device using a Bluetooth connection.
How to link Alexa to a music provider like Spotify
Alexa doesn’t have access to music on its own. Instead, you need to connect Alexa to whatever music provider service you use. The services supported by Alexa depend on where you live, but common providers include Amazon Music, Spotify, and TuneIn.
Some music providers require you to have a special type of account or subscription before they’ll let you connect to Alexa. For example, you can only connect Spotify to Alexa if you have a Spotify Premium subscription.
Before Alexa can use a music provider, you need to give Alexa permission to access your account on that provider. This is called linking your account, and you need to link each music provider you want to access through Alexa. (The exception here is Amazon Music, which is automatically linked to Alexa when you log in to Amazon using the Alexa app.) Follow these steps to link a music provider to Alexa:
- In the Alexa app, choose Menu → Settings. The Settings menu appears.
- Tap Music. The Alexa app displays the Music Services screen, which looks similar to the following figure. If the service you want to use requires permission to allow Alexa to access your account, you see a link to the right of the service. In the figure, for example, you see “Link account on Spotify.com” next to the Spotify service.
- Tap the link to the right of the service, and then follow the instructions that appear. In most cases, you need to log in to your music service and then tap the link or button that authorizes Alexa to access your account.
- When the link is complete, tap Close (X) in the upper-right corner of the app. The Alexa app displays a notification to let you know that you can use Settings to change the default music provider.
If you want to change the default provider, tap the notification’s Go to Settings.
Set up a default music provider, like Spotify, for Amazon Alexa
When you connect the Alexa app to your Amazon account, you get automatic access to Amazon Music, which Alexa sets up as your default music provider. Here, “default” means that when you ask Alexa to play, for example, a song or an artist, Alexa retrieves that music from the default service.
Note, too, that just because you set up one music service as the default, it doesn’t mean that you can’t ever use some other service. For example, if you’re using Amazon Music as the default provider, but you also have your Spotify account linked to Alexa, you can still play something from Spotify by including the service name as part of your voice command. For example:
“Alexa, play Camera Obscura from Spotify.”
If you’re cool with using Amazon Music as your default provider, there’s nothing to see here, so feel free to move on to the next section. If, instead, you want to use a different provider as the default, you need to follow these steps to set up that provider as Alexa’s default music service:
- In the Alexa app, choose Menu → Settings. The Settings menu appears.
- Tap Music. The Alexa app displays the Music Services screen.
- Tap Choose Default Music Services. The Alexa app prompts you to choose a default music library and radio station service, as shown in the following figure.
- Select a music service under the Default Music Library section.
- Select a music service under the Default Station Service section.
- Tap Done. The Alexa app updates your music settings.
Alexa-default-music-service: Use the Choose Default Music Services screen to set your music defaults.
Check this too: Hulu How-to & Troubleshooting Guide
Voice commands for controlling music on Amazon Alexa
Okay, now it’s time to get down, get funky, or get wherever you end up when you listen to your favorite music. Alexa has an extremely long list of voice commands for playing and controlling music.
Some notes to bear in mind as you work through these commands:
Not all these commands will work on all music services. Almost all of them work as advertised on Amazon Music, but your results will vary if you try them with another provider (such as Spotify).
Except where noted, all these commands work on the default music service. To run a command on another service that you’ve linked to Alexa, follow the command with “on [service],” where service is the name of the music provider (for example, “on Spotify”).
You can replace the word song with track or
You can replace the word music with
How to play music by song, album, or artist
Here are some commands to order up music by song title, album title, or artist name:
- “Alexa, play the song [title].”
- “Alexa, play the song [title] by [artist].”
- “Alexa, play the album [title].”
- “Alexa, play music by [artist].”
- “Alexa, play popular songs by [artist].”
- “Alexa, play the latest [artist] album.”
- “Alexa, play that song that goes [lyrics].” (For example, “Alexa, play that song that goes ‘Who let the dogs out.’”)
- “Alexa, play the song I just bought.”
How to play music by genre
To get Alexa to play songs from a particular music genre, use the following command:
“Alexa, play [genre] music.”
For genre, there are dozens of possibilities, but here are the most popular:
Acoustic Electronic Metal
Alternative Folk New age
Blues Gospel Opera
Broadway Hard rock Pop
Children’s Hip hop R&B
Christian Holiday Rap
Classic rock Indie Rock
Classical International Soundtracks
Country Jazz Vocal
Dance Latin World
Easy listening Meditation
How to play music by mood and/or activity
One of Amazon Music’s most interesting features lets you request music to suit a mood (such as mellow or upbeat) and/or an activity (such as relaxing or running). Although no definitive list exists, Amazon claims that it supports more than 500 moods and activities. Here are some commands you can use:
“Alexa, play [mood] music.”
“Alexa, play [activity] music.”
“Alexa, play music for [activity].”
“Alexa, play [mood] [activity] music.”
For the mood, you can try just about any mental state, including angry, chill, energetic, feeling good, happy, joyful, laid back, mellow, relaxed, romantic, sad, or upbeat.
For the activity, try describing just about anything you’re currently doing, including cleaning, cooking, eating dinner, going to sleep, meditating, partying, reading, relaxing, running, studying, waking up, working, or working out.
This feature generally works only on Amazon Music. Also, not every mood, activity, or mood/activity combo works. Alexa tries to match your request with an existing playlist that’s been created by Amazon, and if no such playlist exists — for example, if you ask for “energetic going-to-sleep music” — then Alexa will tell you it can’t find any music to satisfy your request.
How to play and control playlists
Alexa offers a few commands for creating, populating, and playing custom collections of songs, otherwise known as playlists:
- “Alexa, create a playlist named [title].”
- “Alexa, add this song to a new playlist named [title].”
- “Alexa, add this song to the playlist named [title].”
- “Alexa, play my playlist named [title].”
- “Alexa, shuffle my playlist named [title].”
How to get information about music
If you want to know information about a song, album, or artist, Alexa can help. Here are a few commands to try:
- “Alexa, who sings this song?”
- “Alexa, who sings the song [title]?”
- “Alexa, who is in the band [artist]?”
- “Alexa, what year did [artist] release [song or album]?”
How to discover new music on Alexa
If you’re in the mood for something new, here are a few commands you can use to listen to music that’s new or outside of what you normally play:
- “Alexa, play new music.”
- “Alexa, play new music by [artist].”
- “Alexa, play new [genre] music.”
- “Alexa, play the song of the day.”
- “Alexa, play [artist] station.”
- “Alexa, play some music.”
- “Alexa, play more songs like this.”
- “Alexa, play songs similar to this.”
- “Alexa, play songs similar to [title].”
- “Alexa, play songs similar to [artist].”
- “Alexa, play some other music I like.”
- “Alexa, play songs I haven’t heard.”
- “Alexa, play [artist] songs I haven’t heard.”
How to rate music on Alexa
Alexa can make better recommendations if you tell it which songs you like and which ones you dislike. Here are some commands that’ll help:
- “Alexa, thumbs up.”
- “Alexa, I like this song.”
- “Alexa, thumbs down.”
- “Alexa, I don’t like this song.”
How to play popular music on Alexa
If you want to hear the most popular songs, here are some commands that will get you there:
- “Alexa, play the top songs.”
- “Alexa, play the top [genre] songs.”
- “Alexa, play the top songs from the [decade].”
- “Alexa, play the top songs in [country].”
How to control the volume of music on Alexa
To get the music volume just right, here are some commands you can use:
- “Alexa, volume up.”
- “Alexa, increase the volume.”
- “Alexa, raise the volume.”
- “Alexa, louder.”
- “Alexa, volume down.”
- “Alexa, decrease the volume.”
- “Alexa, lower the volume.”
- “Alexa, softer.”
- “Alexa, set the volume to [number from 1 through 10].”
- “Alexa, volume [number from 1 through 10].”
- “Alexa, mute.”
- “Alexa, unmute.”
How to control playback of Alexa music
While Alexa is playing music, you can use the following commands to control the playback:
- “Alexa, stop.”
- “Alexa, pause.”
- “Alexa, play.”
- “Alexa, resume.”
- “Alexa, next.”
- “Alexa, previous.”
- “Alexa, turn shuffle on.”
- “Alexa, turn shuffle off.”
- “Alexa, turn repeat on.”
- “Alexa, turn repeat off.”
- “Alexa, skip back [number] seconds.”
- “Alexa, skip forward [number] seconds.”
- “Alexa, restart song.”
- “Alexa, restart album.”
- “Alexa, restart playlist.”
How to access Alexa via the Amazon Music app
If you get your jams through Amazon Music, not only can you access your music via any Alexa device, but you can also access Alexa via the Amazon Music app, which is available for iOS and Android. This means you can use all the preceding voice commands to control the Amazon Music app. Here are the steps to follow to get started:
- Install and then start the Amazon Music app. The app asks you to sign in to your Amazon account.
- Type your Amazon email address (or mobile phone number, if you have a mobile Amazon account), type your Amazon password, and then tap Sign In.
- If you have two-step authentication turned on, enter the code you were sent and then tap Sign In.
- Tap the Alexa icon in the bottom toolbar. The first time you access Alexa, the app asks your permission to use your mobile device’s microphone.
- Tap Allow Microphone Access.
- Tap OK (iOS) or Allow (Android). The Amazon Music app is now ready to accept voice commands. Either say, “Alexa,” or tap the Alexa icon, and then say your command.
- If you want, you can play Amazon Music content through your Alexa device. Here are the steps to follow:
- Tap the Menu icon (the three vertical dots) in the upper-right corner of the Amazon Music app.
- Tap Connect to a Device. The Amazon Music app displays a list of available devices, which includes any Alexa devices on your network, as shown.
- Tap the Alexa device you want to use for playback. Your Amazon Music content now plays through your Alexa device.
- alexa-select-a-device: Use the Select a Device to Play Music screen to play Amazon Music through an Alexa device.
The downside to playing your Amazon Music selections through an Alexa device is that you forgo the ability to use Alexa in the Amazon Music app. To get Alexa back on the job in the Amazon Music app, you must disconnect from the Alexa device. To do that, choose Menu→ Connect to a Device, and then tap the Disconnect button next to your Alexa device.

How to play third-party music through Alexa devices
If you have a third-party music provider linked to Alexa, you normally ask Alexa to play music from that provider either by specifying the provider name in the voice command (for example, “Alexa, play the Chill playlist on Spotify”) or by setting up that provider as the default.
However, there’s a third method available: You can use the music provider’s app to select your Alexa device as the playback device. For example, in the Spotify app, if you choose Settings → Devices→Devices Menu, you see the Connect to a Device screen, which offers a list of available devices that you can use for playback.
This list will look similar to the one shown here, which you can see contains a couple of Echo devices and a Sonos speaker. Tap the Alexa device you want to use and then any music you crank up in the app will play through your Alexa device.
alexa-spotify-connectThe Spotify app’s Connect to a Device screen, which in this example contains several devices that can be used for playback.
How to adjust Alexa’s music quality
Amazon Echo devices come with a feature sure to warm the cockles of audio-geeks’ hearts everywhere: an equalizer. If you’re not an audio aficionado, an equalizer is a device for adjusting the sound quality by controlling different sound components. Real-world equalizers bristle with obscure settings, but Echo devices mercifully support only three:
- Bass: This component controls the lowest tones in the music.
- Treble: This component controls the highest tones in the music.
- Midrange: This component controls all tones in the music that lie between the bass and treble tones.
You can use Alexa to control each of these settings as follows:
- “Alexa, increase the bass.”
- “Alexa, increase the midrange.”
- “Alexa, increase the treble.”
- “Alexa, decrease the bass.”
- “Alexa, decrease the midrange.”
- “Alexa, decrease the treble.”
- “Alexa, set the bass to maximum.”
- “Alexa, set the midrange to maximum.”
- “Alexa, set the treble to maximum.”
- “Alexa, set the bass to minimum.”
- “Alexa, set the midrange to minimum.”
- “Alexa, set the treble to minimum.”
- “Alexa, set the bass/midrange/treble to [number from –6 through 6].”
- “Alexa, reset the equalizer.”
If you happen to have the Alexa app open, you can also use it to make equalizer adjustments. Choose Devices →Echo & Alexa, tap the Echo device you want to adjust, and then choose Sounds→ Equalizer. Use the Bass, Mid, and Treble sliders to adjust the settings as needed.
If you have an Echo Show or Echo Spot, you can mess up, er, sorry, mess around with the sound quality by opening Settings and then choosing Sounds→Equalizer. Use the Bass, Mid, and Treble sliders to adjust the settings to taste.
How to reset Amazon Alexa
First, be sure you know what type of reset you want to do. If it just appears to be unresponsive, your first call should always be to turn the power off. Simply pull the power adapter out of the back, give it a few seconds, and then plug it back in.
Sometimes the color light your Echo speaker is shining can be a clue as to what might have gone wrong.
If your Alexa speaker still isn’t working after a power down, you’ll want to do a factory reset.
You’ll also want to factory reset your Echo speaker if you’re selling it, or giving it to someone else.
Factory reset using the Alexa app
You can reset your Echo device using the Alexa app on your iOS or Android smartphone.
- Go to Devices.
- Tap the Echo & Alexa icon at the top.
- Choose the speaker you want to factory reset.
- Scroll down to Factory Reset and tap it.
- Confirm you want to reset.
Factory reset buttons on the Echo speaker
How to reset Amazon Echo Dot (2nd-gen, 3rd-gen, 4th-gen)
To reset the Amazon Echo Dot second generation, press and hold the Microphone Off and Volume down buttons at the same time. Wait until the light ring turns orange, which should take about 20 seconds.
To reset the Amazon Echo Dot third generation, fourth generation or Echo Dot with Clock (both generations), press and hold the Action button for 25 seconds – that’s the button on the right of the top panel.
How to reset Amazon Echo (1st-gen, 2nd-gen, 3rd-gen, 4th-gen)
As with the Echo Dot, resetting your standard Echo devices varies depending on whether you have the original or second generation sitting in your home.
To reset your first generation Echo device, use a paper clip (or something similar) to press and hold the Reset button. Wait for the light ring to turn off and on again.
To reset your second generation device, press and hold the Microphone Off and Volume down buttons at the same time. Wait until the light ring turns orange, which should take around 20 seconds.
To reset a 4th-gen Echo, or 3rd-gen Echo, hold down the action button for 25 seconds. The light ring will pulse orange, then turn off. It will then come back on, go blue, and then orange again. It’s now ready for setup..
How to reset Amazon Echo Plus (1st-gen, 2nd-gen)
If you’re working from a different generation of Echo device, the rebooting process is going to be different. That’s the case for the two kinds of Echo Plus models. Also, know that you won’t lose your smart home device connections, if you do decide to reset.
To reset your first generation Echo Plus, use a paper clip (or something similar) to press the Reset button once and quickly release. Wait for the light ring to turn off and on again.
To reset your second generation Echo Plus, press and hold the Action button for 20 seconds. Wait for the light ring to turn off and on again.
How to reset Amazon Echo Show, Amazon Echo Show 5, Echo Show 8, Echo Show 10, Echo Show 15 or Echo Spot (all generations)
How to reset your Amazon Echo
If you have an Echo speaker with a screen, whether you have an Echo Spot, one of the two generations of the Echo Show, the Echo Show 5 or 8, things change slightly. If you have a second generation Echo Show, you can, of course, use the built-in Zigbee chip to connect to your external smart home devices – and how you reset affects those connections.
To reset your second generation Echo Show without losing your smart home device connections, say, “Alexa, go to settings,” or swipe down from the top of the screen and select Settings. From there, select Device Options, and then Reset to Factory Defaults, but retain Smart Home Device Connections. Follow the same steps for the Echo Show 5, Show 8 or Show 10.
To reset your first generation Echo Show or Echo Spot to its factory settings, say, “Alexa, go to settings,” or swipe down from the top of the screen and select Settings. Then, select Device Options, and then Reset to Factory Defaults. This erases all your personal information and settings on the device.
You can also use the following method to reset your Echo Show: Press and hold the mute and volume down buttons for 15 seconds until Amazon logo flash on the display.
How to reset your Amazon Echo sub
One of the latest additions to the Amazon Echo family is the Echo Sub – and, yes, this is very much an optional add-on to your Echo setup. Given this requires some extra setup to get right, and it’ll need to sync with your Echo, Echo Plus or Echo, there’s a chance you’ll need to reset the Sub every now and again.
To reset the Echo Sub, press and hold Action button located just above the power cord for 25 seconds
How to connect Amazon Alexa to Wi-Fi
One of the first things you need to do after getting an Alexa device is to connect it to a WiFi network. So, if you change your WiFi network or try to use your Alexa device in a new place with a different WiFi network, your device just won’t work. Here’s how to connect your Alexa device to a new WiFi network with or without the app.
If you’re setting up your Alexa device for the first time, check out our guide on how to set up Alexa on an Amazon Echo smart speaker.
Does Alexa Need WiFi?
Yes. Alexa devices need a WiFi connection to function properly. When you ask Alexa a question or use a voice command, an audio recording is sent to Amazon’s cloud over your WiFi network. Then it is processed and sent back to your device over WiFi so Alexa can answer your question or fulfill your request.
How to Connect Alexa to a New WiFi Network With the App
To connect Alexa to a new WiFi network, open the Alexa app and tap Devices. Then select Echo & Alexa and choose the Alexa device you want to connect to a new WiFi network. Finally, tap Change next to WiFi Network and enter the WiFi password for that network.
- Open the Amazon Alexa app. You can download the Alexa app on your smartphone or tablet from the Apple App Store and the Google Play Store.
Note: There are a lot of fake Alexa apps, so make sure you download the Alexa app from AMZN Mobile LLC.
Then tap Devices. You will see this in the bottom-right corner of your screen.
Next, select Echo & Alexa. You will see this in the top-right corner of your screen.
- Then choose the Alexa device you want to connect to a new WiFi network. If you don’t see your device listed, go back to the Devices screen and select All Devices.
- You will see this to the right of Echo & Alexa. If you still don’t see your device, you might have to reset it and set it up as a new device.
Note: If you don’t remember the device’s name, you can ask, “Alexa, what is your device name.”
- Next, tap Status. This will show you which WiFi network your device is currently connected to.
- Next, tap Change. You will see this next to Wi-Fi Network and under Wireless.Then press and hold the action button on your device. This is the button with the dot icon on top of your Echo device.
- Once your device is in setup mode, tap Continue. You will know your device is in setup mode when the ring light on your device turns orange and starts spinning.
- Also, your Alexa device will say, “Now in setup mode. Follow the instructions in your Alexa app.”
- Then select your Alexa device from the list.
- Next, select your new WiFi network. If you don’t see your WiFi network appear after a few moments, tap Rescan Network near the top of your screen.
Note: For best results, make sure that your smartphone or tablet is connected to the same WiFi network that you want to connect your Alexa device to.
- Then enter your WiFi password and tap Connect.
- Wait for your Alexa device to connect to your new WiFi network. This can take a few minutes. Your Alexa device will tell you when it has connected to the new WiFi network.
Note: If you can’t use the mobile app to connect Alexa to WiFi, your best option is to do it on a browser.
How to Connect Alexa to a New WiFi Network Without the App
To connect Alexa to a new WiFi network without the app, go to alexa.amazon.com and sign in. Then click Settings > Set up a new device and select your device. Next, put your device in pairing mode and connect to its WiFi network. Finally, choose your new network and enter your password.
- Open a web browser and go to alexa.amazon.com. You can do this using Google Chrome, Safari, Firefox, or any other browser.
- Then log in to your Amazon account. Enter your Amazon username and password. If you don’t have an Amazon account, click the Create a New Amazon Account button at the bottom of the window.
- Next, click Settings. You will see this in the left sidebar of the window. If you don’t see this option, expand your browser window or zoom out on the page.
- Then select Set up a new device.
- Next, select the kind of Alexa device you want to connect to a new WiFi network. You can see more options by scrolling down.
- Then click Continue.
- Next, plug your Alexa device into a power source.
- Then wait for the ring light to turn orange.
Note: If you don’t see your device’s light ring turn orange, select Don’t see the orange light ring? Then you will see which button you have to push on your device. In most cases, you will need to press and hold the action button with the dot in the middle on the top of your Echo device.
Next, connect to a network with the format Amazon-XXX. Without closing your browser, go to your computer or phone’s WiFi networks. If you’re using a Windows10 computer to set up Alexa, you can click the WiFi icon in the bottom-right corner of your screen. If you’re using a Mac, you can find the WiFi icon in the upper right area of the screen. And, if you’re using a phone or a tablet, just go to Settings > WiFi. Then you should see the network listed among all your available WiFi networks.
Go back to your browser and click Continue. Once you have connected to your WiFi network, you will see a window that says, “Your computer is connected” to your Alexa device.
Then select the WiFi network you want to connect Alexa to. If you choose a previously saved network, you can skip the next step.
Next, enter your WiFi password and click Connect.
Finally, wait for your Alexa device to connect to the new WiFi network. Once you are done, you can test the connection by asking Alexa a question. For example, you can say, “Alexa, what’s the weather like tomorrow?”
How do I change the Amazon account on my Alexa?
To change or remove your account open the Alexa app > More > Settings > Device Settings > Device name > Deregister.
It is also possible to do this via the Alexa site on Amazon.com.
Set up multiple Amazon accounts by signing up to Amazon Household and saying “Switch Accounts” to Alexa.
How to Switch Profiles on a Fire Tablet
If you need to change the Amazon account your Alexa is linked to, either because you’re selling the device or because it’s experiencing a change of ownership, the process is pretty simple, providing you know where to look. Follow the steps below to change the Amazon Account on the Alexa App.
Here’s what to do using your smartphone and the Alexa app.
- Open the Alexa app on your phone.
- Tap More.
- Tap Settings.
- Tap Device Settings.
- Choose the device you wish to change accounts.
- Scroll down to Registered to and tap Deregister to remove the account.
- You can now set up your Amazon Alexa device again with a new account.
How to Change to a Different Account
If you’d prefer to change your Alexa settings via the Amazon website, that’s also possible. Here’s how to change your Alexa to a different account via your web browser;
- Go to the Alexa site on Amazon.com.
- You may need to sign in.
- Click Settings.
- Alexa website with Settings highlighted
- Click your Alexa device you wish to change.
- Alexa website with Alexa device highlighted
- Scroll down and click Deregister next to the account name.
- Alexa website with deregistered highlighted next to device
- Click Deregister.
- Alexa website with Deregister your device highlighted
- You can now set up your Amazon Alexa device again.
Using 2 Amazon Accounts on Alexa?
It’s possible to switch between different Alexa profiles using Amazon Household to do so. Both users will need their own Amazon accounts to do this. Here’s how to do it.
- Go to Amazon Household on your web browser.
- Click Add Adult.
- Enter the name and email address of the adult you want to add.
- Get them to accept the invite.
- Say “Alexa, switch accounts” any time you wish to switch between accounts.
- You can also say “Alexa, identify account” to identify whose account you’re currently logged in to.
What Else Do I Need to Know About Changing Accounts on Amazon Alexa?
If you’re wondering why you might need to change accounts on your Alexa or what limitations are involved, read on while we break down the key things to note.
An Amazon Household can include more than two people. An Amazon Household can consist of up to two adults, four teenagers, and four children. It’s possible to set Alexa up to switch between all of these people if you so wish.
It’s helpful to remove accounts before selling or gifting an item. If you’re planning on giving or selling the Alexa to someone, then you must remove your Amazon account beforehand so the new owner can add their own.
Set up voice profiles for better recognition. Go to Alexa > Settings > Account Settings > Recognized Voices to create a new voice profile to help Alexa recognize members of your household more effectively.
Can I change Alexa’s name?
No. Although you cannot change Alexa’s name, you can change Alexa’s wake word to “Ziggy,” “Amazon,” “Computer,” or “Echo.”
Can I change Alexa’s voice?
Yes, but your options are limited. There is a masculine voice option available, and you can change Alexa’s language and accent (e.g., from US English to Australian English). There is a skill that lets you change Alexa’s voice to Samuel L. Jackson.
How do I change my primary Alexa device?
To change your preferred speaker or speaker group, tap your Alexa device or group name in the Alexa app, then tap Edit Preferred Speaker.
Why is my Amazon Alexa flashing green
A spinning or flashing green light on your Echo device means there’s an incoming call or an active call or an active Drop In.
To stop the flashing green light, pick up the call (by saying “answer call”), decline the call (by saying “decline call”), or simply ignore the call until it stops ringing. Quick tip: A spinning green light indicates that you’re currently on a call. To end the call and turn off the green light, say “hang up.”
Why is my Amazon Alexa flashing yellow?
A flashing yellow light on your Echo device means that you have a notification or a message from an Alexa contact. If you see a flashing yellow light on your Echo device, try the following steps:
- Say, “What notifications do I have?”
- Say, “What messages do I have?”
Update your notification settings in the Alexa app.
To get your Echo or other Alexa-enabled device to stop flashing yellow, ask Alexa to read your message. If it’s a delivery notification, Alexa will simply tell you that an order has been delivered. If it’s a message received in your inbox, Alexa will read you the message
How to turn off Amazon delivery notifications on Alexa
- Open the Alexa app .
- Open More and select Skills & Games.
- Select Your Skills, and then select the skill.
- Select Manage Permissions/ Notifications (Depending on your Echo device)
- Then turn notifications on or off.
How to delete Amazon Alexa account
Before we can delete your alexa.com account, ensure that you have already canceled your subscription(s).
To delete Alexa account;
Open the Alexa app on your mobile device. Go to More, then Settings. Select Your Profile, then Voice. Next to your profile, choose Delete Voice Profile.
To delete Amazon Echo account;
Open the Alexa app on your phone. Select Settings from the More menu. Choose Your Profile, then Voice from the drop-down menu. After that, select Delete Voice Profile beside your profile.
How to disable Amazon sidewalk on Alexa
Use the Alexa app or Manage Your Content and Devices to turn Amazon Sidewalk on or off.
The Sidewalk setting only appears when you have a compatible Echo device linked to your Amazon account. The website version of the Alexa app doesn’t show this setting. Also, when you turn Amazon Sidewalk on or off, the same setting will be applied to all of your devices.
To turn Amazon Sidewalk on or off from the Alexa app:
- Open the Alexa app .
- Open More and select Settings .
- Select Account Settings.
- Select Amazon Sidewalk.
- Turn Amazon Sidewalk on or off for your account.
If you don’t have a mobile phone with the Alexa app, you can change this setting from the web. Select Enabled or Disabled under Amazon Sidewalk in Manage Your Content and Devices > Preferences.
How to make a playlist on Amazon Alexa
Follow the steps below to create playlists on Amazon Alexa.
Sign Up For A Music Streaming Service
Amazon Echo works with tons of music streaming services, including Amazon Music, Spotify, and Apple Music. Having an account in one of these is important to create playlists for different occasions (including for your children’s parties and for a relaxing night after a long day at work).
If you have Amazon Prime, you can automatically access the more than 2 million songs and the thousands of playlists in Prime Music. You can also sign up for Amazon Music Unlimited which has a library of over 50 million songs!
The best thing is that they are both supported by Amazon Echo (and other Alexa-enabled devices), plus they have no advertisements, and the songs can be played an unlimited number of times.
However, if you already have accounts in other services and want to make use of playlists you might already have there, you just need to activate the use in the Alexa App. The most popular of these services (Spotify, Apple Music, SiriusXM, Pandora or Tidal) are compatible with Alexa.
Sync The Service In The Alexa App
Unless you wont access Music from Prime Music or Amazon Music Unlimited and planning to use third party music services, then you need to do this additional step (if you are, then go to step 3).
If you are using an external music service, you need to get your smartphone or tablet and open the Amazon Alexa app. Then go to the Settings folder. Underneath Alexa Preferences, choose music. This is where you can link your music streaming service to your Echo. Apple Music subscribers, however, can do this much more easily by enabling the “Apple Music” skill in the Alexa app and linking their account.
Once you have added your external music service account details, these will be saved, and it will not be necessary to connect them again.
Start Creating Playlists
Once you have your accounts ready, you can start creating your playlists. There is no limit to how many you can create, so you can easily have one for walking the dog, waking up in the morning, when friends are over for dinner or even to help get ready for bed. You can basically prepare the right music for any and all situations you would love to have the right music for!
Creating the playlist is very simple, all you need to do is say, “Alexa, create a new playlist.” She will confirm and ask you what to name the playlist. You need to say the title out loud, and once the playlist is created, you can start adding songs to it. However, adding specific hits is not as easily done via verbal command, meaning you cannot add a song by saying out the title.
This can be done when you are actually listening to the song. Once it is playing, you can give the verbal command, “Alexa, add this song to my (name of the playlist) playlist.” This way, even if you do not know the title of the song or you just stumbled upon a new song and like it, you can include it in any of your playlists.
It is also possible to add songs to your playlist using the Amazon Music app, which you can download on any Android and iOS device. You may go to the Amazon Music website as well to edit playlists and add songs. You will also need to add songs manually when using external services like Apple Music or Spotify, as creating a playlist using Alexa is currently not supported.
Test Your Playlists
After you have set up your different playlists, you can command Alexa verbally to play them any time you want. All you need to do is to instruct Alexa to put it on by saying, “Alexa, play my (playlist name) playlist.” This works for all playlists saved on Amazon Music.
For other streaming services, you need to include more information on your commands when picking the playlist. You will need to say, “Alexa, play my (name of the playlist) playlist on (streaming service).”
You can continue to add songs to any playlist any time you discover a new song you like and the playlists will be automatically updated. Just follow the commands or steps to adding songs to the playlist. Once you get the hang of it, you can set up playlists for any occasion or even for a specific time of the day like when you are relaxing with a glass of wine at night.
How to disable Amazon music on Alexa
Follow these steps to disable music on different devices and platforms.
Smartphones and Tablets
If you are interested in understanding how to disable Amazon Music from Alexa through your smartphone or tablet, the first thing you need to do is start the Alexa app on your device, taking the latter and selecting the relative icon (the one with the assistant’s logo voice of Amazon ) that you find on the home screen or in the app drawer.
- Install Amazon Alexa from play store if you are using Android, but if you are using iPhone or iPad, download from Apple store.
- Authorize the download via Face ID, Touch ID or Apple ID password.
- Then launch the app by pressing the Open button that appeared on the screen.
- Now that you see the main screen of the Alexa app, log in to your Amazon account (if necessary)
- Then tap the button with the horizontal lines located at the top left and select the Settings item from the menu that appears.
At this point, select the word Music that you find in the Alexa Preferences section, tap on the item Default services and select, in the sections Default music library and Default station, the service for streaming music that you want to replace Amazon Music ( eg Spotify or Apple Music ).
Amazon music stream platforms
If the music streaming service with which you want to replace Amazon Music is not available in the list, add it first, by tapping on the item Connect a new service that you find in the Settings> Music screen of the app, selecting the logo of your service interest and then providing the required credentials and permits.
Computer
Deactivating Amazon Music from Alexa is also possible from a computer, by accessing the relative web management panel.
- Start the browser you usually use to surf the Net from your PC (eg Chrome)
- Go to the homepage of the service and login to your Amazon account (if necessary)
- On Alexa Web main screen, click on the Settings item in the left side menu and select the word Music and multimedia that you find on the right, in the Alexa Preferences section.
- In the new screen that is now shown to you, click on the Select predefined music services button.
- Then select the music service you want to use as an alternative to Amazon Music (e.g. Spotify or Apple) in the sections Default Music Library and Default Station Service Music).
- Save your changes by clicking the Finish button.
If among the available music services you cannot find the one you are interested in, add it in advance, selecting the item Music, Videos and Books that you find in the left side menu of Alexa Web, then locate the Music section, on the right, click on the name of the service you are interested in among those listed, press the Activate button and provide the credentials relating to the associated account and the required permissions.
Who is the voice of Amazon Alexa?
The voice reportedly belongs to a Colorado-based voice actress and singer named Nina Rolle.
How do I link my Amazon prime account to Alexa?
Amazon Prime Music
You can access Prime Music with an Alexa-enabled device, Fire TV, Fire TV Stick or Fire Tablet but also with Sonos, iPhone, Android phones and tablets, PC/MAC, web browsers, smart TVs and even some cars. Access thousands of playlists, stations and songs anytime and from anywhere. Your listening is uninterrupted, ad-free and on-demand with unlimited skips and offline playback.
For mobile devices, download and launch the Amazon Music app on your device, then sign in using information for your primary Amazon account.
For Alexa-enabled devices, just ask, “Alexa, play music” or ask for your favorite song, artist or album.
For Fire TV Voice Remote, simply press the microphone button on the Alexa Voice Remote and request a song. And with no Voice Remote, just navigate to Your Apps and Games.
Amazon Prime Reading
Prime Reading is a free Prime benefit with unlimited reading of over 1,000 books, magazines, comics, Kindle singles and more. It’s your 24/7 library at your fingertips — anytime and anywhere. Read with your Kindle, Kindle Paperwhite, Kindle Voyage or Kindle Oasis, or access Prime Reading on other devices.
Just download the free Kindle app for use on your iOS or Android smartphone or tablet. With Amazon’s Whispersync technology, you’ll be able to pick up where you stopped reading if you switch between your Kindle and Kindle app on your other devices.
From the Kindle app:
- Launch the Kindle app on your device.
- Sign in using information for your preferred Amazon account.
- Click the “Get started” button on the next screen, then click “OK” in the pop-up window introducing you to Prime Reading.
- In the “Discover New Books” screen, you can find Prime Reading content by looking for the Prime logo on eligible titles.
- From a Kindle device, simply look for the Prime logo on eligible titles.
Amazon Prime Video
Stream unlimited movies and TV episodes from the Amazon Prime Video app on your compatible Fire TV, smart TV, streaming media player, game console, mobile phone or tablet.
From a living room device:
Open the Amazon Prime Video app or download it from your living room device’s app store.
Register your device by selecting “sign in and start watching” to enter your account information directly on your device or choose “register on the Amazon website” to get a 5–6 character code to enter in your account.
From a mobile phone or tablet, download the Amazon Prime Video app, sign in and start streaming.
Amazon Alexa not connecting to Wi-Fi?
Follow these steps as needed to get Alexa up and running again.
- Check your internet connection to be sure it’s working properly. If you can’t connect to the internet, Alexa can’t do her job. If that’s okay, the problem could be in your hardware.
- Manually restart both the modem and wireless router, wait five minutes, then connect Alexa to Wi-Fi. Connectivity problems can sometimes be caused by network hardware, rather than the devices that connect to the network.
- Restart the Alexa-enabled device. Power off or unplug the Echo or Alexa-enabled device, turn it back on, then connect to Wi-Fi again. Sometimes this kind of physical reboot of an Alexa-enabled device can fix the problem.
- Confirm that the Wi-Fi password is correct. If the hardware is working properly, find another device on your Wi-Fi network, disconnect it, then reconnect it using the same password you use to connect Alexa. If the other device recognizes the Wi-Fi network but cannot connect using the same password, then the password you’re using for your Alexa device is likely incorrect.
- This is a common issue because Wi-Fi devices don’t state the reason why they cannot connect to a network.
- Look for blocks in your network and move your device closer to the wireless router. Wi-Fi signals cannot travel long distances without degrading. It may be that your Alexa-enabled device cannot connect to a Wi-Fi network because it’s simply out of range.
- Look into expanding your home’s connectivity with a mesh network if this fixed the problem. Once you’ve moved your device, you might need to connect it to the network again.
- The Best Mesh Wi-Fi Network Systems to Buy
- Check for possible interference. Make sure there aren’t any physical barriers between your router and the Alexa device; things like brick walls, concrete walls, and reinforced doors can block Wi-Fi signals. Also remove or turn off devices that can interfere with the signal, like FM radios or baby monitors.
- Reset the Alexa device to factory settings. When all else fails, resetting the device to its factory settings can sometimes fix Wi-Fi problems.
- The instructions for resetting an Amazon Echo devices depend on the generation of the device.
- Third-generation Echo Dots have a fabric speaker wrapped around the sides of the device with four control buttons on top. Second-generation Dots have a non-fabric speaker and four control buttons on the top of the device. First-generation Dots have only two buttons on top.
- Second-generation Echos have a fabric speaker wrapped around the sides of the device. First-generation Echos do not.
- Follow Amazon’s instruction to reset other Amazon Echo devices (like the Echo Sub or Echo Plus).
- Contact technical support. If you’re unable to connect your Alexa device after completing all of the above instructions, contact Amazon or your internet service provider.
Amazon Alexa not responding to me
To fix issues with your Echo device not responding:
- Make sure you’re using the power adapter that was included with your device.
- Make sure you have an active internet connection.
- Check that your device isn’t muted. The light indicator is red when your device is muted.
- For devices without a screen: press the Action button to see if your Echo device responds.
- To make sure that Alexa hears you, move your device away from walls, other speakers, or background noise.
- Speak naturally and clearly.
- Rephrase your question or make it more specific. For example, there are many cities around the world called “Paris.” If you want to know the weather in Paris, France, say, “What’s the weather like in Paris, France?”
- Try saying, “Did you hear me?”
- Unplug your device and then plug it back in.
Amazon Alexa not turning orange
Orange light means that Alexa is trying to connect to a wireless network.Different causes can prevent Alexa from connecting to WiFi. Sometimes, it could be caused by obstructions in your network or long distance between the device and your wireless router. You can, therefore, make Alexa start turning orange again by doing a few things. Start with the following.
Check the internet connection
Ensure that your internet connection is working accordingly. If you are having trouble connecting to the internet, then Alexa cannot work as expected.
Restart the router and modem
Sometimes, you can solve this problem by restarting your wireless devices such as the modem and router. As you do this manually, wait for at least 5 minutes before connecting Alexa to wifi again. Sometimes, network hardware leads to connectivity issues, and a simple restart can make Alexa start showing the orange light.
Restart the Alexa device
If you are using an Alexa enabled device such as Echo, you can also help it connect to wifi by restarting it. Power it off for some time then put it back on. Give it some time for it to try connecting back to wifi again. If you don’t want to power it off and on, you could try unplugging it for a few seconds. Sometimes, a simple reboot of the Alexa enabled device can solve the problem.
Check if you wifi password has changed
Sometimes, incorrect passwords can also hinder Alexa from connecting to wifi as expected. When this happens, the Alexa will not turn orange as expected. If you confirm that the hardware is functioning accordingly, choose one of the devices connected to your wireless network and disconnect it. When you start reconnecting it, enter the same password you have been using to connecting Alexa.
If the device can easily recognize the network but fails to connect using the password, then the wifi password you are using for the Alexa device is wrong. Using the wrong password is a common issue that causes problems between such devices.
If you think that someone may have changed the password, you should update it on your Alexa device. Go to settings and make the necessary password updates. Consider using a simple password since some Alexa devices don’t like complicated passwords with special characters.
Move any physical objects that may be blocking the network
Any physical barriers between the Alexa device and the router can prevent Alexa from connecting to wifi. You should, therefore, move them to solve this issue. If you have things such as baby monitors or radios, you should keep them far away from your router and Alexa since they tend to cause interference.
When wifi signals have to travel long distances, they tend to degrade. You should ensure that the Alexa device and router are within range so that the Alexa device can easily connect to the wireless network.
Reset your Alexa enabled device to factory settings
For you to reset the device to factory settings, you should first consider the generation of your particular device. If you have a third-generation Alexa enabled device, you can easily reset it to factory settings by pressing down the action button and holding it for at least 25 seconds.
You should notice the light ring blinking orange then turning off. The device should show a blue light. When this happens, you can now start setting up again through the Alexa app.
Ensure that you follow the steps keenly before you attempt to connect to the wireless network once more. If you have a first-generation Alexa enabled device, you can reset it to factory settings using the reset button. This should be found at the bottom part of your device. Use a paperclip to press this reset button until it goes back to the factory settings.
Amazon Alexa not discovering devices
If Alexa doesn’t discover your smart home device, here are some solutions to try.
Check for device or setup issues
Try these steps first:
- Make sure that your smart home device is compatible with Alexa. Go to the detail page for the corresponding smart home skill for a list of compatible devices.
- Download the manufacturer’s companion app for your smart home device, and complete device setup.
- Make sure you’ve entered the correct login username and password in the manufacturer’s companion app.
- Note: Mobile devices default to capitalizing the first letter of a word when typing in a field box. If your password doesn’t start with a capital letter, make sure the mobile app doesn’t accidentally capitalize it. Also, make sure there’s no blank space before or after the username.
- Enter https://alexa.amazon.com/ into a web browser and try completing the setup there.
- Restart your Alexa device and your smart home device.
- Disable and re-enable the skill for your smart home device in the Alexa app.
- Disconnect your smart home device using the Disable option for your device in the Alexa app. Then, re-enable your smart home device again.
- Download and install any software updates available for your devices.
Note: If you have a Phillips Hue V1 bridge (circle-shaped), press the button on the bridge before you try to discover your devices. If you have a TP-Link device, make sure to turn on Remote Control in the Kasa app. If you are re-linking a Harmony device, select Welcome Back on the YOUR SETTINGS HAVE BEEN RESTORED page. Then make your updates, and select Link Account.
Connect to the same Wi-Fi network
Your Alexa device should be connected to the same Wi-Fi network as your smart home device.
You can check or change the Wi-Fi settings in the Alexa app:
- Select the Devices icon “”.
- Select your device.
- Select Change next to Wi-Fi Network.
- Follow the on-screen instructions to update your Wi-Fi information.
Note: Some smart home device only work with 2.4 GHz Wi-Fi band connections. Check with your smart home device manufacturer for more information.
Turn on SSDP / UPnP on your router
Use your computer to update your router settings. If you need more information, your router manufacturer is in the best position to help.
Amazon Alexa not registered
You may come across problems registering your device or application due to outdated software or incorrect account credentials.
Before you attempt to register your device or application, make sure:
- Your device or application is running the latest available software version.
- You’re entering the login information (email address or mobile number) you use to sign into your Amazon account.
- Your email client isn’t filtering incoming mail from Amazon to a junk or spam folder when you log in with your email.
- At the time of registration, some devices or applications require additional authentication.
To complete registration, follow these steps:
- Choose to register your device or software application.
- Enter your login information to sign into your Amazon account (email address or mobile number). An email or text will be sent using the same method you choose.
- You’ll receive an email or text notification from Amazon containing a temporary one-time password. It’s time sensitive and must be used within 10 minutes of receiving.
- Register your device or application using the same email address or mobile number with the one-time password.
- Your device or software application should be successfully registered to your Amazon account.
Why won’t my Alexa enter setup mode?
To fix setup issues with your Echo device:
- Check that your device is connected to Wi-Fi.
- Check that you have the latest version of the Alexa app.
- Restart your Echo device.
- Reset your Echo device.
Alexa not responding to stop
Below are some reasons why your Alexa is not responding and ways to fix it;
The Default wake word has changed
Alexa will only respond to commands when you say, “Alexa…” Unless you’ve changed its wake word.
Once you’ve input a different wake word, it will stop responding to its default name. So, before you do anything technical with your device, check first the wake word on the Amazon Alexa app.
Check this too: TCL Roku TV Troubleshooting Guide
This can normally happen if more than one person has access to your Alexa settings. Or review it on the Amazon Alexa app.
To change Alexa’s wake word:
- Open the Amazon Alexa app.
- Go to the menu.
- Proceed to “Device Settings.”
- Select preferred device.
- Then, input the new or old wake word.
The Speaker’s microphone is off
You’ll know if the microphone is on if the device’s LED light is solid red. When it’s red, it means that Alexa is not listening to you. So, no matter how loud you shout, it will not respond to your commands.
Manufacturers included a microphone button to let users turn off Alexa when needed. It uses a mechanical button. So, you’d have to press it again to turn it on.
Solution:
Alexa speakers have different microphone button icons. Some have a typical microphone icon, while others have a slashed-circle one.
- Check to see which icon is on your speaker device.
- Then, press it once to turn on Alexa’s microphone.
- After that, the LED indicated should turn blue.
The connected device is turned off
With Alexa, you can control other smart devices installed in your home. But there’s one thing you should do to make everything work:
- Keep all connected smart devices turned on all the time.
- Yes, all the time, even when you’re asleep.
- When a device is turned off, it becomes unrecognizable. Alexa can’t connect with unrecognizable devices. And so, it won’t be able to follow your commands.
Solution:
- If Alexa doesn’t respond to one specific command, check the connected device.
- Is it turned on?
- If not, then make sure to switch on the device.
- If you’re constantly unplugging it, make sure to turn its power on every time.
Tip: Are you getting tired of repeatedly commanding Alexa to do a specific thing? Then create a routine. Doing this will help you control your smart devices more efficiently.
The smart device is connected to a different network
“The connected device is turned on. Why is Alexa still unresponsive?”
Alexa communicates with other devices via WiFi.
But it can’t connect with a device that isn’t in the same WiFi network.
For the smart devices to work as one, they have to be connected to the same network.
Smart devices communicate by sending radio waves.
And these radio waves are restricted to one network.
If Alexa isn’t responding to your commands, perhaps the connected device isn’t connected to the same WiFi.
This often happens in households that are using dual-band WiFi networks.
Solution:
- First, check on which WiFi network is the other device connected to.
- You can do that by navigating its companion app’s setting. Look for “Network Settings,” then change the WiFi network if necessary.
- Make sure that it matches the network your Alexa speaker is connected to.
Note: Most smart devices only work with WiFi with a 2.4 GHz band. So, make sure to connect your smart devices to the WiFI with the same frequency band.
Unstable Internet Connection
If that’s the case, then maybe the WiFi connection in your home is unstable. Alexa is dependent on WiFi. Once it gets unstable, Alexa may lag or stop responding. Many things cause the WiFi connection to become unstable. But most of the time, it’s due to weak signal strength.
It can happen if the Alexa device is too far away from the WiFi router. Or if there are too many obstructions in between.
How to fix it:
- If possible, move your Alexa speaker close to the WiFi router. Or at least in the same room.
- According to a study, WiFi signals travel faster in free space. Make sure that no obstructions are present near the devices.
- It can be anything in your house.
- It can be a home appliance or a steel room divider. Or certain kinds of walls. Avoid anything that can interfere with electromagnetic waves.
WiFi network is congested
Did you know that WiFi networks can get congested? Every WiFi plan has a set internet bandwidth limit.
Even if you’re subscribed to an “unlimited” plan, you have a bandwidth limit. Bandwidth is the amount of data that you can use at a set period.
Once it gets low, your can experience not slower but limited internet usage.
Meaning you barely receive data.
It happens once there are too many devices connected to the same network.
Basically, your WiFi network becomes congested. And each device fights to receive sufficient data.
Solution:
Remove connected devices that are not in use from the WiFi network.
There are two ways you can do it:
- By manually disconnecting the WiFi on each device.
- By resetting your WiFi router.
- Resetting the WiFi router disconnects all connected devices.
It may be a hassle to connect your Alexa device again. But it’s convenient if there are too many devices connected to the same network.
Speaker firmware is outdated
Alexa speakers have firmware. And developers occasionally update it to enhance the speakers’ features and security functions. Normally, an Alexa speaker updates itself automatically in off-hours.
But it can sometimes fail to do so due to a system error. If the firmware is outdated, Alexa can malfunction. And fail to respond to your commands. Developers remove or replace features when updating firmware.
And these new updates sometimes become incompatible with the older version. Causing some parts of Alexa’s system not to work.
Solution:
- If Alexa doesn’t automatically update, you could force it to update by soft resetting the device.
- Soft resetting refreshes the system and deletes temporary data. Allowing update installation notifications to come in.
Various Alexa speakers have different soft resetting processes. So, refer to your user manual. Once you’ve soft reset the device, mute the microphone for at least 15 minutes. Alexa speakers updates for about 15 minutes.
Alexa can’t understand your speech
Sometimes Alexa will not respond if it can’t understand what you’re saying. You have to be direct and clear when speaking with it. Alexa can have difficulty understanding your command if you speak too fast.
Talking too fast can sound gibberish to Alexa. Aside from that, speaking with a low tone can also prevent Alexa from picking up the right words.
Solution:
When sending voice commands to Alexa, make sure that you speak clearly.
Here are some reminders to note:
- Talk more slowly.
- Enunciate words clearly.
- Speak with a louder volume.
- Be specific and straightforward.
- Come closer to the Alexa device.
- Always remember to be direct and concise.
- This way, Alexa can understand and follow your commands better.
Alexa can’t understand your accent
Alexa can understand many languages. But very little accents. If Alexa still doesn’t respond, then maybe it can’t understand your accent. Accents can make certain words sound different. And that’s what makes it hard for Alexa to understand some of your commands.
Solution:
Amazon launched a “Voice Training” function to help Alexa learn a certain accent.
And you can do this by creating a voice profile.
To train Alexa to understand your accent:
- Open the Amazon Alexa app.
- Tap the three-line icon.
- Click “Settings.”
- Select Alexa device.
- Choose “Recognized Voices.”
- Turn the “Automatically Recognize Voices” toggle on.
- Click “Your Voice.”
- Tap “Begin.”
- Then, follow the on-screen voice prompts.
There’s too much background noise
Alexa can only understand a command that is spoken clearly. If there’s too much background noise, Alexa won’t understand your command.Many things can be considered as background noise, including:
- People talking in a TV series or movie.
- Family or friends talking with each other.
- Road noise from the outside of your home.
- Music playing from the radio or your phone.
- Machine sounds from vacuums or similar appliances.
- Basically, any noise that isn’t coming from you.
Solution:
Ensure that the surroundings are quiet. If possible, move your Alexa speaker to a quieter room. Doing this will help ensure that Alexa understands your every command. You can also mute the television or music player before sending a command to Alexa.
Device’s name is complex
When you pair a smart device with Alexa, you can name it however you want. Most users name the devices based on their use and location. But some go crazy and label their devices with complicated names.
Well, there’s no problem with it. Only that Alexa can fail to recognize too complex names. Complex names have special characters and numbers in replacement for some letters. Pronouncing these kinds of names is hard.
Solution:
When naming a device, make sure to use simple and short words.
Here are some tips that you can try:
- Use its brand name.
- State its basic function.
- Put the device’s location.
- If you’re not sure if the device’s name is “simple,” try saying it loudly.
- If it’s hard to pronounce, then consider renaming it.
Alexa doesn’t recognize that skill
Alexa skills are like apps and features within Alexa’s system. It has specific words and phrases that users have to say to ask or request something. Some connected devices require that you enable their skills to pair them with Alexa.
So, if you haven’t done it yet, Alexa won’t respond to your commands. Alexa will also not respond if you’re using a wrong command phrase. Perhaps, you’re saying, “Alexa, start Spotify.” When it’s supposed to be, “Alexa, play Spotify.”
Solution:
Check whether the device or app you’re using has an Alexa skill.
You can review its user manual or search it manually on the Amazon page.
If it has, then make sure to enable it.
To enable an Alexa skill:
- Open the Amazon Alexa app.
- Tap the three-line icon.
- Select “Skills & Games.”
- Search for the skill.
- Then, click “Enable.”
Note: Enable an Alexa skill via voice commands by saying, “Alexa, enable [skills name].”
Alexa not connecting to internet
If your device loses its Internet connection and won’t reconnect, first try restarting your Echo device. If that doesn’t work, or if your device has intermittent connectivity issues, try the following steps to resolve most Wi-Fi issues:
Make sure that your Echo device is within 30 feet (or 10 meters) of your wireless router.
Check that your Echo device is away from any devices that cause interference (such as microwaves, baby monitors, or other electronic devices).
Check that your router is working. Check the connection with another device to determine if the issue is with your Echo device, or with your network.
If other devices can’t connect, restart your Internet router and/or modem. While your network hardware restarts, unplug the power adapter from your Echo device for 3 seconds, then plug it back in. Make sure that you’re using the included power adapter for your Echo device.
If other devices are able to connect, check that you are using the correct Wi-Fi password. You can also try turning off some of your other devices temporarily to reduce interference and see if that affects your Echo device’s ability to connect.
If your Wi-Fi password recently changed, update the Wi-Fi settings for your device in the Alexa app.
If your router has separate network names (also called SSID) for the 2.4 GHz and 5 GHz bands, try moving your device from one network to the other. For example, if your router has both “MyHome-2.4” and “MyHome-5” wireless networks, disconnect from the network you’re using, and try to connect to the other one.
If your device is still having intermittent connection issues, restart your device.
Tip: If you are experiencing connection issues on multiple devices, it might be a network issue. You can wait a few hours and try again in case of a network outage, or contact your Internet Service Provider.
Alexa not working red ring
The red light on your Alexa devices can be scary; after all, a red light rarely means good things, does it? And the first time you see it, it can be a little scary and leaves you feeling flustered or worried about your device.
But you needn’t worry! The red ring is just letting you know that your device is having an issue so that you can fix it. There are a few reasons why this happens. A solid red ring means that your microphone is disabled.
You will also notice a red light on the microphone button at the top of your device if that is the issue. When the microphone is disabled, your Alexa device cannot hear you or complete your commands.
Another reason why your device might have a red ring is if there is an issue connecting to the internet. When this happens, your device cannot complete any tasks, as it relies on the internet.
Until this is fixed, you won’t be able to use your Alexa device either through voice commands or on your app.
Not sure how to fix these issues? Don’t worry; we have got plenty of information on that below; keep reading!
Microphone Disabled – How to fix
As we mentioned earlier, the red ring on an Alexa device can mean that your microphone is disabled. When disabled, your device won’t hear anything you are saying or respond to your commands, but you can still control it via the app.
It’s easy to disable your microphone accidentally! On top of your Alexa device, there are four buttons, two that control volume, one that you can press to communicate with your Alexa, and one to disable the microphone.
It’s an easy mistake to press the wrong one, and thankfully it’s even easier to fix the issue!
You can follow our steps below to restore the microphone and banish the red light!
Keep your Alexa plugged in and switched on.
Check the top of your device to see if the microphone button is flashing red too.
If there is a flashing red ring and the microphone button, the microphone is on mute.
To unmute, simply press the microphone button (the flashing red one).
Wait for a few seconds.
The red light and ring will vanish.
Test that it’s working by asking Alexa a command
Diagnosing a muted microphone and fixing it is a simple task. But if that isn’t the issue, there could be another reason why your Alexa has a red ring.
Lost Internet Connection – How to Fix
Another reason why your Alexa device could be flashing red is if your device is struggling to connect to the internet. Now there’s an easy way to tell which issue you have, and that is to look at your device.
If along with your top ring flashing red, the microphone button at the top of your device is flashing red, then your device is muted. You can unmute the device easily (use our above steps if you aren’t sure) and resolve the issue.
However, if that isn’t the case, then you have a problem with your internet connection. When we have issues with our internet, your device cannot respond to any of your requests.
Usually, in these cases, if you ask Alexa a command such as, ‘Alexa, play the Killers,’ she will respond with, ‘sorry, I am having trouble connecting to the internet.’
It’s always worth giving a command when the red light is flashing to see the response. If your Alexa device says it’s having issues connecting to the internet, you can fix the issue! If you don’t want to ask about the device, there are other ways you can check if you are having internet issues.
First, you can check another device for its internet connection. Your phone or tablet is a good place to check. If you have issues across devices, it might be an issue with your network connection or issues with a WLAN repeater.
Check that your internet connection is working and address any issues there first.
If there are still issues, follow our steps below to get Alexa back online!
Restart your Alexa
It sounds like such a simple solution, but it’s a successful one most of the time! Simply unplug your Alexa device (pull the wire out of the back), wait a few seconds (no more than 30), and plug the wire back in.
Test the device. It will take a few minutes for your Alexa to come back to life and reconnect to the internet. If you are still having issues with your internet connection, keep reading the steps below.
Restart your router
Just like restarting your Alexa, restarting your internet router or modem can often solve the issue too! Simply unplug the device, wait a few seconds, and plug it in again. It will take a few minutes for your router to restart and restore your internet connection with all your devices.
Test to see if your internet is working on another device and your Alexa. If your Alexa device is still having issues, then check out the following steps.
Reconnect to the Wi-Fi
If the above steps have not worked, you will need to reconnect your Alexa device to the Wi-Fi network. To start this process, press and hold the Action button on your echo speaker.
This is the button with a dot on it for those unsure. Hold the button down for six seconds. At this point, you should see a flashing orange ring. Once flashing, you can open the Alexa app on your mobile device.
Click on the echo device you are having issues with and select Wi-fi network. You can follow the steps on the app to re-establish the Wi-Fi connection with your device. If you run into difficulties when doing this, the help page on the app will offer you step-by-step guidance.
Generally, this is quite a simple process to follow.
To finish, test your Alexa device. If it can complete commands and the red ring has stopped flashing, then your device is connected to the internet again.
Why is my Amazon Alexa not playing music?
Follow the fixes mentioned here to resolve the issue.
Restart Echo
You should start by resetting the power cycle for your Echo. For that, remove the power cable from the Echo. Then, wait for at least 20-30 seconds before plugging it back. Once plugged in, try playing the music from Amazon Music using Alexa.
Check streaming devices
Say you are playing songs via the Amazon app or other Echo devices through the same Amazon account. So you won’t be able to stream music on other gadgets using the same Amazon account because of the streaming limit. That’s because, Prime Music allows streaming only on a single device at a time.
Check Linked Accounts
Prime Music only works for Amazon prime members. So if your Echo device has multiple profiles linked to multiple Amazon accounts, you need to be signed in to the one that has a Prime membership. To switch users, issue the ‘Alexa switch user’ or ‘Alexa switch profile’ command.
Check Subscription
You need to have an active subscription to either Amazon Prime or Amazon Music Unlimited to play songs with Alexa. If you don’t have an active subscription, Alexa will not play the requested songs. To view your current subscription details, follow these steps:
- Step 1: Open the Amazon website for your country and log in with your account details.
- Step 2: Click on your name at the top and select Memberships & subscriptions. In some countries, you will have different options such as Your Prime Membership.
- Step 3: You will find all your active subscriptions listed there.
Check availability of song
Once you have made sure that you have an active subscription for at least one music service from Prime, it’s time to check for the availability of songs. The Prime Music service offers fewer songs as compared to the Music Unlimited.
So, ask Alexa to play some other song. If it is played normally, then the song that you were looking for might not be available on Prime. You can also open the Prime Music app and search manually for the song.
Set Prime as default music provider
If you have set multiple music providers in the Alexa app, you would need to add the service name to the music command if it isn’t the default one. If Prime is the default music provider, you can simply say ‘Alexa, play Hey There Delilah’, and it will start playing it on Prime Music.
However, if it isn’t the default and you use the same command, it will play it through the default music provider (if the song is available).
Sometimes, the song isn’t available on other providers and we think Amazon Music doesn’t work. So to be on the safer side, you can either make Prime your default service provider or issue a full command such as ‘Alexa, play Hey There Delilah from Amazon Music.’
To change the default music provider, follow these steps:
- Step 1: Open the Alexa app and tap on the three-bar icon at the top. Select Settings from it.
- Step 2: Tap on Music.
- Step 3: Tap on Default Services and select Amazon Music.
Turn off explicit filter
Amazon Music comes with a feature where it blocks songs that contain explicit lyrics. So if you are trying to play such a song, it will not play if the explicit filter setting is enabled. To turn off the setting, follow these steps:
- Step 1: Open the Alexa app on your phone and tap on the three-bar icon.
- Step 2: Tap on Settings and go to Music.
- Step 3: Tap on Explicit Filter. Then disable it on the next screen.
Update Country in Your Profile
Sometimes, there is a mismatch between the location of your Amazon account and Alexa services. You need to update the country to your current location. For that, follow these steps:
- Step 1: Open the Manage Your Content and Devices page. Sign in with your Amazon credentials.
- Step 2: Click on Settings. If Settings isn’t available, you will see a link saying ‘Go to the Manage Your Content and Devices page.’
- Step 3: Click on Country Settings if available. Otherwise, click on Preferences at the top and click on Country/Region Settings.
- Step 4: Click on Change button to change the country to your current location. Add your current location.
- Step 5: You will see the text ‘Click here to learn more about other Amazon sites’. Open the link.
- Step 6: Click on Learn about or Learn. Then confirm your new location under ‘Update your default Kindle Store to Amazon’.
After that, try playing a song from Amazon Music with Alexa.
Check Echo Settings
You need to check a few settings in the Alexa app for music to work. These include Device Location, Time Zone, and Language. Try keeping them to your current location.
To change these settings, follow the steps:
- Step 1: Open the Alexa app and tap on Devices at the bottom.
- Step 2: Tap on Echo & Alexa followed by your Echo device.
- Step 3: Check Device Location, Time Zone, and Language. Match them with your local information. Once you have updated everything, play a song on Alexa.
Transfer music to different country
You should also try moving your Amazon Music country to your current location. For that, follow these steps:
- Step 1: Open music.amazon.com on your PC.
- Step 2: Click on your name present at the bottom of the left panel. Select ‘Your Amazon Music Settings’ from the menu.
- Step 3: You will be taken to the settings page. Scroll down and click on ‘Move your Music account’ if it is showing a different country than your current location.
Deregister Echo
If nothing works, remove or deregister the problematic Echo device from your Alexa app.
To deregister a connected Echo, follow the steps mentioned below.
- Step 1: Open the Alexa app. Tap on Devices.
- Step 2: Tap on Echo & Alexa followed by the name of your Echo device.
- Step 3: Scroll down and tap on Deregister.
Once you have deregistered it, then add it again in the Alexa app as you did before. In case you face any issue, try these fixes.
TV control setup with Amazon Alexa not working
Alexa commands don’t work with your TV or video service provider or setup fails.
Check that you have the latest version of the Alexa app.
Make sure that you’ve completed setup for your service provider’s Alexa Video Skill. Some providers require additional authentication steps before you can connect with Alexa.
Make sure that you’re using compatible equipment from your TV or video service providers.
Check that your equipment is on the latest software or firmware version.
Tip: The Dish TV Alexa Skill requires an Internet-connected Hopper satellite box on the latest software version.
Check that the device you use to access your TV or video service is on the same Wi-Fi network as your Alexa-enabled device.
Unlink your TV or video service provider and relink it in the Alexa app.
Amazon Alexa not talking back
Below are possible causes and ways to fix them;
Unclear speech
Alexa is smart enough to understand different languages and accents. And since it knows a lot of words and phrases, Alexa can sometimes mistake your word for something else.
For once, many English words sound similar. If you say “buy,” Alexa can mistake it as “bye.” As a result, Alexa may act differently from what you intended. Alexa can also have a hard time understanding sentences that were spoken in a low voice.
Plus, talking fast may sound like gibberish phrases to Alexa. If Alexa isn’t responding to you, the device might be having a hard time understanding your speech.
Solution:
Alexa is still a robot despite being smart. This means you have to be patient and direct when speaking to it.When giving out commands, make sure that you speak clearly.
Here are some things that you can do:
- Speak louder.
- Talk at moderate speed.
- Enunciate your words.
- Communicate closer to the device.
The microphone is off
Alexa always hears and follows commands. But not when its microphone is muted. Amazon Echo devices have speaker buttons. Alexa users mute this if they want to stop Alexa from picking up conversations.
Usually, when people are out of the house. Or if there are too many guests inside. If your Alexa speaker doesn’t talk back, it must be because the device’s microphone is off. You may have muted the device on one occasion and forgotten to turn it on after.
You’ll know if the device microphone is on if there’s a blue light on the speaker. And the microphone is off if that light turns to red.
Solution:
If your Alexa speaker has a red light on, the microphone is off.
And the device will not follow your commands.
To make Alexa speak again, press the microphone button.
Note: The microphone button on Amazon Echo devices vary. It can either be the button with the microphone icon or a circle with a slash in the middle.
You changed wake word
Alexa responds once it hears you say, “Alexa…” If it doesn’t, the speaker must have a different wake word. The wake word is the trigger word of the device. And the default wake word of Alexa is “Alexa.”
If you or anyone in your house changed the speaker’s wake word, saying “Alexa…” won’t wake up Alexa. It won’t respond to your queries or confirm actions.
Also, if you perform a factory reset, the wake word resets to the default Alexa. Factory reset deletes data and customization. And that includes your custom wake word.
Solution:
Check your Amazon Alexa app if you’re not sure what wake word is registered to your device.
To check Alexa wake word:
- Open the Amazon Alexa app.
- Select “Devices.”
- Choose “Echo & Alexa.”
- Tap your device.
- Then, click “Wake Word.”
- Changing the wake word back to default is convenient.
- But if you want to secure your home better, create a custom wake word for your Alexa.
“Do not disturb” mode is enabled
When the “Do Not Disturb” mode is enabled, Alexa’s actions will be limited. For example, you can’t make announcements or receive all types of notifications. And these limitations can make Alexa appear unresponsive.
Solution:
You can enable and disable “Do Not Disturb” mode through the Amazon Alexa app:
To enable or disable Alexa “Do Not Disturb” mode:
- Open the Amazon Alexa app.
- Select “Devices.”
- Choose “Echo & Alexa.”
- Tap your device.
- Click “Do Not Disturb.”
- Then, toggle the button on or off.
- If you want to keep this mode on for certain hours, you can create a schedule.
“Brief” mode is enabled
Whenever you command Alexa, it instantly answers with a command confirmation. It’s a good indicator that Alexa has heard and understood your instructions. But then, this command confirmation can sometimes be annoying.
And it eats up so much time. Developers release the “Brief” mode to make Alexa follow queries in an instant. When this mode is enabled, you would hear a beep sound as a replacement for Alexa’s command confirmation.
It feels good not to hear Alexa repeat your words. But, it can confuse you and make Alexa appear unresponsive.
Solution:
If the “Brief” mode confuses many people in your home, it’s best to disable it. You can do this by navigating the Amazon Alexa app.
To disable Alexa “Brief” mode:
- Open the Amazon Alexa app.
- Tap the three-line icon.
- Choose “Settings.”
- Select “Voice Responses.”
- Then toggle the “Brief Mode” button off.
“Follow-up” mode is enabled
Saying “Alexa…” a lot of times can be tiring. To address that, the developers launched a “Follow-Up” mode. “Follow-Up” mode allows users to continue asking queries or sending commands to Alexa without repeating the wake word.
It saves a lot of time. And it allows Alexa to follow instructions better. When this mode is on, Alexa will stay silent as it listens to possible follow-up commands. But sometimes, users interpret this silence as Alexa not talking back.
This prompts used to keep repeating commands and confusing Alexa.
Solution:
If you think that the “Follow-Up” mode isn’t necessary for you, you can disable it through the Amazon Alexa app.
To disable Alexa “Follow-Up” mode:
- Open the Amazon Alexa app.
- Select “Devices.”
- Choose “Echo & Alexa.”
- Tap your device.
- Click “Follow-Up Mode.”
- Then, toggle the button off.
Note: In case you decide to keep the “Follow-Up” mode. Stop Alexa from waiting for follow-up queries by saying “stop,” “cancel,” “go to sleep,” or “thank you.”
“Whisper” mode is enabled
Alexa has another interesting mode, which is the “Whisper” mode. “Whisper” mode allows you to speak to Alexa while whispering. And what’s amazing about that is that Alexa also responds in a whisper. Developers launched this mode to let users continue using Alexa during quiet hours.
“Whisper” mode is really helpful and convenient in the early morning or at night. You can enable it by navigating the Amazon Alexa settings. However, “Whisper” mode can become a problem once you forget to turn it off.
As long as the “Whisper” mode button is toggled on, Alexa will continue to whisper. You won’t be able to hear it from a distance. And that can make Alexa appear not responsive.
Solution:
Disable Alexa “Whisper” mode:
- Open the Amazon Alexa app.
- Tap the three-line icon.
- Choose “Settings.”
- Select “Voice Responses.”
- Then toggle the “Whisper Mode” button off.
Note: Create an Alexa reminder that tells you to turn on or off the “Whisper” mode at a certain time. This will help you not forget disabling the “Whisper” mode when needed.
Low volume
Similar to “Whisper” mode, you may not be able to hear Alexa if its volume is low. Alexa has a volume range of 0 to 10. Zero being muted a being the loudest. If Alexa’s volume is low, you might not be able to hear it respond from a distance.
And you might assume that Alexa is not talking back to you. You can check its current volume by saying, “Alexa, what’s your current volume?”
Solution:
You only have to increase Alexa’s volume. And you can do it in three ways.
- By pressing the Alexa speaker buttons
Alexa speakers have physical volume buttons. To increase the volume, press the plus sign (
+) icon. To decrease the volume, press the minus sign (-) icon.
2. By commanding Alexa to volume down
You can volume up or down Alexa by saying “Alexa, volume up” or “Alexa, volume down.” You can also say a specific volume number by saying, “Alexa, volume 7.”
3. By changing the audio volume in the app
In the Amazon Alexa app, you can control the volume better since it offers a volume range of 0 to 100.
To increase audio volume through the app, go to settings. Select “Devices” → “Echo & Alexa” → Alexa device. Then, adjust the audio slider as desired.
Power connectivity issues
Alexa speakers are not rechargeable. Meaning it has to be plugged in all the time. Alexa won’t respond if the device is not plugged into a power socket.
Are you sure that the power socket has a charge?
Or is the power cable in good condition?
Unstable or weak power connectivity can cause Alexa not to respond. If the socket has little or no charge or the cable is damaged, Alexa will not talk back.
Solution:
- Ensure that the speaker cable is not damaged.
- Look for any signs of bite or burnt marks.
- If the power socket is the problem, plug your Alexa speaker into a different power source.
- Or at least use a wire extension.
Internet connectivity issues
Alexa Internet Connectivity Issues
Alexa depends on WiFi to work.
So, if your WiFi connection is unstable, it can cause Alexa not to respond.
Alexa voice assistant consumes more data than other devices.
And it will stop working once the internet connection slows down.
Many things cause WiFi connection to cut off or weaken, including:
- Out-of-range router.
- Low internet bandwidth.
- Connection interference.
- Crowded internet connection.
Solution:
If this is your case, the solution ensures that your Alexa speaker gets a strong and stable WiFi connection.
Based on a study, putting your router in an open space allows WiFI to travel faster.
So, make sure that your Alexa speaker is close to your WiFi router.
Other things that you can do is to:
- Soft reset WiFi router.
- Install extra WiFi routers.
- Disconnect not in-use devices.
- Soft reset Alexa speaker device.
Alexa is connected to an external device
Some Alexa speakers allow external devices to be connected with them. With this, users can use Alexa for specific electronics. If Alexa is connected to a Bluetooth-enabled device, you can still send commands to Alexa. But you won’t be able to hear it. Because Alexa’s audio is played to the connected device.
This often happens to connected wireless headphones. If the device was improperly unplugged, Alexa could think the device is still connected to it. And so, Alexa continues to connect and play audio to the previously plugged device.
Solution:
There are two ways you can disconnect the device from your Alexa speaker.
- First, by saying, “Alexa, disconnect Bluetooth.”
- Second, by navigating the Amazon Alexa app. Here’s how to do it:
- Open the Amazon Alexa app.
- Select “Devices.”
- Choose “Echo & Alexa.”
- Tap Alexa speaker device.
- Click “Bluetooth devices.”
- Then, disconnect any paired devices.
If you’ve already unplugged the device, try plugging and unplugging it again properly.
How to Change Alexa’s Wake Word
If you don’t already know, you can use multiple wake words—but one at a time—with Alexa. It’s possible someone has changed the wake word for your Alexa, and so Alexa is not responding to your commands.
These Alexa-supported wake words include: Amazon, Echo, Computer, and Alexa.
To check what wake word your Alexa device uses, or to change the word to your liking, follow these steps:
Change Alexa’s Wake Word in the Amazon Alexa App
If you’ve installed the Amazon Alexa app on your smartphone for iOS or Android, the following steps should help you change the Alexa wake word:
- Launch the Amazon Alexa app on your smartphone.
- Tap Devices at the bottom bar of the app.
- Select All Devices at the top of the following screen.
- Choose your Alexa device from the list on your screen.
- On the device screen, scroll down the General section. Here, tap the Wake Word option.
- Select your preferred wake word from the list, and then close the app.
Change Alexa’s Wake Word on the Amazon Alexa Website
If you’d prefer changing the Alexa wake word from the Amazon website, here are the steps to do so:
- Launch the Amazon Alexa site in a web browser on your computer. Log in to your Amazon account if you haven’t already done so.
- From the sidebar on the left, click the Settings option.
- On the right pane, from under the Devices section, choose your Alexa device.
- Scroll down your device’s page to the General section. Here, click the Wake Word option.
- Select a new wake word from the Alexa Device wake word dropdown menu. Then, click Save.
- Change Alexa’s wake word
- Use the newly chosen wake word to get Alexa’s attention on your device.