Do you own a Roomba that is mired with issues? The most common Roomba issue is related to charging, which can be frustrating when all you want is a clean house. Keep reading to learn how to sort all your Roomba charging problems.
How do I know if my Roomba is charging?
The Roomba is powered by a rechargeable battery which can last for hundreds of cleaning cycles as long as it is well-taken care of. The key to this is recharging the battery after every cleaning cycle.
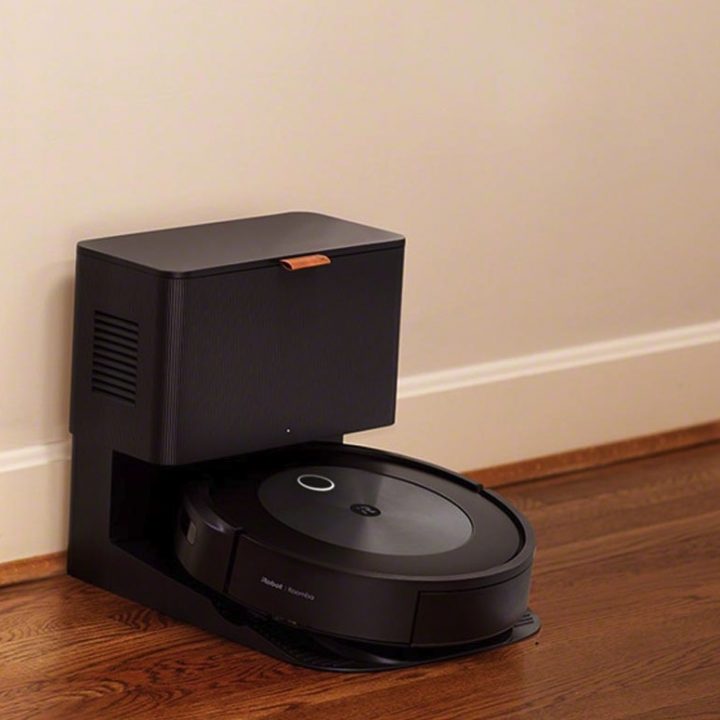
When plugged into a wall outlet, you can tell that the Roomba is charging if the charger has a solid green power indicator. In the case of the Home Base, the Roomba charging dock light goes off after 4 seconds.
The Roomba’s charging indicator will light up immediately after it is docked on the Home Base. However, it will go out precisely after a minute to conserve energy.
There are several ways to determine if the battery is being charged.
Press the CLEAN button on the unit once
- If the color of the power indicator is green, then the robot vacuum is fully charged.
- If it is pulsing amber, then the unit is still charging.
- If the power indicator is colored red, then it means that the unit’s battery is drained and needs to be charged.
Use the iRobot app
This app is available in newer Roomba models, such as the 900 series. Look for the battery icon displayed in the upper right corner. This indicates the current status of the battery.
The CLEAN screen will show ‘charging’ to indicate the battery is being charged. When the battery has been fully charged, the CLEAN display will show ‘Ready to clean. Fully charged.’ This means the unit is ready to perform a cleaning cycle.
Why is my Roomba not charging?
Here are some reasons why your Roomba is not charging;
Clogged contact points in its charging port
- Clogged ports on the docking station
- Damaged battery
- Malfunctioning power outlet
- Displaced battery
What to do when your Roomba is not charging?
Roomba vacuums need to be charged properly for optimal performance. But sometimes it doesn’t charge or doesn’t fully charge, which will prevent it from working as it should. Follow these tips to fix your Roomba charging problems;
Clean the contact points
Clean your vacuum’s contact points with a microfiber cloth and some alcohol. Once you finish cleaning, try plugging it back in to see if it’s charging.
Check the outlet
Test the outlet by plugging in another electronic device in that same outlet. Alternatively, you can plug the Roomba into a different outlet to see if it charges.
Clean the docking station
Dirt can also accumulate on the connection ports of the docking station. Clean the port by rubbing the docking station with alcohol. The vacuum should be able to charge again after its dock is cleaned.
Fix the battery position
Unscrew the base of the Roomba battery compartment, put the battery back in place, then put the screws back in. Now you can plug the Roomba in and check if it charges properly.
Check the charging dock
If you’ve followed all the steps above and your Roomba still doesn’t charge, then it’s probably about time for a dock replacement.
Replace batteries
Faulty batteries cause Roomba charging problems, so if you’ve used your Roomba for a while, you might need to replace the battery.
How long does the Roomba take to charge?
In normal circumstances, Roomba can take at least two hours to charge. You should charge your Roomba battery fully before it can begin cleaning. The green battery light will indicate that it is fully charged, and it will finish at least one full cleaning round, which is about 60 minutes.
Why won’t my Roomba charge unless tilted?
If your Roomba is not charging, clean the charging ports with a soft cloth and rub alcohol on the ports to remove dust, hair, or gunk accumulation. You may also have to reinstall or replace your battery or charging dock or reset the Roomba to factory settings.
Why is the Roomba charging dock light off?
When the Roomba is properly charging, you won’t see any lights on the device itself. These are purposely shut off to conserve energy. It is normal for Roomba units that charge through Home Base to have its light indicator off.
The same goes for the Home Base itself. Both the Roomba and the Home Base need to conserve energy during charging. The light flashes dimly or goes off to indicate that it’s docked and charging correctly.
You can check your Roomba’s charging status via the I-robot app. It will indicate if your Roomba is charging correctly.
How do I know if my Roomba battery is bad?
Below are some telltale signs that your Roomba battery should be replaced;
Reduced run time
Very short run times are a key sign that you need to consider replacing the faulty battery. A good battery should run for about 2 hours. However, this depends on other factors such as your home’s layout, size, floor types, and how many pets you have.
The battery is not holding its charge
Before you replace the battery after it fails to charge, you can run a drain-charge cycle to help revive the battery. Which is basically removing the battery and letting it sit outside the vacuum for 10-minutes.
Then you charge the battery for up to 3 days non-stop and see if the Roomba battery will retain a charge for a relatively long time. If the battery still doesn’t hold a charge after the drain-charge cycle, you must purchase a new Roomba battery.
When the power light doesn’t come on
If the power light doesn’t come on, despite it not having issues, the battery could be faulty, and the only solution to that is a battery replacement. So this light is the only way you’ll be able to know the status of the Roomba battery.
Reduced performance even after proper maintenance
If there isn’t any improvement in the Roomba’s performance after emptying and cleaning the vacuum, you must consider replacing the battery.
The Roomba is too old
An old Roomba battery is often associated with reduced run times and charging issues. You can maintain your unit in the best state possible, but you will have to replace the battery due to old age.
No improved performance even after resetting the unit
After carrying out this simple procedure, Roomba’s performance should improve in normal circumstances. However, if there is no improvement in the device’s performance, the battery is faulty. In such a case, battery replacement will ensure the proper functioning of your unit.
How do I reset my Roomba battery?
Different Roomba’s have different reset protocols. Below are the reset steps for resetting different Roomba models.
How to reset the Roomba 500 and 600 models
- Turn off the vacuum.
- Once it is off, remove the Roomba from its charging dock.
- If you need to replace the battery, turn it off, put the new battery in, and hit the CLEAN button.
- When the green light is on, release that button.
- Hold the SPOT and DOCK buttons at the same.
- Keep holding them for about ten seconds.
- Release the buttons.
- You will hear some signaling sound, which implies that the vacuum is rebooting.
- Put the robot back to its charger to restore its connection, then wait until the green light shows up.
- Press the CLOCK button if you’re unsure whether your robot has rebooted.
- If all clock settings are cleared, your Roomba has been successfully reset.
- Now you only need to set the date, time, and all other details as you wish so that the robot can continue its tasks as usual.
How to reset Roomba models 700, 800, 900, and Roomba 960
- Hit the CLEAN button by pressing it for about ten seconds until the text “rSt” shows up right on the display screen.
- Once you see the text “rSt,” release the CLEAN button.
- Leave it off, and you’ll hear signaling sounds indicating that your Roomba unit has been reset successfully.
- When you reset, all data was erased.
- Then proceed to reprogram your time date and get your robot to do its tasks again.
Note: If you’re using a Roomba 960, you’ve come across several Roomba 960 reviews, buying guides, or troubleshooting guides before. Steps to reset a Roomba 960 are similar to Roomba 700, 800, or 900 lines. So follow these steps to get it rebooted.
How to reset Reset Roomba i3 and i7
- Hit these three buttons simultaneously: CLEAN, SPOT CLEAN, and HOME
- Hold those three buttons until the white light ring on the CLEAN button becomes bright. Now, release all three buttons.
- Leave your robot about 20 to 30 seconds to reboot.
How long does a Roomba battery last before replacement?
A Roomba battery comprises 12 very small NiMH batteries that have been grouped to form a larger battery. On the other hand, the battery can be charged up to 400 times, which translates to between 2 and 4 years of service.
However, it is worth noting that the time the robot will keep running depends on several factors: how well the robot is well-maintained. Additionally, how you use and keep the vacuum after use will also determine how long the battery will last before requiring replacement.
Here are some tips to help save you the expense of a new battery and keep your Roomba vacuum operating for longer;
Clean those brushes
Each time your Roomba cleans up, debris like dust, hair, and fur gets caught in its brushes. However, when that debris builds up, your robot works harder to spin the brushes, draining its precious battery life.
Keep it charged and use it often
For the Roomba’s nickel-based batteries, it’s best to keep the unit charging whenever you’re not using it. However, don’t leave it in its dock for days at a time — lots of vacuuming will keep its battery healthy.
Exhaust the battery
It’s important to drain Roomba’s battery regularly to maintain the battery’s capacity. To do this, run the vacuum until the battery dies, then charge it to full. For best results, repeat this process a few times.
Keep it cool
Store your robot in a cool, dry place to increase the battery’s longevity. In addition, the unit should stay out of direct sunlight, where heat could damage the battery. Likewise, give the unit plenty of breathing room, away from other heat-producing appliances and electronics.
Put it in vacation mode
If you’re going away on vacation, put your Roomba in what could be called “vacation mode.” Doing so will ensure the battery remains healthy when it’s not being used for weeks. Charge the battery completely before putting the battery on vacation mode.
Then, remove it by flipping the Roomba and removing the two screws that secure the battery door. Check out the video above for a more visual guide. Store it in a cool, dry place once the battery is out, separate from the unit.
When you return from vacation, recharge the unit fully, then run it until it dies. Then, you’re free to go back to your routine.
Check this too: Bisell Carpet Cleaner Troubleshooting
How to charge Roomba without a home base
Plug the charger provided witht the vacuum from the manufacturer into the Roomba to charge it. It will stop on its own when it’s done. Your Roomba should have a charging jack on the side, which allows you to connect it to the iRobot charger.