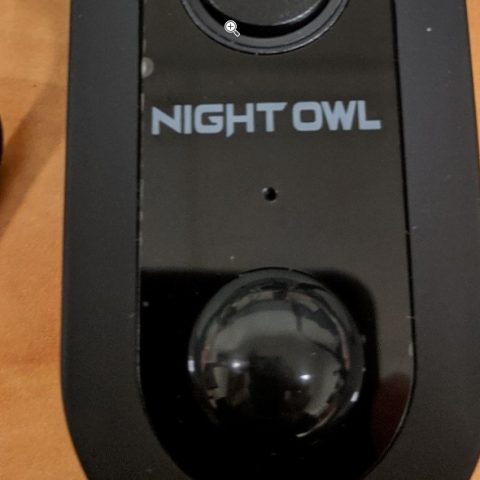
Home security systems have improved over the years with technological advancements. Night Owl has the most affordable wireless home security systems in the market. Night Owl Doorbell Camera adds extra protection to your front door or garage door as the camera allows you to monitor movement around your entryways. Despite all the great features the Doorbell comes with, some users may have difficulties installing, setting up, or using the device. This article will guide you on how installation and how to troubleshoot some of the most commonly reported problems.
How to install and set up a Night Owl Doorbell Camera
First, you must have a functional doorbell to use this product and a 50% Wi-Fi signal strength at the Doorbell’s location. Although the models may vary in appearance, the setup is the same.
Things You’ll Need
- Drill and drill bits
- Internet router
- USB power adapter or USB charging port
- Smartphone or tablet
- Night Owl gateway(optional if you do not have a router)
Directions
Prepare the doorbell camera for setup.
- Remove the contents from its shipping package. Inspect the contents for any damages.
- Test the functionality of the camera before permanently mounting it.
- Pull out the faceplate from the Nigh Owl camera.
- Use a flathead screwdriver to remove the plastic cover from the USB port on the Doorbell.
- Insert the smaller end of the USB cable provided to the USB port on the camera.
- Connect the other end of the USB cable on a USB adapter and then connect the adapter to a wall outlet.
- Let the doorbell camera power up for a minute or two. While on pairing mode, you will receive an audio prompt “Doorbell is pairing” and white LEDs on the doorbell camera rotating clockwise.
- Keep the Doorbell connected until it is time to mount it.
Connect the doorbell camera to the Night Owl Connect App.
- Download the Night Owl Connect app on your iOS or Android phone.
- Create a new Night Owl account or log in if you already had one using your email address and then set up and verify the account.
- While in the app, click on the + symbol to add a device. Then follow the on-screen instructions on the app to pair the doorbell camera to your app.
Check this too: Remo Doorbell How-to & Troubleshooting Guide
Doorbell camera installation
- Switch off the power at the circuit breaker to prevent the risk of electrocution.
- Remove the old Doorbell. Unscrew the wall plate and cut off the electrical wires.
- Disconnect the Doorbell from power and replace the plastic USB port cover.
- Place the new Night Owl doorbell or the mounting plate on the wall and mark the position for the mounting holes.
- Drill the mounting holes for the screws.
- Set the mounting plate on the wall and screw it in place.
- Connect the Night Owl Doorbell to the doorbell wiring. Loosen the screw terminals at the back of the Doorbell, wrap the wires around the screws and then tighten the screws with a screwdriver.
- Push the wires into the wall socket and mount the Doorbell onto the mounting plate and secure it in place with screws.
- Place the faceplate over the Doorbell and secure it with the Torx key and security screw provided.
- Turn the power back on at the circuit breaker.
- Test the Doorbell. If it rings, as usual, it is okay, but if it does not ring or ring continuously, you need to add the Digital Chime Power Amp.
- When you press the Doorbell, the status light turns blue and spins clockwise. The Doorbell then sends a notification to your smartphone.
Install the Digital Chime Power Amp.
- The work of the Chime Power Amp is to regulate equal power supply between the Doorbell’s chime and the smart Doorbell.
- Turn off the power at the breaker.
- Remove the cover from the internal Doorbell.
- Loosen the front and trans terminal carefully without disconnecting the wires.
- Wrap one wire from the Power Amp to the front terminal and the other to the trans terminal. Tighten the terminal screws securely. The order of wire connections is not essential.
- Place the Power Amp in the internal Doorbell away from any moving parts and then replace the cover.
- Turn the power back on at the breaker.
- Go to the settings on the Night Owl Connect App. Change the ‘Bell Type’ settings to digital chime.
- Test the Doorbell, which should be ready for use.
How do I reset my Night Owl doorbell?
Resetting your Night Own doorbell will erase all the saved settings.
- Locate the ‘Sync/Reset’ button on the side of the Doorbell next to the USB port.
- Press and hold this ‘Reset’ button for about three seconds until you hear an audio prompt, “Please be patient as Doorbell resets its factory settings.”
- When the Doorbell resets successfully, it disconnects from the app. You will see the device on the app, but it will be on offline mode.
- To reconnect it again, delete the Doorbell from the app and then add it again to the app and wait for it to pair completely.
Some of the reasons for restoring the Doorbell to factory settings include:
- After resetting the router.
- After changing the Wi-Fi network password
- The Doorbell refuses to pair with the Wi-Fi network.
- When switching the Doorbell from the Wi-Fi connection to the Night Owl Gateway and vice versa
- If the Doorbell is not working correctly or having glitches
How to connect Night Owl Doorbell to Wi-Fi?
The Night Owl Doorbell does not need an internet connection to function. However, you will need internet connectivity when pairing the device to the app, viewing live footage, and upgrading the firmware. You can connect it to your Wi-Fi router or the Night Owl Gateway. Follow the steps below to connect your doorbell camera to Wi-Fi.
- Ensure the strength of your home’s Wi-Fi router signals reaching the Doorbell is between 2.4Ghz to 5Ghz.
- On the Night Owl Connect App, add the device your want to pair, and the LED light will start flashing. If the Doorbell LED does not flash, reset your Doorbell.
- On your mobile phone, go to Settings and click on the Wi-Fi tab.
- Click on the ‘NOIP’ network that appears to pair the device to the Night Owl network.
- Go to the app and choose your Wi-Fi network of choice and enter the Wi-Fi password.
- Label your doorbell camera, click on ‘Complete Setup,’ and then tap play to view live footage from the doorbell camera.
- The LED light on the Doorbell turns solid white when successfully connected to Wi-Fi.
How to replace the Night Owl doorbell battery
The Night Owl doorbell can either hardwired or powered by a rechargeable battery. Either way, you will have to replace the battery when it becomes damaged.
- Remove the security screw at the base of the Doorbell and pull the faceplate away from the wall.
- Locate a black rectangular tab towards the top of the Doorbell.
- Press this rectangular tab to open the battery compartment.
- Hold the battery and then press the rectangular tab with another hand to release the battery.
- Insert the new battery into the Doorbell until it clicks securely into place.
- Put the cover back on and then screw the faceplate onto the Doorbell.
How long does the Night Owl doorbell battery last?
Suppose your Night Owl doorbell is not hardwired to your home’s electrical system. In that case, the battery should last between six to twelve months between charges, depending on how much activity your Doorbell receives. Charging the 6,000mAh doorbell battery takes about five to six hours using the USB port on the side. A hardwired doorbell does not require charging since it is constantly receiving power.
Night Owl doorbell power requirements
The Doorbell needs 12-24 Volts to power, but Night Owl recommends 16-24 Volts to work efficiently and 20-30 amp output. Do not connect the Night Owl doorbell directly to the AC mains during installation, as it may cause electric shock and damage to the device permanently. The AC mains have an average power of 100-240 Volts which is too much for this device. If you notice smoke, burning odors, or noise from the Doorbell, you should cut off power at the circuit breaker.
How to install a Night Owl doorbell without an existing doorbell
You can still enjoy the benefits of a smart Night Own doorbell even without an existing doorbell by wiring it to a 16-24 Volt transformer using a wire cable. Follow the instructions below on how to hardwire a Night Owl doorbell without an existing doorbell:
- Switch off power at the breaker.
- Choose a doorbell mounting location that is at least four feet from the floor.
- Use the faceplate of the Doorbell as a template and mark the drilling points on the wall.
- Make a wider hole in the middle of the Doorbell’s mounting position. This hole is for running the transformer wires from the house to the Doorbell on the outside.
- Route the AC transformer wires through the drilled hole on the wall to the doorbell location.
- Connect the adapter wires to the terminals on the Doorbell.
- Mount the Doorbell and secure it in place with the screws.
- Put the faceplate over the Doorbell and screw it in place.
- Plug the other end of the AC transformer into a power outlet.
- Switch power back on at the breaker. The LED ring on the Doorbell will turn white and spin clockwise when connecting.
- Press the Doorbell, and it will chill via its built-in speaker, and a push notification will appear on your smartphone through the Night Owl Connect app.
Does the Night Owl doorbell work with Alexa?
Alexa voice command works with a variety of doorbell cameras. Unfortunately, the Night Owl Doorbell is not currently compatible with Alexa. Without Alexa, you can still view your live feed through the Night Owl Connect App on your smart mobile devices. As an alternative voice command, you can connect the Night Owl doorbell to Google Assistant. You can view live feeds, start recordings, and control all the devices connected to Night Owl.
How to turn off a Night Owl doorbell?
The Night Owl doorbell rings using the existing doorbell chime, but you can also disable this feature using the steps below.
- Open the Night Owl app.
- Click on Devices and select the Doorbell you want to turn off.
- Tap ‘Device Settings and select ‘Doorbell Kit Settings.’
- Click the toggle to disable the doorbell chime, and it will turn gray. Tape the same toggle to enable the doorbell chime.
- Tap ‘Done to save your changes.
Night Owl doorbell error light codes.
When the Doorbell connects to the internet, it continuously checks the following statuses:
- The status LED light’s top half flashes in white means there is no Wi-Fi connection.
- The status LED light’s top half flashes in blue, and the bottom half flashes in white means the Doorbell’s Wi-Fi signal strength is weak.
- The status LED light’s bottom half flashes in blue means the Wi-Fi password is incorrect.
- The status LED light’s top half flashes in blue means there is no internet found.
- The status LED light alternating blue and white means there is a firmware upgrade error.
Check this too: NuTone doorbell troubleshooting & How-to guide
Conclusion
This article will help you fix some of the common issues that arise when using the Night Owl doorbell. Most common problems are due to poor internet connection or power surges which are easy to fix. Tweaking the settings on the Night Owl Connect app will also help in troubleshooting some issues.