
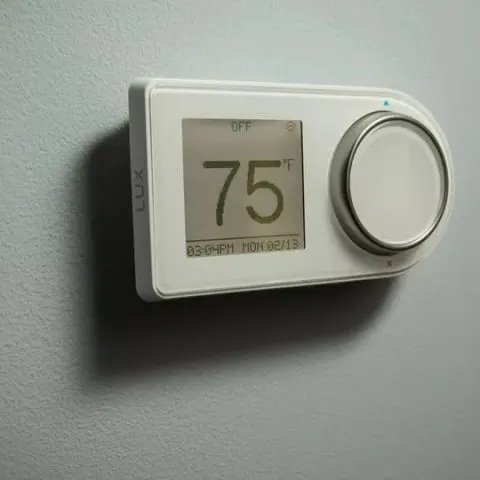
LUX GEO thermostat comes with a beautiful design and features a large display and control wheel interface. It also has built-in geofencing to automatically save energy when the user is out of the house. If you need help setting up your LUX GEO thermostat, or your device has issues, try the simple troubleshooting instructions in this guide first before contacting support or repair.
How Do You Set Up a Lux Geo Thermostat?
To set up your LUX GEO thermostat for the first time, follow these instructions:
- Getting started
- Locate and gather the following items for ease of installation: 2 mounting screws, 2 wall anchors, 2-AA Lithium batteries, Lux Power Bridge (Included). You will need a Philips and flathead screwdriver, wire stripper and cutter, a Wi-Fi enabled device, and a Wi-Fi router.
- Download your LUX Products App from Google Play or Apple App Store and create your account.
- Turn off the power at the circuit breaker to both your heating and cooling systems before performing any wiring. Take a photo of existing wiring to help you when installing your LUX GEO.
- Determine how your LUX GEO can be powered. LUX GEO can be powered by one of four methods:
- 24 V System Power “C-wire” (this powers GEO from your heating/cooling equipment and provides the best performance when using Wi-Fi)
- USB micro-port on GEO (wall adapter and cord not includes- use 1A wall adapter)
- Battery powered ( 2-AA Lithium batteries included)
- Remove your existing thermostat and wire your LUX GEO thermostat
- Release wires and mounting screws from the old thermostat and remove the base from the wall.
- Open GEO from base, pull up on the plastic “cover” between terminal blocks to access and pull wires through.
- Secure your GEO thermostat base to the wall using the included mounting hardware and optional wall plate.
- Wiring: there are several different methods of wiring the GEO thermostat depending on the system type and the power method selected in step 3 above.
- Power on GEO. For method #1 with C-wire and #2 with LUX Power Bridge, secure the GEO front onto base. For method #4 battery power, insert 2-AA Lithium batteries and secure GEO front onto base.
- Configure system settings. GEO will guide you through the setup. Rotate the control wheel to navigate through options and values. Press the blue arrow button to make a selection and the red X button to go back.
- Connect GEO to your mobile device. Select your home Wi-Fi network and enter password. When room temp appears on GEO display, continue by following the prompts on the App.
- Customize settings and set up Radius geofence.
How Do You Turn On Geo Zoning on Lux Geo Thermostat
A radius can be set around a location. Whenever all users with access to this location leave the radius (with their phone) the devices within a location will be set to their away set point. When a single user returns to the location, the devices will resume normal operation.
Radius (geofencing) software can be set on multiple devices/users and to your custom needs and can work with or without a thermostat schedule to still save energy when away or at home.
- Tap on the Radius icon located on the upper right of the “Locations” screen.
- This will take you to the Radius Setup submenus. You are now ready to set your fence. Click on “Get started” to proceed.
- Next, confirm the starting location.
- Then customize your distance. Set the distance from your location that will adjust Away mode.
- Away mode will be set when your device is 5 miles from your location and will end when your device is within 5 miles.
- You can update your settings by tapping the Radius icon on the Locations screen.
How to Adjust a Lux Thermostat
Adjusting temperature
To adjust the temperature:
- Rotate the wheel clockwise to increase the set temperature.
- Rotate the wheel counter-clockwise to decrease the set temperature.
After reaching your desired temperature, press the enter/to confirm button (blue arrow button) to override the set temperature. You will then be prompted to select an override period- rotate the wheel to select a hold time for the override temperature.
If you have not set a schedule yet, it will hold this new temperature indefinitely.
Adjusting mode settings
There are three selectable mode settings for your system: HEAT, COOL, and AUTO.
- Press the blue arrow/enter button to open the main menu. Highlight mode and press the blue arrow/enter button.
- Rotate the wheel to select your desired system mode and press the arrow button to confirm.
Adjusting fan settings
There are three selectable mode settings for your fan (if present): AUTO, ON, and CLEAN CYCLE. To adjust your fan settings:
- Press the Blue arrow/ enter button to open main menu.
- Highlight fan and press the arrow/enter button to confirm.
- Select your desired fan setting and press the enter button to confirm.
You can also set a countdown timer for your filter in this menu by highlighting filter, pressing the arrow/enter button to confirm, and rotating the wheel to select your filter’s lifespan.
Adjusting and setting schedules
You can set a schedule quickly and easily using the LUX App:
- Create a new schedule by following the on-screen instructions in the app and selecting your preferences.
- To adjust your set schedule, tap the “Calendar” icon and move the sliders to your preferred settings.
- To switch to your heat or cool schedule, tap the snowflake/flame icon in the top-right.
If you are not connected to Wi-Fi or if you do not have the LUX app, you can create and change a schedule on the LUX Geo thermostat:
- Highlight the “Schedule” menu and select it by pressing the blue arrow button. If you don’t want to follow a scheduled routine, you can choose “Hold Constant” to maintain a single temperature.
- Highlight “Heat Schedule” or “Cool Schedule” and press the arrow/enter button. Follow the prompts on the screen to set your schedule. You may set custom schedules for each day of the week and you may set a schedule using either 2 or 4 time periods for each day.
Adjusting relative humidity
- Press arrow/enter button to open the main menu. Highlight “Rel Humidity” and select it by pressing arrow/enter button
- If you are in “humidify” or “dehumidify” mode, you can now rotate the wheel to adjust your relative humidity setting. Confirm your new setting by pressing the arrow/enter button.
How to Connect Lux Geo Thermostat to Wi-Fi
If your Lux Geo thermostat is not currently connected to a Wi-Fi network, select “Configure USING APP” in the Network page.
The thermostat will begin the Wi-Fi joining process. To connect to a Wi-Fi network:
- Download the Lux app from the iOS App Store or the Google Play Store.
- Launch the Lux app, create an account, and log into the app.
- Once in the app, add a new thermostat by selecting the “+” at the top left corner of the app screen. When prompted, leave the App and go to your mobile device’s Wi-Fi settings menu.
- Select the Wi-Fi network that looks like LUXGEO-xx-xx.
- Enter in the password displayed on the thermostat.
- After connecting to LUXGEO-xx-xx return back to the App.
- Select your home Wi-Fi network from the list and enter password.
- When room temp appears on the thermostat display, continue by following the prompts on the App. Once you see green tick mark on app and the WiFi icon on the right hand corner of the thermostat’s screen, your system is now successfully connected.
How to Unlock Lux Geo Thermostat
Press the NEXT button 3 times then press the HOLD button once. This button sequence locks and unlocks the thermostat.
How to Reset a Lux Geo Thermostat
To do a hardware reset, which does not erase anything, follow these steps:
- Take the front of the thermostat off the wall and look for a small white round reset button on the right side labeled “H.W. Reset”.
- Hold this button down for at least 5 seconds.
- The screen should fully populate temporarily.
To do a software reset, which will erase your custom program settings, follow the steps below:
- Look for a small white round reset button on the left side with a line going up to s label “S Reset”.
- Hold this button down for at least 5 seconds.
- The screen should fully populate temporarily.
- The day and time will still be correct, but you will have to enter back in all your custom program values.
How to Fix an Unresponsive Lux Geo Thermostat
If your thermostat is behaving erratically or something strange is in the display, pressing the reset buttons can often fix the issue.
Try doing a hardware reset since it does not erase anything. Follow the steps below:
- Take the front of the thermostat off the wall and look for a small white round reset button on the right side labeled “H.W. Reset”.
- Hold this button down for at least 5 seconds.
- The screen should fully populate temporarily.
Lux Geo Thermostat Not Turning On AC
If you have a heat pump system, make sure that the thermostat is configured for the heat pump system type.
If you want to cool your home, make sure that your thermostat is in Cool or Auto mode and that your target temperature is below the ambient temperature shown on the thermostat. If you want to heat your home, make sure that your thermostat is in Heat or Auto mode and that your target temperature is above the ambient temperature shown on the thermostat.
If the thermostat was just installed, check the wiring connections for any errors that might have been made. Make sure you were using the correct wiring diagram for your specific heating/cooling system type.
Lux Geo Thermostat is Not Turning On My Furnace
If your thermostat is not turning on your furnace, check and troubleshoot the following:
Thermostat settings
Verify that the thermostat is set properly. First, ensure the thermostat’s system switch is set to “heat” rather than “cool” or “off”. The fan switch, located just to the left of the system switch, should be set to “auto” rather “on’. See if the furnace activates after adjusting these settings.
Temperature settings
Verify the thermostat’s temperature setting is high enough to activate the furnace. In order to turn on the furnace, the thermostat’s temperature setting needs to be well above the air temperature in the home.
Check the power
If the above steps resolve the issue, it is possible your Lux furnace has no electrical power. If the thermostat’s display is blank, or if the thermostat is slow to respond to key commands, replace the batteries. After replacing the batteries, activate the system and specify a temperature to see if the furnace starts working properly.
Lux Geo Won’t Connect to Wi-Fi
If your LUX GEO is not connecting to Wi-Fi, you may need to manually reconnect your phone to your Wi-Fi network. If this does not fix the issue, restart GEO by going to Menu> Settings> Network and pick up App, and try to connect again.
If your thermostat goes offline, try the following troubleshooting instructions to reconnect:
- First check that your wireless router is working and you have access to the internet. If your internet connection or router is down, you thermostat will reconnect automatically when your internet connection is restored.
- If that doesn’t resolve the issue, confirm that your thermostat is connected to your router. You will see a Wi-Fi icon on the upper right hand corner of the screen. If not, your thermostat is not connected to your router.
- Try resetting your thermostat. Remove the thermostat from the wall and press the RESET button on the back. Once pressed, replace the thermostat on the wall. Once the thermostat is connected to your router, it will display a Wi-Fi icon on the upper right hand corner of the thermostat’s screen.
- If none of the above steps fixes the problem, you should perform the setup process again.
Check this too: Lux Kono How to & Troubleshooting Guide
Use Lux Geo Thermostat without C Wire
For applications that do not have a C-wire at the thermostat, you will need to install the LUX Power Bridge. To install LUX GEO with the LUX Power Bridge, follow the instructions below:
- Take a picture of the wiring at both your thermostat and your furnace. The Power Bridge cannot be used with 2-wire applications, and requires at least cooling or heating wires and a fan “G” wire at the thermostat. If you have more wires (multi-stage systems) than are needed for installing the Power Bridge, leave them unattached as they are.
- At your thermostat- Use the thermostat wire labels to identify each thermostat wire with its current terminal letter.
- At your furnace (air handler)-Remove the door panel and locate your control board. Use the additional wire labels to identify each wire from your thermostat with its terminal letter on the control board. Depending on your application, some wires attached to the control board will remain in place and will not be used with the LUX Power Bridge.