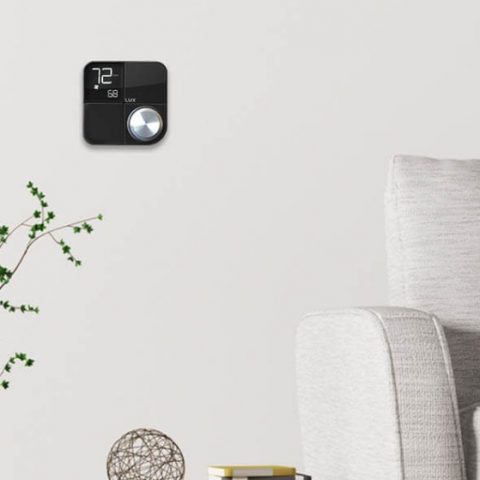
Lux thermostats are not only efficient. They are also durable and easy to use. However, they may still act up from time to time. This means you have to know how to troubleshoot the issues and remedy them. Here is a comprehensive guide to help you handle any problems your Lux Kono thermostat may have.
How to set up a Lux Kono thermostat
For android;
- The KONO will lead you to the connection mode if this is an initial setup or just after a software reset. If this is the case, skip to the third step.
- Press the dial on the thermostat to access the menu
- Rotate the dial clockwise to select the Wi-Fi symbol, press the dial to confirm
- Then rotate the dial to choose On or Set, press the dial to confirm
- Rotate the dial to choose AND 01, press the dial to confirm
- Wait for the screen to say AND 03
- Then open the Lux App on your phone
- If the location is already created, select the location
- Press “Edit Device”
- Press Add Device
- Select the KONO option and press “Correct.”
- Press let’s go. This will show a screen that goes over the steps done on the KONO
- Press the button that says “Go To Wi-Fi settings.”
- Connect to the LUXKONO network using the password on the sticker beneath the faceplate
- Return to the LUX app using the back button towards the bottom of your phone or tablet’s screen
- Select the home Wi-Fi network from the list in the LUX app, and enter its password
- Once the thermostat says “04 done,” it should appear online
- A new KONO may need to apply a firmware update
For iOS;
- Press the dial on the thermostat to enter the menu and select the Wi-Fi symbol
- On an initial setup or after a reset, the setup prompts will end with beginning the connection process.
- Select “Set” from the choices of off, set, and on
- On an initial setup or after a reset, select “on.”
- iOS is the default option; press the dial to confirm
- Wait for the thermostat to say iOS 03
- Then select the location on the App to add the KONO thermostat
- Press edit devices, and then add device
- Select KONO
- Ensure your phone is connected to the home 2.4 GHz network
- Press correct, then “let’s go.”
- The App will search for KONOs. Select your KONO from the list
- The App will prompt you to scan the code on the sticker located beneath the faceplate
- When the thermostat says 04 done, it should appear online in the App
- A new KONO may need to apply a firmware update
Note: Android users may receive interference from their mobile network. This can be resolved by turning off mobile data. Additionally, the presence of a five gigahertz network may cause interference. If the dual-band network is split, a user may forget the 5ghz network to reduce the chance of this.
Mesh networks may also cause an issue. If the network is repeated, try unplugging any nodes that the thermostat shouldn’t connect. The phone may have a problem with joining the Lux KONO network. Try forgetting the Lux KONO network to re-enter its password
How to program a Lux Kono thermostat
The thermostat schedule is divided into four periods, MORN, DAY, EVE, NITE. These schedules are necessary for each of the seven days of the week, for both the heat and cool modes. This means that they must be set for the thermostat to function correctly.
You have to select either HEAT or COOL with the Temperature mode switch. These same programming steps for all four periods below must be performed independently in both Heat and Cool modes.
Before starting the process, it is essential to note the following points;
- This model has a user option to use only TWO periods instead of the default of FOUR. In the 2-period configuration, all of the following steps are the same, except there will be only DAY and NITE periods present.
- This model has a user option to be either programmable or non-programmable (manual). If the clock or period times are not shown, check for this setting.
- You have to select the HEAT or COOL Mode first before you start the programming.
To set the heat temperature program
While in HEAT mode, press MENU, then the SCROLL button one time, and “SET / REVIEW HEAT PROGRAMS” should be displayed at the top of the screen. Press OK. This will program all seven days of the week, each day separately, in order of Mo, Tu, We, Th, Fr, Sa, Su).
MONDAY “MORN” Period
- Period Start Time should be flashing. Use UP/DOWN buttons to set Time for MORN.
- Press NEXT to proceed (note: Next button will not save changes)
- Period Set Temperature should be flashing. Use UP/DOWN buttons to set Temp for MORN.
- Press NEXT to continue
MONDAY “DAY” Period
- Period Start Time should be flashing. Use UP/DOWN buttons to set Time for DAY.
- Press NEXT to proceed
- Period Set Temperature should be flashing. Use UP/DOWN buttons to set Temp for DAY.
- Press NEXT to continue
MONDAY “EVE” Period
- Period Start Time should be flashing. Use UP/DOWN buttons to set Time for EVE.
- Press NEXT to proceed
- Period Set Temperature should be flashing. Use UP/DOWN buttons to set Temp for EVE.
- Press NEXT to continue
MONDAY “NITE” Period
- Period Start Time should be flashing. Use UP/DOWN buttons to set Time for NITE.
- Press NEXT to proceed
- Period Set Temperature should be flashing. Use UP/DOWN buttons to set Temp for NITE.
- Press NEXT to continue
The thermostat will now be on TUESDAY, MORN Period. Continue using the exact NEXT, NEXT process shown above for each of the remaining Weekdays if there are any time or temperature differences between individual days of the week.
Then press the exit button if complete to return to normal use. And copy the heat values to the remaining days of the week.
Note: If the Heating values entered for MONDAY are to be used for all the remaining days of the week, complete all of Monday and press NEXT until you move into TUESDAY.
Once you get into Tuesday settings;
- Press the COPY button one time.
- The screen will show COPY PROGRAM and then allow you to choose the day you would like to Copy “FROM” flashing.
- Choose the Copy From day using the UP/DOWN buttons, then press NEXT one time to proceed. You will now choose the Copy “TO” day, flashing, using the UP/DOWN buttons.
To set up the heat temperature for Wednesday;
- Press the COPY button, and the flashing destination day will automatically advance to Wednesday.
- Keep pressing COPY until the remainder of all the days of the entire week is complete.
- The display should come back around to TUESDAY flashing again.
- All seven days of the week will now have the same program periods for Heat mode.
- Press the exit button if complete to return to normal use.
To set the cool temperature program
- Select the COOL mode.
- Then press MENU, then the SCROLL button one time, and “SET / REVIEW COOL PROGMS” should be displayed at the top of the screen.
- Press OK. This will program all seven days of the week, each day separately, in order of Mo, Tu, We, Th, Fr, Sa, Su).
- Repeat all of the same steps shown above in Heat Mode Programming for the Monday “MORN, DAY, EVE, and NITE” periods. Press NEXT after each step.
- The thermostat will now be on TUESDAY, MORN Period.
- Continue using the exact NEXT, NEXT, NEXT process shown above for each of the remaining days of the week if there are any time or temperature differences between individual days of the week.
- Press the exit button if complete to return to regular use.
- Copy cool values to remaining days of the week
If you intend to use the same settings for all the remaining days of the week;
- Press NEXT until you move into TUESDAY.
- Press the COPY button one time.
- The screen will show COPY PROGRAM and then allow you to choose the day you would like to Copy “FROM” flashing.
- Choose the Copy from the day using the UP/DOWN buttons,
- Press NEXT one time to proceed.
- Choose the Copy “TO” day, which is flashing, using the UP/DOWN buttons.
- Press the COPY button, and the flashing destination day will automatically advance to Wednesday.
- Keep pressing the COPY button until the remainder of all the days of the entire week is complete.
- Press the exit button if complete to return to normal use.
How to reset a Lux Kono thermostat
To reset your KONO, follow the steps below:
- Press the dial to access the menu
- Select the settings icon
- Rotate the dial for “IS yes.”
- Repeatedly press the dial until you are on option 99 (there are not 99 options)
- Rotate for yes, then press the dial
- The word “Hi” will appear on the screen, and you will be taken through the initial setup flow
Lux Kono thermostat error codes
- ER:00 System error, Host Boot up fail
- ER:01 System Error, No reversing valve connected in the heat pump system
- ER:02 Provisioning error, no network
- ER:09 Radio Error, No response from module
- ER:0A Radio Error, weak signal (less than -76 RSSI)
- ER:0B Radio Error, network not found
Lux Kono thermostat not turning on AC
If the thermostat has just been installed, inspect the wiring connections to ensure no installation errors. Also, ensure the AC connection was done right.
If the AC was working in the past, check to see if the settings on the thermostat are on Cool mode. This may be preventing it from turning on the AC, then adjust accordingly. You should also ensure that the thermostat is configured to work with the AC.
Check this too: Trane Thermostat How to & Troubleshooting Guide
How do you unlock a Lux Kono thermostat?
- Press and hold the NEXT button for 5 seconds, and the words “ENTER CODE” will appear at the top of the screen.
- Enter the proper unlock code that was used for initially locking the thermostat.
- Press the UP/DOWN buttons to change each flashing digit, using the NEXT button to cycle through which number is flashing.
- Press and hold the NEXT button for at least 5 seconds.
- The thermostat will return to the Normal Run screen without the padlock, and the thermostat is now unlocked.
Note: If you forget your keypad lock code follow these steps;
- Place the Set Slide switch in the RUN position.
- On the back of the thermostat’s circuit board, press and hold the “HW RST” (Hardware Reset) button for 3 seconds and release.
- The thermostat will perform a reset and should now be unlocked.
- If the thermostat is still locked with the padlock present, perform the “To Unlock The Keypad” shown above using “0000” as the code.
How to connect a Lux Kono to Wi-Fi
Follow these simple steps to connect to your wireless network;
- Download the LUX Application. Which can be found in the Play Store (Android) or the App Store (IOS).
- The install the App on your phone
- For initial setups, the thermostat will ask if you would like to connect to a wireless network.
- If you do not get this prompt, access the menu, select the Wi-Fi symbol and set it to “set.”
- Choose whether you are using Android or IOS.
- The thermostat will automatically start searching for wireless networks within its range.
- Once it displays “03 And/IOS,” proceed to the next set of steps.
For IOS:
- Open the application and log in if you have not done so yet
- Press the + sign in the top left
- Select “Connect a KONO thermostat to my account.”
- Press Yes
- Remove the Decor Snap cover from the KONO to reveal the home kit code
- When prompted by the App, scan the code
- Wait for the thermostat to connect to our services
- You will be prompted to name and schedule the thermostat
For android:
- Open the application and log in if you have not done so yet
- Press the + sign in the top left
- Select “Connect a KONO thermostat to my account.”
- Press Yes
- Press Next
- You will be taken to your phone’s Wi-Fi settings. Connect to the KONO network (the name and password are listed on a label underneath the decor snap cover)
- Press the back button on your phone. This will return you to the application
- Select your home Wi-Fi network, and enter its password
- Press connect and wait for the thermostat to connect to our services
- Once connected, you will be prompted to name and schedule the KONO
Lux Kono not turning on the heat
Here are the primary reasons your thermostat is not able to turn on the heat;
- The thermostat is malfunctioning and is therefore not able to send commands to the AC unit. The malfunction can be as simple as low batteries. However, it could also be caused by more complicated issues such as component damage.
- Incorrect thermostat settings may prevent the AC from turning on. Especially when you fail or forget to set it to the HEAT mode.
- Your thermostat is not compatible with your AC, or it is not designed to operate your AC. Always consult with professionals before buying a new thermostat.
- Loose wire connections and frayed and damaged wires can cause your thermostat to lose connection to your A/C and heating system eventually. First, inspect your wiring and make sure the connections are tight. Then replace any wires as needed.
- A clogged air filter may prevent the heather from blowing hot air. First, check your filter to determine whether it needs to be cleaned or replaced. In some cases, all you need is to clear dust buildup to fix the issue.
- A tripped circuit breaker may also prevent the AC from turning on. Inspect the circuit breaker and ensure it is in good shape.
- A damaged blower or belt can also prevent the AC from turning on. If your AC is making any high-pitched noises, this is a sign that the blower is damaged. First, inspect the AC to see if the blower needs to be repaired or replaced. Then lubricate the belt to improve the air circulation.
How to install Lux Kono thermostat with c wire
This is the most common way to install a Lux Kono thermostat.
- Unplug your heating and cooling equipment
- Remove the front cover of your old thermostat
- Check for one of the following wiring configurations on your old thermostat
- Conventional 1Heat/1Cool – Y, G, W, R, C
- Conventional 2Heat/1 Cool – Y, G, W, W2
- Single-Stage Heat Pump – Y, G, R, O/B, C
- Auxiliary Heat or Dual Fuel Heat Pump – Y, G, R, O/B, W, C
- Choose your wiring system
- Connect each labeled wire with its corresponding terminal by pressing down the lever
- Then fasten your KONO Smart to its base
- Lastly, return power to your heating and cooling system.
How to Install the Kono Smart without a C-Wire
If you are not in a position to install your thermostat with a C wire, follow these steps;
- Unplug your heating and cooling equipment
- Remove the front of your old thermostat from its base
- Check for wiring compatibility on the old thermostat as follows
- Conventional 1 heat/1 cool – Y, G, W, R
- Conventional 2 heat/2 cool – Y, G, W1, W2, R
- Follow the terminal labels on the Lux thermostat base marked Power Bridge.
- Press the lever to insert the wire to the corresponding terminal.
- Connect the Y wire to terminal 1, the W wire to terminal 2, the R wire to terminal 3, and the G wire to terminal 4.
- Remove the door panel of your furnace to access the control board and transformer.
- Label the four wires from the furnace to your thermostat – Y, G, W & R.
- Disconnect the wires from the control board.
- Open up your Power Bridge casing
- Reconnect the wires that were disconnected from your furnace into the corresponding terminals of the power bridge using the above terminal connections
- Insert the wires from the Power Bridge into the corresponding terminals on your furnace control board.
- You now have a wire going to the C terminal on your furnace.
- Put your panel door back on and return the power to your heating and cooling system.
How to replace Lux Kono thermostat batteries
Ideally, you should replace the batters once per year or when the LOW BAT battery symbol appears in the lower-left portion of the display screen. In some models, the word “Replace” will appear on the screen.
To replace the batteries in the thermostat;
- Remove the thermostat’s body from the base plate attached to the wall.
- Remove the used batteries from the battery tray and discard them appropriately.
- Install two new Energizer or DURACELL, “AA” size alkaline batteries into the battery tray. Observe the polarity markings shown in the battery compartment to ensure proper installation.
- Then reattach the top of the unit by the tabs at the top corners of the base
- Lastly, snap the bottom of the unit into place.
- Do not use unnecessary force. If the body does not snap into place easily, remove the body, re-hang it from the tabs, and try again.
Note: You should only use Energizer or DURACELL Alkaline Batteries for all Lux thermostats requiring batteries, except the GEO model, optimized for Lithium. If you install the new batteries within 60 seconds, the thermostat will remember its programmed settings (except the day and time) so that you will not have to reprogram it.
Lux Kono thermostat not connecting to Wi-Fi
Here are some easy tips to help you fix the Wi-Fi connection issue;
- Reset your thermostat’s network settings; – Settings > Reset > Network.
- Restart the thermostat; – selecting Settings > Reset > Restart.
- Then try to reconnect to your Wi-Fi network; – Settings > Network.
If these steps do not work, follow the steps below;
Restart and check your home’s internet connection
- Unplug your modem and router power cords.
- Wait for 30 seconds, then plug your modem or router back in.
- You should also restart your Wi-Fi range extenders or repeaters.
- Check to see if your other smart gadgets are connecting to the internet, such as Google Home, a connected TV, or a connected lighting system.
- You can also go online to determine if Wi-Fi connectivity is the main issue.
Check the settings on your Wi-Fi router or access point
Incompatible settings on your home’s router or access point can cause your thermostat not to connect to Wi-Fi. High firewall security or parental controls can block your thermostat from connecting to Wi-Fi.
Check for interference
Turn off any devices that operate on a 2.4 GHz frequency, then try to connect your thermostat again. Here are some devices that might cause problems:
- Cordless phones
- Baby monitors
- Microwaves
- Bluetooth devices
- Wireless video equipment
After turning off any sources of interference, try to reconnect your thermostat to Wi-Fi.
Replace the thermostat battery
Your thermostat might turn off the Wi-Fi connections to save power if its batteries are low.
What do the various settings on my KONO do?
This thermostat features a wide variety of advanced settings that can be configured directly on the thermostat. The settings are accessed through the Gear icon in the menu.
- 01: Temperature Format (F or C)
- 02: Temperature calibration (can be adjusted in .1 intervals)
- 03: Available HVAC modes (heat, auto, cool)
- 04: Heat limit (max 90F/32C)
- 05: Cool Limit (minimum 45F/7C)
- 06: System Type (Furnace, heat pump or boiler notated as F, hp, or boil, respectively)
- 07: Type of heat pump (O or B)
- 08: Minimum Runtime (2 minutes or 5 minutes)
- 09: Swing value (.25-2.25)
- 10: Stage 2 heating offset (Off-5, for conventional systems)
- 11: Auxiliary heating offset (Off-5, for heat pump systems)
- 12: Time format (12 or 24 hours)
- 13: Blacklight (Always on, or 10-second auto-off)
- 14: Dual Fuel Setting (On or Off, for heat pumps)
- 15: Balance Point High (Determines temperature where your heat pump system will not use auxiliary fuel, 32F-99F, 0C-37C)
- 16: Balance Point Low (Determines temperature where your heat pump system will only use auxiliary fuel 1F-77F, -18C-25C)
- 17: Air Filter reminder (Off, or 30-365 days)
- 98: Compressor Bypass (Yes allows you to bypass the minimum run time for AC and Heatpump Units, *Use Cautiously*)
- 99: Factory reset (Yes, will return the thermostat to factory defaults)
Check this too: Lux Geo How to & Troubleshooting Guide
Note: When accessing the settings, you will see iS in big letters and have the option to the lower right of “yes” or “no.” Turn the knob to select yes and then press the dial one more time to get to option 01.