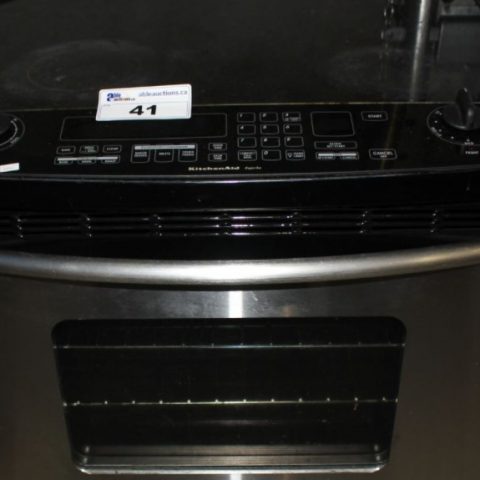
Kitchenaid Superba oven is one of the best convection ovens on the block. It features two ovens, a control lock, self-cleaning, Sabbath mode, and a myriad of other convenient features. And with proper care, this oven can serve you for years to come.
However, every once in a while, you may encounter an issue that may require immediate troubleshooting and fixing. This how-to guide aims to provide a go-to manual for troubleshooting any problems you may encounter and how to fix them.
How do I reset my KitchenAid Superba oven?
Resetting your oven is necessary for several reasons; to remove an error code after you fix the stove and fix an electronic glitch caused by an abrupt power outage.
Method 1
- Turn off the circuit breaker for at least one minute.
- Then turn the circuit breaker back on.
- The oven will automatically turn on.
- Monitor it for a minute or so and check to see if the error code will appear on display.
- If the error code does not disappear. Call a certified professional to fix the oven.
Method 2
- Press the Start button for at least 5-seconds to release the control lock
- Then press the Start button for 5-seconds to set the control lock again.
Where is the thermal fuse on a KitchenAid oven?
The thermal fuse is located at the rear of the oven near the insulation envelope. Refer to your oven user manual for exact location by looking at the parts diagram.
Check this too: Best portable pizza oven
How do I unlock my KitchenAid Superba oven?
Utilizing the lock feature on your oven when using it is always wise if you have small children. As it ensures the children will not be able to unlock the oven when it is hot. However, it becomes a menace when you need to use the oven yourself.
Here are some solutions you can use if your oven door is not unlocking;
Easy unlock process
- Press the Start button on the electronic oven control panel and hold for at least 5-seconds.
- Release the “Start” button when you hear a tone and the padlock icon disappears from the display, which takes approximately five seconds.
The door is locked when starting or using the oven;
- Press Cancel/Off key to start a latch reset and wait 20-30 seconds.
- Then turn the power off at the circuit breaker or fuse box for one minute and then turn the power back on.
- Allow the oven to cool for approximately 30-90 minutes, then move the latch arm to the left to unlock the door.
The door is locked during the Self-Clean cycle.
If there is a power interruption during a Self-Clean cycle, and the process did not resume automatically.
- Select the “Self Clean” option, then select “Cancel.”
- Wait a couple of minutes, then try to start the cycle again.
- If the oven-clean cycle was started by mistake, press the Cancel/Off button.
- The oven will need to cool to 200F(95C) before the oven door opens.
- Allow the oven to cool for approximately 30-90 minutes, then move the latch arm to the left to unlock the door.
The door is locked to using the lock feature.
- Press the “Control Lock” or “Start/Control Lock” button on the keypad with your finger.
- Then hold down the pad for approximately 5 seconds until the words “Control Lock” disappear from the LCD.
- Wait for the oven to finish cool down before attempting to unlock the oven door.
- As a safety measure, the “Lock” function will not release until the oven completes the high-temperature cleaning cycle when self-cleaning.
If the unlocking methods above do not work, try to reset the oven using the methods discussed above. If this does not work, hire a certified professional to fix your oven.
Kitchenaid Superba oven error codes and their meanings
Error codes are essential as they help you troubleshoot minor electronic malfunctions that can be quickly resolved. Here are the error codes you can expect to see on your KitchenAid Superba oven;
- F9 or F9 E0: The electrical outlet in the home or the electrical connection to the appliance may be miswired.
Solution: hire a qualified electrician to verify the electrical supply.
- Unexpected power supply line “noise” during a power outage that the control detected as incorrect voltage may cause the code to display.
Solution: Reset Power.
- Clock is blank
Solution: Press and hold Clock Set/Start for five seconds(typical). The time of day will display automatically without needing a time reset.
- “CAL” Oven calibration issue
Solution: Refer to your Owner’s Manual for calibration steps.
- LOC, Lock, Locked Control Lock has been activated.
Solution: Use one of the unlocking methods discussed above.
- SAB, Sab, 5AB, or 5A6: Your product has the Sabbath Mode feature activated.
Solution: Refer to your Owner’s Manual for specific information on entering and exiting Sabbath Mode.
- PF or PF id=27 or PF id=30: There has been a power failure.
Solution: Press the cancel pad to clear the display. On some models, you may need to reset the time of day clock.
- Time of day is flashing: There has been a power failure.
Solution: Press the cancel pad to clear the display. On some models, you may need to reset the time of day clock.
- F1-E0 – EEPROM Communication Error
Solution: turn off power for at least 30 seconds and then reconnect. Wait at least a minute after power has been restored to see if the error code will reappear. If it does, replace the control board (clock).
- F1-E1 – EEPROM Checksum Error
Solution: turn off power for at least 30 seconds and then reconnect. Wait at least a minute after power has been restored to see if the error code will reappear. If it does, replace the control board (clock).
- F1-E2 – UL A/D Error(s)
Solutions: turn off power for at least 30 seconds and then reconnect. Wait at least a minute after power has been restored to see if the error code will reappear. If it does, replace the control board (clock).
- F1-E4 – Model Id Error
Solution: turn off power for at least 30 seconds and then reconnect. Wait at least a minute after power has been restored to see if the error code will reappear. If it does, replace the control board (clock).
- F1-E5 – Calibration Shifted
Solution: turn off power for at least 30 seconds and then reconnect. Wait at least a minute after power has been restored to see if the error code will reappear. If it does, replace the control board (clock).
- F1-E6 – Latch Signal Mismatch Error
Solution: turn off power for at least 30 seconds and then reconnect. Wait at least a minute after power has been restored to see if the error code will reappear. If it does, replace the control board (clock).
- F1-E9 – Stack Overflow
Solution: turn off power for at least 30 seconds and then reconnect. Wait at least a minute after power has been restored to see if the error code will reappear. If it does, replace the control board (clock).
- F1-E3 – Wiring Harness Cavity Size Does Not Match Stored Value
Solution: Check the harness jumpers to make sure they are the correct size for the oven.
- F2-E0 – Shorted Touch Pad (Keypad)
Solution: Check the connection between the touchpad (keypad) and the control board (clock) to ensure it is secure. Select the ‘cancel’ function and wait for at least 60 seconds. If the error code reappears, replace the touchpad or the touchpad and control board (clock) if it is one unit.
- F2-E1 – TouchPad Cable Unplugged
Solution: Check the connection between the touchpad (keypad) and control board (clock) to ensure it is secure. Select the ‘cancel’ function and wait for at least 60 seconds. If the error code reappears, replace the touchpad or the touchpad and control board (clock) if it is one unit.
- F2-E5 – Cancel Key Line Open
Solution: Check the connection between the touchpad (keypad) and the control board (clock) to ensure it is secure. Select the ‘cancel’ function and wait for at least 60 seconds. If the error code reappears, replace the touchpad or the touchpad and control board (clock) if it is one unit.
- F2-E6 – Cancel Key Line Open
Solution: Check the connection between the touchpad (keypad) and control board (clock) and ensure it is secure. Select the ‘cancel’ function and wait for at least 60 seconds. If the error code reappears, replace the touchpad or the touchpad and control board (clock) if it is one unit.
- F3-E Codes – Oven Temperature Sensor (RTD) or Warming Drawer Defect
Solution: Replace oven temperature sensor (RTD).
- F4-E1 -Meat Probe Defect
Solution: Check the probe for pinched wires and ensure there is no condensation or contamination on the receptacle. Replace the probe if the error persists.
- All F5-E Codes – Door Switch Defect
Solution: inspect door switches, wires, and connections. If the door switches, wires, or connections are damaged, replace the appropriate part. If connections are not damaged, reconnect power and hold down any key until the F5 error clears.
Once the F2 code appears, select ‘cancel’ and wait one minute for the error code to clear. If the error code continues, disconnect power and replace the control board.
- F6-E0 – Return Line Not Connected
Solution: This error should appear within 60 seconds after the power-up of the appliance. Replace control board (clock).
- F7-E1 – Common Switch Wire Is Defective
Solution: Check all the connections on the control board and at the latch switch and door switch. If connections are okay, then check individual switches and replace them as needed.
Note: Double ovens will have two of each switch and one common wire.
- F0 – Control Board Failure
Solution: Replace control board (clock).
- F1 – Control Board Failure
Solution: Replace control board (clock).
- F2 – Oven Temperature Is Too High
Solution: Check for welded contacts on bake and broil relays. If present, replace the control board (clock).
For SELF CLEAN models, check door lock operation, sensor, sensor harness, and the sensor harness connection at sensor and oven control. Also, look out for any causes of high resistance in the oven temperature sensor circuit.
- F3 – Open Oven Temperature Sensor (RTD)
Solution: Replace oven temperature sensor (RTD).
- F4 – Shorted Oven Temperature Sensor (RTD)
Solution: Replace oven temperature sensor (RTD).
- F5 – Control Board Failure
Solution: Replace control board (clock).
- F7 – Function Key Stuck
Solution: Replace control board (clock).
- F8 – Control Board Failure
Solution: Replace control board (clock).
- F9 – Oven Door Lock Failure
Solution: Check door lock switches and wiring. And check for stuck lock switch.
How do you clear error codes on your KitchenAid oven?
Once a problem has been resolved, you can clear the error code by resetting the oven or pressing the cancel button.
Kitchenaid Superba oven power failure
Power failure can be a result of multiple reasons. Here are some solutions to sort out the power failure issues;
Power outage
A power surge can cause your oven to power down due to an inconsistent power voltage supply. In this case, remedy the issue based on the error code displayed. Alternatively, you can reset the oven by turning off the circuit breaker, waiting for at least one minute, and turning it back on.
Then wait to see if the error code will clear. If the error code does not clear, hire an electrician to check and fic your electrical wiring.
Locked control panel
Check to see if the Control Lock feature on the oven is enabled and turn it off. You can do this by holding down the Control Lock button(s) for 3 seconds. If this does not work, check to see if the oven is on Demo mode. Refer to your user manual on the specific instructions for deactivating the demo mode.
Oven settings
Look at your oven’s control settings and use your User manual to change them as per your requirements or baking needs.
Preset bake functions
Check to see if you have selected Delayed start on your control panel. If this is the case, cancel and restart the bake function.
Tripped circuit or blown fuse
Check to see if the circuit breaker has been tripped or there is a blown a fuse. Then replace the fuse or reset the circuit breaker by turning it off toe thirty seconds and turning it back on. If the issue persists, hire a licensed electrician to fix the problem.
Kitchenaid Superba oven not heating up
These are some reasons why your oven is not heating up;
Defective igniter
the igniter draws electrical current through the oven safety valve to open it and ignites the oven burner’s gas. If the igniter is damaged, it will fail to open the safety valve correctly or fail to ignite the gas. To determine if the igniter is defective, observe the igniter when the oven is on. If the igniter is not working, replace it.
Damaged baking element
If the baking element does not glow red, then it is not getting heated correctly. Inspect the heating element for any visible damage, such as holes or blisters. Then use a multimeter to test the element for continuity. If the bake element does not have continuity, replace it.
Broken Bake or Broil Spark Electrode
The spark electrode is a device that sits right next to the burner, and it is used to ignite the gas. It functions like a spark plug. As electric power flows through the electrode, a spark jumps from the spark electrode tip to the electrode shield, igniting the gas.
If the spark electrode is broken or worn out, sparking may not occur. Inspect the electrode assembly for cracks in the porcelain housing or damage to the electrode tip itself. And replace it if it is damaged.
Broken Broil Element
If the broil element does not glow red, then it is not getting the heater correctly. Inspect the heating element for any visible damage, such as holes or blisters. Then use a multimeter to test the element for continuity. If the broil element does not have continuity, replace it.
Power issue
Use a multimeter to test the incoming power at the wall socket. To determine if the electrical outlet is providing sufficient voltage. Ideally, electric ovens require 240 volts of alternating current, while Gas ovens require 120 volts. If there is no power transmission, contact an electrician for help.
Blown Thermal fuse
The thermal fuse trips to shut off power to the oven when the oven gets too hot. If the thermal fuse is blown, the oven will not heat. Use a multimeter to test the fuse for continuity.
If the thermal fuse does not have continuity, replace it.
Loose or Burnt Wire Connection
Inspect the wires leading to the element or igniter. You should see visible burn marks if the wire is burned out. The wires typically burn out near the heat source. If they are burnt out, hire a licensed electrician to repair them.
A defective oven control board
The oven control board is designed to send voltage to the bake and broil circuits according to the user settings and sensor input. If it is defective, it may not send voltage to the heating components. Test all the oven heating components by setting commands on the control board and replacing the board if the commands are not activated.
Defective relay board
The relay board is responsible for sending out relays that control the electrical current relayed to the heating element. If one or more of the relays on the relay board are damaged, the oven won’t produce heat. If this is the case, replace the relay board. Contact a professional if you cannot do this on your own.
Defective safety valve
The gas oven safety valve essentially determines if gas will be released to the burner or not. If the safety valve is defective, the oven will not heat up. Use a multimeter to test the safety valve for continuity. If the safety valve does not have continuity, replace it.
Defective thermostat
The oven thermostat regulates the oven temperature. If there is an oven temperature problem, the oven thermostat is defective. Use a portable thermometer to test oven temperature and replace the thermostat if it is faulty.
Defective valve and pressure regulator
Test the valve and pressure regulator to see if they are defective. Then replace them as needed.
Kitchenaid Superba oven display not working
Check to see if the oven is on and if it is connected to power. Then reset the oven using the methods discussed above. If this does not work, check to see if the control lock feature is enabled and disable the feature.
If the display is still blank, check to see if Display contrast is causing you not to see digits or codes on display. Then adjust the Display contrast to a higher level for better visibility. Do this by pressing the Settings key and then the Display contrast button and using the Up arrow to adjust upwards. Then press an OK key to confirm.
As a last resort, check to see if the controls have been pressed for the upper or lower oven. And adjust accordingly. If this does not work, replace the display screen or hire a professional to fix or replace it.
KitchenAid Superba gas oven troubleshooting
The two leading causes of a malfunctioning gas oven are inconsistent or curtailed gas supply and inconsistent or curtailed electric current supply. These supply shortages are either caused by defective parts or a gas or electricity supply issue.
Gas or electricity supply issue
Check to see if the gas or electricity supply is okay. And check to see if the circuit has been tripped in case of lack of power relay. If there is an issue with your gas or electricity supply, call your gas or electricity company. Alternatively, if there is an issue with the electricity connection, contact a licensed electrician.
Defective parts
Any damaged, broken, or worn-out component can affect the transmission of gas or electricity to the gas range or oven, causing it not to heat up. These are the main culprits when it comes to defective gas oven part;
- Spark ignition switch and harness
- Spark module
- And spark electrode
Use a multimeter to test for continuity and repair or replace the parts accordingly.
Note: Always power down the oven before troubleshooting any electrical wire connections. If you cannot fix your oven or cannot resolve the issue, hire a certified electrician or oven repair professional to fix your oven.
How to Clean Your Kitchen Oven
A kitchen oven is one of the most used appliances in your home with more uses in handling food thus making it susceptible to getting dirty within a few days. Cleaning the oven after ignoring it for a while can prove to be an uphill task that will eat into your time and leave you tired as well. So it is important to have your oven cleaned regularly to ensure that the appliance remains safe to use and functions efficiently.
Food, spills, cheese, and oil will leave your oven will leave the oven dirty and after some time if not properly cleaned, will leave you with a big grimy mess for an oven that may halt all the functions to a stop.
Check this too: Best portable pizza oven in 2022
However, it doesn’t have to get to this as regular cleaning of the oven will make it easier for you to maintain a clean oven by only setting aside a few minutes of your time for the task.
You should have your supplies for the items needed to clean and tackle the oil smudges, grime, and dirt in the oven and transform it into a properly cleaned, odor-free, sparkling, and brand new-looking appliance.
The good thing is the cleaning materials will fit in any budget and give you a cleaning solution that is affordable, effective, and easy to put together. You will need:-
- Vinegar
- Baking soda
- Salt
- Hydrogen peroxide
- Bathroom cleaner
- Liquid dish soap
- Windex
- Warm water
- Both soft and abrasive sponges
- Paper towels
- Clean dishcloths
- Spray bottle
- Rubber gloves
Prepare the cleaning solutions beforehand to save on time and to have an easy time going about the cleaning task.
To make a simple cleaning solution for an oven that does not have heavy build-up add 1 cup vinegar and 1 teaspoon liquid dish detergent to 1 cup warm water.
For a stronger cleaning solution for tough stains and stuck-on grime and grease, add one tablespoon of baking soda into the above solution.
Use rubber gloves while handling the above homemade cleaning agents.
These cleaners have proved over time to be tough on grease buildup and stuck-on food bits and deodorizing the oven.
Before cleaning
Switch off the oven at the socket and allow it to cool down completely before setting to clean.
Cleaning the oven racks and tray
Open the oven door and remove the racks then set them aside for cleaning in the kitchen sink. Soak them in warm soapy water to loosen grease and dirt from the wires then use a suitable sponge to scrub it clean. Rinse them in clean and dry with a clean dishcloth then keep them aside.
Cleaning the oven door using white vinegar
Vinegar, known to be tough on grime and grease within a few minutes will help you clean your grimy oven glass door and leave you with a sanitized and shiny door.
Fill a spray bottle with a cup of white vinegar and spray the inside and outer sides of the oven and oven door. For best results in removing all stains and grease, let the vinegar sit for 15 -20 minutes.
Use a soft sponge to scrub and remove the vinegar from the door panes then rinse and wipe both sides to remove all the vinegar. Finish by wiping down all door parts using a soft microfiber cloth to avoid leaving the door with fluffs.
Cleaning the oven
Use both the soft and abrasive sponges and the cleaning solution to scrub inside the oven. To deal with spills on the bottom of the oven, use a cleaning solution added with a teaspoon of baking soda to scrub the floor of the oven methodically until all stuck on dirt and grime has been cleared.
Rinse well using a cloth and warm water. Use warm soapy water to wipe down all the walls of the oven then rinse with a clean cloth and warm water.
Polishing
Windex will always deliver when it comes to giving your favorite appliance that shiny squeaky look and maintain it looking new. The other advantage of using Windex is that it will pick up dust, grease, and debris before they set and stick on the surfaces.
Apply a good Windex spritz on the surfaces then wipe down using a clean microfiber cloth.
You can also consider other ways of cleaning your oven like the self-cleaning oven feature that makes the cleaning process easy and fast. When the GE self-cleaning cycle is correctly used then you will not have to use commercial cleaners to give your oven clean and sparkling surfaces.
Running a self-clean cycle
You can also other cleaning effective cleaning options like the self-clean feature on your oven
This self-clean feature removes layers of grease and baked-on food within a few hours.
To run a self-cleaning oven cycle:-
- Remove all items from the oven. These include oven racks and trays.
- Clear and get rid of any pieces of food and any large amounts of dirt, grease, and oil puddles. Be careful to remove these as they can be extremely flammable in high temperatures and can ignite if left in the oven during the self-clean cycle.
- In the case of large sauce spills and food globs, use a plastic scraper to remove most of the stuck-on food on the surfaces.
- Pour 1 ¾ cup of filtered water onto the oven floor. Close the oven door and press the Aqualift self-clean button. The cycle takes about 40 minutes and the oven beeps once the self-clean cycle is complete.
- Soak and scrub the oven racks in warm soapy water as the oven runs the self-clean cycle. Rinse in clean water and wipe them dry using a clean cloth.
- To end the cycle press cancel and clean the ashes left in your oven after the self-cleaning cycle.
- Remove leftover dirt and ashes in the oven by wiping using warm soapy water and a cloth. Wipe down again using clean water to clear any soap residue then use a clean microfiber dishcloth to wipe the oven.
- Reinstall the oven racks and you are ready to use your oven.
However, you should not that the self-clean cycle will not be effective for an extremely dirty oven. This option may significantly reduce the dirt in the oven in the first cycle and may require a second cycle to further clean the remaining grease and stuck food on the floor and sides of the oven.
Note: remove hard water deposits by scrubbing the affected surface using a vinegar solution and a soft sponge. Make the solution by mixing one part vinegar with one part water.
Steam cleaning the oven
This is another quick way to clean your oven when you don’t want to run a self-cleaning cycle and maybe want a quick fix for a mess like a greasy spill or just a few splash spots on the surfaces that need to be cleaned.
To carry out a steam cleaning cycle you will need a homemade cleaning solution for an effective outcome. Follow the steps below:-
- Mix one part vinegar, one part water, and one tablespoon baking soda in an oven-safe casserole dish. This solution will soften stuck-on food spills and grease.
- Set the oven at 450 degrees for 30 minutes. Ensure that the water level in the casserole doesn’t get too low.
- If it gets low you can add hot water, heated on the side in a pot. Don’t add cold water into the heated casserole.
- Clean the oven racks in the dishwasher or kitchen sink as you wait for the steaming cycle to complete.
- Once the steam cycle is complete, use a wet cloth to wipe down the inside surfaces and remove all dirt. Repeat using a dry dishcloth and remember to wipe clean the inner glass door.
- Reinstall the oven grills and your oven will be sparkling clean and ready to be used again for the next meal.