Owning a GE microwave is convenient since it allows you to enjoy all the benefits that come with high-grade microwaves. They are designed to fit in any modern kitchen seamlessly. However, like all other electric appliances, even the best products experience hitches once in a while. It is essential to understand how to deal with such issues when they arise. This article explores the most common problems with the GE microwave and guides users to diagnose and fix them where possible.
How do you reset a GE microwave?
There may be instances when you need to reset the microwave for it to serve you better. Proceed as follows:
- Start by pressing the “Off/Clear’ button. This cancels anything on display and automatically resets the microwave.
- Pressing the “Off/Clear’ button for about three seconds will help turn the “Control Locked” child lock off.
- Consider resetting the cooking program if the “Off/Clear” was accidentally pressed when in progress.
- Consider a hard reset that simply pulls the plug from the power supply and waits a while before plugging it back. The microwave’s memory will rest any anomalies from before.
- Reset the time of day by clicking the clock button and turning the dial to set the exact hours.
Why does my GE microwave trip the circuit breaker?
There is a possibility of an overload on the electrical circuit. This means that the course has a lower rate than what the microwave requires. It keeps exceeding the electrical unit current of the circuit. To fix it:
- Plug the unit into an alternate outlet. Consider areas with higher amperage, such as your garage or workshop
- Alternatively, connect it to a dedicated circuit
- If the problem persists, then the microwave is the problem, and there is a need to have a technician look at it with possible repairs in mind. You should also be open to replacing it.
Check this too: Kitchenaid Superba Oven Troubleshooting
GE microwave not heating food but runs.
It happens when there is an issue with the magnetron. This is a component in the microwave that is part of the high voltage circuit. It is responsible for the gadget’s heating capacity. When defective, the issue may be a blown fuse, especially if their functions usually work. To fix it, consider replacing the fuse. However, watch out for the following signs first s they signify a problematic magnetron.
- Failed heating.
- Strange burning odor.
- Snapping and arcing sounds.
How to tell if your GE microwave fuse is blown
Before replacing or changing any fuse, you first need to check and confirm that it is blown. Do this by:
- Removing the grill
- Search for one screw on top of the control panel.
- You will notice the control panel top tilting out.
- The fuse block will be visible.
- Look for more than one fuse as they are at least 2 or 3
- A blown fuse should have scorched marks, and the filament is going to be melted
- Use a continuity tester or ohmmeter when the fuse is ceramic
- The readings should show zero if the fuse is okay and an infinite figure if it is blown
GE microwave error codes: meaning and fixes
Understanding the potential errors helps you quick-fix your microwave. Standard error codes with the GE microwave include:
- Code F1: Indicates open thermal sensor resulting from excessive heat when the microwave is in action
- Code F2: Problem of a shorted thermal sensor
- Code F3: Issue with shorted touchpad panel
- Code F4: Problem with an opened immunity sensor
- Code F5: Issue with shorted immunity sensor
- Code F6: Issue with shorted temperature probe
- Code F10: Problem with shorted touch screen
- Code Probe: Issue with an open temperature probe or the probe is unplugged during the temperature cook function. Always ensure that the probe is fixed firmly into the microwave’s wall.
- Code 888, 8888, or PF: May occur during initial installation or after a power outage. It simply means that there was a power issue. Fix it by canceling the display and proceeding with normal operations, which happens when you clear the pad. You can also reset the clock.
- Code 18/ power watch code: Shows an issue with the electronic control
GE microwave troubleshooting keypad
It is possible for the touchpads on the microwave to stop responding despite the display lights working as expected. Unplug the microwave to access the membrane switch and remove the cabinet altogether.
GE Spacemaker microwave troubleshooting
It is possible to troubleshoot and rectify some of the common problems that your GE Spacemaker microwave has. To do this:
- Replace the charcoal filter. This works especially if the microwave model is not vented outwards and there are excessive smoke and odors when venting.
- Disconnect from power and remove the old filters behind the grille.
- Open the grille and slide out the old filters, replacing them with new filters before replacing the grille.
- Always close the door if the microwave fails to start. Check the plug to see if it’s fully inserted in the wall socket.
- Correct the time of day if there is an unusual low-tone beep. You could attempt to start the reminder with no valid day or that you tried to start the auto night light without a valid on and off time.
- In case of a sensor error, wait until the steam is sensed and the timing completes before attempting to open the door. Alternatively, heat the microwave longer by using the time cook option.
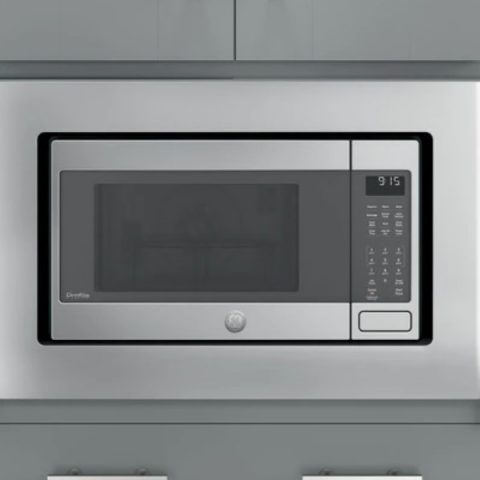
GE profile microwave troubleshooting
Several things could be wrong with your microwave. It is up to you to notice the issue and address it accordingly. Common issues are:
- Door Switch Issues. When your microwave has door switch issues, then it is likely not to start. In most cases, the door switches are primary and secondary interlock switches, and they power various components of the microwave when it’s closed. Always check these switches for continuity.
- The ceramic fuse may be the issue when the microwave fails to turn on. This should b your first suspect, especially if the display is blank. The ceramic fuse protects the microwave’s internal components from fluctuating power supply. When it fails, the power supply is cut, and it should be replaced.
- The thermal fuse may be the reason why the microwave fails to start. The problem may be a thermal cut-out whose role is to protect the microwave from overheating.
- The door latch assembly can also prevent the microwave from coming on. The two hooks on this contact latch should power the controls to keep the door closed.
Check this too: Best Microwave Rice Cooker
GE microwave troubleshooting no power
What do you do when your microwave shuts down every time you switch it on?
- Find out what is blowing a fuse, especially if it keeps recurring even after several replacement attempts
- Narrow your search down by first identifying if the issue is on a high or low voltage side
- Find the relay o the board feeding the transformer voltage by tracing the wires and looking at the wiring diagram
- Unplug the wire, then plug it back in after replacing the new fuse
- If it doesn’t trip, then the issue was on the high voltage side
- Remove all wires and from the capacitor after disconnecting the microwave. Using the ohmmeter, check for continuity across the capacitor. It is likely to be the culprit, and you will confirm this if it has a continuous current reading.
- If doing this still does not fix the tripping issue, you may have to do the same thing for the low voltage side and remove components on this side, such as the fan and turntable motor. However, more often than not, the capacitor is always the challenge you need to deal with.
Microwave Cleaning Hacks That Work
Microwave ovens have been used and are gaining speedy popularity even in remote parts of the globe. Most people in cities have a microwave oven as essential kitchen equipment that will render the kitchen dysfunctional if it ever got damaged or stops working.
Being one of the most used equipment in your kitchen also means that it will get dirty every other time and will need some good scrubbing frequently. This will depend on how much you use the microwave.
Cleaning your microwave should not be a big deal after going through the following hacks on cleaning the microwave properly and keeping off bad smells from your favorite oven.
Cleaning with a Lemon
Lemons are widely known for their superior scent and ability to keep off bad odors. They are also a cleaning alternative when it comes to dealing with grime and grease.
You will need a large microwave-safe bowl, a sizeable lemon, water, and a clean cloth.
- Take the lemon and squeeze it to make it mushy. Cut it into two halves and squeeze as much juice as possible.
- Fill the bowl with two cups of water, add the lemon juice and the squeezed halves.
- Place the bowl in the microwave and turn it on for five to ten minutes at high temperature to get the oven steamy. Let the door remain closed for five minutes.
- Remove the bowl from the oven carefully as it might be hot.
- Remove the turntable and clean it by wiping it with a clean cloth.
- Using paper towels wipe down the bottom and top part, the side, and the door to remove excess grime then wipe all the surfaces again with a clean dishcloth.
- Wipe the microwave dry using a clean cloth and replace the turntable.
Cleaning with Vinegar
Vinegar is one of the safest natural cleaning agents in your kitchen and works wonders when it comes to cleaning a microwave oven and maintaining it smelling fresh.
You will need a large microwave-safe bowl, vinegar, water, a clean cloth, and your favorite essential oil (optional)
- Fill the bowl with two cups of water, add two tablespoons of vinegar, and one drop of your favorite essential oil to prevent the microwave from having that lingering vinegar smell.
- Place the bowl in the microwave and turn it on for five minutes at high temperature to get the oven steamy. Let the door remain closed for fifteen more minutes to allow all the grime to soften for easy cleaning.
- Remove the bowl from the oven carefully as it might be hot.
- Remove the turntable and clean it by wiping it with a clean cloth.
- Using paper towels wipe down the bottom and top part, the side, and the door to remove excess grime.
- To remove all stains and grime use a sponge and vinegar solution to wipe all the surfaces on the inside. Be careful not to get the vents moist.
- Wipe dry using a clean cloth and replace the turntable.
Cleaning with Window Cleaner
Window cleaners can be used to clean a microwave often but you should note that most of these cleaners contain ammonia and should not be mixed with other cleaning agents.
- Put a cup of water into a microwave-friendly bowl and add about ten sprays of the window cleaner.
- You could also spray the inside of the oven if it has stuck on spills.
- Place the bowl in the microwave and turn it on at five minutes on high.
- Let it sit for five minutes then carefully remove the bowl from the microwave as it might be hot.
- Remove the turntable and clean it by wiping it first with a damp paper towel then followed with a dry one.
- In the same way as the turntable, clean the inside surfaces of the microwave.
- Make sure the surfaces are completely dry then replace the turntable.
Cleaning with Soap and Water
This is one of the oldest and most convenient ways of cleaning most wares in the kitchen. Good thing is that it still works in its simplicity and ease.
- Add some dishwashing soap to a bowl of warm water and lather the mixture.
- Remove the turntable and wash it in the sink using a sponge and soapy water. Rinse and wipe it dry.
- Use a wet paper towel or cloth to remove food remains from the microwave.
- Scrub the surfaces using the sponge and warm soapy water and remove all grime. Be careful not to get water into the vents.
- Wipe the surfaces with a damp paper towel or a dishcloth then wipe again using dry ones.
- Put back in place the turntable.
You can also use this alternative procedure using soap and water.
- Add some dishwashing liquid into a microwave-safe bowl filled with warm water. You could add a little baking soda to the mixture if your microwave needs to be deodorized.
- Place the bowl in the microwave and turn it on at five minutes on high.
- Let it sit for five minutes then carefully remove the bowl from the microwave as it might be hot.
- Remove the turntable and wipe it using a damp sponge then dry it with a paper towel.
- Wipe the inside surfaces with a sponge and dry with a dishcloth or paper towel.
- Replace the turntable.
The results from using any of the above procedures will be a sparkling clean microwave that you’ll be proud of. To maintain it clean for longer in between, wipe the inside immediately food spills and splashes in the microwave.