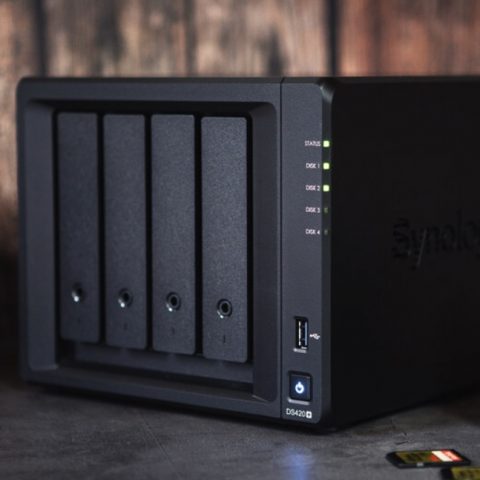
With the growing trend towards remote work, there is a high demand in managing your data conveniently and flexibly hence the benefit of cloud servers. The Synology NAS is not just a storage drive for your documents and media. It can also stream your local shows on your Smart TV without extra streaming devices like Netflix and Hulu. Thankfully, you can easily access your NAS remotely.
There are three ways you can access Synology NAS remotely: through QuickConnect, EZ internet, and port forwarding. External or remote access allows you to use your DiskStation Manager interface outside your network.
DSM will allow you to access your Synology NAS by entering a custom domain name into your internet browser. However, remote access to your Synology server makes it vulnerable to anyone since it uses an internet connection. You’ll learn to conveniently and securely access your Synology NAS data and files remotely.
How do I access my Synology NAS remotely?
Synology QuickConnect is a feature that gives you access to your Synology NAS outside the local network. Using Synology QuickConnect is the easiest way to manage your Synology NAS over the internet without setting up port forwarding rules or complex network settings. Instead, you will use a customizable address. Follow our step-by-step guide on setting up remote access for Synology NAS.
What you need
- A Synology NAS with the latest DiskStation
- Steady internet connection
Procedure
- Open the DiskStation manager and go to Control Panel.
- Click “QuickConnect”.
- Tick the “Enable QuickConnect” check box.
- Click “Log in or register a Synology” and enter your credentials, then hit the “Log in” tab.
- Create the QuickConnect ID that you’ll use to access your NAS remotely.
- Tick the terms of service and a privacy check box to agree and click the “Apply” button.
- A message box will appear with an access link you will use to connect to your NAS remotely via a web browser and the access ID for connecting to your NAS from a mobile device through Synology mobile app. Save the URL and ID somewhere safe on your phone.
- To access your NAS, you will enter the QuickConnect ID into a Synology mobile app or the URL to access the service through your web browser. It automatically detects your location and uses the fastest route to your Synology NAS.
How do I access Synology NAS remotely with a VPN?
A VPN(Virtual Private Network) protects your PC against hackers and cyber-attacks. The VPN Server package turns your Synology NAS into a VPN server that allows DSM users to access files from your NAS remotely. You have to incorporate the three common VPN protocols – OpenVPN, L2TP/IPSec, and PPTP – for the VPN Server to set up and manage the services. Here’s how you can connect to your Synology NAS remotely via VPN.
L2TP/IPSec
- Enable the L2TP/IPSec VPN server
- Go to “Packages” and install the “VPN Server” package.
- Open the VPN Server package.
- Scroll to “L2TP/IPSec and choose “Enable L2TP/IPSec VPN Server”.
- Enter the VPN server’s IP address in the “Dynamic IP address” field or leave the default.
- Set the “ Maximum connection number” to limit the number of concurrent VPN connections.
- Set the “Maximum number of connections with the same account” to limit the number of VPN connections using the same account.
- Click on the “MS-CHAP v2” authentication method to allow encryption of VPN client passwords.
- Tap the “Pre-shared key” box and choose “Use a securely generated password” or enter your strong password.
- Tick the “Enable SHA2-256 compatible mode(96 bit)” to allow specific clients to use the L2TP/IPSec connection.
- Select “Apply.”
- Click “OK” on the message prompt on open Firewall ports.
- Log in to your router’s web interface to configure the L2PT/IPSec port forwarding to your router.
- Then copy and paste the “1701, 500” and ”4500 (UDP)” ports to the IP address of the Synology VPN Server.
- Configure the new VPN connection to access Synology NAS remotely from Windows 10.
- Go to Settings > Network & Internet > VPN > Add a VPN connection.
- Fill in all the fields as follows:
- VPN provider: Choose Windows (built-in).
- Internet Server name or address: Enter the external IP address of your Synology NAS.
- Connection name: Name this VPN connection.
- VPN type: Choose “Point to Point Tunneling Protocol(PPTP)” or “L2TP/IPsec with a pre-shared key.
- If you selected ”L2TP with pre-shared key”, enter your pre-shared key in the Pre-shared key field.
- Username and Password: Input your DSM/ VPN user credentials.
- Click “Save” to save your VPN profile.
- Tap the VPN profile and click “Connect” to sync to the VPN. You’re now able to access shared files within your Synology NAS.
- To disconnect, click the Network icon in the System tab. Next, select your VPN connection and select “Disconnect.”
OpenVPN Connections
- Go to OpenVPN’s official site, download, and install the latest OpenVPN application.
- Find OpenVPN GUI in the Start menu and launch it as an administrator.
- Transfer the configuration file from the OpenVPN tab on VPN Server. Extract the exported file, and you will see OpenVPN.ovpn and README.txt file.
- Use a text editor to open “OpenVPN.ovpn” and replace “YOUR_SERVER_IP” with the IP address of your Synology NAS. If your Synology NAS is behind a router, replace “YOUR_SERVER_IP’ with the router’s exact external IP address. If you want to send all traffic through the VPN server, remove # from “#redirect-gateway def1” and click “Save.”
- Put the ”openvpn.ovpn” files into the ”config” tab under the ”OpenVPN” directory.
- Double click the ”OpenVPN GUI” icon in the system tab. The icon is a PC with a padlock.
- Use your DSM user credentials to log in to the OpenVPN VPN server.
- Sign in to your Synology again to access your files via OpenVPN.
- Click ”Disconnect” to disconnect VPN.
How to access Synology NAS remotely without QuickConnect?
There are two other ways you can reach your Synology NAS remotely if QuickConnect fails; using EZ internet or port forwarding.
What you need
- A Synology NAS with the latest DiskStation
- Steady internet connection
- A UPnP compatible Router (for EZ Internet method)
Procedure
Using EZ internet to access your Synology NAS remotely
- Open the DiskStation menu and select “EZ Internet .”This initiates the wizard that will help you through the entire setup process.
- Click “Next.”
- On the firewall setup screen, tick the “Enable firewall to block incoming connections” box to block the incoming connections. Then, scroll through the list downwards and place the tick beside the service you want access to.
- If you only want to go to the DiskStation manager, click “Next” at the bottom.
- Enter a hostname in the field. You can also change the domain name linked to your hostname. Finally, write down the domain name to access your Synology NAS.
- Log in to your Synology account, accept the “Terms and Conditions” tab, and click “Next.”
- Ensure the settings are correct and click “Apply” to set up the firewall and DDNS settings.
- Click “Finish.”
- If an error message appears, the router may not be compatible. First, you need to confirm if the firewall settings have taken effect. Then, go to the DiskStation menu and select “Control Panel’.
- Choose the external access icon and go to the “Router configuration” tab at the top of the screen.
- Click “Setup router .”The message “No UPnP router found” indicates this method won’t work for you.
Using port forwarding to access your Synology NAS remotely
- First, ensure the Synology NAS has its gateway setup with the router’s IP address. To check this, go to DiskStation menu > Control panel > Network.
- Click the “Edit” button. Confirm the IP address is your router. If not, you will have to configure the DNS server on the network screen manually.
- Log into your router’s interface and change the ports that have to be open for remote access.
- After configuring your router with the correct ports, set up the DDNS hostname for access.
- Go to DiskStation menu > Control Panel > External access
- Under the “DDNS” tab, click “Add” and a drop-down menu with different DNS providers.
- Choose the provider you have an account with, enter all your details on the DDNS page, and select “Test Connection” to ensure proper connection.
- Then click “OK.
Is allowing remote access to your Synology NAS safe or necessary?
Remote access is not safe for your Synology NAS. Typically, you can access the files on your NAS from a wireless device connected to the same network without the internet. You can also access the same files on your NAS remotely through the internet by opening a corresponding port on your router. However, exposing your Synology NAS server to the internet has its risks that you should avoid as much as possible. Opening these ports can expose your files and information to hackers. With an open port, a cybercriminal can exploit this vulnerability and take control of your NAS server and infect it.
If you must access your Synology NAS remotely, we recommend using a Synology NAS server’s VPN. The Synology NAS, the OpenVPN, and L2TP / IPsec protocols allow safe access to your NAS. In addition, the VPN server opens only one port on your router that requires digital certificates for authentication. It means no one else can access your NAS without the authentication codes. That’s also why the VPN only gives access to the administrator account.
Conclusion
Now you can set up and manage your Synology NAS remotely. However, remember that security is crucial whether your Synology NAS stores media files or financial credentials. If you have any security concerns, it is best to use a VPN to access your Synology NAS server. You can use the Synology VPN packages or outsource commercial VPNs.