
TCL TVs offer good picture quality and great features at a low price. With the TCL Roku TV, customers can choose their preferences from the different products on offer.
They range from budget-friendly streamers to 4K Ultra HD smart TVs. But like other smart devices, the TV can be challenging for some users to set up, or some issues can arise from its day-to-day use.
If you are having problems with your TCL Roku TV, it’s likely not a big issue and should clear after doing some troubleshooting. Here is an easy-to-follow guide to help you get around some of the common challenges with this TV.
TCL Roku TV Won’t Turn On Fix
If your TCL Roku TV doesn’t turn, try the following steps below;
- Try the power button that is on the TV. The problem could be the remote control. The remote could have dead batteries, be defective, or something is blocking the remote sensor on the TV from receiving a signal from the remote.
- Does the status light blink? Try pressing a button on the remote to check if it blinks. If it does, it means the TV is on and receiving a signal from the remote.
- Try changing the input of the TV.
- If no LED is on, chances are power isn’t getting to the TV. Bypass any power strips and connect it direct to the wall or change the power cord
- If it still doesn’t turn (status LED also stays off) on after changing the power cord or skipping power strips and other gadgets are working in the house, you need to get a technician to look at it
Troubleshooting Black Screen
If you power on your TV but you don’t see the menu options, or any video display-just a black, blank screen, and possibly no audio as well; try the steps below to resolve the issue:
-
Check if the status LED on your TV is ON
The LED at the base of your TV should be solid white when the TV is off or in standby mode. To confirm, point your remote towards the TV and press any button. If the LED blinks after pressing a button on the remote, proceed to step #2.
If not, likely your TV is not powered on or it’s not responding to the remote. If the TV doesn’t seem to receive power check that the power cord is firmly plugged into the back of the TV.
Plug the other end to a working outlet. Bypass any power trips for troubleshooting purposes.
-
Verify cable connections
Ensure all external devices plugged into the TV are connected properly to the appropriate port and are powered on. Unplug then reconnect the cables if necessary.
-
Restart the TV
Press the power button on your TV. Unplug the TV from the power outlet. After 30 seconds, plug the TV back.
-
Factory reset the TV
If you can’t view the menu options, force reset the TV by following the steps on how to reset the TV (scroll down to the section below where we teach you how to factory reset the TV).
-
Contact support
If after performing the factory reset the display is still blank, contact TCL support for further troubleshooting.
Check this too: Haier TV Troubleshooting Guide: Problems & How to
How to Troubleshoot a TCL Roku TV Without a Remote
The Roku mobile app is an alternative remote for your TCL Roku TV that you can use to troubleshoot. It is free for compatible iOS and Android mobile devices.
You can use the Roku mobile app to control your TV with voice commands. This includes changing stations, TV inputs, and launch streaming channels, and more. Voice commands are only available in the United States.
- Before you start using the Roku mobile app, check that your mobile device and your Roku device are on to the same wireless network.
- When the Roku mobile app launches, it will discover any Roku devices on your network.
- Select the Roku device you wish to control using your Roku mobile app.
- You will then be taken to the home screen where you will be able to control your Roku device.
TCL Roku TV Blinking On and Off
If your TV blinks on and off a component attached to it could be at fault. To fix it, try turning the TV off and back on. The TV could be having difficulty talking with your router.
Also, try restarting the router. If the problem persists, try changing the location of your TV and router. After that, try changing the channel.
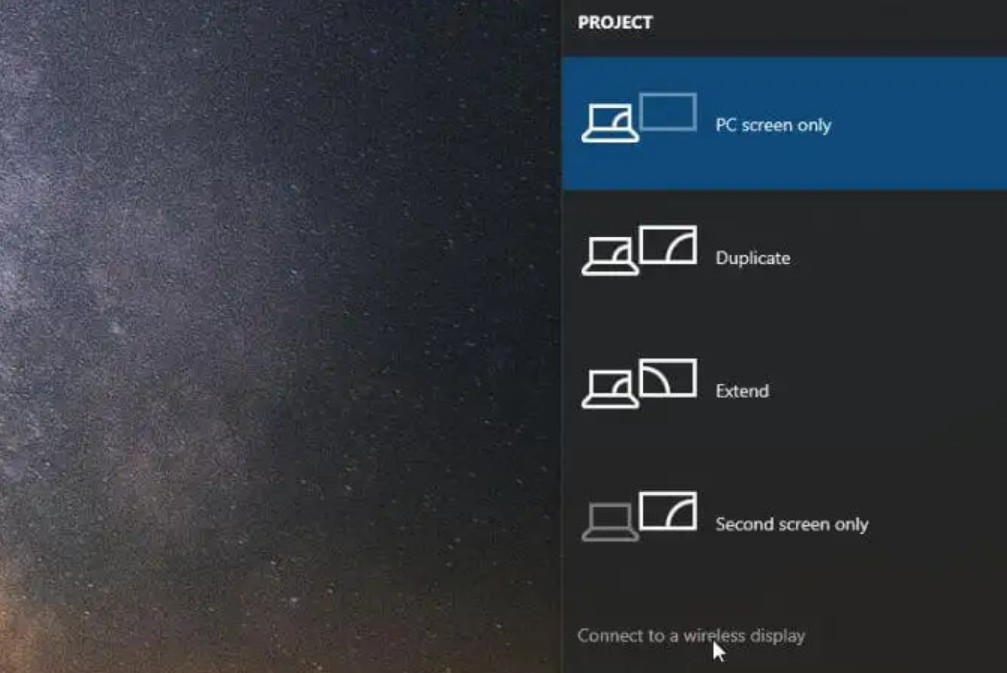
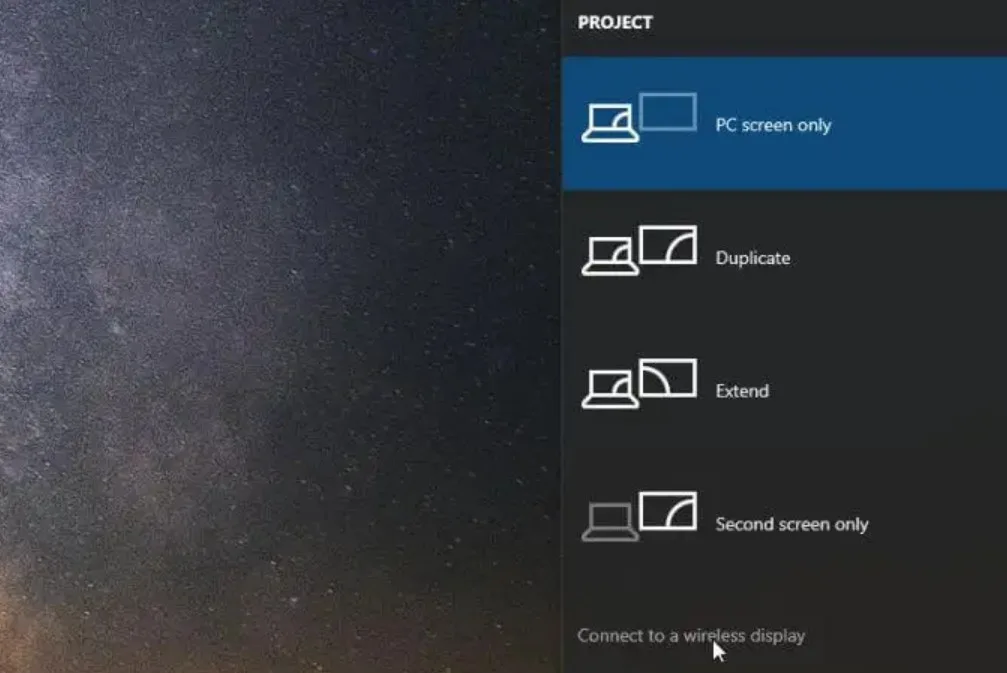
Laptop Not Mirroring With TCL Roku TV Troubleshooting
If you are having problems mirroring a laptop with your TCL Roku TV, it could be problems with your settings. By default, your TV’s screen mirroring mode is set to prompt.
In this mode, when your TV receives a screen mirroring request, it prompts you with Always accepting, accept, and ignore options, unless you have previously Always accepted or Always ignored for the device.
To change the list of devices that are set to always accept or always ignore:
- Navigate from the Home screen to Settings> System> Screen mirroring> Screen mirroring devices
- If the problem persists, try resetting the network connection
TCL Roku TV Error Codes: Their Meaning, and Fixes
When setting up your TCL Roku TV or during regular use, you may encounter various error codes. Below are the error codes you may come across, their meaning, and their fixes:
-
Error Code 009
This code means that your TV is connected to the router, but doesn’t have internet access. To fix it;
- Use another device, like a computer or tablet, to check if you have a working internet connection.
- If you don’t have a connection, contact your ISP for help restoring the internet connection.
- If your tablet or computer has an internet connection and you still see Error 009, restart your TV.
-
Error code 012
This is an Ethernet-related error. Try the following steps below to fix it:
- Confirm that your Ethernet cable is firmly connected to your TV and router.
- Try a different Ethernet cable if possible.
- If the cable is good, restart both your TV and wireless router.
-
Error code 13
This is another Ethernet-related error. Try these steps to clear it:
- Check and verify that you have a properly working wireless router.
- If you are able to connect to the internet from another device, restart your TV.
- If unable to connect to the internet from another device, try disconnecting and then reconnecting the Ethernet cable.
- If the problem doesn’t resolve, restart your router before contacting your internet service provider.
-
Error code 014
If you get this error code, it means your TCL Roku TV has failed to connect to the wireless network.
- Make sure you are selecting the correct wireless network name. Choosing the wrong wireless network will cause your wireless connection to fail.
-
Error code 014.20/014.30/014.50
When you get these error codes, it means your TV is not getting a strong enough wireless signal from the router.
- If your password is correct and other devices can access the router, but you are still failing to connect to your wireless network, the problem is most likely the strength of the wireless signal.
- Check the distance between your TV and router, and also for obstacles between the two. Wireless signal gets weaker the farther your Roku device is from your router.
- Try to restart both the router and your TV. If the problem persists, reset your TV to factory default.
-
Error code 014.40 or 014.41
You might get these error codes if the password you are entering is not correct or when there are restriction settings enabled on your router. To fix this:
- Confirm you are selecting the correct wireless network name.
- Make sure you are entering the correct password. Note that passwords are case sensitive.
- Check if you have MAC Address Filtering enabled on your router. If yes, you have to add your TV’s MAC Address to your router’s allowed list.
-
Error Code 016
This error happens when you are attempting to launch a streaming channel but your TV lost its network or internet connection.
- Select Set up connection.
- Go to your TV’s network settings and follow the on-screen instructions.
-
Error code 017
This error occurs when your TV is getting a poor wireless signal from the router. To fix this:
- Follow the instructions on the screen and reconsider the placement of your TV and wireless router.
- Try restarting your TV and wireless router.
-
Error code 018
You get this error when the internet bandwidth is poor.
- Check with your internet service provider to determine the speed connection you are subscribed to.
- You may want to upgrade to a faster connection if necessary.
Why Is My TCL Roku TV Not Connecting to Wifi?
If your TV is not connecting to WiFi, it could be because you are didn’t select the correct wireless network name. In order to connect to a wireless network, you need the following required credentials:
- Wireless Network Name (SSID)
- Wireless Network Key (Password)
To find the network credentials, check the label on your device. Most wireless routers or gateways have a label with the default credentials. If you don’t find the label with the credentials, check the documentation that came with your device.
Another reason for this could be that the TV is not getting a strong enough wireless signal from the router.
The wireless signal gets weaker the farther your TV is from your router, and with more obstacles (like walls and cabinets) between your router and your TV.
Also, try to restart both the router and your TV. If you have previously connected to your router, your TV should connect automatically. If it is not reconnecting, or if you are setting up your TV for the first time, complete the network setup process. If the issue persists, you might have to rest your TV to factory default.
How to Reset a TCL Smart TV
You can choose to reset only the TV picture and audio settings to their original values, or carry out a full factory reset to return the TV to the state it was when first unpacked and turned it on.
To reset only the TV picture and audio settings to their original values:
- Navigate to Settings> System> Advanced system settings> Factory reset.
- Highlight Reset TV audio/video settings.
- Read the information on the screen to make sure you understand what the reset operation does.
- Press PLAY/PAUSE three times in a row to proceed with the reset operation.
To perform a factory reset:
- Press the home button on your remote to open the main screen
- Scroll down and select “Settings”.
- Press the right arrow button, scroll and select “System”.
- Press the right arrow button, scroll and select “Advanced system settings”.
- Press the right arrow button, scroll and select “Factory reset”.
- Press the right arrow button, scroll and select “Factory reset everything”.
- To proceed with the full factory reset, enter the code listed on the screen and select “OK”.
It is possible that your TV might get into a state where you cannot access the various menus, including the one that lets you perform a factory reset operation. If that happens, you can force the TV to reset by following the steps below:
- Using a ball-point pen or straightened paper clip, press and hold the recessed RESET button on the TV connector panel.
- Continue holding the RESET button for about 12 seconds. When the reset cycle finishes, the status indicator comes on dim.
- Release the RESET button. The TV is now powered off.
- Turn on the TV and proceed through Guided Setup.
How to Browse the Internet on TCL Smart TV
In order to enjoy your TCL Roku TV’s streaming capabilities, it must be connected to the internet. This can be done via WiFi or by using an Ethernet cable (for TCL Roku 4k TVs).
For wireless connection setup, be sure you have a wireless network name and password. Then follow the steps below.
- Press the home button on your remote to open the main screen.
- Scroll down and select “Settings”.
- Press the right arrow button and select “Network”.
- Press the right arrow button and select “Wireless”.
- Your TV will start scanning for available wireless networks.
- Scroll down and choose your wireless network name from the list.
- Press the OK button.
- If your network is password-protected, use the on-screen keyboard to enter your wireless network password.
- Scroll down and highlight “Connect” then press the OK button.
- After submitting your network password, the TV will display progress messages verifying your connection.
If you are using a TCL Roku 4K TV and you choose to connect it to the internet using an Ethernet cable, follow the instructions below:
- At the back of your TV, locate the Ethernet port.
- Connect an Ethernet cable coming from your router or modem to the TV.
- On your TV, Press the home button on your remote to open the main screen.
- Scroll down and select “Settings”.
- Press the right arrow button and select “Network”.
- Press the right arrow button and select “Wired (Ethernet)”.
- The TV will then verify connectivity to your local network and the internet.
TCL Roku TV Mac Address Blocked Fix
Check if you have MAC Address Filtering enabled on your router. If yes, you have to add your TV’s MAC Address to your router’s allowed list.
To locate your wireless MAC address:
- Press the Home button on the remote.
- Go to Settings and select OK on the remote.
- Go to Network and select OK on the remote.
- Go to About.
- The MAC address can be found next to Wireless MAC address.
TCL Roku TV Troubleshooting Digital Tuner
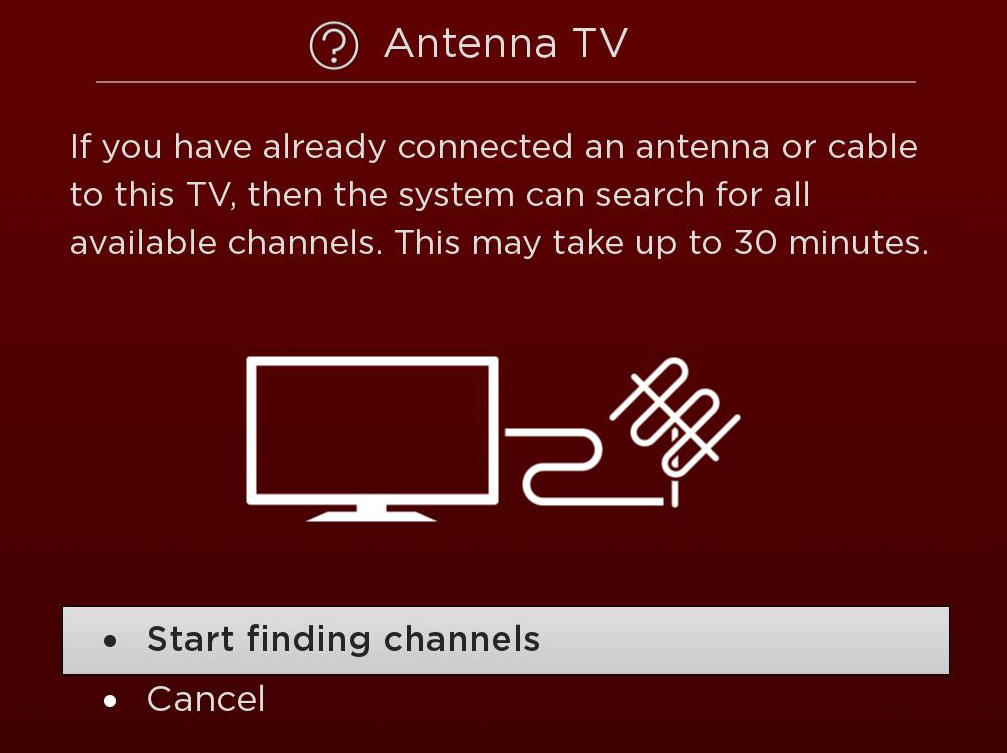
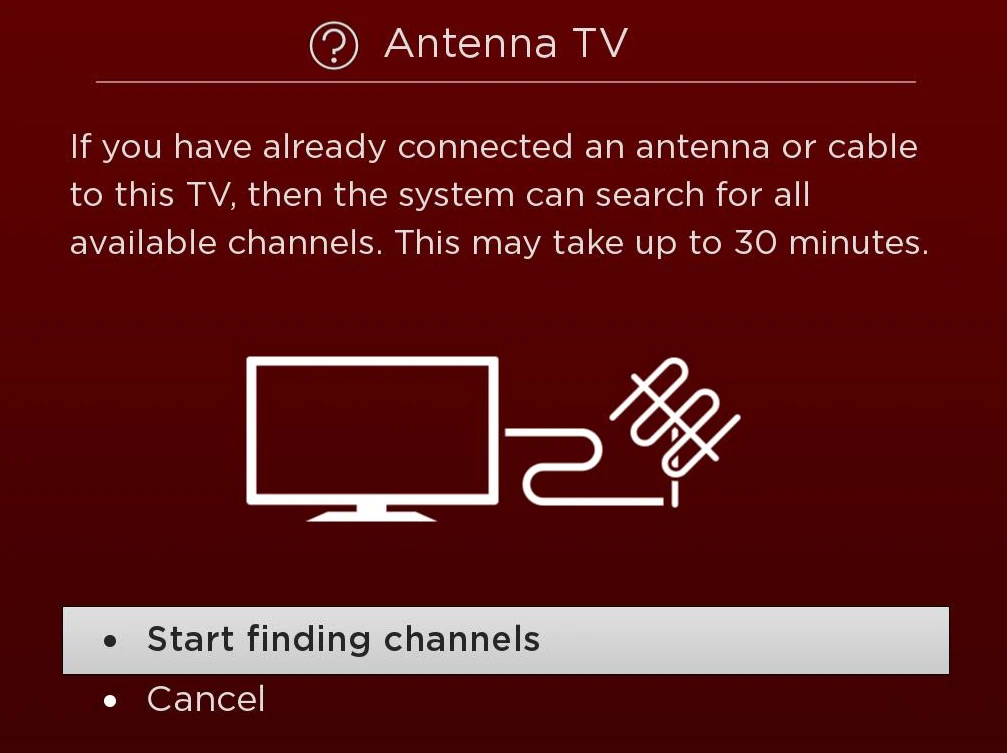
The first time you select the Antenna TV tile, you have to set up the TV tuner. Setting up the TV tuner scans for active channels and adds them to your broadcast TV channel list.
If you are having problems with your digital tuner and are not getting channels, make sure you are getting a good signal.
There will be times when you need to create a new channel list. For example, you:
- Change cable providers
- Reorient your TV antenna
- Move to a different city with different channels
Repeat the channel scan from time to time to make sure you are receiving all of the latest channels. To repeat the channel scan:
- From Home screen menu, navigate to Settings> TV inputs> Antenna TV> Scan again for channels.
- Then select Start finding channels to begin the channel scan process
Troubleshooting a TCL Roku TV Remote that’s Not Working
Depending on the TCL Roku TV you are using, you will have one of the following remotes:
- Standard IR remote
- Enhanced remote
To resolve issues with your standard IR remote, try the following:
- Verify that there is a clear path between your TV and remote. There should be no obstructions between your remote and the remote sensor located in front of the TV.
- Aim the remote directly at the TV.
- Try reinstalling the batteries.
- Replace the batteries if there’s still no improvement.
You can also carry out an Infrared Emitter Test. For the procedure, you will need a smartphone or a digital camera with a live display. Also, it is recommended to conduct the procedure in a darkened room. Then follow these steps:
- Point your smartphone or digital camera towards the remote’s tip.
- Look into the camera as if you are taking a picture while pressing any button on the remote.
- You should see a flashing purple light as you press and hold the button.
- If no light is seen from the IR emitter, then it is likely that the remote is defective
- If the remote is working, there’s a clear line of sight with nothing blocking the TV’s IR receiver, but the TV still doesn’t turn on, then the problem could lie with the IR receiver on the TV.
To resolve issues with your enhanced remote, try the following steps:
- Try replacing the batteries with new fresh ones.
- Try restarting your TV and enhanced remote.
- Try re-pairing the enhanced remote and your TCL Roku TV.
Troubleshooting No Cable Signal Problem
Step 1: Check the power
Step 2: Check the input source
If power is okay, check to ensure your TV is properly connected. You might have your TV set to the wrong input source.
Step 3: Check the cables
If you still have a signal problem, check to ensure the cables are working and are firmly inserted.
There 3 ways to connect your cable or satellite service on your TCL Roku TV:
- Connecting with HDMI
To connect using HDMI;
- With the TV powered off, connect the HDMI cable from your Cable or Satellite Receiver to the HDMI 1 input or any other available HDMI ports on your TV.
- Power on your TV and your receiver.
- From the Home Screen, and using the remote, navigate to the HDMI Input Tile where you connected the device.
- Press the OK button.
- If the receiver is powered on and cables are plugged properly your TV will recognize the connection.
- Connecting with Composite RCA Cable
- While the TV is powered off, connect each plug to the corresponding connector on the receiver and on the TV.
- Power on both your TV and the receiver.
- From the Home Screen, and using the remote, navigate to the AV Tile.
- Press the OK button.
- If the receiver is powered on and cables are plugged properly your TV will recognize the connection.
- Connecting with a Coaxial Cable
- With the TV powered off, screw the coaxial cable from your Cable or Satellite Receiver on to the Coaxial input of your TV.
- Power on your TV and from your Home screen, navigate to the Antenna TV tile. Press the OK button on your remote.
- Select Start finding Channels and press OK on your remote.
- Select No, Channels 3 & 4 are needed. If a VCR is connected from your Cable or Satellite receiver to your TV then select Yes, Channels 3 & 4 are needed.
- Your TV will start to scan for channels.
- In the next step, your TV will try to find cable channels available through your paid subscription.
- When the channels scan is completed, the TV will display a message showing the number of channels found and information about editing the channel lineup.
- Once you press done, it will bring you to the Home screen. The Antenna TV tile should display the input’s preview.
- Select the input tile and press OK to start viewing shows from your cable subscription.
Audio Troubleshooting TCL Roku TV
If your picture is fine but the sound is missing on your TV;
- The sound might be muted. Try pressing the volume up button to restore sound.
- Do a channel search and check if it is the same with other channels. If only there is only one channel with no sound, the problem is likely poor signal strength of the network, or it may have a technical issue.
- If you are using DVI or Y, PB, PR, remember to also connect the device’s left and right audio output jacks to the TV’s L and R audio input jacks.
- If your TV is connected to a different device such as a cable or satellite box, Blu-Ray, DVD, etc make sure the cable connection is correct. Check if the device has a volume controller and try adjusting it.
- Change the TV sound mode to mono or stereo.
Check this too: Coway Air Purifier How to & Troubleshooting Guide
TCL Roku TV Remote Not Working
The solution depends on the type of remote you have.
Standard IR Remote
Standard IR remotes use an invisible Infra-Red light to transmit remote key selections. To ensure IR remotes are operating reliably, they must be pointed directly at the front of your TCL Roku TV. To resolve issues with your standard IR remote, try the following:
Verify that there is a clear path between your TV and remote
Ensure that there are no obstructions between your TCL remote and the remote sensor located in front of the TV. For example: If you have a sound bar, confirm that it is not blocking the TV sensor.
Aim the remote directly at the TV
Ensure you are pointing the remote directly at the TV or at an optimal distance.
Try reinstalling the batteries
If the remote is still unresponsive or intermittently responding, it is possible the batteries were installed incorrectly. Try removing the batteries from the remote and re-inserting them.
If there is no improvement after reinstalling the batteries, try replacing them.
Perform a power drain on the TV
Unplug the power cord from the power outlet, push the power button on the TV for ~15 seconds, then plug the TV back into the power outlet. Once completed, try to use the TCL ROKU TV remote control to turn on the TV.
Infrared Emitter Test
For this procedure, you will need a smart phone, or a digital camera with a live display. Note: Some cameras will show the Infrared (IR) signal better than others. Also, it is recommended to conduct this test in a darkened room.
- Point your smartphone or digital camera towards the tip of the TCL remote.
- Look into the camera as if you are taking a picture while pressing any button on the remote.
- You should see a flashing purple light as you press and hold the button.
- The IR emitter will be more visible in a darker room and quite hard to see in a brightly lit room.
If no light is seen from the IR emitter, then it is likely that the remote is defective. If the remote is emitting an IR signal, but the TV still does not turn on or respond, confirm that nothing is blocking the TV’s IR receiver (located underneath the TCL logo).
If there’s clear line of sight, and the TV still does not turn on, then the issue could lie with the IR receiver on the TV.
Voice Remote and Enhanced Remote
The voice remote and enhanced remote connect over your wireless network and do not need to be pointed directly at your TCL Roku TV. This easy-to-use remote needs to be paired during initial TV setup. To resolve any issues with your enhanced remote, refer to the recommended steps below:
- Try restarting your TCL Roku TV and enhanced remote
- Open the battery compartment and remove the batteries from the remote.
- Restart your TCL Roku TV by pressing the physical button on the TV
- When you see the home screen on your TV, reinsert the batteries.
- Try re-pairing the enhanced remote and your TCL Roku TV
- Open the battery compartment to locate the pairing button
- Press and hold the pairing button for three (3) seconds or until the pairing light starts flashing.
Note: If the light does not flash, try again. If the light still does not flash, then you will need to replace your batteries. After replacing the batteries, repeat step 1.
Restart your TCL Roku TV
- Wait for 30 seconds while the remote establishes a connection with your TV.
- The remote pairing dialog should appear on your TV screen.
- Once TV and enhanced remote are successfully paired, the TV will show the battery status of the enhanced remote.
Try replacing the batteries
Open the battery compartment and remove the batteries from the remote.
Install new fresh batteries of same type in your TCL ROKU TV remote control, observing the proper orientation as indicated in the battery compartment.
Perform a power drain on the TV. Unplug the power cord from the power outlet, push the power button on the TV for ~15 seconds, then plug the TV back into the power outlet. Try again to re-pair the remote to the TV.
If none of the above steps resolved your remote problem, try the fixes below;
Pair your Roku Remote
Another common cause for a Roku remote not working is that the control has become unpaired from the box it is supposed to operate.
System updates, low power, changing Wi-Fi networks, using the device with another Roku box, or a simple technical glitch could all theoretically trigger an unexpected unpairing.
Thankfully, it is easy to pair a Roku remote with a Roku box or streaming stick. Just follow the instructions below:
- Disconnect your Roku box from its power supply.
- Wait 10 seconds, reconnect the box, and wait for the Home page to load.
- Locate the pairing button on your remote. It is typically found on the front of the device or in the battery compartment.
- Hold the button down for five seconds or until you see the Roku remote blinking.
- Remember, some older Roku models come with an IR pointer instead of using your Wi-Fi connection. If you have an IR Roku remote that’s not working, check that no dirt is blocking the receiver on either the control or the box/TV. Also, ensure that there are no obstructions in the remote’s line-of-sight to the Roku box.
Reset Your Roku Remote
You can reset Roku remotes by performing a specific sequence during the box or stick’s boot process.
To reset a Roku remote, follow the steps below:
- Remove the batteries from your Roku remote.
- Remove the power supply from the Roku box/stick (or go to Settings > System > System Restart > Restart if you have an IR Roku remote that’s still working).
- Wait 10 seconds and then reconnect your Roku box to the power.
- Wait for the Home screen to load.
- Reinsert the batteries into your Roku remote.
- If the Roku TV remote still doesn’t work, move onto our next tip.
Check for HDMI Interference
The remotes for some Roku models are affected by interference from nearby HDMI cables. The issue is especially prevalent on Roku streaming sticks which connect directly to the HDMI port on your TV.
The solution is to use an HDMI cable extender, thus allowing your streaming stick to be positioned further away from the TV’s HDMI port.
You can use any HDMI extender you have lying around your home. However, if you don’t already own one, Roku will ship you a short extender for free. To claim your free cable, you just need to fill out the appropriate form on the Roku website.
Check Your Wi-Fi Connection
If you’ve worked through all the Roku remote troubleshooting tips but you’ve still not had any success, your Wi-Fi connection could be the culprit.
The Roku remote does not require an internet connection in order to connect to your box, but it does need a functioning local network. If your local network is down for any reason, the remote will not function until the connection is restored.
If you have enough technical knowledge, it might be worth digging into the router’s settings; something might have happened that’s causing the remote’s connection to get blocked.
Use the Official Roku Remote App
you can download the official Roku remote app and use it for free on both Android and iOS. It’s a reliable temporary stop-gap. Ensure the app is on the same Wi-Fi network as your Roku streaming device.
As soon as the app loads, you will see the Discovery screen. Allow the process a few seconds to complete, and you should see your Roku box listed. Tap on the name to make the connection. Aside from working as a remote, Roku TV remote, the Roku app has plenty of other cool features that are worth using.
This includes access to free TV shows and movies on your device via The Roku Channel, the ability to use your device’s headphone connection for private listening, support for keyboard (and, on some models, voice input), and a way to cast content from your device to the TV screen.
TCL Roku TV Volume Control Not Working
If your TCL TV sound is not working, not syncing, won’t turn, or stays up and down check to see that your remote is working, turn the ‘Volume Mode’ off, confirm the audio settings, disable the speaker sound and install a soundbar, or control the sound through the Roku app on your smart device.
When the picture of your TCL TV is working in perfect order, you may be thinking you could want nothing more. That is until the sound is no longer functioning properly, which can be just as big of an issue as the picture malfunctioning when it comes down to it.
If you are having problems with your TCL TV sound not working, not syncing, not turning, or staying up or down, continue reading to find your problem with a solution attached to it.
TCL Sound Not Working/Stopped Working
If you have a general problem of your TCL sound not working or it simply stopped working out of nowhere, it may feel like one of those issues that is going to cost some serious time and money.
Before you bring in the experts though, try a few different troubleshooting methods to see if you can resolve the issue on its own. For many owners, the problem is typically rather obvious and simplistic, it just takes a bit of digging to discover.
If your TCL Sound is not working or has randomly stopped working, you want to first check your remote. For those TVs that have a Roku remote controller, there is a mute button which is located on the side, but it is rather small.
Even with its small size, it is very easy to push and this is sometimes one of the biggest reasons that owners are experiencing problems with their sound not working.
If the mute button is not your problem, check to see if the channel you are on is causing the problem by switching to a different station of application.
If this is not the issue, be sure that the HDMI connection on the back of your TV is very secure and that any other device connected to your TV is secure as well. Any loose cords can easily interrupt the audio of your TCL TV.

TCL TV Sound Doesn’t Match Picture
Not having sound on your TCL TV is a huge inconvenience, but when it comes to frustrating situations that nearly make you want to crawl out of your skin, there are few things worse than the sound not matching properly with the picture.
For most TCL TV owners, when the sound does not match, it is usually lagged behind the picture, causing the mouths and scenes to move faster than the audio output.
If your TCL TV Sound doesn’t match the picture, the problem may exist due to the ‘Volume Mode’ on your TV being turned on. To turn the “Volume Mode’ off, simply press the ‘*’ symbol on your remote control and go directly to the ‘Volume Mode’ setting.
Once you are there and you notice that this setting is turned on, simply select the option to turn it off and your audio sync problem should be fixed.
If the volume mode on your TV is already turned off, then you know this is not the problem. If you are using a soundbar, turn off the soundbar and allow it at least 60 seconds to be off before turning it back on.
If you are not using a soundbar, try completing a power cycle by unplugging your TV directly from the power source, allowing it to sit unplugged for 60 seconds, then plugging it back in.
TCL TV Doesn’t Have Sound/Keeps Losing Sound/Sound Not Working
When you turn on your TCL TV and there is no sound, or it keeps losing sound, or the sound simply is not working, there are a few different solutions you can troubleshoot with to get the sound back in working order.
Be sure to first make sure that the volume level is not set to (0) or that the TV is muted. To check this, you can either press the mute button on your remote or simply increase the volume level on the right side of the remote.
If your TCL TV doesn’t have sound, keeps losing sound, or the sound is not working and the volume is not the issue, confirm your TV’s audio settings. To do this, press ‘Home’ on your remote control > select ‘Settings’ > select ‘Audio’ > scroll and select ‘Audio Mode’ > scroll and highlight ‘Audio (Stereo)’ > then press ok to confirm your settings.
TCL TV Sound Won’t Turn Down/Up
When you are in the middle of an action-packed movie, there is nothing better than getting a total theatre effect by increasing the volume to a point that you can nearly feel it in your bones. Just the same, on a lazy Saturday afternoon, there is no need for the relaxing music you are playing to be set at 80, as a lower volume is more appropriate. What do you do then if your TCL TV sound refuses to turn up or down?
If your TCL TV sound won’t turn up or down, check to see if it is an issue with your remote or your control board. To do this, turn your TV off, and then, on the TV press the volume (-) button down as you turn the TV on.
When the TV is turned on, if you don’t notice an automatic increase in the volume, then your remote button is stuck. If you do notice an automatic increase, then an issue within your control panel exists.
TCL TV Volume Keeps Going Up/Down
Perhaps even worse than the volume of your TV being stuck either too loud or too quiet is the problem of the volume randomly going up or down on its own.
If you are sitting on the couch without even touching the remote and the volume randomly begins to increase, this can not only cause a quick scare, but it can also reach levels so high that you are unable to even be in the same room. What do you do if this problem persists for your TCL TV?
If your TCL TV Volume keeps going up and down, be sure that your remote is not the culprit by replacing the batteries to see if this stops the increase or decrease.
If this is still happening, check to make sure that the Roku phone application is not being hit as you watch TV as volume can be controlled from here. You can also install a soundbar and disable the sound in your TV speakers to isolate the issue.
TCL TV Audio Keeps Cutting Out
If the volume on your TV is working, but all of the sudden it begins to cut out, this can leave you missing out on important scenes, beautiful melodies, and even more, leaves you wondering what exactly is causing such a sporadic issue. If your TCL TV audio keeps cutting out, read below to find a few solutions to such a problem.
If your TCL TV audio keeps cutting out, one of the most common problems is a loose cord on the back of your TV. Be sure that every cord is securely inserted into the TV so that your audio doesn’t experience interference.
If this is not the problem, a reset of your Roku may be needed. To do this press the ‘Home’ button on your remote > ‘System’ > ‘Power’ > ‘System Restart’ > ‘Restart’ > ‘OK.’
TCL TV Sound Not Working in Apps
The beauty of a TCL TV is that you can just as easily watch cable or satellite TV while having the same quick accessibility to a multitude of different apps. If you are watching TV by either cable or satellite and have no trouble with volume, but once you switch to an app you find that the sound is no longer working, you’re left wondering what on earth could cause such an isolated problem.
If your TCL TV sound is not working when you are in apps, this may not be a problem necessarily with the volume, but with the firmware on your TV.
This means that your TV may be in need of a firmware update to help resolve any glitches that are causing widespread problems with your application. To complete a firmware update press ‘Home’ > ‘Settings’ > ‘System’ > ‘System Update’ > ‘Check Now’ > then update.
How to Turn Up the Volume on TCL TV Without a Remote
There are so many times when owners find themselves searching profusely for the remote control to their TCL TV to no avail, no matter how persistent their efforts are. When this happens, they are in need of a solution to not only get the TV on and change the channel, but to control the volume.
What do you do if you cannot find your remote (or your remote is not working) and you need to turn the volume up?
To turn the volume up on your TCL TV without a remote and there are buttons on the bottom or back of the TV, simply press the (+) button on the remote to turn the volume up.
If there are no buttons on your TV, you can install the Roku app on your smartphone by which you will be able to control the volume of your TV from. If you do not have a smartphone, a new remote will need to be purchased to turn up the volume.
Restart Your TV To Fix The TCL Roku TV Volume Control Not Working
Restarting your TCL TV is the foundation of troubleshooting any technical issues. Follow the steps given below to restart your TV along with your remote;
- Press the ‘Home’ symbol on your TCL remote.
- The main screen will appear.
- Navigate towards ‘Settings’.
- Click on it and select ‘System’ from the list that opens.
- Then select ‘Power’.
- Click on ‘System Restart’.
- Select ‘Restart’ to confirm the action.
Your TV will restart. Now, try pressing the volume button to check if it works. If not then repeat the restart along with the steps given below;
- Open the back cover of your remote.
- Take out the batteries.
- After the TV restarts, insert the batteries back into their slots.
- Try the volume buttons once more.
- This method helps clear glitches in the proper transmission of the signals from your remote.
Reset Your Remote
Most times, the batteries may have run out of power. So it is advisable to replace them once in a while. This method requires you to do the following;
- Remove the back cover of your remote.
- Take out the batteries.
- Then press the number 1 on your remote for 60 seconds.
Get brand new batteries and place them in the slot. Put back the cover and try to work your remote.
Dismantle Your Remote
If the previous step doesn’t give any result, then go ahead with this method. It is not difficult to dismantle your TCL remote. Why would you have to perform this step?
It is wise to remove any possible ways for glitches to come through. This includes dust collecting inside the remote parts.
This method will also help fix any buttons stuck inside, unable to register the pressing action. So you will need to perform a quick disassembling and straighten out these buttons.
All you have to do is follow these steps;
- Firstly, remove the back cover and the batteries.
- You will find four screws on the corners of the battery holder. Unscrew them using a screwdriver.
- Now, use your screwdriver to pop up the front cover of the remote, by placing it into a groove.
- Remove the buttons along with the cover.
- You will find the green circuit board.
- Using a soft white tissue, wipe the green board gently.
- Make sure you have cleared any dust inside.
- Now place the buttons back in position, and put the front cover back on.
- Press it in, making sure the buttons are in the right position.
- Screw in the four screws and put in the batteries.
- Close the cover, and try the volume buttons.
Reconnect HDMI-CEC
The remote may have perfectly working buttons, yet the TV may not receive the signal accurately. This can occur for the volume button alone.
So if the HDMI-CEC cables work inadequately, chances are that there will be an interruption in the signal and your TV will fail to receive it.
Thus, while pressing the volume button on your remote, the signal may not be received. So this is your cue to refresh the HDMI-CEC connections to your TV.
Here are the steps to do so;
- Remove all HDMI devices from your TV and any external sound system that you may have.
- Restart your TCL TV.
- To do so, press and hold the ‘Power’ button. Once the TV turns off release it. Press and hold once again. A menu will appear. Click on ‘Restart’ and wait for a short while.
- Now connect all HDMI devices. Plug it into the sound device and connect the other end to the TV.
- Now play any content on the TV. Now check whether the volume varies when you press the volume button on the remote.
This method might clear any interruptions in the delivery of signals.
How to Reset TCL Roku TV Remote
If your Roku remote is the standard infrared version, there’s no reset option – just replace the batteries.
If you need to reset your Roku remote, remove the remote’s batteries and disconnect the Roku from power. Reconnect the Roku to power; when the home screen displays, reinsert the remote’s batteries. Press and hold the remote’s pairing button for three to five seconds. Within about 30 seconds, the remote will be reset and re-paired with the Roku TV or device.
How to Reset the TCL Roku TV
Unplug the Roku and its power cable, wait 10 seconds, and plug them back in again to reset the Roku. This can sometimes get the remote to work again, letting you adjust the volume.
How to Turn On TCL Roku TV Without Remote
The traditional way to turn on a Roku TV is to press the Physical button on the Roku. That button will be located on the side or bottom of the TV. This is the main way to activate the TV without a Roku remote.
Turn on Roku TV without the remote using the Roku app
The mechanical button on the Roku TV is usually pressed to activate the Roku TV. But even without that, you can use Roku apps to control Roku TV via Smart Phone.
The steps for this are as follows.
- Step 1 – The first thing you need to do is install the Roku app on your phone from the App Store or Google Play Store.
- Step 2 – All you have to do is connect your smartphone and Roku TV to the same Wifi network.
- Step 3 – All you have to do now is open the Roku app and go to the device below it.
- Step 4 – It shows your Roku device. Click Remote. Then represents its remote key. With them, you can control the TV.
The disadvantage of using this application is that the application does not work if the TV is deactivated. (You can do the same process for a TCL TV running Android, but you can use another application for this.)
If you have an IR sensor in your mobile phone, you can easily turn on the Roku TV using your phone.
Turn on TCL Smart TV With the Nintendo switch
You will need a Nintendo switch for this. The Nintendo Switch is a gaming device that acts as a hybrid console. This device can turn on the Roku TV.
- Step 1 – The first thing you need to do is connect the Nintendo Switch to the Roku TV via the dock.
- Step 2 – Then go to Home screen > System Settings > TV Settings > Turn on Match TV Power State.
Now the process is complete. The Roku TCL TV is also activated when you activate the Nintendo switch.
Turn on TCL Smart TV With PS4
- Step 1 – Connect your PS4 console to your TV first (connect via HDMI) and then turn on the PS4 console.
- Step 2 – Then go to Home screen and go to Settings> System Settings. Check the Enable HDMI Device Link.
Now the ohm process is over. Now when you turn on the PS4 console, the associated TCL Roku TV is also ON.
The special thing is that you can recommend using the physical button or the Smartphone app to enable or disable the TCL Smart TV.
Use The Manual Power Button To Turn On The TCL Roku TV
Are you aware of the existence of a power button on your TCL TV? If you didn’t know this fact, well, yes. Your TV does have a power button. In spite of the minimalism that the manufacturers have shown in the TV production, they have definitely installed a manual power button that you can use.
This is situated below the TCL TV logo. However, the location can change depending on the model of the TV that you own. To locate your manual power button and turn your TV on.
How to connect Roku to Wi-Fi without a remote
First, you’ll need to set up the Roku app on your phone. It’s available for free on iPhones from the Apple App Store, and for Androids from the Google Play Store.
- Connect your smartphone to the same Wi-Fi network as the Roku player. Again, if your Roku isn’t connected to Wi-Fi at all, you’re stuck.
- Open the Roku app and tap Devices at the bottom-right corner of the screen.
- Tap your Roku device when it appears in the app. If you don’t see it, try restarting either your phone or the Roku and then check again.
- Your phone should now be connected to the Roku as a remote. Tap Remote and use the virtual remote to select Settings on the left side of the Roku’s Homescreen, then select Network.
- Select Set up connection and let your Roku search for a new Wi-Fi signal. When it finds the one you want, select it and enter the password.
You’ll want to set up a new connection.
Once you connect to the new network, your virtual remote will disconnect. You’ll need to connect your phone to the new network and reconnect it.
Connect Roku to Wi-Fi Without a Remote with Roku App
Even without the physical remote, you can use your phone to connect your Roku device to your Wi-Fi network.
To do this, download the Roku remote app for Android or iOS.
When the app starts the first time, it will walk you through its different options—including how to use it as a Roku remote replacement.
Roku Remote App
Next, the app will prompt you to sign in with your Roku account. It’s not necessary to sign in, however. Instead, you can select Continue as guest and sign in later if you want.
Continue as guest Roku app
Next, tap on Devices in the lower-right corner of the bar at the bottom. Tap your Roku device, then select the Connect now button.
Device connect now Roku app
Tap the Remote icon under the discovered Roku device—its name will appear at the top. You can then tap the Home button or OK button to wake up the Roku device connected to your TV.
Remote Roku App
Now that the Roku app and Roku device are “talking” to each other, use the arrow pad to go to Settings > Network > Set up connection > Wireless on the Roku device. Follow any further instructions on your TV to set up the Wi-Fi connection.
Try a Chrome Extension
If you don’t want to use your phone, you can use your computer to control your Roku device. Remoku is an excellent option for controlling your Roku using your PC.
You’ll need to install the Remoku extension in your Google Chrome or Microsoft Edge browser first. Once the extension is installed, press the Remoku icon in your extension area (top-right in Google Chrome), then select one of the simulated buttons.
Use an Ethernet Connection
This method will only work on Roku devices that have an Ethernet port. An Ethernet port is only found on Roku Ultimate models, certain Roku TVs, and the Roku Streambar (using a USB to Ethernet adapter). A streaming stick like the Roku Premiere or Streaming Stick+ can’t connect via Ethernet.
To use this method, first connect your Roku to your router via an Ethernet cable. If connecting the cable to your router makes sense in your home setup, you can carry on using this afterwards. You don’t have to connect to Wi-Fi too.
To set up Wi-Fi, however, make sure the Roku app on your phone connects to the same network. Next, launch the app and find your connected Roku device.
- Using the remote app, go to Settings > Network > Set up connection > Wireless.
- Roku Network 1
- Find your Wi-Fi network and select it.
- Type in the password you use to connect to the Wi-Fi network, then press Connect.
This should establish the connection to your Wi-Fi network. You can now disconnect the Ethernet cable from your Roku device (if you prefer to use the Wi-Fi connection).
Using a Roku Device Without a Remote
Not having your Roku remote when you’re connecting to a Wi-Fi network—or when you’re trying to use your Roku device at all—can be tricky. Hopefully, these workarounds will help.
Using the Roku app is your best bet in most situations. However, if worse comes to worst, you can use your iPhone as a Wi-Fi hotspot or turn your Android into a mobile hotspot instead. You can then connect your Roku to it. In that situation, you could be subject to bandwidth limitations and be charged overage fees on a limited data plan, so plan accordingly.
TCL Roku TV Not Finding Channels
Unfortunately, not finding channels isn’t usually traceable to a single component or single likely issue, but there are many tried-and-true methods of resolving these kinds of issues.
You’ll need to make sure your antenna signal strength isn’t the problem. If you have a weak signal, you may fail to find channels as well as experience constant buffering and low-quality streams. Considering moving your TV to another room to see if anything improves or moving your antenna into a location free from as many close objects as possible.
If this isn’t your issue, there are a number of other steps you can take to try to fix your Roku TV not finding antenna channels.
Like always with electronics, the first step is to reboot your Roku TV to see if your issue goes away.
If you have a partly-functioning remote, it can make you think there are more serious problems with your TV than there really are. Check to make sure your remote is working properly.
If your Roku is too long out-of-date, you may experience any variety of issues. Update your Roku TV, and look to see if the problem is resolved.
Especially after trying out the above, rescanning for channels can sometimes fix channels not appearing.
As a last resort, you can reset your Roku TV to factory defaults, which can solve a bunch of different problems. After doing this, you may need to update your device again as well as scan for channels again.
A Note on Location for Roku TV Antenna Channels
Depending on your geographic location and not just the specific positioning of your TV in your home as well as the weather, you may experience signal interference from time to time that interrupts the signal reaching your internal tuner in your Roku TV.
If you’re suddenly experiencing an issue after, for example, a long time without any issues, interference is a likely cause. Consider looking up online if other people in your local area are experiencing similar issues.
Alternatively, consider waiting a day or two and then attempting to rescan for channels. If there was a signal interference problem, it will eventually go away and your connection will return to normal.
How do I delete antenna channels on a Roku TV?
While you can’t delete individual live TV channels, you can remove the Live TV tile from the Roku home screen. Highlight the Live TV tile > press the star icon > select Remove input. If you use an HDTV antenna, you can show only over-the-air programming and hide streaming live TV channels from Settings > TV inputs > Live TV > Hide streaming TV channels.
What local channels can I watch on Roku without an antenna?
Many local news channels have free Roku apps that provide on-demand content and live broadcasts. You can also watch live TV on Roku by subscribing to a service such as Hulu + Live TV, YouTube TV, or Sling TV, which offers live TV channels based on where you live along with streaming content.
Scan for Antenna Channels on your TCL TV
When it comes to TCL, you will not be able to find any additional information on how to scan for the channels.
To scan for TCL channels, you must first ensure you have the right tuner mode, i.e., antenna, cable or satellite.
- Now you can perform the steps starting with going to the home screen of the Android TV.
- Next, press the “source” button on your remote, and from the option shown, select the TV option.
- From the menu, choose the Channel option, but you can only see the option if you have an active TV signal.
- From the list, choose Channel Scan and select your Country or Region.
You will see Automatic Search or Manual scan options, and from them, you have to select your Tuner mode and perform Search when prompted.
This is how your TCL TV starts channel search to scan for your available antenna channels.
Troubleshoot TCL Roku TV Not Finding Antenna Channels
Like many other devices, the Roku TCL TV is also open to troubleshooting methods for an easy fix.
When it comes to the antenna problems, there are four solid ways by which it is possible to fix the trouble.
Reset Your TCL TV
One of the ways by which you can start troubleshooting is by trying a system reset.
- Using your remote control, go to the main screen and select the Settings option.
- Scroll through the option to go to System and select Advanced System Settings.
- You will find the option Factory reset among the available options and press OK.
- You have to give the option Factory Reset Everything, and a code will be displayed on the screen.
- Enter the code in the keypad on the screen and press OK for the process to start.
The code will be different every time and if this method isn’t working, try to go for the next steps.
Check the Cables
The cables have always been reported to give the users more trouble than other issues.
You can start by checking to see if the power input to the cable is correct and giving off steady input.
If all is good in there, time to move on to the body of the cables and check for any damages.
Frayed or bent wires can partially disrupt the performance of the device.
And last but not least, check to see if you have the ends of the cable connections tightly plugged into every socket and port.
If the cables are still functioning well, then it might be time for you to think about installing a new external antenna for your TCL TV.
How to Set Up an External Antenna for your TCL TV
Setting up an external antenna has a high chance of getting rid of your problem.
Just follow the steps below in order, and you are good to go.
- Start by connecting a 75-ohm coaxial cable (300-75 ohm adapter for twin-lead cable) from your new antenna to the cable input of your TCL TV
- Connect your TV to a power source and make sure that the power button is ON
- Using your remote, go to the home screen and select the antenna TV tile
- A set of instructions will be displayed on the screen, and read them before choosing to start setup
- If the TV can’t figure out your time zone from the connected internet, you will be asked to enter your time zone manually
- If asked, you can also give the option for adding analog channels 3 and 4 if you want to connect your extra game consoles or VCRs
Your TV will scan for a broadcast, and this may take some time
Once the TV has finished scanning channels, another dialogue box will open up displaying the number of channels added to the TV
You can do the channel scan as mentioned at the start of the guide to see all your channels
How to scan for antenna TV channels on my TCL Android TV
Before you start your channel scan, make sure the antenna is firmly connected to the coaxial port (or the port labelled CABLE/ANT) located at the back of the TCL Android TV. To initiate a channel scan, follow the step-by-step instructions below:
- Using your TCL Android TV remote, navigate and select the Inputs icon
- From the Source Choice list, select Antenna TV and press OK on your TV remote
- It will go to the Antenna TV input. You might see the message “No channel found, Please press OK on your remote to scan” – as shown below.Click OK on your TV remote.
- If you see the pop-up message below, click OK on your TV remote
- The Channel scan settings options will be displayed. Select the appropriate options for the following:
- Country/Region: United States
- Automatic Search:
- Tuner Mode: Antenna
- Channel Type: Digital
The channel scan should begin. You will see the progress bar displaying the scan completion % and number of channels found.
Once it shows 100%, click the Finish button
It will open antenna TV and you can start to scroll through and view the available channels.
TCL Roku TV not finding cable channels
Roku TVs are built with ATSC tuners in them which can access Over-The-Air digital content. These steps refer to troubleshooting these kinds of live channels not appearing. You can, however, connect an HDTV antenna to a Roku TV.
If you experience issues with this kind of antenna, you will likely need to consult the user manual of your antenna to figure out the most likely issues. Though, broadly speaking the following tips may apply as well.
How to Fix Roku TV Not Finding Antenna Channels
Unfortunately, not finding channels isn’t usually traceable to a single component or single likely issue, but there are many tried-and-true methods of resolving these kinds of issues.
You’ll need to make sure your antenna signal strength isn’t the problem. If you have a weak signal, you may fail to find channels as well as experience constant buffering and low-quality streams. Considering moving your TV to another room to see if anything improves or moving your antenna into a location free from as many close objects as possible.
If this isn’t your issue, there are a number of other steps you can take to try to fix your Roku TV not finding antenna channels.
Like always with electronics, the first step is to reboot your Roku TV to see if your issue goes away.
If you have a partly-functioning remote, it can make you think there are more serious problems with your TV than there really are. Check to make sure your remote is working properly.
If your Roku is too long out-of-date, you may experience any variety of issues. Update your Roku TV, and look to see if the problem is resolved.
Especially after trying out the above, rescanning for channels can sometimes fix channels not appearing.
As a last resort, you can reset your Roku TV to factory defaults, which can solve a bunch of different problems. After doing this, you may need to update your device again as well as scan for channels again.
A Note on Location for Roku TV Antenna Channels
Depending on your geographic location and not just the specific positioning of your TV in your home as well as the weather, you may experience signal interference from time to time that interrupts the signal reaching your internal tuner in your Roku TV.
If you’re suddenly experiencing an issue after, for example, a long time without any issues, interference is a likely cause. Consider looking up online if other people in your local area are experiencing similar issues.
Alternatively, consider waiting a day or two and then attempting to rescan for channels. If there was a signal interference problem, it will eventually go away and your connection will return to normal.
How to Change Resolution on TCL Roku TV
streaming player such as Roku doesn’t have a resolution of its own. It adapts to the resolution of your smart TV, so you can adjust it to your liking.
How to Set Roku to 1080p
Thanks to this, setting your Roku to the highest possible resolution shouldn’t be an issue. Of course, if the TV can handle it. If not, then you’ll have to settle for less.
How to check this out? It’s simple. In the following article, you’ll learn everything about changing the resolution of your Roku and whether it’s possible to do so with a Roku TCL TV.
How to Change Resolution on Roku?
If you own a Roku player, you can easily increase the resolution. That said, your TV needs to support the higher resolution or else nothing will happen.
To check the available options and change the resolution, you need to access the “Settings” menu on your Roku. Do the following:
- Press the “Home” button on your Roku remote to access the Home screen.
- Go to “Settings” at the bottom of the page.
- Select “Display Type” from the following menu.
- Find the 1080p option and select it.
When you choose the resolution, Roku will analyze the HDMI connection and try to adjust the screen resolution. When this happens, your TV might go blank for a few seconds. Don’t worry and just wait for the process to finish. When everything is done, you’ll need to confirm the selection before you can enjoy the 1080p resolution.
Note: If you have a TV that supports 4K resolution, you’ll see a bunch of 4K options, too. On the other hand, if your TV doesn’t support it, you might only see 720p and sometimes even lower resolution options.
There’s also an “auto-detect” option which selects the resolution based on your TV specifications. If you’re unsure whether a certain resolution is a good fit, you can always opt for this option.
Note: if you have a Roku TCL TV, you may not find the “Display Type” option in the Settings menu. This is because each Roku TCL smart TV comes with a built-in resolution that you cannot change.
So, if you’ve purchased a 720p Roku TCL TV, you’ll have to settle for the lower resolution. You can always check the resolution on the package or on the internet before you buy. Therefore, if you want to stream in 1080p on your TCL TV, you’ll have to purchase a 1080p TV.
The only option that comes close to changing the resolution on Roku TCL TV is the image-stretching feature explained in the following section.
Alternative Option: Stretching Your Screen
You can stretch the screen via your remote and cover a greater area of the screen, but this is a double-edged sword. Most of the time, the stretched screen will get cut off and you will only see a part of the picture, which makes it near-impossible to enjoy watching movies or playing games.
You can try this option out:
- Press the “Star” button on your TCL remote to open the “Options” side menu.
- Navigate to the picture size section using your remote buttons (arrows).
- Choose “Stretch” by pressing the right arrow button on your remote.
- If this option cuts off the picture to the unwatchable point, then it’s best to return it to the normal resolution.
If you want a better screen resolution for playing video games on your PS4 or Xbox One on a Roku TCL TV, there’s another trick. You need to lower the resolution to the lowest possible in the Settings menu of these consoles after you stretch the image.
The graphics won’t be as good as 1080p, but you’ll see the whole picture and use the full potential of your TCL Roku screen.
Be Careful When Buying TV
As you see, if you have a regular Roku USB stick, changing resolution shouldn’t be a problem. In fact, it will automatically adapt to the highest possible resolution of your smart TV when you access the “Display Options” menu.
On the other hand, the Roku TCL TV causes major issues because you’re stuck with the resolution of the TV. Thus, be careful when buying a TCL TV.
Which TV do you have? Have you managed to find the “Display Settings” option and switch the resolution? Do you have any other solutions for those that own a Roku TCL TV? Leave your thoughts in the comment section below.
How to Connect iPhone to TCL Roku TV
Apple AirPlay and HomeKit are now available on select TCL Roku TVs.
AirPlay allows you stream TV shows, movies, videos and photos directly from your Apple devices to your Roku TVs. You can also share music to your Roku TV, as well as to any AirPlay 2-enabled speakers. You can even mirror what’s exactly on the screen of your Apple device, as well as use your Roku TV as a second screen on your Mac.
And with HomeKit support, Roku TVs can easily be controlled with Siri or the Home app on your Apple device. Visit the Apple support website to learn more.
- Control your Roku TV with your voice using Siri on your iPhone, iPad, or Mac
- Play music, control your AirPlay sessions, and more from anywhere in the house
- Ask Siri to turn your Roku TV on and off, adjust the volume, and more
- Setup in just a few easy steps with the Apple Home app
Roku devices now support AirPlay and Apple HomeKit. That means you can mirror your iPhone, iPad, or Mac computer to certain 4K Roku devices. Screen mirroring allows you to display anything on your iPhone’s screen directly to your TV. Here’s how to mirror your iPhone to a Roku device and which Roku devices support AirPlay.
How to Mirror an iPhone to a Roku Device
To mirror your iPhone to a Roku device, open the Control Center on your iPhone. Then tap the Screen Mirroring button and select your Roku device from the pop-up list. Finally, enter the code that appears on your TV into your iPhone and tap OK.
Note: In order to mirror your iPhone to a Roku, you first have to update to Roku OS 9.4. To find out how to update your Roku device manually, check out our step-by-step guide here.
Open the Control Center on your iPhone. To do this on an iPhone X or later, swipe down from the top-right corner of your screen. On an iPhone 8 or earlier, swipe of from the bottom of your screen.
Then tap Screen Mirroring. This will have a symbol with two rectangles stacked on top of each other. Depending on what you have in your Control Center, you may or may not see any words.
Next, select your Roku device.
Note: If you do not see your Roku device listed, make sure that it is turned on and connected to the same WiFi network as your iPhone. You can find out which WiFi network your Roku device is connected to by going to Settings > Network > About on your Roku device. Then you can change your WiFi network by going to Settings > Network > Set up connection and selecting Wireless.
Then enter the code from your TV on your iPhone
Finally, tap OK to mirror your iPhone to your Roku device.
You can stop mirroring any time by pressing the Home button on your Roku remote. Or you can go back to the Control Center on your iPhone, select Screen Mirroring, and then tap Stop Mirroring.
If you are having problems mirroring your iPhone to your Roku device, first, you should make sure that your device supports AirPlay.
Which Roku Devices Support AirPlay?
Currently, only certain 4K Roku devices support AirPlay, including some Roku TV models, the Roku Ultra, Roku Streaming Stick+, Roku Premiere, Roku Streambar, Roku Express, and Roku Smart Soundbar.
To find out if your Roku device supports AirPlay, you can go to Settings > System > About on your Roku device and compare your model number to the chart below.
Note: The “X’s” in the chart above are placeholders. If you have a Roku TV that contains the same letters and numbers without the “X’s,” it should support AirPlay.
If your Roku device is not compatible with AirPlay, you can still use your iPhone to “cast” videos, music, and photos to your TV. Check out our step-by-step guide on how to cast content from your iPhone to a Roku device to find out more.
If you have a compatible Roku device, and you are still not able to mirror content from your iPhone, you might have to change the AirPlay settings on your Roku device.
How to Change AirPlay Settings on Your Roku Device
To change your AirPlay settings on a Roku device, press the Home button on your remote and go to Settings > Apple AirPlay and HomeKit. Then select AirPlay and HomeKit Settings and make sure AirPlay is turned on.
Press the Home button on your Roku remote. This is the button with the house-shaped logo at the top of your Roku remote.
Then press the left directional button. This will let you access the menu bar on the left side of your screen.
Next, select Settings. You can do this by pressing the up directional button on your remote once. Then press the OK button on your remote.
YouTube Not Working on TCL Roku TV
If Youtube is not working on your TCL TV, try deleting the YouTube and YouTube TV app and reinstalling both, check that you have a network connection, check that your network has a speed of 3 Mbps or higher, update the app, or reset your TV to get the app back into working order.
YouTube is a streaming application that requires no subscription, but allows users millions of different options when it comes to video and music content. Because of this, YouTube has become an incredibly popular app for those looking to expand their content base without having to reach into their wallets. If you own a TCL TV and are wanting to get YouTube working but notice that it is having issues, take a look below to find how you can remedy the situation.
TCL TV YouTube Not Working
Using YouTube on your TCL TV involves a simple search, download, and installation before you are on your way to being able to have access to all of the video content you could ever imagine. This process seems relatively simple at first glance, but for some TCL owners, they have noticed that the app presents issues that call for a fix. If you own a TCL TV and notice that YouTube is no longer working, take a look below to find how you can get the app running again.
If Youtube is not working on your TCL TV, try removing the YouTube app as well as the Youtube TV app. Once you have deleted both, complete a system reset on your TV and then download both applications again. Once they have been installed, try YouTube once again to see if it is working properly.
TCL TV YouTube Not Loading/Opening
Once you have found the YouTube app on your TCL TV, you will then have to download and install the app. When this has completed, the app will load momentarily before opening and giving you access to the content within. However, if you have downloaded and installed the app without issue, but are still met with the app refusing to load or open as it should, continue reading to find out how to resolve this problem quickly and efficiently.
If YouTube on your TCL TV is not loading or opening, it could be an issue with your network connection. To check that you have a functioning network connection on your TCL TV, press the ‘Home’ button on your remote > ‘Settings’ > ‘Network’ > ‘About’ > view your network status.
YouTube Not Connecting On TCL TV
YouTube is an application that can only be run through a strong connection to a network, which means that when YouTube will not connect to your TCL TV, it is likely that there is some type of network issue present. When you go to open YouTube on your TV and notice that a connection is not being made, you may be wondering what would cause such a problem. Read on to find out what is the most likely cause of YouTube connection issues and how to solve them.
If YouTube is not connecting on your TCL TV, it could be that your network needs to be reset. To do this, unplug your router or modem for 60 seconds before plugging it back in, then allow it to reboot. If this does not work, it could be an issue with the strength of signal from your router.
TCL TV Won’t Play YouTube
If you are able to download the YouTube app to your TCL TV, have no problems with installation, and are able to browse through content from within the app, it may feel as if you have avoided any and all trouble. However, some TCL owners have noted that once they select a video to play from within the app, they experience problems. If you are using YouTube on your TCL TV but the video won’t play, keep reading to find the solution.
If YouTube will not play on your TCL TV, it could be that your internet speed is not fast enough to load the content and play it without interruption. With a TCL TV, you must have an internet speed of at least 3 Mbps or greater for the video to play at optimal speeds.
YouTube Keeps Crashing On TCL TV
When you open the YouTube app on your TCL TV, you should be able to access content without any issue once you start playing. However, some TCL TV owners have noticed that once they open the app, the app crashes rather than loading completely or continuing to play what they have selected. If YouTube keeps crashing on your TCL TV, continue reading below to find out what might be the cause of this and how you can fix it.
If YouTube keeps crashing on your TCL TV, it could be caused by the app being outdated. To get the YouTube app up to date on your TV, click the ‘Home’ button on your remote and click on ‘YouTube’ and allow it to highlight. You will then click on the ‘*’ button, check for updates, then install.
TCL YouTube Sound Not Working
When watching YouTube on your TCL TV, you not only want to be able to see the picture that is coming from the screen, but be able to hear what is going on from within the video as well. Just as when watching any other type of TV, when in the middle of a YouTube video, you want the full experience. Therefore, when you go to play a video from within this app and are met with no sound, you are left wondering how to fix such an essential component.
If the sound on YouTube is not working on your TCL TV, try a workaround to get the sound to restore without having to leave the video you are currently playing. To do this, pause the video, press the ‘*’ button on your remote control once, then a second time, then play the video once more.
TCL TV YouTube Black Screen/No Picture/Green
If you are in the middle of watching a video on YouTube or listening to your favorite music, the only thing you should be worried about is whether or not the volume is at an appropriate level, not if the picture on your TV is functioning properly. For some TCL TV owners, they have found that when they open the app or begin playing a video from within the app, they are met with a black screen, no picture, or a green screen, interrupting their viewing experience.
If your TCL TV is showing YouTube with a black screen, no picture, or a green screen, a simple fix of resetting your TV could be the solution. To reset your TCL TV, unplug your TV directly from its power source and wait for a full 60 seconds before plugging it back in and trying YouTube once more.
How to Turn Off Voice on TCL Roku TV
Your TCL Roku TV has built-in Audio Guide which assist users to navigate the on-screen menus. Once this text-to-speech (TTS) feature is activated, Audio Guide will read out text, menu items and other on-screen items. Below are the step-by-step instructions to enable or disable this feature:
- Press on your remote to open the main screen.
- Scroll up or down and select Settings.
- Press the right arrow button and select Accessibility
- Press the right arrow button and select Audio Guide
- Press the right arrow button and select ON to enable or OFF to disable the text-to-speech feature
TIP: You can also enable and disable Audio Guide by pressing the key four (4) times from your TCL Roku TV remote.
You can turn off the voice on Roku by pressing the asterisk button on the remote control four times quickly.
- If your Roku streaming device is reading things aloud to you, you can turn off that feature.
- If you find your Roku player talking to you, there are two possible explanations.
- If it’s reading the interface aloud as you navigate and make selections with the remote control, it means the Screen Reader an accessibility feature that used to be known as Audio Guide is enabled.
But if you’re watching a TV show or movie and hear audio describing the scene, it’s possible a different kind of accessibility feature, usually called Descriptive Audio, has been enabled.
Fortunately, both are easy to toggle on and off. Here’s how to do it.
How to turn off voice on Roku using the remote
Screen Reader is convenient for visually impaired users who need extra help navigating the Roku menus. But if you find it has been turned on by accident, the easiest way to turn it back off is with a shortcut on the Roku remote.
To toggle the Screen Reader on and off, quickly press the asterisk button on the Roku remote four times in a row.
Press the asterisk button four times to turn Audio Guide on or off.
Quick tip: It’s easy to accidentally turn on Screen Reader this way. Unfortunately, this shortcut can’t be disabled, so be aware of this feature when handling the remote.
How to turn off voice on Roku using the Settings menu
If you prefer, you can find the Screen Reader controls in the Accessibility menu.
1. Press the Home button on the Roku remote.
2. Select Settings in the sidebar on the left.
3. Select Accessibility.
In Settings, select Accessibility.
In “Settings,” select “Accessibility.”
4. Select Screen Reader.
5. Select Off.
Disable the screen reader in Settings.
Disable the screen reader in Settings.
Why is my Roku narrating movies?
Even if you turn off the Screen Reader, you might still find your Roku unexpectedly talking to you.
It’s always off by default, but many streaming services like Netflix, Hulu, HBO Max, and others support an accessibility feature known as descriptive audio which narrates descriptive information about scenes in addition to the usual dialog, sound effects, and soundtrack.
How to turn off descriptive audio
Descriptive Audio is a feature that each streaming service implements on its own, so if you hear it and want to disable it, you need to do it from within the streaming app where you hear the audio.
Every steaming app is different, but here is a brief guide to where you can find the descriptive audio controls within several of the most popular streaming apps.
Apple TV: Select the gear-shaped Settings icon at the top of the Apple TV home screen , then choose Accessibility, Audio Descriptions, and Off.HBO Max: Press the Star button on the Roku remote and choose Accessibility & Captions, then scroll to Audio Track. Choose a language that doesn’t include descriptive audio (be sure to look at the summary at the top of the screen to see which tracks are descriptive).
Many common streaming apps have a descriptive audio feature which you can turn on or off as needed.
Hulu: Press the Up button on the Roku remote, then Settings. In the Audio section, change the language to a language without the audio description.Netflix: Press the Up button on the remote to view the language options. Change the selection from English – Audio Description to a language without audio description.
Prime Video: Press the Roku remote’s Up button, then select Audio & Languages. Choose the available language without audio description.
If you have a traditional cable TV input connected to your Roku, you might discover that cable TV programming can also have this kind of descriptive audio. To disable it for cable, you need to turn off the cable network’s Secondary Audio Programming (SAP).
SAP controls also vary among cable providers, but if you have Spectrum TV, for example, use the remote to choose Settings, then Preferences, and Audio Language (SAP).
TCL Roku TV Netflix Not Working
Check your network settings
One of the most common reasons Netflix does not work on your Roku device is if you’re not connected to the internet. It may sound simple, but there’s always a chance you disconnected accidentally. If you believe that to be the case, follow these steps:
From the home screen, scroll to the Settings menu.
Open the Network section to check your Roku’s connection status.
If it says that you’re connected, use the Check Connection button to test the strength.
If your Roku appears to be humming along just fine, you might find that the problem lies in your router instead. Luckily this is once again an easy fix, and you should be able to reboot your connection in a few minutes. You might also find that your Roku device works better with an Ethernet connection. If you’re still having connection issues, look at the Roku support page for more information.
Check for updates
Another reason you may not be able to get Netflix to work on your Roku streaming device is if either one needs an update. Some apps tend to act up, especially if you haven’t updated them in a while. Your Roku should check for updates pretty regularly whenever you turn it on, but you can always manually check for them as well. Here are the steps to follow:
Navigate to the Settings menu from your home screen.
Locate and enter the System option and choose the Software Update selection.
Last, click on the Check Now button. This will check for updates to the Netflix app as well as the Roku system.
If Netflix is not working on your Roku, the problem may have nothing to do with the device itself. In fact, there’s always a chance that the fault lies within your account. Whether you recently changed your payment methods or your account only supports a few simultaneous streams, there’s a lot that can go wrong.
As you know, Netflix charges more money for the ability to stream on multiple devices at once. While we love our family and friends, sometimes you have to show some tough love and kick them off your account. Well, that or tell them to start chipping in for a more powerful plan.
Delete and redownload the Netflix app
One last way to get Netflix back up and running on your Roku device is to delete and reinstall the app. Think of it as turning it off and turning it back on again, but for software. Just note, the process is slightly different depending on what Roku device you have. Here are a few of the most common ways to remove Netflix:
- Remove from your channel lineup
- Press the Home button on your Roku remote.
- Navigate to the right until you find the Netflix channel.
- Press the Star button on your remote to open the options menu.
- Select the Remove channel option and confirm when prompted.
- Remove from within the Roku Channel Store
- Press the Home button on your remote.
- Select the Streaming Channels button to open the store.
- Locate Netflix from the store menu and press the OK button.
- Select the Remove channel option and confirm when prompted.
There you go, a few ways to reset Netflix, update your Roku, and check your account status. If none of these methods has helped you, it might be time for a new streaming device. On the bright side, there are plenty to choose from.
Having a TCL smart TV makes it easy to watch your favourite movies or TV shows on Netflix. However, when Netflix isn’t working, it’s hard to know if it’s the Netflix app, the TV or something else causing the issue. If you are having troubles with Netflix on a TCL TV, this article contains many troubleshooting options for you to try.
Netflix may not be working on your TCL TV due to poor WiFi connection, firmware bugs, an overloaded cache or because the Netflix servers are down. Common fixes include resetting the TV, reinstalling the Netflix app, updating your firmware or resetting the modem/router.
Hand holding and pointing remote at TV screen
I will guide you through these troubleshooting methods below, as well as discuss less-common fixes. I have also included what you can do if the sound or picture is not working on Netflix.
Restart Your TCL TV
The quickest and easiest troubleshooting method is to restart your TV. Often the power button on the remote only puts the TV into ‘Standby’ mode, but you can restart the TV in one of two ways. You can either unplug the TV from its power source for a few seconds and plug it back in, or follow the steps below through the TV’s settings.
- Step 1: Press the ‘Settings’ button on the remote.
- Step 2: Navigate to ‘More Settings > Device Preferences > About’.
- Step 3: Select ‘Restart’ and then confirm your choice when prompted.
- Step 4: Wait for the TV to fully reboot.
Reinstall the Netflix App
Reinstalling the Netflix app is a way you can start fresh and clear away any errors that may have occurred in the old app. This will reinstall the latest firmware and will also clear all cache data, which I will talk about further down. To uninstall and reinstall the Netflix app, follow the steps below.
- Step 1: Press the ‘Home’ button on your remote.
- Step 2: Navigate to ‘Settings > Device > Apps > Downloaded Apps’.
- Step 3: Find and select the Netflix app.
- Step 4: Select ‘Uninstall’ and press ‘Ok’ to continue.
- Step 5: Restart your TCL TV (see above).
- Step 6: On the home screen, open ‘Apps’.
- Step 7: Select ‘Get More Apps’.
- Step 8: Find and select the Netflix app.
- Step 9: Select ‘Install’.
Update Your TCL TV and Netflix App
If you want to update your Netflix app manually, this can be done through the TV’s settings. Updating your firmware will ensure any bugs in the previous firmware are fixed. Whenever an issue is reported to Netflix, the developers will work toward creating a fix and releasing a new update.
This is a good option if you can’t uninstall the Netflix app. To update your Netflix firmware, follow the steps below.
- Step 1: Press the ‘Home’ button on your remote.
- Step 2: Open the Google Play app.
- Step 3: Navigate to ‘My Apps > Updates Available’.
- Step 4: Select ‘Update All’, or select Netflix to update individually.
Note that if Netflix is up to date, it will not be listed in the available updates list. You can also turn on automatic updates in the same ‘My Apps’ menu, by selecting ‘Open Settings’ and ‘Auto-update Apps’.
If there is a bug in your TCL firmware, this may also be causing Netflix to stop working. To update your TCL firmware, follow the steps below.
- Step 1: Press the ‘Home’ button on your remote.
- Step 2: Navigate to ‘Settings > More Settings > Device Preferences > About > System Update’.
- Step 3: Select ‘Network Update’ and choose ‘Ok’ to confirm.
- Step 4: Wait for the TV to finish installing the update.
Perform a Hard Reset of Your TV
A hard reset will allow your TCL TV time to discharge any residual power from the circuit boards. This will force it to erase any temporary memory, including small errors that may have occurred.
This process will not delete any of your saved preferences or downloaded content, so is a safe option if you want to try to fix the Netflix app. Follow the steps below to perform a hard reset on your TV.
- Step 1: Disconnect all devices from your TV.
- Step 2: Unplug the TV from its power source.
- Step 3: Press and hold the power button on the TV for 30 seconds.
- Step 4: Wait a further 10 minutes to ensure the TV has discharged.
- Step 5: Plug your TV back into the power socket and turn in on.
Perform a Factory Reset of Your TV
A factory reset is very affective at fixing any issues with your TV because it will return it to its original settings, from when you first purchased the TV. Keep in mind that this will erase all saved preferences and delete your downloaded content. If you still want to do a factory reset, follow the steps below.
- Step 1: Press the ‘Home’ button on your remote.
- Step 2: Navigate to ‘Settings > Device Preferences > Reset’.
- Step 3: Confirm you want to proceed with the factory reset.
- Step 4: Enter the code, ‘1234’.
- Step 5: Confirm you want to proceed by pressing ‘Ok’.
- Step 6: Wait for the TV to fully reboot.
If you happen to have a different brand of tv please checkout our netflix not working on a smart tv article.
TCL Netflix Not Loading
When Netflix is not loading, is freezing, is stuck on a blank screen or won’t connect, it is likely an issue with your internet connection. Below are the most effective troubleshooting methods to fix the internet connection to your TV.
Restart Modem and Router
- Step 1: Unplug the modem and router (if you have one) from the power.
- Step 2: Wait at least one minute.
- Step 3: Plug the modem back in and wait for it too fully reboot.
- Step 4: When the modem is ready, plug the router back in.
- Step 5: Wait for the router to fully reboot before checking your connection again.
Check Your Internet Speed
You can check your internet speed through the Netflix app using the steps below. This will tell you if the network is connected and your download speed.
- Step 1: Open the Netflix app.
- Step 2: Open ‘Settings’.
- Step 3: Select ‘Check Your Network’.
Netflix recommends a minimum download speed for different streaming qualities. Therefore, your internet needs to be fast enough to support your preferences. These are listed below.
- Standard Definition: 3MB/s
- High Definition: 5 MB/s
- 4K or Ultra HD: 25MB/s
Check for Interference
There are objects in your home, listed below, that can interfere with the WiFi signal and reduce download speeds or block the signal. Make sure you have minimised these so that your internet is as strong as it can be.
- Other networks or Bluetooth devices, such as headphones.
- Baby monitors or other radio devices.
- Microwaves.
- Thick timber or concrete walls.
- Large bodies of water, such as an aquarium or hydronic heating system.
If you cannot remove or minimise any of the above, you can also try the following options to help improve your Netflix experience.
- Reduce video quality on Netflix
- Use Ethernet connection
- Use a WiFi booster
The streaming quality can only be adjusted on Netflix through a web browser. You can change these settings to ‘Low’, ‘Medium’ or ‘High’ through the pathways below. Higher quality will put a higher demand on your download speed.
Account > Profile & Parental Controls > Playback Settings > Change
TCL Won’t Play Netflix
If Netflix won’t play, you can try logging out of your account and logging back in. This has worked for some users and is a simple process (see below).
- Step 1: Select ‘Get Help’ or ‘Settings’ from the Netflix menu (left of screen).
- Step 2: Select ‘Sign Out’ and confirm by choosing ‘Yes’.
- Step 3: Enter your login credentials to sign back in.
If this does not work, it is most likely a result of a poor internet connection. Follow the troubleshooting tips mentioned above to improve your signal. You can also try the troubleshooting methods at the beginning of this article.
Netflix Not Connecting To TCL
If Netflix is not connecting on your TCL TV, you are unable to connect to the Netflix servers. This could be issues with your internet, which you can work through using the methods above. However, it could also be an issue with the Netflix servers.
To check if the Netflix servers are down, go to the Netflix Website or call Netflix support directly. In this situation, all you can do is wait for Netflix to work through the issue.
Netflix Keeps Freezing/Crashing on TCL
If your Netflix app keeps freezing, it is usually due to poor internet connection, but sometimes can be fixed with some of the general troubleshooting methods mentioned above. Netflix recommends the following troubleshooting methods.
- Sign out and back in to Netflix
- Restart or reset your TCL TV
- Update the Netflix app
- Restart your WiFi
- Improve your WiFi signal
However, apps can also crash when they are overloaded with data. Therefore, another method to try would be to clear the Netflix cache or erase all your Netflix data completely, detailed below.
Clear Netflix Cache or All Netflix Data
The cache is a temporary data storage that allows the app to load faster. An overloaded cache may cause the Netflix app to error and crash and erasing the cache will not delete any of your saved data. This is why clearing the cache, which is detailed below, is generally a good option if Netflix is crashing or freezing.
- Step 1: Press the ‘Home’ button on your remote.
- Step 2: Navigate to ‘Settings > Apps > See All Apps > Netflix’.
- Step 3: Select ‘Clear Cache’.
Another option in this menu is to ‘Clear Data’. This option will delete your saved data on Netflix, essentially formatting Netflix to its original state. This option will clear more space than simply clearing the cache, so it will allow Netflix to run even smoother than before.
TCL Netflix Sound Not Working
Below are standard troubleshooting tips for sound issues on your TV.
- Ensure the TV or speaker is not on ‘Mute’.
- Turn the TV or speaker volume up.
- Secure any wired connections between the TV and speakers.
- Make sure the speaker is on.
Sometimes the audio settings may be causing incompatibility issues with Netflix. To determine if this is the issue, toggle the ‘Digital Audio Out’ setting. This can be found in the settings below.
Settings > Sound > Advanced Settings > Digital Audio Out
TCL Netflix Black/Blank Screen
If you have a blank screen when trying to open or play Netflix, it is recommended that you perform a hard reset on your TV. You can also try reinstalling the app. These are just some of many troubleshooting tips mentioned at the beginning of this article.
However, it may also be that your internet is not working or is incredibly slow. This would leave Netflix loading on a blank screen for extended periods of time.