
Homemade ice cream is a cut above name brand ice cream as it can be customized to suit your taste. And you also get to use better quality ingredients, resulting in a more delectable end product similar to gourmet ice cream. And to make ice cream making easier, an ice cream maker is essential.
However, like all other kitchen gadgets, it is prone to breakdowns from time to time. So what do you do when your ice cream maker stops working?
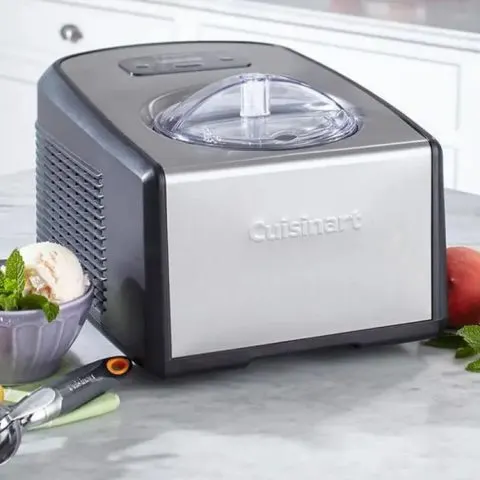
Ice cream maker paddle not turning
Before you start panicking, check to see if there is any stuck ice and rock salt coolant mix around the canister. Then add some rock salt or cold water to clear the jam. If this doesn’t work, try with the unit loaded to full capacity. Also, check for stuck or damaged parts.
Check this too: How to Make Gelato Without an Ice Cream Maker
Here are other reasons why the paddle is not working;
Jammed paddle or dasher
Frozen ice cream built up along the edges of the canister will make it difficult for it to rotate freely. This will also cause the paddle or dasher to jam. To remedy this, switch off the power, open the canister, and check if the ice cream mixture has uniformly solidified.
Then, scrape off the frozen mix from the edges, stir the ingredients thoroughly, and rerunning the unit.
Lack of or insufficient quantity of rock salt
Rock salt causes ice to melt by lowering the freezing temperature of the water. Insufficient salt amounts make it difficult for the canister to turn when the unit is packed with layers of ice cubes that aren’t going to melt any time soon.
To fix this, pack alternate layers of rock salt and ice to the brim of the canister. Then, pour a cup of cold water over the ice and salt to prevent it from jamming. This will allow molten ice to settle down and speed up the freezing process.
The ice cream maker is not loaded to full capacity
Churning a small quantity of ice cream mix can freeze quickly along the edges first and hinder the movement of the paddle. To remedy this problem, load your ice cream maker to the total capacity.
Electrical or mechanical faults
Check for electrical connectivity to the motor using a multimeter. Then inspect parts of the ice cream maker motor to see if they are damaged. Also, assess the condition of the gear assembly. Then buy manufacturer recommended parts if to replace the damaged or worn components.
Rusted or Faulty Parts
A rusty motor, dasher shaft, or gears could also stop the canister from turning. Additionally, thick or balled-up lubricants can prevent the canister from turning, which in turn causes the paddle to stop turning.
Clean and lubricate the mechanical parts of the ice cream maker to prevent rust formation or remove any rusty buildup. You should also inspect other components and replace them. If you cannot do the troubleshooting yourself, get a professional on board to help fix the appliance.
Note: Sometimes, the paddle may stop churning if the ice cream is ready as per the setting selected. Contact the ice cream maker manufacturer if the ice cream mixture is still watery and you have tried all solutions discussed above. Or contact a kitchen appliance maintenance specialist.
Thorough cleaning of the ice cream maker after every use is a must. You should also dismantle the unit, thoroughly clean it, and lubricate the internal components. Doing this at least once a year will help prolong its lifespan.
How to get rid of ice crystals in ice cream
Icy ice cream is disappointing, especially if you have been writing to churn and freeze the ice cream. While it may not be unpalatable, the icy texture is more of a sorbet than the ice cream you were looking forward to having. That said, here are some tricks to help you get less icy ice cream;
Go Full-Fat
This will give you a thicker consistency with fewer ice crystals. The fat content in cream is responsible for the silky feeling you get from high-quality ice cream. As such, do not be tempted to sub skim milk for whole milk.
Chill Your Base Well
Before churning it, chilling the ice cream mixture is essential if you want your ice cream to have fewer ice crystals. The mix should be very cold before churning time to keep ice crystals from snowballing.
Freeze It in Portions
Store homemade ice cream in small containers as thawing and refreezing the ice cream can make ice crystals grow and expand.
Note: Over-churning can cause these more significant pieces to form. To salvage an extra-frosty batch of homemade ice cream, leave it on the counter for 10 minutes before serving. If that doesn’t do the trick, let it melt to liquid in the fridge, and then try re-spinning it.
Ice cream maker not turning on
This could be as a result of a damaged or worn-out motor or gear. For example, this can be caused by mixing large batches of ice cream or by neglecting a jammed mixing paddle. Other causes of the issue could be a damaged electrical cord or stuck motor bearings.
Troubleshooting steps to remedy the problem;
- Make sure power is on at the outlet and test the electrical cord.
- Lubricate dry motor bearings with lightweight machine oil.
- Test the motor and replace it if necessary.
- Inspect the paddle for damage and replace it if necessary.
- Also, replace worn or damaged gears in the motor.
- Check and replace worn or damaged gears.
If the ice cream maker is damaged, you should replace all the faulty parts with manufacturer-approved parts. You can source the items from the manufacturer or an aftermarket parts supplier.
Lubricants and fasteners are readily available through a local hardware store.
Items needed to repair your malfunctioning ice cream maker;
- Screwdrivers
- Wrenches
- Multimeter for testing components
Steps to repair and replace faulty or worn-out parts;
- Disassemble an ice cream maker.
- Make sure the unit is unplugged from the electrical receptacle.
- Remove the motor unit if easily detached.
- Remove the ice bucket or other components to access the motor and gear assembly.
- Turn the motor unit upside down and remove the cover or base plate to access the motor and gears.
- Carefully remove gears and check for wear.
- Clean any debris around the gears and motor, then remove the motor and test it with a multimeter.
- Replace any worn or broken parts.
- Carefully lubricate all moving parts and reassemble.
Ice cream maker not freezing
If your ice cream maker is not freezing, your first instinct is to think that the ice cream maker is broken. However, this could be a result of other issues. Here are some culprits to look into before buying a new ice cream maker;
Too Much Ice Cream in the Canister
Making a big batch of ice cream will increase the ice cream freezing rate. Do not fill up the canister to the top. Most ice cream makers limit how much should be inside the bowl to ensure proper freezing. Refer to your user manual to see exactly how much this should be.
Icecream Ingredients
Room temperature ingredients will affect the freezing rate. This includes some fruits, nuts, and flaked coconut fit into this. Fresh fruit may take longer too. Additionally, thick cream will also make it harder for the ice cream maker to get it cold. Lastly, too much sugar will make it impossible for the ice cream maker to freeze the mix.
Amount of Water in the Bucket
If you have too much water sitting in the bowl, this will cause the whole machine to get warmer, and your ice cream will not freeze completely. If you notice the top of your ice cream is frothy and the bottom is a liquid, this is a sign that too much water is allowed to stay in the bucket.
Warm Ice Cream Base
Cooling down the ice cream base ahead of time will help the ice cream maker to work better. Do not churn ice cream if the base is warm. This prevents the ice cream from having time to cool down. Instead, chill the base in the fridge or freeze it overnight before churning ice cream.
Ice and Salt Quantity
The ice helps to lower the temperature better, especially with large amounts of ice cream. The salt helps the ice melt and release some of the cooling you need. Adjust the quantities to keep it frozen.
Damaged Thermostat
Check the thermostat to see if it is damaged or is getting down to the correct temperature. If the thermostat can get down to the recommended temperatures based on your user manual, the problem is most likely the type and temperature of the ingredients you put inside.
Check this too: Best whipped cream dispenser
On the other hand, if the machine struggles to get to the right temperature, this is a sign that your ice cream maker is broken. You can look for a certified repair shop to fix it.
Ice cream maker freezing slowly
Here are some reasons why your ice cream maker is freezing too slowly;
- Too much ice cream in the canister
- The ice cream ingredients were not pre-chilled
- The ice cream maker has a damaged board which affects the temperature
- High-fat content
Note: Your ice cream maker must be at the proper temperature for effective ice cream making. If the ice cream is not cold enough, your ice cream will be runny and not freeze all the way.
Why is my ice cream maker so loud?
No one wants to make ice cream in a noisy ice cream maker. Here are some leading causes of a loud ice cream maker;
- The motor is damaged, causing it to struggle while working
- The canister is frozen on the outside, causing it to get stuck while turning
- The gears are rusty, causing the canister to wobble while turning