
Most people look forward to Christmas since it offers a chance to enjoy time with family and friends that they have probably not seen for a long time. The season comes with a lot of cheer and light. Decorations of all kind often go up, but one of the most common ones are Christmas lights.
But what should someone do when their lights are flickering, won’t come on, or experience other problems? Read on to discover how these lights work, the different issues your Christmas light may face, and how best to fix them.
After all, no one wants to miss out on the festive cheer because they do not have the right Christmas lighting.
What causes a section of Christmas lights to go out?
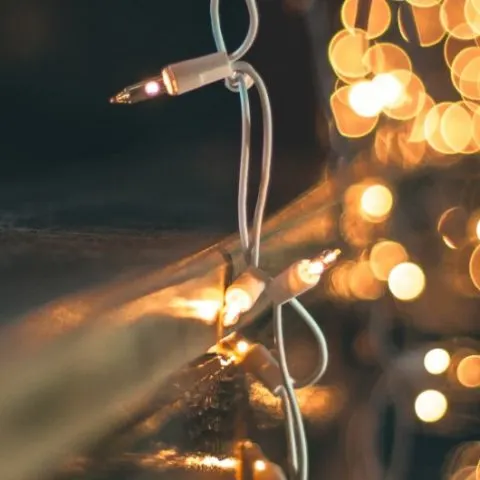
Christmas lights go out for various reasons. Usually, they are loose or burnt out. When bulbs loosen from their string, they disconnect from their respective housing. Fix this by tightening the loosened bulbs, and everything will go back to normal.
How do you know which bulb is out on Christmas lights
Sometimes, not all lights are bad. Diagnose and identify specific lights to fix as follows
- Put the light tester close to each bulb
- The tester’s indicator will light up when close to a functioning bulb
- If your voltage detector is non-contact, place it close to the wire section between individual bulbs to test the voltage
- The dead wire section will be the section after the bad bulb
How to test Christmas lights with a multimeter?
To use the multimeter:
- First, start by unplugging the string of lights exhibiting the issue.
- Prep the multimeter by setting it up to measure resistance following the manufacturer’s instructions. The chances are that you will end up with two probes plugged into the meter.
- Insert a multimeter probe into a hole in the female socket.
- Make sure the other probe touches one of the male plug prongs
- Check and note the resistance when reading on your multimeter. In case the reading is not zero, touch the probe to the other prong. If both readings are zero, then the circuit works properly from end to end. In case there are variations, then you need to check for damages and fix them physically. Once repaired, re-test to ascertain progress.
- Open the fuse access compartment situated at the male electrical plug
- Touch the two multimeter probes to the fuse but on the opposite ends
- Note the resistance readings. When zero, then the fuse is okay. If not, replace it and plug in the lights before testing further if necessary.
- If the problem persists, then you should unplug the lights and test individual bulbs.
How to fix Christmas lights when the whole string is out
You need to test individual bulbs as follows:
- Start at the darkened string end and remove the first bulb carefully
- Find the two wires at the bottom and let the probe touch each wire as long as the probes do not touch each other or more than a single wire. The multimeter will emit a low voltage which tests if the bulb is burned out or not.
- Observe the multimeter’s resistance reading. A zero reading shows a functioning light bulb while a non-zero indicates a malfunction, and the bulb should be replaced.
- Insert the working or new bulb into the testing position
- Proceed to the next socket and check all the bulbs individually until the Christmas lights are well lit
How much power does my Christmas lights draw?
The amounts of power your Christmas lights draw depend on several things. The display size and type of bulbs are used to determine the power drawn by the lighting. For instance, a 100-count string of incandescent mini lights will run at 40 watts, whereas a 70 count of 5mm Wide Angle LEDs will total to about 4.8 watts.
How do I know if my Christmas light fuse is blown?
You can always tell when a fuse blows.
- There is a break in the small metal filament inside the glass fuse when it has burned out.
- Replace the bad fuse with a duplicate of the same size and rating. You can find these in any electronics stores or hardware stores that sell a variety of fuse replacements
Christmas light fuse – How to find and replace it
To find problematic fuses:
- Unplug the Christmas lights first before opening the plug cover
- Find the sockets entering the wall and pull them out. Do not pull out sockets from the cord as this can easily damage your lights
- Test the lights to be sure they are not working
- Locate the male sockets by checking individual sockets to find out if they are male or female
- Gather strands that are not working. If they are more than one, then you may have to replace multiple fuses.
- Watch out for male sockets since missing one means that the entire string is affected and may not work
- Check the socket for proper marking and configuration. The underside of the plug is where the fuse is located.
To replace old fuses:
- Open the socket door to remove the fuses.
- Find grooves on the socket door which are apparent to touch. Push on the door but do not force it.
- If it fails to come off by hand, use a flat head screwdriver or a knife to nudge it open
- Gently push the door to show the fuses
- Once the door opens, check the fuse which is underneath the door.
- Check for damage or replacement need
- Locate the fuses, which are likely to be two in most cases. However, do not panic if you find only one.
- The door should slide up enough for you to reach the fuses
- Remove the fuse or fuses
- Check the color of the fuse to know if they are burned.
- Burned fuses are dark, but this may not be easy to note in some cases
- Use a voltmeter to confirm the fuse’s strength. If it fails to register anything, then the fuse is burned.
Installing replacement fuses
- Once you have confirmed that your fuses need to be replaced, proceed as follows:
- Find the spare fuses. Most of the Christmas lighting comes with these fuses
- If you do not have spare fuses that come with the lights, then purchasing them from the nearest electronic shop is advised.
- Once you have the new replacement fuses, place the new fuses in the socket. Pop them into place but do not be forceful
- The fuses you are replacing must be secured in place before you close the plug door.
- Once you have replaced the fuse, plug the lights back to the outlet
- Confirm that the socket door is secured in place
- Plug the lights back in, and they should go on when you switch on the lights
- In case the lights fail to come on, then the fuses are not the issue, and you should continue diagnosing the problem.
How to fix a cut wire on Christmas lights
There are several reasons why Christmas lights may be cut. While some may be purely accidental, some are intentional to remove bad portions or shorten the lights. Whatever your reasons, splicing the wires is important if you intend to fix the cut wires. Do this as follows.
- Place masking tape pieces on either side of the damaged wire. Do this for all the strands since Christmas lights may have 2 or 3 strands of wire.
- The first strand should be labeled A on side, the second one B, and the third one C
- You can then cut the damaged parts or proceed if they are already cut
- Measure the thinner portion of the connector’s barrel and divide it in half
- Place an end of the wires into the end of the connector.
- Place the connector and wire into the crimping tool’s grooved side and squeeze the tool handles together to crimp the connector together.
- Take the other wire with a similar label to the connector’s other end and place the connector’s end to the crimpling tool before squeezing it shut.
- Pull either ends firmly to secure it into the crimp.
- Make sure to repeat the crimping process for all the other wires
Christmas lights suddenly got brighter – why is this so?
This is a matter of electric current flow.
- The filament gets hotter when more current passes through it, meaning that it gets brighter. Unfortunately, this also means that it is likely to burn out faster as a result of it.
- When the circuit breaks or opens up, no electricity can pass through the filament. There will be no light.
Why are half of my Christmas lights blinking?
Christmas lights may flash for various reasons.
- First, it could be a flasher bulb that was installed into the socket
- The flasher bulb only causes the circuit it is part of to flash on and off.
- Other strings flash if the controller chip is set to flash mode
- If you don’t want yours to flash, find the flasher bulb and replace it or change the settings on the Christmas lights controller
Outdoor Christmas lights keep turning off
One of the primary reasons your Christmas lights keeping going off is a faulty bulb.
Isolate each bulb and check which one is the problem. Once you find it, replace it and restore the power to make the entire lighting system back.
Use a light tester to identify the bad bulb and replace it
GE C9 led Christmas Lights Troubleshooting.
There are general troubleshooting tricks that work for all Christmas lights. These include:
- Always lookout for loose or burned-out bulbs.
- Check fuses for those bulbs with an alternatively colored lamp base.
- Check the fuses in the male end of the plug, which is at the end with blades
- Once you troubleshoot and identify the problem, check if you need replacement accessories.
Troubleshooting led Christmas lights.
Christmas lights can be boring to repair, especially when you cannot find the exact bulb causing the problem. It is even more frustrating when the LED string lights are not replaceable type. Rather than writing it off, consider the following tips to repair and fix it.
- Gather the right electric gadgets to ensure your safety is guaranteed. Some of the tools needed include Voltage Detector, Wire Strippers, Soldering Iron
- Understand the current structure. LED lights will not use a lot of energy. Note that a break in the LED circuit affects the entire system.
- Learn how to detect the malfunctioning LED light. It would help if you used a voltmeter to detect the live wire going into the first LED. Then check the wire that goes into the second light from the first one. You need to check the voltage between lights. Any break indicates a faulty LED that could affect the rest of the circuit
- You can cut off the faulty LED section and solder an adjoining section with still working LEDs. Remember you have to keep the right number of LEDs per string to avoid burning them out
Troubleshooting Noma LED Christmas lights
Many things can go wrong with your Noma LED Christmas lights. One of the most common ones is blown fuses. However, it is also possible that the socket has an issue because the fuses keep blowing. In such a case:
- Turn off the power to the socket.
- Test the socket. Do this by attaching the continuity tester’s clip to the hot screw terminal with the black wire lead.
- Touch the probe to the metal tab located at the socket’s bottom.
- Check to see the tester’s behavior. It should be glowing if everything is right. In case the opposite is true, then the socket is faulty and should be replaced.
Troubleshooting outdoor Christmas lights
To identify issues with the Christmas lights you own:
- Start by plugging the lights into the electrical outlet.
- Turn on the light switch and circuit breaker.
- Observe the fuse or fuse from the plug at the end of the light strand. This is usually a glass cylinder with a wire filament.
- In case the fuse is okay, then you need to check the bulb.
Troubleshooting icicle Christmas lights
Examine the entire line of icicle lights to verify the power supply. To verify, remove the extension cord and plug in something different.
Find the icicle light strand at the end of the outlet. You should unplug it to see if the rest of the lights go on. In most cases, bad strands affect the good ones and hinder the rest from lighting.
Check the strands you are holding for bad bulbs. Press each bulb into the socket gently, even when it seems connected. The bulb filaments may be detached. If this is the problem, then pressing it lightly will fix the issue once plugged in.
Check this too: Barbeque Gift Basket Ideas: What to Get Someone Who Loves to BBQ
Move to the next strand in case the entire line is dark. You need to check the bulbs in the second closest strand and reconnect, then observe the other strands light up.
Repeat the process with each strand back to the outlet. You may need to replace the failed strands with those that work.
When you come to the extension cord connection, and it is still dark, you may need to replace the extension cord.
Troubleshooting 3 wire Christmas lights
Unravel the entire strand of lights. This should happen in ample space to minimize tangling when your work is in progress. Start by working at a light at a time. Plug the light and unscrew the first light carefully and test while setting it aside. Screw the replacement bulb into the empty hole and check all bulbs until you locate the bulb that requires to be replaced.
Unplug the lights and find the position of the miniature fuses. You should see two of them on either side of the AC. Replace the fuse that seems to be the problem and plug back the light to confirm that you swapped the correct fuse.
Keep the lights unplugged after checking each bulb to be sure it is properly connected. You should always start with the first bulb and check if you can unscrew and screw it back safe.
Troubleshooting GE LED Christmas lights
- Consider loose or burned-out bulbs by placing bulbs from the unlit section to the lit one.
- Consider fuse bulbs with a colored lamp base.
- Consider fuses in the male end of the plug
- Replace necessary accessories
Troubleshooting series-parallel Christmas lights
Find out the problem by carefully inspecting every string of light before you plug it into the electrical outlet.
- Find where the bad bulb is and swap it out with the right one.
- You should fix faulty filaments.
- Replace the fried or broken fuse.
- Purpose to upgrade the lights
- Troubleshooting Noma advanced Christmas lights.
- For connection issues such as the “Lights Connected” prompt not appearing on the Pairing screen, go back to adding the lights again or resetting the lights.
- To reset the lights unplug, and wait for 3 seconds before re-plugging it.
- Repeat the process two more times.
- To maximize the connection, connect up to 8 string lights at ago.
Keep an eye on regular updates. Usually, the app will notify you each time there is an update available. It also prompts you to either accept or decline. When you update the lights, they will have a blue flash.