
Raynor is a credible and professional company when it comes to garage door openers. Their garage door openers are durable and easy to maintain, with a wide range of options to choose from. However, the Raynor garage door openers may develop issues over time, either from regular use, poor installation and wiring, or the usual wear and tear.
Troubleshooting may vary depending on the model number but knowing the basics will help you save on professional labor costs and time spent on booking a technician. This article is about the most common problems and the most likely repairs for each issue.
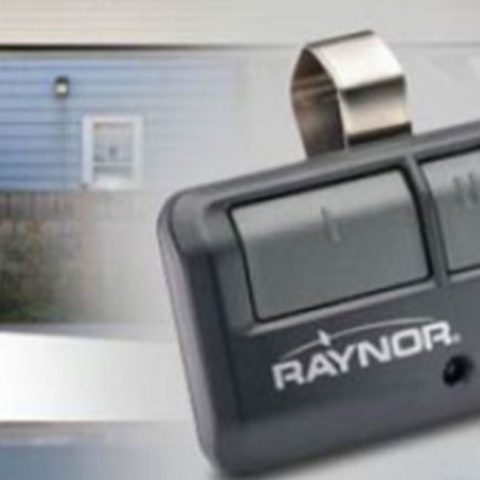
How to operate the Raynor garage door opener
- Activate the garage door opener with any of the following devices:
- Hand-held remote control: press and hold the large push-button until the door starts to move
- Wall-mounted door control: press and hold the push button until the door begins to move.
- Keyless entry: Press the PIN code after programming the device to your garage door opener using the steps below. Note that not all models come with this accessory.
- Press the ‘Learn’ button on the door opener to activate programming mode.
- Press the ‘Learn’ button again, and the LED light will flash once.
- Enter a 4-digit personal identification code(PIN) of your choice on the keyless entry keypad and press ‘Enter.’
- The garage door opener lights will turn on, or you will hear two clicks to indicate the keyless entry’s successful programming.
- Press the push bar on the remote control, wall switch or enter the PIN on the keyless entry to open or close the garage door.
- Press the push bar again to reverse the door during the closing cycle or stop during the opening cycle.
- The garage door opener has lights that will turn on;
- When you power on the opener.
- After a power interruption
- When you activate the opener and when someone is walking through the open garage door. The lights will stay on for about four and a half minutes.
How to operate the Raynor garage door opener manually
You will have to open the garage door manually when you forget the remote control or you need to fix something. Here is how to safely disengage the garage door motor:
- Ensure the door is fully closed and the doorway is clear of people or obstructions.
- Pull out the release emergency handle to disconnect the trolley.
- Lift the door with your hands
- Activate the lockout feature by pulling the emergency release handle down and back towards the opener. The lockout feature will prevent the trolley from automatically reconnecting, allowing you to operate the door as often as possible manually.
- To deactivate the lockout feature, pull the emergency release handle down. The trolley will rejoin on the next up or down cycle either manually or by remote control or door control.
How do I reset my Raynor garage door opener?
You will have to reset your door opener if it is malfunctioning, an unauthorized remote control activates your garage door, or your hand-held remote is stolen or lost. The resetting process may vary depending on the model number, but this is a standard guideline for resetting the Raynor garage door opener.
Reset the remote control and keyless entry
- Locate the ‘Learn’ button on the motor unit.
- Press and hold the ‘Learn’ button for about four to six seconds or until the LED light goes off.
- A reset deletes all the codes from all remote controls and keyless entry devices.
Reset all devices
- Locate the ‘Learn’ button on the motor unit.
- Press and hold the ‘Learn’ button for about four to six seconds or until the LED light goes off.
- Immediately press and hold the ‘Learn’ button again until the learn LED goes out.
- All the garage door opener devices reset to factory settings.
The Raynor garage door opener blink codes and their meanings
The Raynor garage door opener has an in-built self-diagnostic system. The LED light, usually next to the ‘Learn’ button, will flash several times and then pause to indicate there’s a problem with the garage door opener. The indicator lights on the sensors will also glow if there is a potential problem. Below is a diagnostic chart of a Raynor garage door opener.
| Diagnostic codes | Symptom and solution |
| 1 flash- safety sensor wire broken or disconnected 2 flashes- safety sensor wire shorted or incorrect wiring | Symptom: One or both LED lights on the safety sensor flash. Look out for any short, disconnected, or wrongly connected cables. Replace any short or broken wires and reconnect any wrong wiring correctly. Disconnect all the wires from the back of the motor unit. Detach the safety sensor from their brackets, shorten the sensor wires to about 1-2 feet and reconnect them to the back of each sensor. Use shortened wires to reconnect a sending eye on the motor unit. If the sending eye indicator lights up steadily, attach a receiving eye. Position the sensors and if the indicator lights turn on, replace the wires on the sensor. |
| 3 flashes | Symptom: The door control LED does not turn on, or the door control does not activate the garage door. Check the door control wires for a burnt wire and replace them. Detach the wires at the door control, temporarily connect the wires, and replace the door control if the door opener activates. If the garage door opener does not work, disconnect the control wires from the motor. Temporarily connect the red and white terminals with a jumper wire. If the motor unit activates, replace the door control wires. |
| 4 flashes | Symptom: Sending indicator light glows steadily while receiver’s indicator light flashes or is dim. Reposition the receiving eye sensor. Clean the eye sensor lens. Secure the brackets holding the sensors in place. |
| 5 flashes | Symptom: Motor is overheating; the motor is failing or the motor unit hums; the door moves 2-3 inches and stops. Reset the motor unit. If the flashing continues and the motor moves about 6-8 inches, replace the RPM sensor. Reconnect the emergency release. If the unit does not move at all, the motor is overheated. Unplug it from power, wait 30 minutes and turn it on again. If the motor still doesn’t operate, replace its logic board or the entire motor unit. |
| 6 flashes | Symptom: Motor has failed. Replace the motor’s logic board or replace the whole motor unit. |
Raynor garage door opener not working
There are several reasons responsible for your garage door not working. Here is how to diagnose and troubleshoot a garage door opener that is not working:
1. A blocked photo-eye
The most recent garage door openers have a photo eye about four to six inches off the ground, which senses when a person or object is in the doorway. It sends a laser beam across the length of the garage doorway; when interrupted, it cuts off power to close the door and raises it.
- Inspect the condition of the wire connected to the photo-eye and replace it if necessary.
- Clean the lens of the photo-eye with a lint-free cloth. Dust can accumulate on the eye and block the laser beam.
2. The door is off track.
If the garage door is off track, it will not move. To troubleshoot this:
- Disconnect the garage door opener from power and manually lift the garage door to ensure that it is rolling smoothly on the track.
- Check the track for bends, gaps, bumps, and obstructions.
- While moving the garage door, listen for squeaks and other unusual noises to indicate a faulty track.
- Loosen the fasteners that attach the track to its frame. Gently tap the track back to its position using a rubber mallet and a level.
- Remove any debris on the track with a dry scrubbing brush.
3. A faulty power source
The wall socket that powers the garage door opener could be damaged or not switched on.
- Make sure the switch is on.
- If switching the socket doesn’t work, make sure the wall socket is working. Check the circuit breaker and fuse. Use a multimeter to test if it is passing current. If it is not, the socket may be damaged and needs replacing.
4. Broken garage door torsion springs
When the spring breaks, you will hear a loud sound. You can also inspect to see if it is damaged.
- You should not try to open the garage door if you suspect a broken spring. Have a professional come and replace the spring.
5. The cables are broken or disconnected.
When a spring breaks, the cables also snap off, or they loosen and disengage over time. It would be best if you got a technician to fix the disengaged cables.
6. Misaligned sensitivity or safety sensors
The garage door opener will not operate if the sensitivity is set too high or too low. Position the sensor about six inches above the floor and reset your safety sensors.
- Ensure the indicator lights on the sensors are glowing steadily. If they are light glowing steadily, they are wired and aligned correctly.
- Check the amber LED on the sending sensors, which always glows regardless of misalignment or obstruction. If it is off, check if the garage door opener is receiving power; look for a broken or short sensor wire and replace it if necessary.
- Check the wiring on the sensors. White wires should connect to the white terminals and the black wires to the gray terminals.
- If the green LED light on the receiving sensor is off, realign the sensors or check for broken wires and replace them if necessary. To align the sensors:
- Loosen the fasteners holding the receiving eye and adjust it until it receives the sender’s beam. Then secure it in place.
- Loosen the fasteners on the sending eye, move it until it receives the sender’s beam, and then lock it in place.
7. An unseen object is obstructing the door.
As a safety measure, the garage door reverses when it comes into contact with an object. Something you cannot see could be obstructing the garage door.
- Inspect the tracks for dirt, debris, or even birds. Wipe the tracks with a lint-free cloth to remove any stuck objects or debris.
8. A faulty remote control
If your remote control is not engaging your garage door, here are some of the causes of a faulty remote control;
- Your remote control or wall switch could require a battery change.
- The remote control is out of range.
- The motor’s antenna could be damaged or obstructed from receiving the signal. Readjust the antenna to hang down from the motor.
- If all these solutions fail, reset and reprogram the remote control.
9. The limit setting requires adjustment.
Weather conditions can affect door travel; therefore, the garage door opener’s limit setting needs adjustment every so often. The adjustment limit setting regulates how high or low the garage door moves.
- Manually check the balance of the door and any binding.
- Run the door opener through a complete travel cycle. Check if the door opens or closes fully or if it reverses unintentionally when fully closed.
- If the door travel is off, use a screwdriver to turn the adjustment screw and adjust the up and down travel limits accordingly.
10. The emergency release handle is engaged.
Raynor garage door openers have an emergency release handle is a lock button that disengages the motor and allows you to operate the garage door manually. Check to see that you did not accidentally turn the release handle down.
Check this too: Chamberlain Garage Door Opener How to & Troubleshooting Guide
Raynor garage door opener remote not working.
When your remote control stops operating the garage door, try these troubleshooting solutions:
1. Remote batteries are dead.
Consider changing the batteries to your remote control if it has been a while since your last replaced them. Garage door remote batteries tend to last about two years before they require replacing. To replace the remote control batteries:
- Use the visor clip or flathead screwdriver to pry the case’s edges to open the battery compartment.
- Insert the new battery with the positive (+) side up. Only use the 3VCR2032 lithium coil cell batteries.
- Replace the case until it clicks into place and dispose of the old batteries properly,
2. Remote control requires reprogramming
After prolonged use, the remote control signal becomes disrupted, and it sends hazy signals to the antenna. To reprogram your remote control;
- Locate the ‘Learn’ button on the opener.
- Press and hold the ‘Learn’ button until the lights flash or the LED light blinks.
- Test the door’s response by pressing the push button on the remote control.
3. A disrupted remote signal.
When the signal between the remote control and antenna is blocked, the garage door will not respond. Two reasons that can cause this disruption are when you use the remote control when you’re out of range or the receiving antenna is defective.
- Use the remote control within 20 feet from the garage door opener.
- Check if the antenna is broken and replace it if necessary.
- If the antenna is not damaged, ensure there is no debris stuck on the antenna and that the antenna is pointing towards the garage door.
4. The lock button is engaged.
Make sure the lock button on the wall mount control panel is in the off position. Engaging the lock button shuts off the motor and prevents the remote control from operating the garage door. Turn the lock off and test the door with the remote control.
5. Malfunctioned door control wiring
Follow these steps to test the condition of the garage door opener’s wiring:
- Unplug the opener from power.
- Disconnect the two wires from the motor.
- Reconnect the opener to power, erase the motor’s memory and reprogram all remote controls.
- Unplug the opener again from power.
- Reconnect the two wires to the motor.
- Disconnect the wiring to the wall control panel.
- Press the push button on the remote control to test the functionality of the garage door.
6. A blown GFI
The remote control will not work if you have a blown Ground Fault Interpreter(GFI). The GFI detects changes in amperage or an overheating motor that could damage your garage door opener or start a fire. When the GFI malfunctions, it stops the door from moving or operates the door using the backup battery in some models.
- Locate the GFI switch on the wall outlet and press it once to reset it.
- If the GFI keeps tripping, you need to remove the devices connected to the same wall outlet with the garage door opener.
Maintenance schedule for your Raynor garage door opener
Like any other machine, garage door openers have moving parts that have to be maintained to increase their service and also work efficiently. Maintenance also reduces replacement and repair costs.
Once a month
- Operate the garage door manually, check for unbalance and binding.
- Ensure the door opens and closes completely and adjust the travel limit and force if necessary.
- Perform the safety reverse test and adjust where necessary.
Twice a year
- Inspect the chain tension. Disconnect the trolley and adjust accordingly.
Once a year
- Lubricate the garage door hinges, rollers, and bearings. Do not oil the tracks.
Conclusion
Raynor garage door openers are very durable therefore hardly develop complicated issues, but when they do, our article will help you troubleshoot the most common problems. Keep in mind that a well-maintained garage door opener is likely to develop any serious issues.