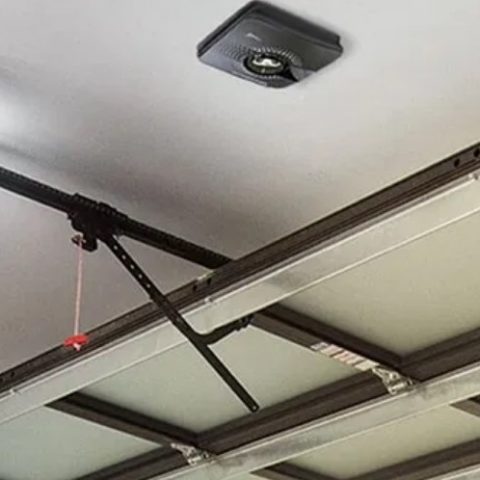
Chamberlain is known for its reliable and convenient lines of garage door openers for both professional installers and DIYs. The embedded “myQ” technology in the garage door openers and lights can be added to Wi-Fi networks to control these devices.
If you own a Chamberlain garage door opener and are having difficulties with the installation or any other problem, here is an easy-to-follow how to and troubleshooting guide to help you get around the issue.
How to program a Chamberlain garage door opener
Programming can be done through the door control or the learn button on the garage door opener. To program your garage door opener using the door control:
- Press the navigation button below MENU to view the Features menu.
- Use the navigation buttons to scroll to PROGRAM.
- Select REMOTE or KEYPAD to program from the program menu.
- For remote control, press the button on the remote control that you wish to operate your garage door.
- For keyless entry, enter a 4-digit PIN of your choice on the keyless entry keypad. Then press the ENTER button.
- The garage door opener lights will flash (or hear two clicks) when the code has been programmed.
To program using your garage door opener LEARN button:
- Locate the LEARN button on the garage door opener.
- Press and immediately release the Learn button. The Learn LED will glow steadily.
- Within 30 seconds, press the button on the remote control you wish to operate your garage door.
- The garage door opener lights will flash or two clicks will be heard. The remote control is programmed.
To program using your door control LEARN button:
- Locate the Learn button on the door control.
- Press the Learn button twice. The LED will blink.
- Press and release the button on the remote that you wish to operate your garage door.
- The garage door opener lights will flash or two clicks will be heard. The remote control is programmed.
How to program a Chamberlain garage door opener to a car
You can program the opener with your vehicle’s HomeLink system. Depending on the car model you have, you may need a compatibility bridge for the opener to properly operate. Follow these steps to program the garage door opener to your car’s HomeLink system.
- Press and hold the two outer HomeLink buttons, releasing only when the HomeLink indicator light begins to flash after 20 seconds.
- Position the hand-held transmitter 1-3 inches away from the HomeLink surface, keeping the HomeLink indicator light in view.
- Using both hands, simultaneously press and hold both the desired HomeLink button and hand-held transmitter button. Do not release until the HomeLink indicator light flashes slowly and then fast. Release both buttons when the indicator light flashes fast.
- Press and hold the trained HomeLink button and observe the indicator light. If the indicator light is solid/continuous, programming is complete and your device should activate when HomeLink button is pressed and released. If the indicator light blinks rapidly for 2 seconds and then turns a solid/continuous light, proceed to the next step.
- At the motorhead, locate the Learn or Smart button. Press and release this button. You have 30 seconds in which to initiate the next step.
- Return to your vehicle and firmly press and hold the trained HomeLink button for 2 seconds and release. Repeat the sequence up to 3 times to complete the training process.
Car2U system is not compatible with Chamberlain without a Car2U bridge.
How to reset Chamberlain garage door opener
Resetting erases all remote controls, keyless entries, and MyQ devices from the garage door opener. To reset your garage door opener:
- Press and hold the LEARN button on the opener for about 6 seconds until the learn LED goes out.
- Immediately press and hold the LEARN button again until the learn LED goes out.
- All codes are now reset.
To reset the connection from garage door opener to home Wi-Fi network:
- Press and hold the black adjustment button on the opener for about 6 seconds until you hear 3 beeps.
To erase a MyQ account:
- Go to mychamberlain.com to access your MyQ account.
- Go to ACCOUNT section.
- Click DELETE ACCOUNT.
How to reprogram Chamberlain garage door opener
- Press and hold the LEARN button on the opener for about 6 seconds until the learn LED goes out. This confirms that all remote control and keyless entry codes are now erased.
- Press the navigation button below MENU to view the Features menu.
- Use the navigation buttons to scroll to PROGRAM.
- Select REMOTE or KEYPAD to program from the program menu.
- For remote control, press the button on the remote control that you wish to operate your garage door.
- For keyless entry, enter a 4-digit PIN of your choice on the keyless entry keypad. Then press the ENTER button.
- The garage door opener lights will flash (or hear two clicks) indicating it has been reprogrammed.
How to connect Chamberlain garage door opener to wifi
To connect your garage door opener to Wi-Fi and control it with MyQ app you will need the following:
- A tablet or smartphone
- Broadband internet connection
- A strong Wi-Fi signal in your garage
- Your home network password
- MyQ serial number located on the garage door opener.
The follow these steps:
- Press and release the yellow LEARN button on your garage door opener 3 times. The opener will beep once and a blue light will flash. You have 20 minutes to complete the connection.
- On your mobile device, go to settings> Wi-Fi, and select the network with the “MyQ-“ prefix.
- Then launch the web browser on your mobile device and go to “setup.myqdevice.com”. Follow the on-screen instructions to add the garage door opener to your home Wi-Fi network.
- Download the MyQ app from Google Play or AppStore. Sign up for your MyQ account and add the MyQ serial number to your account.
Note that the MyQ smartphone control will not work if your garage door opener is operating on battery power.
How to change frequency on Chamberlain garage door opener
- Step 1: Locate a button labeled “Smart” or “Learn” on the door opener’s motor unit. Press it and then release it.
- Step 2: Press and hold the Learn button on the remote within 30 seconds.
- Step 3: Release the Learn button when the motor unit light blinks or clicks twice.
- Step 4: Press the remote button once to test the new code.
How to change the battery in a Chamberlain garage door opener
If the remote control’s battery is low, the LED will not flash when the button is pressed. You’ll need to replace it. Follow these steps to replace the battery to your remote control:
- Pry open the case first in the middle, then at each side with a visor clip.
- Remove the old battery from the compartment.
- Insert the replacement battery (3V CR2032), making sure the positive side (+) is up.
How to Install Chamberlain Garage Door Opener Battery Backup
The battery backup allows access in and out of your garage, even when the power is out. To install battery backup:
- Start by unplugging the garage door opener.
- Open the light lens on the right-side panel of your garage door opener. Use a Philips head screwdriver to remove the battery cover.
- Remove your old battery from the battery compartment and partially insert the replacement battery with the terminals facing out.
- Connect red (+) and black (-) wires from the garage door opener to the corresponding terminals on the battery.
- Replace the battery cover.
- Plugin the garage door opener and wait for the green battery status LED to start flashing before you proceed to test the battery.
To test the battery:
- Unplug your garage door opener. The battery status LED will either glow solid orange showing opener is operating on battery power or it will flash indicating low battery.
- Open and close the door using the remote control or door control. Opener may run slower if the battery isn’t fully charged. The battery takes 24 hours to charge fully.
- Plugin the garage door opener. Check to verify the battery status LED is flashing green, indicating the battery is charging.
Check this too: Genie Garage Door Opener Troubleshooting & How to Guide
Chamberlain Garage Door Opener Diagnostic Codes Troubleshooting
Your garage door opener is programmed with self-diagnostic capabilities. The Up and Down arrows on the opener flash the diagnostic codes. Here are those codes, what they mean, and their solution:
-
1 up arrow flash and 1 down arrow flash
- Safety sensors may not be installed, connected, or wires may be cut. Inspect sensor wires for a disconnected or cut wire.
-
1 up arrow flash and 2 down arrow flashes
- There may be a short or reversed wire for the safety sensors. Inspect safety sensor wire at all staple and connection points.
- Replace wire or correct as needed.
-
1 up arrow flash and 3 down arrow flashes
- The wires for the door control may be shorted or the door control is faulty. Inspect door control wires at all staple and connection points.
- Replace wire or correct as needed.
-
1 up arrow flash and 4 down arrow flashes
- Safety reversing sensors may be misaligned or were obstructed momentarily. Realign both sensors to ensure both LEDs are steady and not flickering.
- Ensure nothing is hanging or mounted on the door that would interrupt the sensor’s path while closing.
-
1 up arrow flash and 5 down arrow flashes
- The door moves 6-8” stops or reverses: Manually open and close the door. Check for binding or obstructions, like a door lock or broken spring, and correct as needed. Check wiring connections at the travel module and at the logic board. Replace the travel module if necessary.
- No movement, only a single click: Manually open and close the door. Check for binding or obstructions, correct as needed. Replace the logic board if necessary.
- Opener hums for 1-2 seconds no movement: Manually open and closes the door. Check for binding or obstructions, correct as needed. Replace the motor if necessary.
-
1 up arrow flash and 6 down arrow flashes
- Door coasts after it has come to a complete stop. Program travel to coasting position or have the door balanced by a trained door systems technician.
-
2 up arrow flashes and 1-5 down arrow flashes
- Replace the logic board.
-
3 up arrow flashes and 2 down arrow flashes
- Check the travel module for proper assembly. Replace if necessary.
-
3 up arrow flashes and 3 down arrow flashes
- It may be a battery backup charging circuit error. Replace the logic board.
-
4 up arrow flashes and 1-4 down arrow flashes
- Manually open and close the door.
- Check for binding or obstructions, such as a broken spring or door lock, correct as needed.
- Contact a door systems technician if the door is binding or sticking.
- Try reprogramming travel if the door is not binding or sticking.
-
4 up arrow flashes and 5 down arrow flashes
- It means there may be communication errors with the travel module.
- Check travel module connections. Replace the travel module if necessary.
-
4 up arrow flashes and 6 down arrow flashes
- Safety reversing sensors may be misaligned or were momentarily obstructed.
- Realign both sensors to ensure both LEDs are steady and not flickering.
- Make sure there is nothing hanging or mounted on the door that would interrupt the sensor’s path while closing.