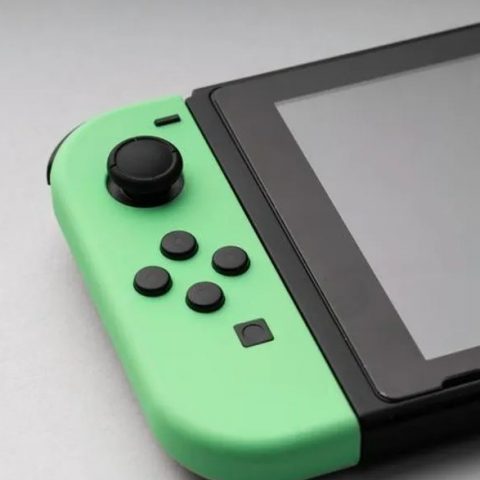
Despite being the new kid on the block, the Nintendo Switch is a worthy personal gaming console. Not only can you use it to play games on the TV, but it can also be used on the go to play games. This hybrid gaming console certainly takes the cake when it comes to usability.
However, like all other electronic gadgets, it is bound to experience some glitches from time to time. This can be as simple as a Wi-Fi connection problem or as complicated as an impromptu shutdown. Keep reading to learn how to troubleshoot your Nintendo switch problems and the best solution for each issue.
How to Connect a Nintendo Switch To a TV
The most common way to connect the Nintendo Switch to the TV is using a switch dock. However, it is still possible to connect it without a dock.
Connecting a Nintendo Switch using a dock
- Open the back cover of the Nintendo Switch Dock.
- Connect the USB plug from the Nintendo Switch AC adapter (model No. HAC-002) into the top terminal of the dock labelled “AC ADAPTER,” then connect the other end of the AC adapter to a wall outlet.
- Connect one end of the HDMI cable into the bottom terminal of the dock labelled “HDMI OUT,” then connect the other end into an HDMI port on your television or monitor.
- Close the back cover of the Nintendo Switch dock.
- Remove the left and right Joy-Con controllers from the console.
- Position the console so that the console screen faces in the same direction as the front panel on the dock, then insert the console into the dock.
- While the console is docked, the console screen will shut off.
- Turn the TV set on, and select the correct HDMI input.
Note: If the Joy-Con controllers were not previously attached to the console, they must first be registered to the console in order to be utilized as wireless controllers.
How to connect a Nintendo Switch OLED Model using a dock
- Open the back cover of the Nintendo Switch Dock.
- Connect the USB plug from the Nintendo Switch AC adapter (model No. HAC-002) into the top terminal of the dock labeled “AC ADAPTER,” then connect the other end of the AC adapter to a wall outlet.
- Connect one end of the HDMI cable into the bottom terminal of the dock labelled “HDMI OUT,” then connect the other end into an HDMI port on your television or monitor.
- Close the back cover of the Nintendo Switch dock.
- Remove the left and right Joy-Con controllers from the console.
- If the Joy-Con controllers were not previously attached to the console, they must first be registered to the console to be utilized as wireless controllers.
- Position the console so that the console screen faces in the same direction as the front panel on the dock, then insert the console into the dock.
- While the console is docked, the console screen will shut off.
- Turn the TV set on, and select the correct HDMI input.
Note: The Nintendo Switch can be connected to the dock using the LAN port while connected to a power source and TV
How to Connect Nintendo Switch to TV Without Dock
If your TV dock is damaged, you can still connect the Nintendo Switch to your TV without the dock. Using USB Type-C cables, a High Definition Multimedia Interface (HDMI) cable, or an HDMI adapter, you can do this.
The HDMI cable will transmit high-definition audio and video over a single cable. You can also use the USB-C cable to connect the Switch to the TV via the HDMI port. This will enable you to view videos on your TV screen. It’s best to use USB type-A instead of USB Type-C cables as the A-side of the line has a resistor that makes the cable safe to use.
Alternatively, you can connect the Switch to a TV without a dock by connecting a USB-C cable to an HDMI Adapter. This adapter plug will then be fixed directly to a television.
To perform the connection;
- Confirm that the HDMI cable is connected to the TV and that the original Switch dock is connected to the socket.
- Create a little space for the ventilators to work, after which you place the Nintendo dock upside down.
- Then connect the USB-C cable of the smaller side to the USB-C port inside the dock.
- Connect the other end of the USB-C cable to your Nintendo Switch, then turn on the power to the Nintendo console to confirm you did a good job.
Nintendo Switch Not Charging
There are several reasons why your Nintendo switch may not be working. These include;
- The outlet might need to be reset.
- The power outlet may be damaged.
- The contact point of the Nintendo Switch’s USB-C charging port is dirty or damaged.
- The charging adapter might have gotten dirty or damaged.
- The Dock may be damaged.
- You Nintendo Switch is incompatible with the third-party adapter.
- You have made modifications or hacked your Switch.
Follow the steps below if your Nintendo switch is not charging;
Check the outlet
Something might be wrong with the outlet you’re using to charge your Switch. Plug another device’s cord into the outlet and see if the device that uses it receives a charge. If the outlet is the problem, you might have a burnt-out fuse or might need to call an electrician. If you have a faulty outlet, move the Switch to another outlet and allow it to charge back up.
Check the dock
Check the dock to ensure that all of the cables are securely in place. It’s possible that something is loose. If that doesn’t fix the issue, the dock itself might have gotten damaged and need repair.
Reset the charger and outlet
It would be best if you tried a few different things before purchasing a new adapter or sending your Switch in for repairs. Start by giving your AC adapter a reset. Power off your Console by long-pressing the power button for at least three seconds.
Unplug the charger from both the outlet and the Switch and wait 30 seconds. If the outlet you’re using has a reset button, push the reset button now. Plug the adapter back into the Switch. Then plug the charger directly into an outlet.
See if the charging indicator shows up on the screen. If the battery still has some juice, the indicator will turn green on the screen’s upper-right side. If the battery is depleted, the charging indicator will show up on the upper-left side on a blank screen.
Charge the depleted battery
If the Nintendo Switch’s battery gets drained and doesn’t receive a charge for a long time, it can take a while to respond to an adapter when it finally gets plugged in again. Leave the console plugged into the charger overnight and see if this fixes the issue.
Carefully clean the USB-C port & charger
Grime or dirt may be preventing the Switch console’s USB-C port or Dock’s USB-C port from making contact with the charger. Careful cleaning of the USB-C port can fix the issue. When cleaning a USB-C port, you need to do so carefully.
You should never stick metal objects like safety pins and knives into the USB-C port. This can damage the tiny contact points and permanently damage your device. If nothing has worked up to this point, you might need a replacement charger. Use the official Nintendo Switch adapter as it is the most likely to solve the issue.
Undo any hacks on the Nintendo Switch
The Nintendo Switch was designed to function in a particular way. If you attempt to hack, jailbreak, or modify how your Switch works, it may no longer charge when plugged into an outlet. It’s important to note that hacking or modifying the Nintendo Switch voids any active warranty you may have.
So you likely won’t be able to send your console in for official Nintendo repairs if customizing it permanently messed things ups. Instead, you’ll need to undo the customizations that you’ve made and see if that fixes things.
Send the Switch in for repairs
If you tried everything and your Nintendo Switch still won’t charge, then it’s time to call in the professionals. You’ll need to create an official ticket through Nintendo’s Customer Support and potentially send your Switch in for repair.
Nintendo Switch Won’t Turn On After Battery Dying
If your Switch is unresponsive and won’t turn on, or has an issue with charging, follow these steps to troubleshoot it
Plug it in to charge and Let it charge
Charge it using the official Nintendo Switch Power Adapter that came with the console and leave it for at least an hour. You’d be surprised how often this works.
Most of the time, when a Switch refuses to turn on, you can chalk it up to a drained battery. This is especially true if it’s been a long time since its last charge. Over time, it may have lost even its residual charge.
Place it into its dock or plug the charging cable in directly to the switch and wait at least an hour for it to charge back up. The Switch should soon be operational and will be fully charged in about three hours.
Perform a hard reset
If your Switch remains unresponsive, even after a decent charging session, or if you can see a faint light coming from the blank screen, it’s time to force a shutdown instead. =
To shut the Switch off manually:
- Hold down the little circular power button on top of the Switch for between 15 seconds.
- The power button on top of the Switch can be hard to see.
- Release it and wait a few more seconds.
- Push the power button usually.
If it still doesn’t turn on, you may have a deeper issue. Contact Nintendo support and see if they can help.
My Switch won’t charge
If your console isn’t taking or keeping a charge, you can try a couple of solutions before taking the nuclear option.
Use an official Nintendo Switch Power Adapter
The Switch charges using a non-standard protocol, so if you’ve been using a third-party adapter, the switch may not charge.
Power-cycle your power adapter
Unplug it from both your Switch and the wall and leave it for 30 to 60 seconds. This will, in essence, reset the adapter and set things right.
Check the power adapter for damage
Check inside the USB-C plug for any bent pins that might not be making good contact. Then inspect the cable for fraying as this can cause a short. Additionally, make sure there are no cracks or buckling on the housing of the wall adapter side.
If you see any signs of damage, do not use the adapter as it could pose a danger. Instead, replace it with another official adapter, and see if the switch will charge.
Leave it to charge for a few hours
Suppose the battery’s been really heavily drained. In that case, it needs to recharge slowly for safety reasons. If your console’s battery is depleted, and you plug it in, it will likely be useable almost immediately, but if it’s sat for weeks or even months with no charge, it could take several hours to get even any kind of response out of it.
Leave it on charge (supervised) for at least 2 hours, but keep it plugged in for longer if it still shows no signs of life. If you still get nothing from turning it on after 12-24 hours, try a hard reset as detailed above as one last attempt to get things going.
All Nintendo Switch Error Codes, Their Meanings and Fixes
Below is a list of errors you may expect and possible solutions to fix them.
Hardware Issues
Error code 2153-0321
This code means there is a severe audio-hardware issue
The console will need to be physically repaired. Call Nintendo support for more info.
A temporary workaround that works for some, but not all: turn off the “mute volume when headphones are unplugged” setting.
Error code 2168-0002
This is a console crash error. It could be caused by either corrupted hardware or pirated content.
- If there is any pirated content on the Switch, delete the files immediately.
- Try rebooting the console.
- If rebooting doesn’t work, try making sure the system is up to date.
- If the above fails, the Switch may need to be physically repaired.
Error code 2115-0096
The Amiibo figure is not being accepted on the Switch.
- Check for system updates.
- Check the right Joy-Con to make sure it is working correctly.
- Reset Amiibo data.
Error code 2153-1540
This error code indicates the Switch is not functional.
- Restart the Switch.
- Check for updates.
- If this doesn’t work, call Nintendo Support. The Switch may need repairing.
Error code 2139-0006
There is something wrong with the hardware.
Call Nintendo Support. The console will need to be prepared.
General Errors
Error code 2162-0002
This is a crash error with multiple causes.
- Try restarting the console.
- Make sure the Joy-Cons are charged.
- Once rebooted, make sure all parts of the Switch are up to date.
- If the crash error persists, contact Nintendo Support.
Error codes 2813-6838 / 2813-6561
The Nintendo eShop Card code attempting to be used is unable to be processed.
- Try the code again, checking the numbers carefully.
- Make sure the code isn’t intended for a different region.
- If the above doesn’t work, contact Nintendo Support.
Error code 2801-7199
Facebook upload is not working.
- Try unlinking, then relinking the Facebook account.
- If this fails, check Facebook permissions on the Facebook site/app.
- If the error code persists, wait and try again later.
Error code 2124-4009
This is a general functionality error code.
- Restart the Switch.
- If problems persist, there may be maintenance or an outage. Try again later.
Error codes 2124-4517 /2181-4017
Usually, there flagged unusual behaviour on the Switch, preventing online service access.
Wait and try again later.
If the problem persists, contact Nintendo Support.
Error code 2124-3080
The Switch cannot connect to online match-making.
Online multiplayer is likely not available in your region.
Error code 2124-4007
The Switch console being used has been permanently banned from connecting online, likely due to a breach of Terms of Service.
Contact Nintendo Support.
Error code 2813-0055
The Switch cannot redeem a download code because the software is not released to the public yet. Wait until the release date.
Error code 2813-1470
The credit card being used in the eShop has been rejected. Delete and set up the card again.
Error code 2813-0040
The download code attempting to be used already been redeemed. Double-check the download code.
Error codes 2005-0005 / 2005-0004
This error means something in the Nintendo is likely corrupted.
- Turn off the Switch. Do not delete any data yet.
- Turn it back on and make sure the system is up to date.
- If this does not work, delete any offending DLC or pirated content.
- If the above doesn’t work, try a new Micro SD or format the current one.
Error code 2124-0291
Transfer of user account to another Switch cannot be finished.
- Check that the user account isn’t already linked in some way to the second console.
- If so, delete that data and try the transfer again.
Software Issues
Error codes 2164-0020 / 2122-0082
- There is software on the Switch causing an error.
- Go to manage software.
- Delete the software causing this issue (likely the game that caused the crash).
- Restart the Switch. Put the game card back in if it is not digital.
- Reinstall the software.
Error code 2162-0101
A game cannot start because an update is required. Check for software updates.
Error code 2306-0819
The Switch is unable to connect to online games.
Make sure the Switch software is up to date.
Error codes 2021-0003 / 2000-0000 / 2101-0002 /2107-0427
The latest software is not being used.
Check for software updates and corrupted data.
Error code 2124-3000 / 2137-1508
The Switch is unable to connect to an online service because it is not up to date.
Update the Console.
Error code 2813-0071
The software is having a general issue with downloading on the eShop.
Restart the console and try again.
Error codes 2142-1099 / 2155-0400
The Parental Controls app cannot connect to the internet. The console needs to be up to date.
Update the Console’s Internet Connection
Error code 2110-1100
The Switch is unable to determine a network.
- Run through all internet troubleshooting settings:
- Make sure no objects are blocking the Switch.
- Recheck the network password and retry.
- If failure, try either power cycling the home network or moving closer to the router.
- If the connection fails again, try turning off password requirements for the network.
- If all steps fail, check network settings for the home network.
- If this still fails, call Nintendo Support as there may be additional solutions. In some cases, the Switch may need repair.
Error code 2811-7001
An error in using an online service like eShop has occurred.
- Restart the Console.
- Check internet connection.
- Restart network devices.
Error code 2110-2004
The Switch is unable to determine a network.
- Run through all internet troubleshooting settings:
- Make sure no objects are blocking the Switch.
- Recheck the network password and retry.
- If failure, try either power cycling the home network or moving closer to the router.
- If the connection fails again, try turning off password requirements for the network.
- If all steps fail, check network settings for the home network.
- Update the router’s firmware.
- If the above doesn’t work, factory reset the router.
- If this still fails, call Nintendo Support as there may be additional solutions. In some cases, the Switch may need repair.
Error code 2110-2091
LAN Adapter is detected, but the Switch could not make a connection with the router or modem.
- Check to make sure the Ethernet cable is secure.
- Try power cycling your home network.
- Use a different port on the router.
- Try a different Ethernet cable.
Error codes 2110-2201 / 2110-2214
The router or access point alerted the Switch that an incorrect password was used.
Confirm the connection password.
Troubleshoot internet connection:
- Move the Switch closer to the router.
- Create a wireless internet connection file.
- Power cycle your network.
Error code 2110-1100
A wireless network connection cannot be made. This is due to the Switch not detecting a network. (This can also sometimes mean, for those that have USB LAN, that the USB LAN is not correctly set up)
- Create a new internet connection file.
- Move the Switch closer to the router.
- Power cycle the home network.
- Move anything blocking the Switch or Router.
Error code 2110-2091
The Switch cannot connect to a wired network.
- Check internet connection.
- Restart the Switch.
- Check DNS settings.
Error code 2110-2003
There are connection issues related to the failure to detect the LAN Adapter.
- Make sure the Ethernet is attached.
- Power cycle the home network.
- Try a different router port.
- Try a different Ethernet cable.
Error codes 2110-2004 / 2110-2220 / 2110-2201 / 2110-2214
Cannot connect to a specific wireless network. Usually, this is due to incorrect password use.
- Make sure no objects are blocking the Switch.
- Recheck the network password and retry.
- If this does not work, try power cycling the home network or moving closer to the router.
- If the connection fails again, try turning off password requirements for the network.
- If all steps fail, check network settings for the home network.
Error code 2110-3127
Cannot connect to a specific wireless or wired network.
Check DNS settings and make sure they are correct.
Error code 2110-3400
Cannot connect to a specific wireless or wired network.
Check web authentication permissions.
Error codes 2122-2403 / 2211-0524
This is a general error, usually caused by a needed software update or connection issues.
- Make sure your Switch is up to date.
- Check internet connection.
- Restart the Console.
Error code 2811-1006
The Switch is unable to connect to the Nintendo Account
- Make sure no objects are blocking the Switch.
- Recheck the network password and retry.
- If failure, try either power cycling the home network or moving closer to the router.
- If the connection fails again, try turning off password requirements for the network.
- If all steps fail, check network settings for the home network.
Error codes 2811-5001 / 2811-1028
The Switch is unable to connect to the eShop or other online features.
- Make sure no objects are blocking the Switch.
- Recheck the network password and retry.
- If failure, try either power cycling the home network or moving closer to the router.
- If the connection fails again, try turning off password requirements for the network.
- If all steps fail, check network settings for the home network.
Error code 2155-8006
The Switch is unable to link a new Nintendo account to the console. This is usually due to a DNS error or general connection timeout.
- Make sure no objects are blocking the Switch.
- Recheck the network password and retry.
- If failure, try either power cycling the home network or moving closer to the router.
- If the connection fails again, try turning off password requirements for the network.
- If all steps fail, check network settings for the home network.
Error code 2618-0513
The Switch is unable to complete a match-making process.
- Try again.
- Test your internet connection.
- Power cycle your gateway.
- If this does not work, try updating your gateway’s firmware.
- If the above fails, contact Nintendo Support.
Error codes 2160-0103 / 2306-0520 / 2618-0006 / 2618-0201 / 2618-0516
Joining an online match, starting/completing the match-making process, or completing a match has failed. This is very likely a connection issue.
- Restart the Console.
- Check the connection.
- Try a manual DNS alternate.
- Try power cycling your home network.
Error code 2160-0202
Connecting to an online service has failed. This is likely a connection timeout issue.
- Make sure no objects are blocking the Switch.
- Check the network password again and retry.
- Try either power cycling the home network or moving closer to the router.
- If the connection fails again, try turning off password requirements for the network.
- If all steps fail, check network settings for the home network.
Error code 2155-8006
The Switch is unable to link a new Nintendo account to the console. This is usually due to a DNS error or general connection timeout.
- Make sure no objects are blocking the Switch.
- Check the network password again and retry.
- If failure, try either power cycling the home network or moving closer to the router.
- If the connection fails again, try turning off password requirements for the network.
- If all steps fail, check network settings for the home network.
Error codes 2124-8006 / 2137-8006
A download cannot be completed. Usually, this is caused by connection timeout.
- Check DNS settings.
- Restart the Console.
- Run through internet troubleshooting:
- If this does not work, manually enter an alternate DNS.
- If the above does not work, try power cycling the home network or moving closer to the router.
- If the connection fails again, try turning off password requirements for the network.
- Try connecting to an alternate wireless band as the last step.
- Contact Nintendo Support if problems persist.
Error code 2810-1224
Sign-in to either the Account or eShop has failed. The connection may also be an issue.
- Restart the Console.
- Check connection signal. Then attempt regular activity again.
- If the above fails, contact Nintendo Support.
Error code 2137-0240
Downloads cannot be completed. This is because of an internet issue, likely a timeout.
- Check internet connection.
- Troubleshoot internet issues:
- Power cycle the home network.
- Move any objects blocking the Switch or Router.
- If able, connect to another wireless band.
- For wired connection troubleshooting:
- Restart network devices.
- If all the above fails, try updating the router’s firmware.
Error code 2124-8028
Nintendo sign-in has failed. This is due to poor internet speeds or wireless issues.
- Check internet speed.
- Troubleshoot internet issues:
- Power cycle the home network.
- Move any objects blocking the Switch or Router.
- If able, connect to another wireless band.
Error code 2124-8006-2124-8007
This is an error code associated with a connection timeout or DNS error. It could also be a weak signal or slow internet.
- Check internet connection.
- Restart the Switch.
- Enter a different DNS.
- Run through internet troubleshooting:
- Move any objects blocking the Switch (if wireless).
- If the above does not work, try power cycling the home network or moving closer to the wireless router.
- If the connection fails again, try turning off password requirements for the network.
- Try connecting to an alternate wireless band as the last step.
Error code 2160-8006-2160-8007
A connection test cannot be completed.
- Check internet connection.
- Make sure you are connecting to the correct network.
Error code 2618-0203
Nintendo Switch cannot connect to an online service. This is possible due to issues with the DNS.
- Restart the Console.
- Check the DNS settings.
- Try power cycling your home network.
- Manually enter an alternate DNS.
- Test the internet connection.
Error code 2142-0507
The Parental Controls app cannot connect to the internet. The internet is not detected, likely due to a timeout.
- Restart the Switch.
- Check internet connection.
- Power cycle home network.
- Use a different network.
Maintenance and Server Issues
Error code 2813-0002
There is a service outage preventing connection to the Nintendo eShop.
Wait and try again later.
Error code 2618-0542
The Switch is unable to join an online match. This is due to too many players.
Wait and try and join a match later.
Error code 2613-1400
The Switch will not create a credit card purchase. This is likely due to maintenance or server issues. Wait and try again later.
Error code 2306-0811
The Switch will not connect to an online service. This is likely due to maintenance or server issues. Wait and try again later.
Error code 2801-7002
Twitter uploads cannot be completed. This is likely due to maintenance or server issues. Wait and try again later.
Error codes 2124-5119 / 2124-5249
Nintendo Account Services is experiencing server issues or undergoing maintenance. Wait and try again later.
Error code 902-5998
The Nintendo eShop is experiencing maintenance. Wait and try again later.
Error code 2810-1500
Facebook sign-in cannot be completed.
Restart the Console. If the problem persists, it may be may server issues. Try again later.
Error codes 2124-5002 / 2124-5200
Sign-in to a pre-existing Nintendo Account has failed. This specific code determines this is an outage on Nintendo’s side.
Wait and try again later.
Error codes 2813-0009 / 2813-1400 / 2813-6835 / 2813-9804 /2813-9712
There is a temporary service issue with the Nintendo eShop. It may have also timed out due to inactivity.
- If inactivity, relaunch the store.
- Wait and try again later.
Error codes 2811-7503, 2811-7504
There is a network outage to the Nintendo eShop.
Wait and try again later.
Error codes 2816-0700 / 2817-0700
A maintenance error is popping up on general application use.
Wait again and try later.
Micro SD Error Codes
Error codes 2002-2049-2002-2064 /2002-4690 / 2002-6201 / 2016-0247 / 2016-0602 / 2016-0641
An error code while downloading software or updating a game has occurred. The Micro SD is likely at fault.
- Reset and check the Micro SD.
- Make sure data isn’t corrupted.
- Remove and reinsert Micro SD
- If the above doesn’t work, format the Micro SD.
- If all of the tips above do not work, try getting a new Micro SD or downloading directly to the Switch.
Error codes 2002-2001 /2016-0390 / 2205-0123
- The Micro SD card cannot be accessed.
- Reset and check the Micro SD.
- Remove and reinsert Micro SD
- If the above doesn’t work, format the Micro SD.
- If all of the tips above do not work, try getting a new Micro SD or downloading directly to the Switch.
Error codes 2002-4517 / 2002-4641-2002-4660 /2002-4741-2002-4760 / 2002-0007-2002-0008 /2002-4683
- Software for or from the eShop cannot be downloaded. This is a Micro SD issue.
- If a Micro SD is not being used, restart the console.
- Check for software updates.
- Remove and reinsert Micro SD
- If the above doesn’t work, format the Micro SD.
- If all of the tips above do not work, try getting a new Micro SD or downloading directly to the Switch.
Error codes 2002-4301-2002-4463 / 2002-3005 /2002-3500-2002-3999 / 2002-0001 /2016-0601 / 2101-0001 / 2107-0445
- A Micro SD error has occurred while playing a game powering the Switch on (or waking from sleep mode).
- Restart the Switch.
- Check for software updates.
- Remove and reinsert Micro SD
- If the above doesn’t work, format the Micro SD.
- If all of the tips above do not work, try getting a new Micro SD or downloading directly to the Switch.
Error codes 2002-1002 / 2002-2629-2002-2669
- A game cannot download or start. This will happen with a Micro SD.
- Check for software updates.
- Remove and reinsert Micro SD
- If the above doesn’t work, format the Micro SD.
- If all of the tips above do not work, try getting a new Micro SD or downloading directly to the Switch.
Error 2002-2085
- The Micro SD cannot be recognized.
- Check for software updates.
- Remove and reinsert Micro SD
- If the above doesn’t work, format the Micro SD.
- If all do not work, try getting a new Micro SD or downloading directly to the Switch.
Error 2005-0003
- There is an issue with the Micro SD, and it is preventing downloads.
- Make sure the system is up to date.
- Find a new Micro SD or Repair the current Micro SD.
- If repairs fail and there is no other Micro SD for use, try downloading the software on the Switch system for later use.
Range Errors
These sets of ranges tend to have the same meaning within their group. Make sure to search the specific code if these general tips do not help.
This means the Switch cannot connect to the wireless or wired network. Usually, the error occurred before, not as a timeout.
- Try power cycling your gateway.
- Place the Switch in a DMZ in gateway settings. Within those settings, forward ports to the Switch.
- Restart the Console.
Errors 2110-2000 – 2110-2899 / 2110-2900 – 2110-2999 / 2110-3000 – 2110-3999
These error codes mean a connection was not made to a wireless or wired network. This error usually occurs during the action, such as a connection loss. However, the connection loss also could have happened while obtaining the IP address.
- Make sure no objects are blocking the Switch.
- Check the network password again and retry.
- If failure, try either power cycling the home network or moving closer to the router.
- If the connection fails again, try turning off password requirements for the network.
- If all steps fail, check network settings for the home network.
Errors 2618-0501, 2618-0502 / 2306-0501, 2306-0502
- This error occurs when the Switch fails to join an online match.
- Make sure no objects are blocking the Switch.
- Check the network password again and retry.
- If the above doesn’t work, try power cycling the home network or moving closer to the router.
- If the connection fails again, try turning off password requirements for the network.
- If all steps fail, check network settings for the home network.
Errors 2124-0200 – 2124-0269
- The user is attempting to use an online game feature while not logged in.
- Log in to the intended Nintendo account.
Game Related Errors
These error codes are for specific video game titles.
Error 2306-0820
- The Splatoon 2 Global Testfire demo will not launch.
- The demo sessions for this game are no longer available.
Error 2-AABQA-1021
- An online match in Arms will not connect.
- Check your internet connection and try again.
Error 2-BABBE-1000
- Ultra Street Fighter 2 Online will not connect.
- Check for a software update on the game.
- If this doesn’t work, check the internet connection.
Nintendo Switch Black Screen of Death Fix
There are several reasons why your Nintendo Switch appears off, not turning on, or only showing a black screen.
The battery is drained.
If your Switch has a black screen, but the battery charge indicator shows up briefly before disappearing, the battery may simply need to be charged long before the system turns back on.
Broken AC adapter or dock.
In other cases, a bad charging adapter (AC adapter) or dock is the reason why a Nintendo Switch is not turning on.
The screen is damaged.
If the screen is broken, the console may not turn on, and the screen will only show a black screen. If your console still charges OK, but the screen remains blank, you may have a possible screen problem.
Other hardware issues.
Just like any electronic device, your Nintendo Switch can fail if there’s an issue with one of its critical components or if there’s a motherboard failure.
How to fix Nintendo Switch black or blank screen issue
There are a couple of possible solutions that you can try to fix the black screen issue on the Nintendo Switch.
Perform a forced reboot.
If your Nintendo Switch has a black screen, the first potential solution you must do is perform a forced reboot, also known as a hard reset. Here’s how it’s done:
- Connect the AC adapter to your Nintendo Switch console.
- Wait for about 10-15 minutes (this should allow the battery to charge for some time).
- Press and hold the Power button for about 12 seconds. Afterwards, press the Power button once to try to turn the console back on.
Check the charging accessories (AC adapter, cable, dock).
Make sure that the charging accessories that you’re using are working. If possible, try to charge your Nintendo Switch console with another AC adapter. If you have a friend or a family member who plays the Switch, try to borrow their AC adapter and use it to charge. Make sure to leave the console and controllers charging for at least 3 hours.
If your Switch turns back on using a second set of charging accessories, that means that your own AC adapter, cable or dock may be defective.
Note: If your Switch is still not working after you’ve checked the charging accessories and forced reboot it, you should contact Nintendo for repair. When returning the console, also include the AC adapter or dock so they can also be tested.
How to Reset a Nintendo Switch
If your console won’t start up or come out of sleep mode, perform a hard reset before anything else. If you’re selling it or giving it away, factory reset it first. Here’s how;
- If your console doesn’t start up, hold the power button until the console resets, then release and press the power button again.
- To enter Maintenance Mode, turn off the console, hold the volume up and volume down buttons, and press power.
- In Maintenance Mode, select Initialize Console or Initialize Console Without Deleting Save Data to reset your Switch.
How to Perform a Hard Reset on a Nintendo Switch
- With the system powered down, hold the power button until the console resets.
- This step can take up to 15 seconds.
- To turn off your Nintendo Switch, release the power button, then press it once to start the console like usual.
- Your console should boot up without any issue.
How to Reset the Nintendo Switch’s Cache
Like any internet-connected device, the Nintendo Switch has a cache that stores your IDs, passwords, and browsing history. To do so;
- On the Nintendo Switch home screen, select Settings.
- Nintendo Switch Home Screen highlighting Settings cog
- Scroll down and select System on the left menu.
- System highlighted in the Nintendo Switch Settings menu
- Scroll to the bottom of the screen, and then select Formatting Options.
- Formatting Options highlighted in the Nintendo Switch Settings menu
- Select Reset Cache.
- Reset Cache highlighted in the Nintendo Switch Settings menu
- To delete the keyboard’s learned predictions, select Reset Keyboard.
- A warning that you can’t restore the data will pop up. Select Reset.
- Reset Cache Screen on the Nintendo Switch
How to Reset Your Nintendo Switch Without Losing Your Game Saves
Use this method if you need to reset your Nintendo Switch more comprehensively than simply clearing the cache. These methods delete everything from the console except for game save data, screenshots, videos, and user information.
- Turn off the Console. Hold down the power button until you see Power Options, then select Turn Off.
- Hold down the volume up and volume down buttons, then press the power button.
- Continue holding the buttons until Maintenance Mode loads on the Nintendo Switch.
- Choose Initialize Console Without Deleting Save Data, then select OK.
- Wait for the console to finish resetting, restoring it to factory settings.
Note: Use this option when your Nintendo Switch runs into issues, and you don’t want to lose everything while fixing it. Think of it like Safe Mode on a PC.
How to Reset Your Nintendo Switch to Factory Settings Using Maintenance Mode
If you’re selling your Nintendo Switch, restore it to factory settings and delete your files so the new owner can’t access your data.
- Use the previous instructions to put the Switch into Maintenance Mode.
- From there, select Initialize Console > Continue.
- Wait for the console to finish erasing your data.
Note: This is a permanent fix. It erases all your data, including saved files, game downloads, and your linked Nintendo account. Only perform this restore if you’re confident you don’t mind losing these files.
How to Factory Reset Nintendo Switch from the Settings Menu
Alternatively, you can perform a full reset from the Console’s Settings menu.
- On the Nintendo Switch home screen, select Settings.
- Nintendo Switch Home Screen with Settings highlighted
- Scroll down and select System on the left menu.
- System highlighted in the Nintendo Switch Settings menu
- Scroll to the bottom of the screen and select Formatting Options.
- Formatting Options highlighted in the Nintendo Switch Settings menu
- Choose Initialize Console, and then select OK.
- Initialize console highlighted in the Nintendo Switch Formatting Options menu
- Wait for the console to finish erasing your data.
- This process also unlinks your Nintendo account from the system.
Nintendo Switch Won’t Turn On After Hard Reset
You can turn on the Switch by performing the Force Restart procedure.
- Hold down the Power Button for at least 12 seconds until the Switch Console turns off.
- Nintendo Switch console with the power button on top highlighted
- Once the Switch has been entirely powered off, press the Power Button again to turn it back on.
Nintendo Switch Not Turning On in Dock
The Switch Dock is a docking station with electrical connectors that enable Nintendo Switch to charge and connect to a television using an HDMI cable. Here are some reasons why the Switch is not turning on;
The Switch Dock is not Working
Several reasons could cause this;
Switch Dock in Error state
The Switch Dock might get into an error state where it fails to recognize and connect with your Nintendo Switch or TV. Here, power cycling usually does the trick.
The Cables are in the wrong order
This is an unintentional coding bug/mistake done by Nintendo Engineers and is present to this day. Plugging in the cables in the correct order usually fixes the issue.
Faulty Dock
Your Dock might also be faulty. Consoles are known to get issues even if they are new all the time. Contact the Nintendo service centre and get it checked.
Cable not providing enough power
The power cable attached to the Dock is not providing enough power to the peripheral. There are several different angles to this and will be discussed in the solutions.
HDMI issues
Ensure the HDMI is correctly plugged in or not. If there are issues with HDMI, you will not be able to connect.
Power outlet
The dock requires a decent amount of power to operate as expected.
Bad configurations
If there are bad configurations stored on your computer, the Switch Dock will not work or will work sparingly. You can either reset the temporary configurations or perform a hard reset.
Make sure that you save all your settings and configurations in the cloud and proceed with the solutions in the ordered manner.
Solutions to remedy the issue
Power Cycling Entire Setup
Before you power cycle, make sure that any unsaved data is saved. In some cases, some temporary settings might get set to default, so keep this in mind.
- Unplug the HDMI cable from Switch Dock and also the power cable.
- Now hold and press the Power button for around 10-15 seconds.
- Power cycling entire setup
- Now you have to wait for 30-40 seconds. During that time, try power cycling your television and Nintendo Switch as well.
- After the time has elapsed, plug everything back in and power them up.
- Then try connecting Nintendo Switch to Dock and check if the issue is resolved.
- If you fail to fix the issue through power cycling, move on to the next solution.
- This means that there is no issue with temporary configurations, and the problem may lie with the hardware modules.
Insert the Cables in Correct Order
The Switch Dock only responds to the specific order in which the cables are inserted, including the power cable, the HDMI, and the Switch peripheral. If the issue is with your computer or a laptop/notebook, you should try using Restoro Repair to scan the repositories and replace corrupt and missing files.
This works in most cases, where the issue is originated due to system corruption. Follow the steps below in the exact order in which they are listed. The firmware of Switch Dock crashes when the HDMI is connected to the TV first before it is given power.
- Unplug every cable from Switch Dock, including the HDMI, Power, and Switch peripheral itself.
- Now, plug in the power cable first into your Switch Dock. Make sure that power is coming by looking at the power LED.
- Inserting Cables in order – Switch Dock
- Next, plug in the HDMI cable.
- Then insert Nintendo Switch into the Dock. If everything goes alright, the green light will go on, and it will be switched to HDMI
- Checking Power Cable
Your Switch Dock is responsible for connecting your Nintendo Switch to your TV and also charging it. Since it does a load of these functions, it requires a decent amount of power.
If there isn’t enough power delivered, the Switch Dock will not work as expected and cause various issues such as not charging or not connecting to the TV properly. Ensure that you are plugging in the original Switch Dock Power cable and are plugging it in an independent power outlet.
Check your HDMI Cable
If the HDMI cable is faulty or has issues, the content will not be able to transmit correctly, and hence you will not be able to connect. Instead, check your HDMI cable by connecting it with another device such as a laptop or computer to see if the HDMI cable works.
Make sure that one end is plugged inside the TV and not some other device. Once you are sure that the issue isn’t with your HDMI cable, move on to the next solution.
Checking for a Faulty Dock
If all the above methods don’t work, you should check whether your Switch Dock is faulty or not. To check whether you have a defective dock and be sure, you can borrow a Dock from a friend and then try plugging your Switch and TV in it.
Make sure you keep in mind Solution 2. If the friend’s Dock also fails to connect properly with your Nintendo Switch/TV, it probably means there is some issue with the settings. If it does, it rectifies the case of you having a faulty dock.
If the dock is faulty, contact the Nintendo customer service centre if you have a warranty.
Note: If none of the Methods has resolved the issue for you, use the Restoro Repair Tool to scan the repositories to replace corrupt and missing files. This works in most cases, where the problem is originated due to system corruption. Restoro will also optimize your system for maximum performance.
Nintendo Switch Won’t Connect to Wi-Fi
One common fix for major connectivity issues associated with Wi-Fi is simply updating the Firmware of the Router or resetting the router back to Factory Settings.
If your Nintendo Switch doesn’t connect to Wi-Fi, you won’t be able to use download titles, access multiplayer modes, or use voice chat, though you should still be able to play most games.
The Switch can either fail to connect to a network during the initial setup or lose the connection later.
Causes of Nintendo Switch Not Connecting to Wi-Fi
- Nintendo Switch Online or other services are down.
- Your Wi-Fi network is down.
- Your Switch is out of range of the router.
- Your network’s security key is incompatible.
- A firewall is preventing the Switch from accessing your network.
What to Do When Your Switch doesn’t Connect to Wi-Fi
Try the troubleshooting options below to get your Switch back online. If nothing works, get in touch with Nintendo’s tech support.
See if Nintendo Switch Online is down.
A local or global outage will stop everyone’s Switches from accessing online services. Make sure the problem isn’t on Nintendo’s end before you try other fixes.
Move closer to your router.
If you have a Switch Lite or another console in portable mode (that is, it isn’t connected to your TV), you may be too far from the router. Sit in a different spot to see if the connection improves. If your Switch is connected to its dock, try moving it closer to the router.
Check your network status.
If the issue isn’t with the service, it could be with your network. See if other devices, like phones, laptops, and tablets, can connect to Wi-Fi. If they can’t, take some steps to troubleshoot it.
Restart the Switch.
Turning the hardware off instead of putting it to sleep may fix some problems. Hold down the Power button on the console for about five seconds to open a menu and select Power Options. You can choose to restart or turn off the console and turn it off to power the system down completely.
Restart your modem and router.
Whether your network seems to be up or not, it’s not a bad idea to try power-cycling it, too. For example, if your router and modem are separate, unplug them for about a minute. Then, plug your modem back in, wait about 30 seconds, and then restore power to your router.
If you have a combination router/modem, unplug it, wait about a minute, and plug it back in. Then, try the connection again once it’s wholly started up.
Ensure your wireless security is compatible.
You should secure your home network with a WEP or WPA key to keep your information and connection safe, but not every new standard may work with the Switch. Check Nintendo’s compatibility list for the most current support information.
Try a wired connection.
The Switch and Lite can’t use a wired internet connection when you first buy them. You’ll need to purchase a LAN adapter to get them online mechanically. (The Nintendo Switch OLED model comes with a dock with a wired LAN port.) Switch Lite will also need a USB stand to create a port for the adapter to plug into.
The standard Nintendo Switch can only use a wired connection when it’s docked.
Check your firewall settings.
Your network’s firewall may prevent the Switch from accessing services. You can put it into a DMZ to separate it from the rest of the devices and bypass the firewall. Follow the instructions on Nintendo’s support site to set up a DMZ for your Switch.
Forward network ports.
You can ensure that your Switch can access all the bandwidth it needs by forwarding ports through your router. Of course, the specifics of opening and assigning sections of your network to the Switch may differ depending on your hardware setup. Still, it amounts to logging in to the router or modem and changing a couple of numbers.
Nintendo Switch Won’t Turn Off
If your Nintendo Switch system does not power off when the POWER Button is pressed, it may have a software glitch. In this case, you may need to forcefully power off the Nintendo switch.
Follow these steps to remedy the issue;
- Remove any game cards or Micro-SD cards from the system.
- Press and hold down the POWER Button for three seconds, then select Power Options followed by Turn Off.
- If the system does not respond, press and hold down the POWER Button for at least twelve seconds to force the system to shut down.
- Press the POWER Button once to turn the system again and ensure it has the latest system update.
- Situation not resolved
- If the system cannot be powered off or the POWER Button does not respond, the Nintendo Switch system will need to be repaired.
Note: When the system is powered on, pressing the POWER Button once will not turn it off but rather set it to Sleep Mode.
Nintendo Switch Won’t Read SD Card
Back up your information before reformatting the Micro SD. For example, if downloadable software was saved to the Micro SD card, it could be downloaded again using the same Nintendo Account where it was purchased.
- Power off the Nintendo Switch console.
- Remove the Micro SD card from the console and check for any dirt or debris in the Micro SD card slot or on the Micro SD card connectors.
- If there is visible contamination on either one, the Micro SD card may need to be replaced, and the console will need to be sent in for repair.
- Verify that the Micro SD card is compatible with Nintendo Switch.
- If the Micro SD card is not compatible with the console, replacing it with a compatible type may resolve the problem.
- If the Micro SD card label indicates SDXC, reinsert the Micro SD card back into the console. Then power on Nintendo Switch and be sure to perform a system update.
Note: The system menu version will not change after this update. If the Micro SD card is still not detected, it may need to be formatted. Once formatted, the information on the Micro SD card cannot be recovered.
If it cannot be detected after formatting the Micro SD card, the Micro SD card will need to be replaced. Likewise, if multiple Micro SD cards cannot be read on the console, the console will need to be repaired.
AC Adapter Nintendo Switch Not Working
Reset the AC adapter by leaving it unplugged from both ends for at least 30 seconds. Use a Nintendo Switch AC adapter (model No. HAC-002). If a different charger is being used, replacing it with the correct accessory may resolve the problem.
For best results, connect the AC adapter to the console and directly to a wall outlet. Also, check the AC adapter for any cuts, kinks, frayed cables, etc. If any damage is found, the AC adapter will need to be replaced. The Nintendo Switch AC Adapter plugging into a wall socket and the Nintendo Switch console
One Controller On Nintendo Switch Not Working
Before troubleshooting a controller, verify that the control stick configuration is set to the standard inputs. You can tell that a controller’s stick inputs have been remapped because, throughout different menus, a wrench icon will be displayed beside the controller in use at the bottom-left corner of the system screen.
If you don’t know or remember the custom configuration for your controller, you can set the system to sleep mode. Then, upon waking up the system, you’ll have the option to reset the controller inputs.
This issue can be categorized into two;
The Joy-Con Not Recognized or Not Registering While Attached to the Console
- Ensure that your console has the latest system update.
- If your console is already up to date, be sure to restart it by holding down the POWER Button for at least three seconds, then select Power Options followed by Restart.
- If you cannot perform a system update due to the Joy-Con not being recognized, you can use the touch screen to connect to the Internet and enter the required fields.
- Detach the Joy-Con from the console, and continue with the following steps by troubleshooting one controller at a time.
- Reset the Joy-Con by pressing the SYNC Button once. Then press any other button on the controller to power it on again.
- Attach the Joy-Con to the console, ensuring that it is correctly oriented and inserted all the way.
- If the Joy-Con is still not recognized by the console, try to detach and reattach the Joy-Con to the console a couple of times.
- If at all possible, test another Joy-Con with the console.
Note: If another Joy-Con works with the console, only the non-working controller will need to be repaired. Alternatively, if the console does not recognize another Joy-Con or another Joy-Con is unavailable, the Nintendo Switch console and the problematic Joy-Con Controller(s) will need repair.
The Joy-Con Control Sticks Are Not Responding or Respond Incorrectly
- With the Joy-Con attached to the console, verify that they register correctly as connected within the Controllers screen, accessible from the HOME Menu.
- If the Joy-Con is not registering correctly on the console, please read Joy-Con Not Recognized or Not Registering While Attached to the console.
- Ensure your console has the latest system update.
- Ensure the Joy-Con have the latest controller firmware installed.
- Remove any skins or covers from the problematic Joy-Con, if any, and calibrate the control sticks.
- If the issue is occurring with a specific game or application, try the following:
- Check for any available software updates for that game.
- Check the electronic manual for that game.
- Note: Some games, such as Mario Kart 8 Deluxe, support in-game tilt controls. If these are activated, it may seem as if the control sticks are not responding correctly. If this is the case, the in-game tilt controls may need to be deactivated.
- If the control sticks cannot be calibrated, the non-working Joy-Con controller will need to be repaired. Likewise, if the Joy-Con registers correctly as being attached to the console, but the control sticks are not responding correctly, the non-working Joy-Con controller will need to be repaired.
Note: The Joy-Con cannot be attached to Nintendo Switch Lite. However, they can be used as wireless controllers with Nintendo Switch Lite.
Mic On Nintendo Switch Not Working
If you are experiencing the following symptoms when you use your headset with a Nintendo Switch,
- Mic Not Working in Chat (you can’t be heard in chat)
- Chat Audio Not Working (you cannot hear other people in chat)
Follow the steps below;
Make sure that chat is enabled in the game you’re playing. You may need to re-enable the in-game chat. In addition, you may need to disable the Push-to-Talk feature.
To do so:
1. Make sure you are logged in to your profile. Once logged in, press the “+” button on the Switch to bring up the main menu; then, navigate to the “Settings” option on the right sidebar.
2. Go to the Audio Settings (speaker icon).
You can configure the Volume sliders to your liking.
Below the Volume sliders, there are two toggle settings: Voice Chat and Voice Chat Method.
Voice Chat is “On” by default. To hear and be heard in chat, this setting needs to be “On”. If this setting is turned off, you will not listen to the chat audio, and you will not be heard in chat.
Voice Chat Method is set to “Push To Talk” by default. However, this setting needs to be “Open Mic” to be heard in chat whenever you speak. If this setting is turned on, you will not be heard in the chat unless you press a specific button when you talk into the mic.
Make sure that the Voice Chat is On, and the Voice Chat Method is set to Open Mic, and then test the headset again. You should be able to hear and be heard in the chat.
Why Is My Nintendo Switch Not Holding Charge?
There are several reasons why your Nintendo Switch might not be charging;
- The outlet might need to be reset.
- There might be something wrong with the outlet, like a burnt fuse.
- The contact points within the Nintendo Switch’s USB-C charging port might have gotten dirty or damaged.
- The charging adapter might have gotten dirty or damaged.
- If you mainly charge using the Nintendo Switch’s Dock, then the Dock may have gotten damaged.
- You might be using an incompatible third-party adapter. Some third-party accessories don’t work correctly with the Switch console.
- If you made modifications or hacked your Switch, the console might not be working correctly. You might need to undo the changes you made to your Switch to get it charging again.
Is It Bad to Leave Nintendo Switch Docked?
No. The Nintendo Switch console can be left in the dock while not in use to ensure that it is fully charged. However, if you put the console in the dock or plug in the AC Adapter directly to charge before the battery is completely spent, it will only count as a partial charging cycle.
Leaving the console on the dock or plugged in directly with the AC adapter overnight or past the point where the battery is fully charged will not damage the battery.
How Long Does Switch Battery Last?
The Nintendo Switch console takes approximately 3 hours to fully charge when the console is powered off or in sleep mode. Charging time will be longer if the console is in use.
After 800 charge cycles, the console battery life will decrease to about 80% compared to the battery on a new console. This is normal and does not represent an issue with the console or with the battery.
Once fully charged, the battery duration for the Nintendo Switch varies depending on the model and on the software application and functions being used.
- For Nintendo Switch – OLED Model with a serial number that starts with “XT”, the battery life is approximately 4.5 to 9 hours.
- For Nintendo Switch consoles with a serial number that starts with “XK”, the battery life is approximately 4.5 to 9 hours.
- For Nintendo Switch consoles with a serial number that starts with “XA”, the battery life is approximately 2.5 to 6.5 hours.
- For Nintendo Switch Lite, the battery life is approximately 3 to 7 hours.
Nintendo Switch Will Not Download Games
Follow the steps below if the download of software or update data is stuck or will not progress;
- Ensure your console has an active Internet connection.
- If the software is currently being played, save your in-game progress and then close the software.
- The software can be closed from the HOME Menu by highlighting the software title and pressing the X Button.
- Select your user page from the HOME Menu, select User Settings, scroll down, and select Update Download Progress.
- If the issue persists, restart the console and then wait for the console to connect online.
- Once the console is connected to the internet, the download should start to progress.
- If the download is progressing slowly, test your Nintendo Switch console’s Internet connection.
- If you find the download speeds are slower than expected, attempt to resolve any network-related issues causing these slow downloads.
Note: Some games and software will pause downloads when they are being played. This is generally done to ensure the best experience when using a game’s online features and services.
Other General Problems when Downloading Software
Follow these steps if you are trying to start a downloaded game on a Nintendo Switch system and there is a long load time, a long lag, the console freezes, or it will not respond.
- Restart the Nintendo Switch system by holding down the POWER Button for at least three seconds, select Power Options, and restart.
- If the system is not responding, hold down the POWER Button for twelve seconds to force the system to shut down. Then power it on again.
- Perform a system update.
- Check for any software updates for the problematic game.
- Check for corrupt data.
- Delete the problematic software and then re-download it.
- If the issue persists and a Micro SD card is being used with the system, try the following:
- Format the Micro SD card.
- Replace the Micro SD card.
- Remove the Micro SD card and download the game again to download it directly to the system memory.
- If the issue situation is not resolved after this, please Nintendo for additional support.
Note: If a specific error code or message is displayed, search for it within the knowledge base and follow the steps therein.
How to Charge Nintendo Switch Joy-Con
The primary way to charge Nintendo Switch Joy-Cons is to attach them to the console while charging by sliding them down from the top until they click into place on either side of the device screen. This can be while it’s in the dock or handheld mode but attached to the AC adapter.
If you don’t want to attach them to the console itself, you can pick up a Joy-Con charging grip, sold separately. While it looks similar to the standard Joy-Con grip that comes with a new Nintendo Switch purchase, the charging grip means you can use the two Joy-Cons like a normal controller and charge them both simultaneously.
Connect the controllers to a charging grip
If you want to play on a TV and charge your Joy-Con controllers simultaneously, you need to buy a charging grip separately.
You can connect this controller grip to your AC power unit, and it will charge the Joy-Cons even as you use them on another display.
How long do Joy-Cons take to charge?
According to the official Nintendo site, in terms of the length of time it takes to charge Joy-Cons, a full charge from empty will take approximately three and a half hours.
Note: If the console is not charging and the Joy-Cons are attached, they will only charge to the halfway mark to reserve some console battery—the Nintendo Switch Joy-Cons charge from connecting to the console if you don’t buy any extra accessories. So make sure you always put the Switch in the dock and attach the Joy-Cons when you’re not using it to keep them charged at all times, and you’re golden.
How to Add Friends On Nintendo Switch
There are two ways to become friends. Either you must accept a friend request you have received, or the other user must get a friend request sent by you. You must link your user account to a Nintendo Account before sending or receiving friend requests.
Follow these steps to add friends;
- Select your user icon (My Page) on the HOME Menu, and then select Add Friend.
- A red user icon with Mario’s face is selected in the upper-left corner of the Nintendo Switch HOME Menu
- From this screen, you can accept pending friend requests sent to you, view pending friend requests you have sent, or use the following methods to send friend requests.
- Friend Suggestions: Select this option to send friend requests to friends you are friends with on Nintendo smart-device apps, Wii U, Nintendo 3DS, Facebook, or Twitter.
How to add friends on Nintendo Switch using Friend Codes.
You’ll need your contact’s Friend Code. To find it, go to the main Switch menu, select your avatar in the top left-hand corner of the screen. If you don’t recognize your Mii on sight, the name will appear when you hover over it.
There’s no need to select anything from the side menu — your Friend Code is right there. It’s the third item down on the right-hand side of the screen. Grab a pen and note down the code’s 12 digits (do not copy the two letters at the start.)
How to add friends on Nintendo Switch – code digits
Now you’ve got the Friend Code, and you’re ready actually to add your first friend to your Nintendo Switch.
- Adding friends start on your profile page, so select your avatar in the top left-hand corner of the home screen.
- Select “Add Friend” in the menu on the left-hand side of the page. It’s the item that’s second from the bottom of the list.
- If you’re in the same room as the person, you can choose “Search for Local Users” or add them as someone you’ve played with before.
- But the most straightforward way is still to select “Search with Friend Code.”
- Type the code of the friend you want to connect with. Once you’ve done this, select Enter to confirm.
- If you’ve typed the Friend Code correctly, you’ll see their name, avatar and play history. If all looks right, press “Send Friend Request.”
How to add friends on Nintendo Switch: Accept a friend request
To accept a friend request someone has sent you, follow the same steps as before: select your avatar in the top left-hand corner of the home screen.
Select “Add Friend” from the menu on the left-hand side. This time, select “Received Friend Requests” in the menu on the right.
Find the right friend request, and select it. Choose “Become Friends”, and they will be added to your list.
You will now be able to see when they’re online, what game they’re playing, and what they’ve been up to lately.
How to Delete Saved Data On Nintendo Switch
Nintendo Switch only comes with 32 GB of storage space by default, so if you aren’t playing certain games anymore, you can remove them to free up space. Your saved data won’t be deleted automatically when you delete a Nintendo Switch game, so you can always reinstall it and resume playing.
You can delete a game’s program data, which takes up the most space. Alternatively, you can also delete its saved data (which contains all your progress in the game) to free up a bit more space.
How to delete games on a Nintendo Switch;
- From the Switch home screen, scroll to the game you want to delete.
- If you have enough games and apps, you might need to select the “All Software” icon at the right end of the home menu to see everything you have on your device.
- Find the game that you want to delete.
- Once you’ve found the game you want to delete, press the plus (+) button on the right-hand Joy-Con controller or the minus (-) button on the left.
- If you’re using a Pro Controller or another controller that doesn’t use Joy-Cons, the plus and minus buttons will still be on the right and left, respectively.
- Select “Manage Software” in the menu that appears.
- Click “Delete Software” and then confirm your choice.
Notes
Deleting games off your Switch does not delete your saved progress. You can even leave a shortcut to re-download the game at any time by selecting “Archive Software” instead of “Delete Software.”
Archiving a game will remove its data from your console, leaving its icon and save data on the homepage. This is great if you want to clear space temporarily. If you’re going to delete the game, save data and all fully, it will free up more space, but you’ll have to start from scratch if you ever download it again.
How to delete saved game data of a Nintendo Switch
- From the bottom toolbar on the home screen, open the Settings menu.
- Select “Data Management.”
- Click “Manage Save Data/Screenshots” and then “Delete Save Data.” If you’re in handheld mode, you can click “Delete Save Data” right away.
- Select the game for which you wish to delete data.
- You can delete the saved data for a specific user profile or select “Delete All Save Data for This Software” to erase all the saved data on your device.
- If you ever want the game back, re-download it from the Nintendo eShop. It’ll be free, and if you didn’t delete your saved data, you could pick up right where you left off.
Note: Game save data is stored in the console’s internal memory and cannot be saved/moved to a Micro SD card.
Complete these steps to delete saved data
- From the HOME Menu, select System Settings.
- Scroll down and select Data Management, then Delete Save Data.
- If prompted, enter your Parental Controls PIN.
- Select the game title for which you want to delete the saved data.
- If available, select the User for which you want to delete the save data, or select Delete All Save Data for this Software. To confirm, select Delete Save Data.
- Important: Once deleted, saved data cannot be recovered.
Nintendo Switch How to Change Primary Console
To change the primary Console for your Nintendo Account, you will need to de-register your current primary console, then set the new primary console. This is because you can only register one primary Console per Nintendo Account.
Once you’ve registered a primary console, your digital purchases can be played by anyone that uses the primary console. In addition, you can use your Nintendo Account to access the game on any Nintendo Switch console (primary or non-primary) once you’ve purchased a digital game.
When using a non-primary console, you are the only player that can access digital games that you’ve purchased. Other players will not be able to access your digital games on a non-primary console.
Follow these steps to change the primary account;
- Log in to your Nintendo Account and de-register the console.
- If you can’t de-register the primary console, contact Nintendo for additional assistance.
- On the second Nintendo Switch console, link your Nintendo Account to a new or existing user account.
- Use your Nintendo Account to access the Nintendo eShop on the second console. The system will automatically be set as the primary console for your Nintendo Account.
- To verify, check that the Primary Console setting is in your Nintendo eShop Account Information.
- If you have a Nintendo Switch Online membership, download your Save Data Cloud backup files as needed.
- All Nintendo Accounts on your primary console will be able to play any games that you’ve purchased.
- If you want to change your primary console again, complete steps 1-4 again to de-register this console and register a different one.
- If you no longer have access to the previous system (traded in, stolen, etc.), change your Nintendo Account password to make sure your account isn’t accessible on the previous system.
Note: Save data cannot be transferred from one system to the other via this method. However, players with a Nintendo Switch Online membership can use Save Data Cloud backup to access the save data for compatible games from multiple consoles.
Can I Leave My Nintendo Switch Charging Overnight?
Yes. It is safe to charge the Nintendo Switch console overnight to ensure that it is fully charged. Leaving the console on the dock or plugged in directly with the AC adapter overnight, or past the point where the battery is fully charged will not cause harm to the battery.
If you put the console on the dock or plug it into the AC adapter before the battery is entirely used, it will only charge long enough to fill it up so charging too much at night isn’t an issue.
Ensure your charger is good enough because if it’s weak, your Switch will drain power overnight rather than gain it. Additionally, if you put the console in the dock or plug in the AC Adapter directly to charge before the battery is completely spent, it will only count as a partial charging cycle.
What Does Flashing Green Light Mean On Nintendo Switch Dock
Ideally, the TV output LED on the front of the dock will flash and shut off. Additionally, the TV output LED will remain solid green while the console is docked and the application screen is displayed on the TV. If it is flashing, then there is a connection issue between the TV and the gaming console.
How to resolve this issue;
- Undock the Nintendo Switch console and ensure it has the latest system update installed.
- Then restart it by holding down the POWER Button for three seconds, then select Power Options followed by Restart.
- If this does not work, hold down the POWER Button for twelve seconds to force it to shut down, then power on the console again.
- If you are using a Nintendo Switch dock with a LAN port, update the firmware for the dock.
- Unplug the HDMI cable from the dock. Then reset the AC adapter by disconnecting it from both ends for at least 30 seconds.
- Ensure you use the Nintendo Switch AC adapter (model No. HAC-002) and check for any cuts, kinks, frayed cables, etc.
- If any damage is found or a different charger is being used, replacing it with the correct accessory may resolve the problem.
- Verify you are using the Nintendo Switch dock (model No. HAC-007) or Nintendo Switch dock with LAN port (model No. HEG-007).
- If a different accessory is being used, replacing it with the licensed dock may resolve the problem.
- Connect the AC adapter to the dock and directly to a wall outlet, then connect the HDMI cable back to the dock. Ensure it is plugged in directly to a TV or monitor.
- With the console powered on, place it back in the dock with the console screen facing in the same direction as the front panel on the dock.
- If the TV output LED continues to flash when the console is docked, try testing the console with another dock if possible.
- If the issue is resolved using a second dock, only the problematic dock will need to be repaired. However, if the dock has a problem, contact Nintendo.
Note: This procedure applies to Nintendo Switch Family, Nintendo Switch, and Nintendo Switch – OLED Model. The Nintendo Switch dock is not compatible with Nintendo Switch Lite.
Nintendo Switch Dock Not Working After Power Outage
There exists a possibility that the fault might be because of wrong configurations or, as it is seen, that the Switch Dock requires a decent amount of power to run. You haven’t connected the dock to a proper Power source, and you must have connected it to a regular one.
As we have seen that there might be more than a single reason behind your Nintendo Switch Dock Not Working, so is the way to fix it. Also, many users faced “Nintendo switch dock not working no green light”.
The solution options below will help to get rid of the Nintendo Switch Dock issue;
Check Power Cable
Since we see that the Nintendo Switch Dock is primarily used to charge the Nintendo Switch device, it is highly possible that it is not working as usual because the power cable attached to the Dock is not providing enough power to the peripheral.
Make sure that you are plugging in the original Nintendo Switch Dock Power Cable and plugging in an independent power outlet. A separate power outlet will be consuming the same power as a combined one.
Insert Cables in Correct Order
If you ever come across your Switch not behaving the proper way it should be, try to look at the cables connected to the dock. It might be possible that the cables were unintentionally wrongly linked and remained the same from the beginning till now.
Unplug the entire setup
A different thing that you can do here to solve the issue is to unplug the entire setup from the primary source and each other and later on try to build the setup the way it should be to avoid any error that might have happened in the past from anyone.
Check HDMI Cable
If you come across a situation where you are not able to connect your Switch Dock to your TV, you should check whether your HDMI is correctly plugged in or not. If there is an issue with the HDMI, you will not connect the TV with Switch Dock.
Check Faulty Dock
If you just got a new console for yourself, there isn’t a surety that the Dock you have will work just fine. Consoles are known to get issues if they are newly bought. For this, you can take your console to the Nintendo service centre and help you replace the faulty Dock.
Sometimes Nintendo switch dock will not work after a power outage. If this happens, you have to take it to the repair centre.
Reset Nintendo Switch
Unplug the power cable from the power socket and the HDMI cable from Switch Dock. Now hold and press the power button for 15 seconds. Wait for around 40 seconds and during this time, try powering up your Nintendo Switch and Television as well. After a minute, plug everything back in and power up. At last, try connecting Nintendo Switch to Dock to see if the error persists or not.
Check this too: Can You Connect a Keyboard to a Smart TV?
Why is the Nintendo Switch dock not working after the update?
This can happen if the update was not correctly done, so kindly reset and then re-update your console.
Different Nintendo Switch and Dock Flashing Lights and Their Meaning
Blinking green
Blinking GREEN means the charger is “balancing” the cells, so if one or more cells are defective and will NOT reach 4.2 V, then the charger will keep on trying.
Flashing red
If your power light is flashing red, there is a problem with the 72-PIN connector. This problem may be caused by dust. A dusty connection leads to the game not being able to register. If the 72-PIN connector is clean yet still not working correctly, it can be faulty, which will require you to purchase a new one.
How to Clean and Disinfect Your Nintendo Switch
Your Nintendo Switch gaming machine should probably be looking a little grimy after a long time of use. Dirty hands, sweaty palms, and grime will smudge your Nintendo Switch making it unattractive, old, and smeared with germs, of course.
You should clean your favorite gaming machine every other time especially in these times when hygiene practices have to be upheld to minimize infections.
Cleaning your Nintendo Switch shouldn’t be an uphill task. The procedure won’t take much of your time once you have assembled all the necessary items around you.
Of importance to note before getting started on the cleaning and disinfecting procedure is the sensitive nature of the Nintendo Switch screen to chemicals and water, just like smartphones and tablets. Chemicals should not be used to clean the screen as they may destroy a special coating on the screen if used over time. Though in times of disease like this, disinfecting your machine with some chemicals is necessary.
Assemble the following items for a thorough cleaning and disinfecting job; a soft microfiber cloth, a dry toothbrush (one that has not been used for brushing teeth before), cotton balls, disinfectant, and a few toothpicks.
Dos and don’ts before you start
Make sure your Nintendo Switch is off by long-pressing the power button, selecting power options on the pop-up screen then selecting turn off.
- Check the slots to remove any micro SD cards and game cards.
- Detach the Joy-Con controllers from the switch
- Avoid tampering with the metal pins as they may not work if damaged or accidentally scraped.
- Do not use compressed air to clean the switch. Nintendo specifically warns against using chemicals to clean the switch. This is because compressed air is made of chemicals that are not recommended for cleaning the screen, the cartridge, or the charging port.
- Only use isopropyl alcohol or diluted bleach to disinfect your Switch. The rubbing alcohol content should be above 70% to kill viruses and most germs. If using bleach, make sure you used a type that disinfects as most scented types do not disinfect. It’s also important to check the label to see the expiry date.
- Do not mix the bleach with any other cleaning detergents while cleaning the Nintendo Switch
Cleaning the Nintendo Switch Screen
Your gaming machine will most likely have stuck-on grime from food and grimy hands, fingerprint smudges, and dust. To clean the fingerprint smudges simply use a dry microfiber to wipe the screen until the smudges clear. This might require you to wipe a couple of times for a super clear screen.
To clean the grime that is stuck on the screen you’ll need to damp microfiber cloth to wipe the screen focusing on parts the grime is stuck. Make sure the cloth is not over-wet and wipe in side to side or up and down motion as circular motion won’t give the best results on the screen.
Take another piece of dry cloth and wipe the screen again until the screen is clear.
Cleaning the Nintendo Switch Case and Controllers
The matte look on the Nintendo Switch casing makes the surface appear dirtier than they are. The matte surface will also make it difficult to clean. The main problem you’ll encounter with the controllers and casing is oil residue.
Wipe all the surfaces of the controllers using a damp cloth (don’t overwet the cloth so you don’t have water getting into the crevices around the buttons). Use a dry cloth to wipe all the surfaces and the controllers.
It’s important to note that oil is stubborn to remove without soap, so you may have to repeat the process of damp and dry wipes several times for good results.
In some cases, the buttons may feel sticky and hard to press which may be as a result of dirt lodged in. You can clean by taking a dry toothbrush and scrubbing the parts around the buttons then wipe out any particles with a dry piece of cloth.
Cleaning the Cartridge Slot and Charging Port
There’s a likelihood that the charging port is gagged up as it is more susceptible to hair, dust, and dirt. If not cleaned, this may interfere with the connection of the charging cable. On the contrary, the cartridge slot may not need to be cleaned because it is always covered.
To clean the charging port, wrap cotton on a toothpick by twisting the toothpick around a cotton ball. Make sure it is only enough to squeeze into the port and clean without getting the cotton lodged in the port. Be careful not to damage the metal pins as they may fail to work if tampered with or scraped.
Repeat the process until all dirt is cleaned.
Disinfecting Your Switch
You may want to take an extra step and disinfect your Nintendo Switch if you feel some germs and viruses have to be done away with. You will need isopropyl alcohol for the screen, disinfectant wipes, and (or) diluted bleach solution for the Switch casing and Joy-Cons.
Moisten a cotton ball with alcohol and wipe the screen gently and allow it to evaporate.
Dilute bleach of four teaspoons with a quart of water and use this to dampen a cloth and wipe the case and Joy-Cons then allow them to air dry.
You now have a clean and germ-free Switch to enjoy your gaming without any worries.