
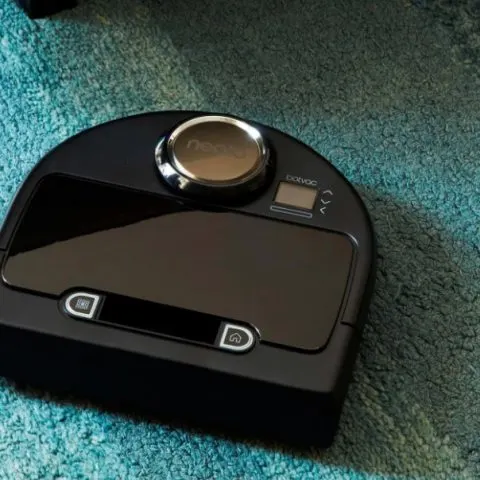
Neato robot vacuum is proven to be the best performing robot vacuums in the market to date. Paired with your phone or tablet, it has a high-performing remote functionality that cleans your floors flawlessly.
Though a very high-quality robot vacuum brand, it does develop a few hiccups when in use. With new models coming up often with more advanced features, users also have difficulty setting up their new Neato device. We have a comprehensive guide to help you set up and troubleshoot other connectivity issues you may have when using the Neato robot vacuum.
How to set up the Neato Vacuum
Follow the steps below to set up a new Neato robot;
- Unbox your Neato robot.
- Unpack the Neato Vacuum from its carton packaging and inspect the device for any shipping damages. If you notice any damage, you should contact the Neato dealership.
- Remove the films and stickers from the device and its charging base to allow it to operate correctly.
- Charge the Neato vacuum.
- Choose a power socket with no switch, and one gives about one meter of clearance on all sides.
- Place the charging base against the wall. This clearance allows the vacuum robot to find its charging station.
- Insert the power cord into the charging port on the charging base and plug the adapter into the power socket.
- Place the Neato vacuum’s rounded side against the metal charging contacts on the charging base and push the metal contacts in completely. An LED light on the vacuum will start blinking green and blue to indicate that it’s charging. Ensure the vacuum charges full to ensure it cleans efficiently.
- Connect the Neato robot to Wi-Fi.
- Download the free Neato app on your phone, create an account using a verified email address and connect your Neato robot.
- Pair your robot to the app by turning on the robot. Your Neato robot is usually in pairing mode the first one hour after turning it on. There will be a solid blue LED light that lasts about five seconds when the pairing is successful, and the LED light will turn solid red to indicate unsuccessful pairing.
- Use your Neato robot.
- You can control your Neato vacuum from the app or the LCD Control Centre screen.
- Press the start button on the vacuum, and if it were on sleep mode, it would wake up. Press the ‘Start’ button again, and it will start vacuuming the floors room by room until it completes one battery charge.
- If it did not finish cleaning, it will go back to its charging base, recharges, and then returns to the last spot it stopped cleaning to continue cleaning. The robot will do a maximum of three rounds of cleaning and return to its charging base.
- Create a cleaning schedule.
- For efficient cleaning, you need to set a cleaning schedule for the robot. Depending on the model, you can control the cleaning schedule from the LCD Control Centre screen or the Neato app.
- Set the current day and time for the vacuum to know when to start the next cleaning—Press ‘ Menu’, select 12-hour clock or 24-hour clock.
- Scroll down and click on Set Clock, and then scroll to select the current day, hour, and minute first and press ‘Save.’
- Then set the future vacuuming schedule, press ‘Menu’ and select ‘Schedule,’ set the day and time, and click on ‘Save.’
- Future vacuuming will always happen on the scheduled dates. The vacuum will automatically leave the charging base and start cleaning. When the charge begins to run low, it will go back to its charge base, recharge, and go back to cleaning where it left off.
- Maintain the Neato robot vacuum.
- Pop off the bin cover, remove the filter and empty the vacuum’s dirt bin.
- Tap the vacuum’s filter over a garbage can to loosen any debris stuck on it.
- Use the comb cleaning tool to brush off any remaining dirt on the filter.
- You have to replace the filter every one or two months or as needed.
- Insert the filter back to the vacuum until it clicks securely, and then close the cover.
- Use the cleaning tool to clean the side brushes. Make sure you remove all the dirt and hair strands that are stuck in the brush bristles.
- Use a clean, dry cotton swab to clean the two drop sensors on the vacuum’s underside.
- Take a dry lint-free cloth to wipe the dust off the vacuum’s top.
- Turn off your Neato robot vacuum.
- You will have to turn off your vacuum because you plan to leave the house for a long time or to store the vacuum. Keep in mind that turning off your vacuum will delete your clock settings and you will need to reset the clock when you turn on the vacuum.
- Remove your Neato from its charge base.
- Select ‘Menu’ on the app or LCD screen.
- Click on ‘Support.’
- Select ‘Shut Down’
How do I reset my Neato vacuum?
Follow the steps below to reset the Neato vacuum;
- Remove the robot from its charging base.
- Hold the robot with the straight edge facing you, press and hold the ‘Right Bump’ and the ‘Start Button’ for about 10 seconds until the vacuum automatically shuts off.
- Press the Start button again, and the vacuum will turn on.
- The vacuum will produce a beeping sound to confirm the reset is successful.
- After a reset, all the vacuum will delete all the saved settings.
How to recalibrate the Neato battery
Recalibrating the Neato battery improves its capacity and helps to lengthen the time between charges. You should recalibrate the batteries when;
- The robot is new.
- The batteries are new.
- You updated the software.
- You increased your cleaning area.
Here is how to recalibrate the Neato robot battery;
- Turn off the scheduled cleaning and turn on the robot’s ON/OFF switch.
- Reset the batteries by going to the ‘Menu’ on the LCD screen on the robot, click ‘Support’ then ‘New Batteries.’
- Place the Neato robot on its charge base and allow it to charge fully.
- Press the ‘Start’ button and let the robot run until it displays ‘Battery Low.’
- Reconnect the robot on the charging base again until the battery LED turns green.
- Rerun the robot until it requires a recharge.
- If the running time increases more than usual, recalibration was successful, and if it is less, you need to repeat the process.
Why is my Neato not working?
Here is how to troubleshoot a Neato vacuum that’s not working;
- Check if the battery sits correctly in its compartment. Open the cover, remove the battery, replace it properly and charge it.
- Connect the vacuum manually to its charging base and allow it to charge completely. If the charging status light does not turn on, then the charging base may be faulty, and you need to replace it. If it turns on, but the vacuum isn’t working, continue troubleshooting.
- Make sure there is power coming out of the wall power outlet. If there is no power on that specific outlet, the power socket may be blown and requires a replacement.
- You can move the vacuum charge base to another power outlet if that specific outlet is not passing current.
- Clean the charge metal contacts on the charging base and the vacuum with a clean, dry cloth to remove any debris affecting the power connection.
- There may be a software glitch if the battery is fully charged but will not move the Software glitch. Upload the latest software update for your Neato model. If there is no software update available, you can try letting the vacuum’s battery completely drain and then charge it.
- Reset or reboot your Neato vacuum to fix any errors.
- If you have been using your vacuum for about a year, change your Neato vacuum batteries. The batteries may have expired and cannot keep a charge.
Why is my Neato blinking red?
- If the info LED is blinking red, it indicates there are maintenance issues. Follow these steps to troubleshoot.
- Remove the vacuum from the charging base.
- Empty and clean the dirt bin and filter to reduce clogging. You can run the dirt bin in clean water and allow it to air dry.
- Replace the worn-out filter.
- Make sure the dirt bin and filter and insert them properly in the vacuum. If inserted correctly, the top of the bin should be on the same level as the robot’s top.
- Clean off any debris and hair from the side brushes and end caps.
- Ensure the wheel wells are free from dirt and anything that can block proper vacuum movement.
- Use a dry cotton swab to clean off dust from the two drop sensor windows.
- Overturn the vacuum, and using a dry cotton swab, spin the laser housing under the laser cover bout five times in each direction. Avoid touching the openings in the housing.
- Reset your vacuum by pressing and holding the start button for about 10 seconds. Wait for all the lights to turn off, and then press the start button.
- If resetting doesn’t fix the battery LED from blinking red, the battery is experiencing an error. You should contact your local Neato support for troubleshooting solutions.
Neato starts then stops.
Follow these troubleshooting instructions;
- Check the batteries of the vacuum. Batteries that are wearing out will not hold enough change, which will need a replacement.
- Clean the robot vacuum as clogged parts will not allow the robot to work efficiently. Clean the sensor windows with a dry cotton swab, empty the dirt bin, clean the filter, and comb the brushes to remove any hair and debris.
- Check the wheels, clean them, and start the vacuum. If the problem persists, the wheels may be damaged and require replacement.
Neato Botvac keeps saying, turn the switch on.
When the robot vacuum tells you to switch it on, it means that the robot is off or the battery is not connected. Here is how to fix the error message;
- Check if the ON/OFF switch on your Neato robot is on.
- Open the dirt bin and look for a red and green sticker on the dirt bin’s left side; this is the ON/OFF switch.
- Press the switch down to ON to connect the battery, then replace the dirt bin.
- Connect the vacuum to the charging base and allow it to charge fully until the LED light turns solid green.
- If your Neato model doesn’t have a battery switch and the error message is still there;
- Using a screwdriver, open the battery doors on the bottom of the robot vacuum.
- Lift the battery doors and ensure the battery connectors are securely connected.
- Screw back the battery doors.
Check this too: How to Clean Shark Vacuum Filter
Neato’s floor plan is not working.
Here is how to troubleshoot a Neato robot that’s ignoring the floor plan or No-Go Lines:
- Check the surroundings. Look out for objects around the No-Go Lines that someone may have notably moved since you created the floor plan.
- Go to where the robot ignored the No-Go lines and compare with the cleaning map on the Neato app after a cleaning cycle.
- Recreate a new floor plan. Ensure the boundaries are well defined and that there are no spaces the vacuum would go past.
- Avoid lifting the Neato vacuum from the floor mid-cleaning. It will cause its systems to disorient, and the vacuum will have trouble finding its way to the charging base or even lose its cleaning memory. If you picked your vacuum, put it back on the floor about one foot from its last location.
- If the robot still has trouble following the floor pan, put it back to its base and turn it on.
Does Neato Botvac need Wi-Fi?
No, the Neato Botvac does not need Wi-Fi to work as you can control it manually using buttons on the LCD screen on the vacuum. However, you will need Wi-Fi to pair the vacuum to the Neato app and control the vacuum from the app.
How do I connect my Neato to a new Wi-Fi?
To connect your Neato robot to a different Wi-Fi network, you need to reset the robot’s Wi-Fi connection and then reconnect to the new Wi-Fi network using the following instructions;
- Remove the robot from the charging base.
- With the curved edge facing forward, press and hold the ‘Right Bumper’ and ‘Start’ buttons or ‘Clean House’ buttons simultaneously for 15 seconds.
- Create a Wi-Fi access point by pressing ‘Select’ on the LCD screen on the robot to open the main menu.
- Tap on ‘Settings’ and then click on Wi-Fi, and the Wi-Fi icon will appear on the Home Screen.
- Log into your Neato App and connect the robot to your Wi-Fi network of choice by entering the new password.
Why does my Neato keep going offline?
Try troubleshooting using the steps below.
- Ensure your phone or tablet with the Neato account is receiving 3G or 4G internet service.
- Make sure you have the correct network username and password.
- Ensure your Wi-Fi router firewall and port settings allow your Neato robot to connect to the Neato servers.
- Reset your Neato robot vacuum.
- If it doesn’t stop the issue, delete your Neato vacuum from the Neato app. Reconnect the vacuum again until it says ‘Ready To Clean.’
How to Clean a Neato Robot Vacuum Brush
Finding the time and energy between work, daily routine activities, kids, and cleaning can at times prove to be quite a challenge to most people, and cleaning hacks that work come in handy to help ease the burden of cleaning tasks.
Neato robot vacuum cleaner has proven to be that one gadget that will come into your life and save you lots of time and energy to do other things as well as leave your home with super clean surfaces and floors.
You can use the little Neato robot vacuum cleaner from wherever place you are once it is programmed and no matter how busy you are, you can still have clean floors and a cozy home to rest at the end of the day.
The gadget uses a brush to run through dust, hair, and any sort of debris to clean and this will eventually leave the vacuum cleaner with a pretty dirty brush that may not work as efficiently and effectively if not cleaned or replaced.
You need to clean your Neato robot vacuum brush regularly to have it stay in good shape longer and most importantly extend its battery life which saves you money in terms of costly replacements. Cleaning the brush prevents it from breaking within a short period.
Before starting the cleaning process it is important for the user to understand how the robot cleaners operate. The rather small vacuums work in a similar way to the larger vacuums by using a series of small brushes and a rotating brush bar to pick up particles from the floor and carpets and suck them up.
The particles are then pushed through a filter then emptied into a dust container. The dust container and filter should be cleaned regularly to maximize the gadget’s performance.

The robot vacuum uses smaller brushes extending past the circumference of the gadget and Infrared lasers(sensors) to navigate between rooms with different flooring so they don’t get stuck.
Cleaning your Neato robot vacuum brush is not as complicated as you may think and will only take 15 minutes of your time every month or sometimes more often when it is dusty or a lot of hair and debris in your environment.
You only need a cleaning brush and a small pair of scissors and you are good to go. Below is a six-step guide to cleaning your Neato robot vacuum brush.
Step 1: Turn around the Neato robot cleaner
Turn around the gadget to see the brushes located at the bottom of the robot. Do this carefully not to damage the sensors on the upper part of the vacuum. Note that damaged sensors work less efficiently and may cause the robot to bump into objects or fall off the stairway.
Step 2: Remove the side brushes
To remove the side brushes click them off the robot or as indicated in your gadget’s user manual. Be careful as you pull out the brushes as dust and hairs may fall off from the side brushes at this point. Consider replacing the side brushes if they appear worn out.
Step 3: Remove the brush framework
Most robot vacuum cleaners have their central brush protected by a frame that has to be removed to access the brush. Follow instructions on the gadgets user guide to be sure of doing the right thing.
Step 4: Clean the brush
Use the supplied comb that comes with the robot vacuum to clean the brush. You can use an old toothbrush if you lost the comb. If there is a lot of hair on the brush, then you can use a small pair of scissors to cut loose the hairs for easy cleaning of the brush. However, if the brush is too dirty then it’s time you bought a new brush for your robot vacuum cleaner.
Check this too: How to Clean Shark Vacuum Filter
Step 5: Clean the wheels
It is also important to clean the wheels once you have finished cleaning the central brush. Use a wet cloth to wipe out dust and use a small pair of scissors to cut hairs stuck on the wheels.
Step 6: Reinstall the parts
Replace the parts back into place starting with the central brush, followed by the brush frame. Make sure the brush frame clicks back into position then reinstall the side brushes and your robot vacuum cleaner is now ready for the next cleaning task.
Conclusion
This guide will help you set up your new Neato robot vacuum, connect it to Wi-Fi and troubleshoot some common issues with the device. Keep in mind that proper maintenance allows your robot to serve you longer and efficiently.