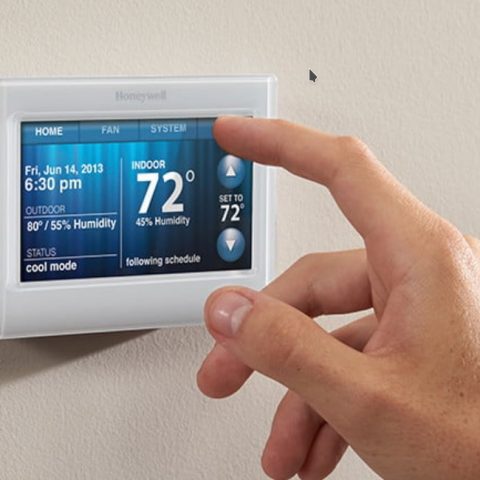

Honeywell have a range of home thermostats that enable users to take control of their home comfort and save on energy costs. From smart Wi-Fi thermostats with room sensors and humidification control, to programmable and non-programmable thermostats, users have plenty of options to meet their needs.
But, like other devices, your thermostat may experience issues that may prevent it from operating optimally. Or you may be having challenges with the setup.
Don’t worry, in this guide, we’ll teach you how to resolve some of the common Honeywell thermostat problems and the correct way to set up your device. Read on to learn more.
How to Program a Schedule on a Honeywell Thermostat (TH6210U2001, TH6220U2000, TH6320U2008)
To set your schedule on a Honeywell T6 PRO thermostat:
- Touch “MENU” on the thermostat display, select “SCHEDULE”.
- Each Day/Period will be displayed. Touch “SELECT” to edit each period.
- Touch the TIME displayed and use the “+/-“ icons to adjust the start time for the desired period (adjustable in 15-minute increments). Touch the TEMPERATURE displayed to adjust the desired heating or cooling temperature (Touch the TEMPERATURE display again to alternate between the cooling and heating temperature setting). Press SELECT when complete.
- After adjusting the TEMPERATURE and TIME for each schedule day and period, DONE will be displayed on the screen. Touch “SELECT” to save your new schedule.
To modify your schedule:
- Touch “MENU” on the thermostat display, select “SCHEDULE”.
- Each Day/Period will be displayed. Touch < or > to locate the desired period you wish to edit. Touch “SELECT” to edit each period.
- Touch the TIME displayed and use the “+/-“ icons to adjust the start time for the desired period (adjustable in 15-minute increments). Touch the TEMPERATURE displayed to adjust the desired heating or cooling temperature (Touch the TEMPERATURE display again to alternate between the cooling and heating temperature setting). Touch “SELECT” when complete.
- Touch the > icon until DONE is displayed. Touch “SELECT” to save your settings.
How to Connect Honeywell Smart WIFI 9000 thermostat to WIFI and Register It
You can connect your thermostat to Wi-Fi during the initial setup and configuration, or later at a time you choose.
To connect to Wi-Fi during initial setup:
After the Configuration step during the initial install, you will be prompted to connect your Smart Wi-Fi 9000 to your Home Wi-Fi. The Smart Wi-Fi 9000 uses a 2-step connection and registration process.
Step1- Connect the thermostat to your home Wi-Fi (Setup on thermostat display)
- Once installed and configured, the thermostat will prompt you to connect to Wi-Fi. Select your Home Wi-Fi network name and touch “CONNECT”. For hidden networks, touch the “OTHER” button to enter the network name/SSID manually.
- Enter the password for your Home Wi-Fi network.
- Touch “NEXT”. You will receive a “Success” message.
Step2- Register your thermostat. This is done in the My Total Connect Comfort web portal. The registration cannot be performed with the mobile app, currently it is only supported via the web portal.
- Registration is completed at mytotalconnectcomfort.com/portal.
- Touch the “Add Device” icon and Input the MAC ID/CRC for your device. The MAC ID/CRC are located on your thermostat information card, on the back of the thermostat, or from the Menu> Equipment Status screen.
- Complete the security check if prompted and follow the directions within the web portal to complete the registration.
If your device connects to Wi-Fi but fails to register, it may already be registered to another user. If you know the previous user, contact them and ask that they delete the device from their account.
Otherwise, you will need to contact reside customer care to unregister your device. You will need the MAC ID to complete the un-registration process.
How Do I Change the WIFI connection on My Honeywell Smart WIFI 9000 Thermostat?
The thermostat connects to the home Wi-Fi from the thermostat menu. To change the Wi-Fi connection, follow these steps:
- Touch the Menu from the thermostat main screen.
- Scroll down and touch Wi-Fi Setup. Touch “Change Network”.
- Select the desired Wi-Fi Network and touch “Connect”.
- Enter the Wi-Fi password and Touch Next.
Honeywell Thermostat Won’t Turn ON Heat
If heating is not working on your RTH8500WF Wi-Fi Series Wi-Fi Touchscreen Programmable Thermostat, try these troubleshooting instructions:
- Confirm the thermostat is set to Heat mode and the setpoint is set to a temperature higher than the display temperature.
- Confirm the message “Heat On” is solid (not flashing) on the thermostat display.
- Confirm your wiring is correct, and the wires have good contact in the terminals (tug gently on the wires).
- Check your jumper wire. To operate heating, the thermostat requires power to the R terminal. If you have a wire in the RC terminal and no wire in the R terminal, insert the jumper wire between the R and RC terminals.
- If the problem still persists, using a multimeter measure the AC voltage between your R wire and W wire (between RC and Y for heatpump systems) to make sure it is between 20-30VAC. If not, have the problem addressed by a professional contractor.
Check this too: Dometic Thermostat How to & Troubleshooting Guide
If you have a Honeywell RTH5160 Series Non-Programmable Thermostat and the fan does not turn on when heat is required, check System Setup Option 205 to make sure it is set to match your heating equipment.
Honeywell Thermostat Screen Not Responding
The causes for this problem may vary from one model to another. Here is a look at the common causes of the issue in some of the popular Honeywell thermostats.
Smart Wi-Fi 9000 Thermostat
The thermostat operates between 20-10VAC, supplied to the R/RC terminals and returning through the C terminal. AC wire, connected to C on the equipment, is required for the thermostat to power itself. If the thermostat screen won’t power up:
- Verify the furnace/air handler door is closed, the power switch is on, and the breakers are on.
- Confirm you have a C wire in the C terminal. If your previous thermostat did not use a C wire, it is unlikely that it is connected at the equipment. Verify the C wire is connected to the C terminal in your furnace or air handler.
- Check your jumper loop. If you have a wire in the R terminal and no wire in the RC terminal, verify the jumper loop is inserted. If you have a wire in the R terminal and a wire in the RC terminal, the jumper loop will be removed.
- Using a multimeter, measure the AC voltage between your R/RC wire and your C wire. It should not be outside the 20-30VAC range.
T6 Pro Thermostat
If your Honey T6 pro thermostat display is blank, try the following instructions:
- If the thermostat is battery powered check/replace your batteries. If the device is common wired, try and power it up with batteries. If that fails to power up the thermostat, you may need to involve a technician.
- If batteries do power up your common wired thermostat, check your breakers, furnace power switch, and furnace door kill switch to insure your system is powered. If your system is fine, and the thermostat only works on batteries, you may need to involve a technician.
Honeywell Thermostat Not Working After Battery Change
Occasionally, you need t change the batteries on your Honeywell thermostat. With most thermostat models, the battery runs out after 1-2 years and will need to be replaced for the thermostat to continue working properly.
If after replacing the batteries your thermostat is no longer working, here is what you can try to resolve the issue:
- Check if the batteries were installed correctly. Go back to the battery compartment and confirm you have installed the batteries in the required orientation. If not, rectify the placement to ensure correct orientation.
- If the orientation is okay, try changing the batteries. The problem could be that you need a stronger batteries brand.
- Try resetting the thermostat. Follow the procedure on how to reset a Honeywell thermostat.
- If the problem persists, examine the thermostat because a wiring issue may have arisen especially for Honeywell thermostats that need to be taken off the wall for battery replacement. Make sure no bare wires are touching. Also, verify that no wires are loose or incorrectly placed.
- Shut the access door (on the furnace) correctly. The door switch in some furnaces engages when the access door is closed the right way, making the entire system activate. If the door is not correctly shut, the switch won’t be depressed and thus cutting power to your Honeywell thermostat.
- Reset the circuit breaker/ replace the fuse. For Honeywell thermostats running off in-wall electricity, a blown out fuse or tripped circuit breaker tends to shut off the thermostat, making it go completely blank. The thermostat will not work even after changing the batteries until the tripped circuit breaker is reset or blown fuse replaced.
- If the problem persists after checking all the above, the thermostat could be faulty. It could be time to replace or upgrade your Honeywell thermostat.
Honeywell Thermostat Not Cooling
If the cooling system does not respond on your Honeywell RTH5160 Series Non-Programmable Thermostat, try these troubleshooting tips to fix the problem:
- Press “Menu” and then “Mode” to set system to Cool. Make sure the temperature is set lower than the inside temperature.
- Check the circuit breaker and reset if necessary.
- Make sure power switch at heating & cooling system is on.
- Wait 5 minutes for the system to respond.
If you have a Honeywell WIFI smart thermostat (9000) and cooling is not working, try the following troubleshooting instructions:
- Confirm the furnace/air handle door closed and turned on. Check the circuit breaker to your equipment.
- Confirm the thermostat is set to Cool mode and the setpoint (the number at the top of the thermostat display), is set to a temperature lower than the display temp (the larger number in the center of the display).
- Confirm the message “Cool On” is solid (“Waiting for Equipment” is not displayed) on the thermostat display.
- Confirm your wiring is correct and the wires have good contact in the terminals.
- Using a multimeter, measure the AC voltage between your RC wire and your Y wire. The thermostat operates between 20-30VAC, have a qualified technician check the issue if you get any reading outside this range.
Honeywell Thermostat Won’t Connect to WIFI
If you are unable to complete the connection process on your Honeywell Wi-Fi thermostat, try the following before proceeding:
- Turn off mobile data. This allows the thermostat and mobile device to communicate via the same communication method and can help with the registration process.
- Try to connect and register the thermostat to a mobile hotspot. This allows the registration data to bypass any network security that may be causing the connection failure. Once successfully registered, a Wi-Fi reset can be performed to move the thermostat to the home network.
- Try to use an alternate mobile device as some mobile devices use security features that can disrupt the registration process.
If you experience an inability to connect, failure to register, or frequent Wi-Fi signal loss, verify the following:
- 2.4 GHz bandwidth Network. Simultaneous 2.4/5GHz networks that experience connectivity failure may require a separate dedicated 2.4 GHZ network to be calibrated.
- Connect directly to the router signal. It is not recommended for use with signal boosters, satellites, or extenders.
- Business Networks (Enterprise networks, guest networks, or networks that require logging in via a web page/portal) are not supported.
- Gateways or Network switches can block communication and are not supported
- Recommended WPA2-AES Network Security Protocol.
- DHCP is enabled. Static networks are not supported.
- UPnP/P2P is enabled.
- Band-Steering is disabled.
Honeywell Thermostat Flickering
If the screen on your Honeywell thermostat is blinking, the batteries powering it could be dead. To resolve the issue, try replacing the batteries.
Some Honeywell models also have a low battery notification, which will use a tone or the words “replace bat” when it is almost time to replace the batteries.
A flickering screen can also be related to issues with compressor protection. Most Honeywell thermostats blink when in a time delay for cooling (or heating if it is a heat pump).
This time delay feature protects the compressor from cranking too soon following a short off cycle or a power outage. The “cool on”, “heat on”, snowflake or flame icon will be blinking if this is the case.
Honeywell Wireless Thermostat Problems
Your Honeywell Wi-Fi programmable thermostat may experience several problems. The following are some of the issues and the steps you can try to resolve them:
Lost signal
If the no-Wi-Fi signal indicator displays in place of the Wi-Fi strength indicator on the home screen:
- Check another device to be sure Wi-Fi is working in your home. If not, call your internet service provider.
- Move the router,
- Restart the thermostat: remove it from the wall plate, wait 10 seconds, and snap it back into the wall plate. Return to the first step of connecting to your Wi-Fi network.
- Error code E01- During Wi-Fi setup, the router lost power
- Ensure your router has power.
- If trying to connect to a hidden or manually added network, confirm the router has power and is working.
- Error code E02- Invalid Wi-Fi password. This code displays for 30 seconds then the thermostat will re-enter Wi-Fi Setup mode.
- Re-enter password for your home Wi-Fi network.
- Repeat setup process and confirm your password for your home Wi-Fi network.
- Error code E42- Router is not issuing an IP address to the thermostat.
- Wait for 30 minutes, connection can take several minutes.
- If there is still no connection, remove the thermostat from the wall plate for 10 seconds, then reconnect it.
- Verify your router is correctly setup to automatically give IP addresses.
- Error code E43- No internet connection, Thermostat cannot communicate to Total Connect Comfort.
- Make sure the internet cable is plugged in,
- Reboot the router.
- Error code E99- General error
- Remove the thermostat from wall plate for 10 seconds, then reconnect it.
- Display is blank
- Check the circuit breaker and reset if necessary.
- Make sure power switch at heating and cooling system is on.
- Make sure furnace door is closed securely.
- Make sure C wire is connected.
How Do I Reset My Honeywell Thermostat?
Resetting a Honeywell thermostat can help if you want to change the program, or if the display doesn’t power on.
To reset a Honeywell programmable thermostat, follow these steps:
- Set the thermostat switch to “Off”.
- Insert a coin into the battery door slot to push it open.
- Remove the batteries.
- Insert the batteries backward, such that the negative pole lines up with the positive terminal. Leave the batteries placed backward for at least five seconds.
- Then remove the batteries, put them back in the correct way and close the battery door. The display will turn on. The thermostat is now reset.
How Do I Know If My Honeywell Thermostat is Bad?
There are several signs that could indicate your thermostat is bad:
- Your thermostat has no power or is unresponsive.
- Your heater or AC won’t turn on.
- Your heater or AC runs constantly and won’t turn off.
- Room temperature and setting don’t match.
If you notice any of these signs, you can troubleshoot the thermostat by trying the following:
- Make sure the thermostat is on the right setting.
- Turn the thermostat up or down 5 degrees depending on the season. You should hear a click. Wait a few minutes to see if your supply registers blow air out or if your return vents such in air.
- If you have a digital thermostat, try replacing the batteries to see if that fixes the problem.
- Check and test wires and wire connections. Make sure the wires are all firmly connected to their respective mounting screw.