
Even though your Nest thermostat has a battery and can work without a C-Wire, most people prefer installations with the unit drawing power from the HVAC through the C-Wire.
In such a scenario, your Nest will always have power meaning its battery will stay topped up. The unit will only use the battery as a power backup option when there is a power blackout or a fault with the C-Wire power delivery.
When this happens, the battery will deplete for a while but should charge back up when power is back.
If you don’t have a C-Wire, you will have to charge your Nest thermostat frequently. Such a setup uses a USB cable to charge the thermostat before reattaching it to the wall plate.
How Do I Tell If My Nest Thermostat is Charging?
If the thermostat is charging through the HVAC system, then there is no obvious charging indicator. The only way to tell it is still charging is by confirming that the battery level is not low.
You can check this within the power settings menu of the Nest thermostat.
- Go to the menu
- Click on the gear icon
- Scroll all the way to the right and select Technical Info
- Select Power
- This will show you the battery voltage, the Voc, Lin, and the Vin.
- The battery voltage should be above 3.7 if you are charged
- The Lin should be above 20mA
If you are charging through the USB port, a blinking light will pop up at the front of the thermostat once you start charging. The color of the light varies depending on the battery level giving you an estimate of how full the battery is.
You can also check the Nest thermostat battery level and status from your Google Home App.
- Navigate to Thermostat on the Google Home App
- Select the Nest thermostat you want to inspect
- Go to Settings > Device Information > Battery State
ProTip: The very first Nest Thermostat didn’t have rechargeable batteries. It uses AAA alkaline batteries.
Why Won’t My Nest Thermostat Charge?
Recharging your Nest thermostat shouldn’t be a problem if your HVAC system is well wired, and there is no power outage. Some of the top reasons you might have problems charging your Nest includes:
- A wiring problem on your Rc and Rh wire connection
- The HVAC isn’t delivering power
- You don’t have a C-Wire
- The thermostat has been sat for ages
- Software issues
- You have battery problems
The HVAC System isn’t Delivering Power
Since all the power comes from the HVAC unit, your thermostat won’t get any power if the HVAC isn’t sending that power. This will happen if:
- The HVAC unit isn’t plugged in and turned on
- The HVAC unit’s circuit breaker tripped
- There is a power blackout
- The wires from the HVAC unit (Rc, Rh, and C-Wire) are disconnected
- The HVAC unit is turned on at the mains supply but it won’t turn on because it is faulty – call a technician to help you troubleshoot
- There is low voltage on your mains power
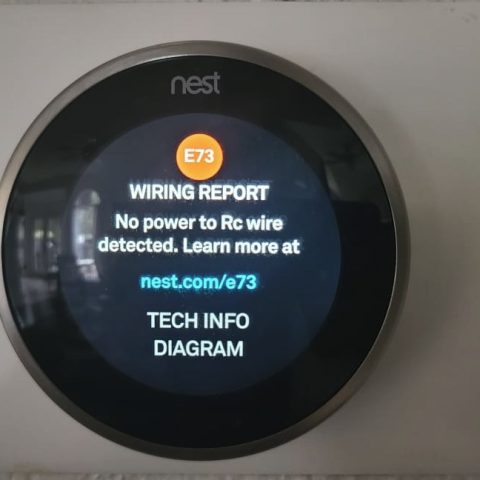
You Have Issues With Your Rc or Rh Wire Connection
The RC and Rh wires in the thermostat wiring convention are sources of 24V power. The Nest thermostat draws from this to get the power it needs to run off the mains and keep the battery topped up.
If there’s a problem with both, then the thermostat will have no power. However, since the Rc and Rh wires have different important functions in the system, a failure on one will lead to more problems in your HVAC system.
- The Rh wire runs on 24V and is in charge of the heating system controls. If it is faulty and doesn’t have the base power, then you will have trouble with your heating.
- The Rc wire runs on 24V and controls cooling. If it has a problem, your thermostat can’t control the cooling system.
A problem on one of these wires will have far-reaching repercussions long before your Nest thermostat battery runs out of power.
Use a Multimeter to Check Their Voltage to the C-Wire
A quick troubleshooting tip to confirm if there is 24V on these wires is using a Multimeter between one of them and the C-Wire. You should get a 24V reading if everything is fine. If not:
- Confirm that the affected wire is connected to the HVAC system’s control board
- Ensure that the HVAC unit is turned on and delivering power. You can do this by using the multimeter to test the Rc or Rh to C-Wire at the HVAC’s unit control board.
- Confirm that the Rc and Rh wires are firmly seated on the thermostat’s terminals
If there is the power to the Rc and Rh terminals at the HVACs system control board, but there is no power at the respective terminals on the thermostat plate, there is the possibility that the wires have a discontinuity somewhere.
This could happen if someone inadvertently severed the wires during remodeling or if it is an elaborate prank from a dark humor friend.
Warning: Always turn the HVAC unit off at the circuit breaker before changing the wiring on its control board.
You Don’t Have a Working C-Wire
The Common Wire (C-Wire) is the ground wire that allows you to tap into the 24V lines from the Rc and Rh and use them for different purposes. C-Wires became a staple in modern home wiring systems after shifting from older mechanical thermostats that didn’t need power.
If the C-Wire is there, but you aren’t getting a full 24V reading when you tap between the Rc or Rh wires and the ground at the back of the thermostat, chances are:
- The C-Wire isn’t hooked up to the HVAC unit.
- The C-Wire was damaged and has no continuity to the HVAC unit
The only solution, in this case, is hooking it up to the HVAC unit or running a new C-Wire
If you are moving into an older home with no C-Wire, you will have to:
Run a new wire to serve as the C-Wire
Running a new C-Wire involves snaking an extra cable through the conduit that feeds the thermostat installation plate.
It is the neatest solution but will involve some crawling and work.
- Disconnect all the wires from the thermostat installation base plate
- Find out what route the wires take to the HVAC unit
- Find the most convenient way to either remove the fully or tuck them out of the way
- Run a new set of wires of the same gauge and color coding as the ones you are replacing from the HVAC unit to the opening behind the thermostat base
- Currently, a fully kitted-out home needs up to 5 wire thermostat wiring. A basic home needs three or four.
- Go overboard and install 8 wires. This way, you (or future homeowners) will not have to repeat the process should they need an upgrade in the future.
- Ensure the wires follow an acceptable color coding format to make matching them easier. If you can’t use different color wires all through
- Once you are done running the new wires, connect them to the respective terminals on the base plate and leave unused ones unstripped and taped.
- You should now have all working terminals (including a C-Wire)
Repurpose the Fan Wire (G) and have it serve as the C-Wire
If you don’t feel like rewiring your home, you can repurpose the fan wire (mostly Green and hooked up to the G terminal) and use it as the C-Wire
Most homeowners don’t use their thermostats to control fans. Sacrificing this terminal shouldn’t be a problem if you fall under this category. However, this solution isn’t for you if your system has controllable fans.
- Identify the Fan terminal and wire on the base plate and the HVAC unit control terminal.
- From the HVAC unit, detach the Fan wire from its Fan terminal and attach it to the C-Wire terminal or Ground at the HVAC unit.
- Return to the thermostat base plate and switch the Fan wire from the Fan terminal to the C-Wire terminal.
Your thermostat should now have a working C-Wire and can tap into the 24V provided by the Rc and Rh wires.
Set Up a Common Wire Transformer
This is a 24V transformer that plugs into a mains AC power outlet and provides power to your Nest unit supplying it with the complete 24V it needs to run.
One wire will go to the Rh or Rc terminal, and the other one to the C-Wire terminal to provide the complete 24V circuit you need to power the thermostat and keep the battery topped up.
These transformers have some wires you have to run to the Nest. The neatest way to install it is to run the wires behind the wall and out behind the thermostat base plate. The wall brick should also plug into the main supply from behind the walls.
This will involve some rewiring, but it isn’t as intense as rewiring the whole wiring to the HVAC system.
Use a USB Charger
The simplest way to charge your Nest battery is to use a USB charger. The Nest is easy to detach from the wall, and you will find a USB terminal behind it.
Plug in a USB cable to the back and let it charge for around 2-3 hours until it is full. The only problem is that you will have to keep repeating this every time the battery is low.
The Thermostat Has Been Sat for Ages
Sometimes, if the thermostat stays for very long with no power, the battery might be too low to charge with the 24V power.
In this case, you can bring it back to life using the USB power port. Think of it the way you charge a phone whose battery is dead.
- Plug in a working USB charger and let it sit for a while
- After a few seconds, it should indicate that it is charging
- Let it charge until it is full before re-attaching it to the base plate on the wall
This should only happen if the Nest has been off for a long. This could be during storage, when in an unused house, or when you buy a new unit that has been on the shelf for a very long.
A Faulty Thermostat
Sometimes, all the wiring could be fine, but your Nest is the problem. Like any electronic, it can glitch out or develop a software issue preventing it from charging.
The problem could also be bad contact with the base plate or a faulty battery. You can fix these by:
- Restarting the thermostat
- Ensuring that the thermostat is running the latest firmware
- Confirming that there is clean and firm contact with the base plate. Use compressed air to clean any dust and debris before firmly resitting the thermostat onto the base plate.
- If the thermostat is very old, the battery could be on its way out and not recharging. Consider replacing it if it doesn’t accept charge on USB
- If all the above doesn’t fix the problem and the USB still can’t charge the unit, consider getting a replacement or a technician to service the thermostat.
Can You Replace the Batteries in a Nest Thermostat
The very first generation Nest used AAA alkaline batteries. These were user replaceable – and very easy to replace.
Later models use an inbuilt battery that you can only charge via USB. Like modern phones with a non-removable battery, this battery could theoretically be replaced, but you need special tools and extra expertise.
A very old thermostat that frequently ran on the battery could have worn down its battery, warranting the need for a replacement. The simplest way out would be to make the Rc and C-Wire power supply work so that the thermostat can keep working from the supplied 24V power instead of the battery.
What is the Expected Nest Thermostat Battery Life
The Lithium Ion battery in your Nest thermostat rechargeable can last between 300 and 500 cycles. The years you can get from this depends on how often you run your unit on battery power.
If you have no working HVAC power to the thermostat or an alternative 24V supply with a working ground, you will run through this within a year or two.
As for running time, the battery is very tiny and only meant to be a backup unit. The unit can keep working for up to 12 hours or more, depending on the battery state and what it does during the power blackout.