
Ice cubes are an essential part of your favorite drinks. You can put them in your smoothies, lemonade, whiskey, or some of your favorite cocktails. If you regularly have friends over for parties, especially during the summer, investing in an ice maker is wise.
That will ensure that you have a supply of ice cubes, especially when it is sunny. Ice cubes can also be an excellent way to cool your water before drinking on a hot day. Owning an ice maker makes entertaining easier, helps stock your cooler for road trips, and ensures you have improved ice quality. There are several ice maker manufacturers, but a Whirlpool ice maker is an excellent choice for your home.
Emory and Louis Upton in 1911 established Whirlpool. The company is over a hundred years old, and in that time, it has developed laundry, kitchen, and other home appliances. The company employs 92,000 people worldwide.
Whirlpool manufactures excellent ice makers that are efficient, save on energy, and user-friendly. They are made with high-quality materials to ensure they are durable, easy to clean and maintain. In addition, their ice makers come in several colors, including fingerprint-resistant stainless steel.
If you plan to buy a Whirlpool ice maker or just purchased one, you need to know how to take care of it and perform maintenance checks. You should also be able to identify problems and repair them immediately to ensure that it produces quality ice cubes. Below is a comprehensive guide on the use and troubleshooting of a Whirlpool icemaker.
How to reset a Whirlpool ice maker
If your ice maker has stopped working or produces slushies instead of ice cubes, you can quickly reset it. Here are two ways to reset your ice maker.
Pressing the reset button
The reset button can be at the bottom of the icemaker, above or under the ice tray.
- Long press the button when you find it.
- Make sure that you hold the button until you hear a beeping sound from inside the ice maker.
- That will reset the machine, and it should work.
Pressing the power switch
If you have problems finding the reset button, switch the machine off and on to reset it.
Why is my ice maker jammed?
If your ice maker is jammed or stuck, it can be very inconvenient. A jam could be due to ice clumps, ice in the raker, or a clogged dispenser chute. Follow these steps to solve these problems, so your ice maker works.
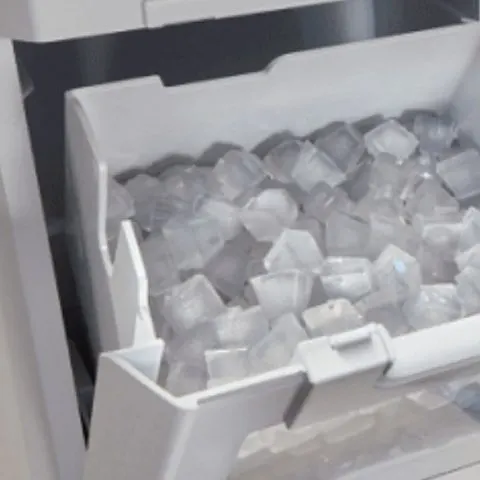
Ice clumps
If your ice bin is full of ice cubes and they start to melt, it can make them stick together due to the cold temperature. When that happens, your ice maker will not dispense ice. To fix this problem, follow these easy steps.
- Remove the ice bin and break up the pieces of ice.
- If you cannot break them up, put them in your sink.
- The best method to deal with this problem is to ensure that you regularly empty the ice bin.
- Ice in the Raker
- If your raker has ice in it, it will not evenly distribute your ice cubes in the ice bin. To fix this problem, remove the ice cubes caught in the raker by hand.
- Clogged dispenser chute
- If ice blocks the dispenser chute, it will not open correctly.
- Open the ice maker door and check the chute and remove the blockage by hand.
How to clean a Whirlpool ice maker
To ensure that your Whirlpool icemaker works correctly, clean it regularly. That will improve its efficiency and prevent failure of the appliance. Most Whirlpool icemakers have a light that prompts you when it is time to clean the machine.
When the Cleaning Cycle light turns from green to yellow, you need to clean your ice maker. Follow these steps to clean your icemaker exterior and interior.
Cleaning the Interior
- Start by switching off the machine and unplugging it to prevent electric shock.
- Wait for a few minutes to ensure all the ice falls into the ice bin and remove it.
- Next, you need to unscrew the water pan drain cap which is inside the ice bin. Ensure that the water drains out.
- Screw on the drain cap and make sure that it is tightly in place. If you do not, you may get no ice cubes or thin ones.
- Make sure that you use a manufacturer-approved bottle of ice maker cleaner. You will need a 473 ml or 16oz bottle to clean the ice maker correctly.
- Pour the contents of the bottle into the water pan.
- Fill the bottle with tap water twice and add it to the cleaner in the water pan.
- Plug your ice maker in, then switch it on.
- Press the clean button, and when the light blinks, that is a sign that the cleaning cycle has begun. The process should last 70 minutes. Bear in mind that the system will clean and rinse itself during the cleaning cycle.
- After the cycle is complete, check that there is no more cleaning solution in the water pan. If there is, start the cleaning cycle again. If you have scale buildup in the ice maker, you will need to run the cleaning cycle several times with fresh cleaning solutions.
- To start ice production after cleaning, just press the ON button.
Cleaning the exterior
It is essential to clean the exterior of your ice maker so that it retains a shiny appearance.
- Use warm water, dish soap, and a soft cloth to clean the gaskets and the colored surfaces.
- Rinse, then wipe it dry. Use a microfiber cloth to buff the surface, so it looks shiny.
- You can also polish the surface to enhance longevity and appearance.
- Do not use abrasives like steel wool to clean the exterior. In addition, avoid using harsh cleaners such as bleach and acidic products like vinegar. These will dull the finish, especially if it is stainless steel.
Whirlpool ice maker not dumping ice
This problem occurs when you do not use the ice maker regularly, such as during winter. People rarely take cold drinks when in winter, and you will not use an ice maker often. That results in your ice maker not dispensing ice. Here are the reasons why your ice maker is not dumping ice and how to fix the issues.
Clumps in the Ice bin
If the ice cubes in the ice bin melt and then freeze again, they form clumps in the ice bin. This chunk of ice can be challenging for the auger to break down. And you will hear a grinding noise from the ice maker.
- To fix this issue, you should remove the ice clumps using your hands. If the clumping is severe, you should consider defrosting your icemaker. If you do not clear all the chunks correctly, this problem will recur.
- Do not return clumped ice to the ice bin as that may cause the problem to keep coming back.
Ice in the Raker
If there is ice in the raker, your ice maker will not dispense ice. Instead, the raker evenly distributes ice cubes in the ice bucket. That helps prevent clumps, but the machine will not issue the ice if there is ice in the raker.
- To fix this, remove the ice cubes in the raker using your hands.
- If the problem is too much ice in the bin, you need to remove the excess ice cubes.
Clogged Dispenser
If your ice maker is not dispensing ice, you may have a jam in your chute. Check the drain, the bin, and the dispenser. If there are no ice cubes, you may have a clogged dispenser.
- To fix it, reach into the dispenser and remove the clog.
- If an ice clump is blocking the dispenser, you will need to wait for it to melt. Ensure you have a bowl to catch the water to avoid making a mess.
Frozen Auger Motor
If you do not use the ice maker for a long time, the auger motor may freeze. Your ice maker will not dump any ice as the drill is not spinning.
- To fix this issue, press the lever and hold. That will ensure the motor keeps turning and warm it up. But, unfortunately, the melting ice could damage it too.
- For a long-lasting solution, check the motor and the icemaker walls to determine the cause of the freeze.
No ice
If the ice maker stops producing ice, it could be because it is not making any ice. Check that the machine is on; if not, switch it on and start making ice.
Remember that switching off the ice maker when you do not need ice can prevent the problems above. If your ice maker is on and not making ice, it may require extensive repairs.
Why is my Whirlpool ice maker not making ice?
An ice maker that does not make ice can be a significant inconvenience, especially if you have guests. Therefore, you must find the reason for this and make the repairs immediately you discover it. Here are some of the reasons that your ice maker is not making ice.
It is off
If your ice maker is off, it will not make ice. First, make sure that you check that the power outlet is working correctly and that none of the circuits in your house have tripped. If the outlet is not working, make the necessary repairs.
Changed water filter
If you recently substituted the water filter and the ice maker is not working, you may have installed it incorrectly. The problem could be that the rubber seal between the filter housing and the filter does not seal correctly. If you have not changed the filter for six months, the problem could be a blocked water filter.
- To fix the problem, remove the water filter and reinstall it correctly. Ensure that you give enough time for the ice maker to start making ice.
Blockage
Excess amounts of ice in your ice maker can cause a jam, and it will not produce any ice. Check the injector or raker on your icemaker for ice. If it is clogged with ice, it will not allow ice to fall, and the buildup will cause a problem. To fix this issue, you should remove the ice blocks by hand. If they are extensive, allowing the icemaker to defrost may be the only solution.
Flushing the water system
After replacing the water filter, you need to flush the water system. If you do not do that, air bubbles trapped in the lines will affect the performance of your appliance. Air bubbles can also result in hollow ice cubes and a dripping dispenser. Follow these easy steps to flush the water lines.
- Allow water to flow out of your water dispenser for a few minutes.
- Wait 5 seconds, then do it again for 3 minutes.
- Do this several times to remove air bubbles and ensure that your ice maker works correctly.
Water supply
If your water supply lines are off, your machine will not make any ice cubes. Make sure that the lines are connected to the cold water supply and are secure. Inspect the pipes for kinks, breaks, and leaks and fix them immediately. Check the supply shut-off valve and ensure that it is open.
Why would an icemaker suddenly stop working
Sometimes ice makes may unexpectedly stop working. That can be surprising and frustrating, although in some cases, the ice maker will start working again without the need for repairs. Here are some of the problems that make your ice maker stop working suddenly and how to fix them.
Icemaker temperature too high
If your ice maker’s temperature is 10 degrees Fahrenheit or more, it will not make any ice. If you accidentally changed the temperature settings, fix this problem by changing them to between 0 and 5 degrees Fahrenheit.
Check the condenser coils for debris and ensure that the fan is working correctly.
Defective water valve
The inlet valve controls the water supply to your icemaker. If you have water pressure below 20psi, it will not work correctly, and your ice maker will stop producing ice.
When the water pressure exceeds 20psi and the ice maker does not work, check the power supply using a multimeter and make the necessary repairs. If your inlet valve has the correct pressure and power supply, and the ice maker does not work, it is faulty, and you need to replace it.
Clogged water filter
If your water filter is clogged, water will not flow into the water dispenser, and your appliance will not make ice. Therefore, replacing your water filter twice a year is essential to enhance water quality and flow.
Damaged door switch
When you open the ice maker door, it stops working and will only continue after you close the door. If the door switch is faulty, the ice maker will not work after you close the door. If you suspect that this is the problem, use a multimeter to check for continuity. If there is no continuity, remove and replace the door switch.
How do I test my whirlpool ice maker?
It is essential to examine your icemaker during maintenance. Testing will tell you whether all system parts are getting the power that they need to function correctly. First, you should test the system when the electricity is on and when it is off.
To examine it, you will need to open the back cover and find test points. Next, use a multimeter and isolated jumper wire to test the ice maker. Follow these easy steps.
- Start by testing that the ice maker is getting enough power using your multimeter. Make sure that you close the door of the icemaker before you start.
- Use the isolated jumper wire to test the bimetal thermostat using test points T and H. If it is working correctly, using the jumper will cause a harvest cycle.
- The wheel will turn 360 degrees, and the icemaker will fill with water.
- You can test the water inlet valve using the jumper wire on test points L and V. If it is working correctly, the icemaker will fill with water. Do not exceed 7 seconds on this test.
- To test resistance in the mold heater, use test points L and H after making sure you turned off the power supply to the icemaker. If it is working correctly, it should have a resistance of 72 Ohms.
- To test motor resistance, use test points L and M. When it is working correctly, resistance should be 8800Ohms or 8.8kOhms.
Whirlpool ice maker not getting water.
Without water, your ice maker will not make enough ice. If your ice maker is not getting water, here are the possible reasons and how to rectify the problem.
Frozen water line
You may not be getting water into your ice maker because the water lines are frozen. You can clear the problem by defrosting the ice maker. If you have an ice maker in your fridge, open the freezer door and wait for it to defrost.
Closed water supply valve
Check that the water supply valve is in the on position. If it is off, it will not supply water to your icemaker.
Faulty water filter
If your valve is open and the lines are not frozen, the problem could be the water filter. A water filter that has been in use for more than six months is probably clogged. Make sure that you replace it with a new one, and your icemaker will have enough water.
Faulty water lines
- Check the water lines for defects, breaks, and leaks. Straighten out the kinks and replace the cables if they are leaking. That will ensure your system gets enough water.
- Check water pressure
- If you have low water pressure in your home, your ice maker may not work. First, make sure that the ice maker gets water at 20psi pressure. It will not work if the water pressure is lower than that.
Whirlpool ice maker not filling
If your ice maker does not fill up with water, it could be due to a water supply problem. To fix this problem, review the following issues.
- Low water pressure or changing water pressure can result in your icemaker not filling.
- Leaking water lines may also cause this problem, so make sure that you repair them immediately.
- A faulty water supply valve can also cause this problem, so ensure that you inspect and make the necessary repairs.
Whirlpool ice maker not making enough ice
Your ice maker should make up to 175 ice cubes every 24 hours. If it is not producing enough icecubes, then it has a problem that requires repair. Check for the following issues and make the following repairs.
Faulty water inlet valve
Start by checking that the valve is not broken and leaking. Next, ensure that you check for continuity to ensure the valve is getting power using your multimeter. If there is no continuity or you find a leak, you will need to replace it.
Clogged water filter
As mentioned above, you need to change your water filter every six months. If you use it for longer than that, it will affect water flow due to clogs. Check the water filter for blockage and replace it. The water flow will improve when you do that, and your ice maker will produce more ice.
High freezer temperature
If you have an ice maker assembly in your freezer, it could make fewer ice cubes if the freezer temperature is too high. The correct temperature should be 0-5℉. To check the temperature, place your kitchen thermometer in a cup filled with cooking oil. Leave it for two hours, and you will get an accurate temperature reading.
To fix the problem, you need to check the evaporator coils, condenser coils, and fan. If there is dirt or debris on them, you need to clean them off. Replaced a faulty fan immediately, so your icemaker works correctly.
Defective ice maker assembly
The other reason your ice maker is making little ice is that the assembly is damaged or faulty. If your ice maker does not have any of the above problems, the body is usually the problem. Bear in mind that when one part of the assembly is damaged, you have to replace the entire machine. That is because spare parts are rare.
The Whirlpool ice maker not working, but the water does
If you are not getting ice cubes but have water from your ice maker, you can quickly fix the problem. Follow these easy steps to do that.
- Check that the ice maker is on. If the ice maker is not on, you will get water but not ice cubes. Turn the control arm to the on position, and your ice maker will start making ice cubes.
- Check the water filter for clogs and debris. If it is dirty, replace it immediately.
- Check that the temperature is not above 10 degrees Fahrenheit. If it is, lower it, and your ice maker will start producing ice cubes.
How do I force my Whirlpool icemaker to cycle?
You can use the following steps to force your Whirlpool icemaker to cycle.
- Remove the front panel on the icemaker using a screwdriver.
- You will find two plastic gears. Reach into the icemaker for the handle that pushes the ice out. Hold its teeth and pull them clockwise.
- The cycle should start.
- Replace the cover and tightly screw it in place.
Check This Too: How to Defrost and Clean an Ice Maker
Icemaker running but does not produce ice.
If your icemaker is running but does not produce any ice, it can be very inconvenient. Use these steps to troubleshoot your ice maker.
- Make sure that the control arm is in the on position
- Inspect the water supply lines and ensure that the inlet valve is in the on position.
- Check the drain cap and tighten it if it is loose.
- Inspect and clean the drain tube if it is dirty.
The ice maker runs but produces very little ice.
If you are not getting enough ice although your icemaker is running, follow these steps to troubleshoot.
- If you set the ice maker to the accelerated production settings, turn it off.
- Check that the room temperature is less than 90°F. Higher temperatures cause a reduction in ice production.
- Check the condenser for debris and clean it off.
- Inspect the freezing and water system for scale buildup and clean it if necessary.
- Check the drain cap and tighten it.
- Inspect the water filter and ensure you installed it correctly.