
Due to the global waste crisis, it is now crucial to embrace a recycling and reuse culture for environmental conservation purposes. And in some cases, this is actually a plus as the damaged product may actually be reusable. Keep reading to learn how to repurpose old broken hard drives.
How to use old hard drive as storage?
If the drive is still working, don’t waste that space. It can still be valuable storage for your data. You can turn it into storage by doing the following;
Turning It into an external hard drive
Once you upgrade your laptop’s drive or run out of space on your PC, you have a functional HDD in your hands. Put it to use again by popping it into an external hard drive enclosure and you’ll have a DIY external hard drive.
Because of availability and a lack of general consumer knowledge, internal hard drives can be somewhat cheaper than standalone external hard drives. You can take advantage of this by plugging a new or extra internal drive into a hard drive enclosure.
Follow the steps to turn an old hard drive into storage;
- Depending on the drive and the enclosure, you’ll be able to use it with or without a power adapter. As a rule of thumb, power adapters are helpful for desktop (3.5-inch) hard drives, while adapters aren’t usually needed for laptop (2.5-inch) drives.
- Choose an internal hard drive. You can mix and match almost any hard drive and enclosure, but check the manufacturers’ websites to make sure the drive and enclosure are compatible, just in case.
- Mount the drive into the enclosure. Inside the enclosure, there may be a place to mount the internal hard drive into the enclosure, either by screws or fasteners (some slot into the connector).
- If you’re installing older drives such as EIDE or IDE, you may see several wires to connect the hard drive. For SATA or mSATA drives, you should see a single SATA connection like those inside the PC.
- Plug in the connections. The connections you need to make differ depending on the type of hard drive connector you have.
- For most modern drives that use SATA or mSATA, there is a single 7-pin connector that is the interface connection and provides power.
- For PATA drives (EIDE or IDE), there’s a 40-pin connector and a 4-pin power connector.
- Both types of connectors are keyed to be plugged in one way only.
- Inserting a hard drive into the external interface.
- Seal the hard drive enclosure. After it’s connected, seal the enclosure tight once again, with the internal hard drive inside.
- Most hard drive enclosures have screws or simple fasteners that you can use to seal up the drive. You now have an internal hard drive acting as a portable external storage device. All that remains is to connect the enclosure to the C.
- Connect the enclosure. The enclosure comes with whatever cords are necessary to connect it to a PC. Usually, it’s a USB cable, which provides both connectivity and power to the drive.
- Connect the enclosure to the PC. Connect the USB cable to the PC, and allow the drive to come on. If it has a power switch, turn it on.
- Plug and play the hard drive. Once you plug it in and turn it on, your Windows machine should recognize that you added new hardware and let you “plug and play” it. You can browse to the drive, open it, drag files and folders into it, or set it up for receiving security backups and recovery files.
- If your PC does not recognize the drive, there may be a formatting problem. You’ll need to format the drive properly to suit your computer. Learning how to format a hard drive is easy.
Building a Network Attached Storage (NAS) Box
In case you already have an external drive or don’t have use for one, it might be time to build your own network attached storage (NAS). Creating a NAS with an old hard drive allows you to do is access your hard drive’s contents from any device connected to your home network.
There are different levels of NAS. If you’re fine with spending some money, you can buy a NAS box like the TerraMaster F2-221 and simply pop in the drive.
Alternatively, you can repurpose an old PC into a NAS computer by installing dedicated NAS operating system like TrueNas or Unraid and popping in a couple of old hard drive to store your data.
Check this too: How to Map a Synology NAS
What to do with broken hard drives?
Here are other old hard drive projects you can attempt;
DIY Magnetic Knife Block
Hard disk drives contain two large neodymium magnets that can be used to create a magnetic knife block. You won’t need any special tools for this, but if you don’t have wood glue or other simple hardware tools around, your local hardware shop should have it.
Once you’re done, you’ll have a neat magnetic knife block that you can hang above your kitchen. Knives will stick to this block like magic, turning what would have been e-waste into something practical and convenient.
Turn it into a mirror
The platters inside a hard disk drive can act as perfectly polished mirrors. Be a little gentle while dismantling them: you don’t want chips or scratches here. But if you get it out whole, it’s the perfect mirror.
You can get creative in your cubicle by turning this into a rearview mirror; all you need is a large thumbtack. Mount it on your cubicle, place the thumbtack in the center, and you will be able to see who is trying to sneak up on you from behind.
Platters can also turn into signal mirrors which is a mirror that reflects sunlight to show your location. Apart from being handy in survival scenarios, it can also be a decent safety tool for cyclists.
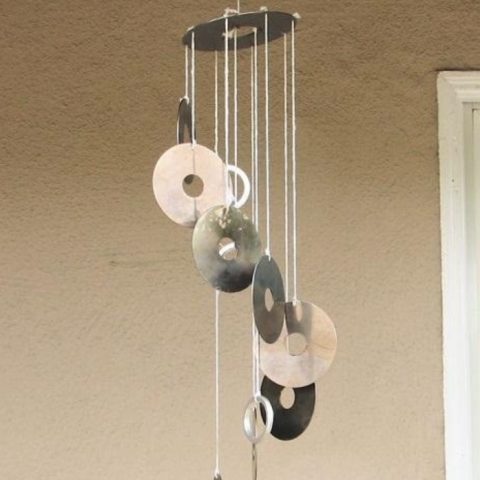
Build a Wind Chime
If you have several old drives, harvest the platters and turn them into a wind chime. It’s an easy DIY project that puts your geek cred out there for the world to see.
Most of the project uses the parts you dismantle from a drive, like the base plate and the mount ring. You’ll need a strong line to hold all the plates, of course. Run the lines through the ring and into the corners of the plate, then attach a platter to the end of each line.
Make a Hidden Safe using a Hard Drive Case
Once you remove all the parts inside, the hard drive case itself makes a pretty cool safe for storing your cash and no one will suspect. Take out all the parts, then insert one of the screws in the corner. This turns the front of the hard drive into a swiveling door to open and close the container. Perfect for stashing your emergency money.
Build a Fancy Hard Drive Clock
An old hard drive’s parts are perfect to build yourself a brand-new clock, complete with LEDs and other cool bits. You’ll need to buy the clock hands separately, such as these from Amazon.
Hard Drive Sander
If you have one of the older HDDs then you’ll be familiar with the spinning disk inside. For a project that you would never expect, turn that spinning disk into a micro sander.
For less than $10 you can hack your old HDD and use it as a sander to sharpen tools, with many other applications possible too. The extra components required are a servo tester, an electronic speed controller, two banana terminals, and some sandpaper.
Note: make sure your hard drive has aluminum platters. Glass platters will not work and could easily cause harm to you.
Build a Hard Drive Laser Motor
The best part about old technology is that it usually has mechanical components. Unlike the newer SDDs, HDDs have small motors inside to spin the platter. This can be harnessed in an incredibly fun way to build a small laser machine.
Are old hard drives worth keeping?
An old hard drive will only fetch a fraction of its purchase price if you try to sell it, but it still can have some value to you if you keep it around. According to a Google study on hard drive failure, the failure rate as much as triples on a drive that is more than three years old.
You can hold on to an old hard drive as a spare part. If a newer hard drive fails on another computer, you can use the old drive as a replacement part. While the older drive has a higher chance of failing, Google reports that the rate is only between one and five percent annually on a five-year-old drive.
The old hard drive likely has less space than the newer one and performs a little slower, but it comes as a free replacement. The old hard drive has some value in this instance as money saved versus money gained.
You can use an old hard drive to make a backup clone of another hard drive instead of buying a third hard drive. A cloned drive is a ready-to-use copy of another hard drive that can be swapped out with it’s origin drive to get a computer back up and running like it was when the clone was made.
The cloned drive will only work if the total amount of data on the origin drive is less than the clone-to-be drive’s capacity. Clone drives are often used to recover from hard drive failure and catastrophic damage from malware.
You can use an old hard drive as free additional storage in a desktop computer. Desktop computers typically have support for four or more storage devices including hard drives and optical drives. You can install the old hard drive in a desktop computer as long as there is room for it.
If there is no room for it, you can access the old hard drive’s storage by adding a hard drive dock to the computer. You can also use the old hard drive as a backup storage device. After installing it and transferring the data you want to back up on to it, you can remove the hard drive and store it somewhere else, making it a protected, high-capacity backup.
Can you throw away a hard drive?
You can’t just dispose old hard drive or drop it off at a recycling center. These drives may contain personal data, and you need to deal with them carefully to ensure that no one can recover your information. Here’s how.
Back up your data
It’s best to plan ahead and use full-disk encryption for all your drives so you don’t have to worry about your data being accessible when you need to get rid of them. Securely erasing the drives is a good idea, and as a last resort, disassembling them and destroying the platters makes a good weekend project.
How to erase drives
Before going any further, you should securely erase your drives. This article tells you how to do this with Disk Utility, and also how to securely erase free space from an SSD from the command line (using the Terminal app), since you can’t securely erase SSDs.
It’s worth noting that if you’ve been using FileVault, or encrypted your drives with your Mac, then you probably don’t have to worry about erasing them. As long as the passcode required is complex enough that no one can figure it out, then you may feel comfortable with just taking the drives to a recycling center.
However, if you are still worried, or haven’t encrypted the drives, or if you’re not sure and they don’t work, then you should take them apart.
How to disassemble hard drives
When you’ve got a bunch of old hard drives you want to get rid of, it’s time to get out some tools and get to work. You’ll need a number of obscure screwdrivers, so it’s best to buy a set of computer tools.
Start by unscrewing every screw you can find, especially on the aluminum cover of the disk.
Depending on the size of the drives, and their ages, the platters will be different. For glass platters, just shatter the platters.
Note: the glass can be very sharp, so goggles and gloves are recommended.
How to destroy old hard drives
3.5″ hard drive platters are made of aluminum, with several coatings of different materials. For these platters, there are a number of ways to ensure that data cannot be recovered. Depending on your tools, you could:
- Soak them in acid
- Scratch them all over with a screwdriver
- Sandblast them
- Deface them with a multi-tool (a grinding head)
- Demagnetize them with a very strong magnet
- Use one of the other suggestions in this article