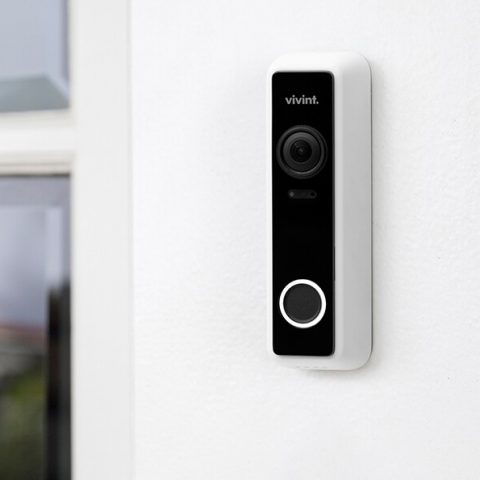
A doorbell is like a virtual butler, and a security provider all rolled into one. It helps you get the door before you even get to the door using the doorbell camera. You can see who is at your door whether you are at home hundreds of miles away.
You can also record videos of people coming to your door for security reasons. Not to forget the motion detector, which helps you know if someone is at the door when you are out. Reliance on intelligent doorbells has become so prevalent that lack of access to your doorbell makes your life seem less convenient.
Not to worry, this how-to and troubleshooting guide will help you be better versed at operating your Vivint doorbell. And be able to fix it if it has any minor issues.
How to install Vivint doorbell camera
Items needed;
- Phillips screwdriver
- Wire nut
- Pliers (optional)
Installation steps;
- Start by turning off the power to your doorbell. Do this by turning off the power to the circuit your chime box is on at the breaker box. Do not touch your doorbell wiring until the power is off.
- Then remove the front cover of your chime box. Take a photo of the wiring to enable you to rewire them properly.
- Disconnect the chime wires from their existing screw terminals. Once the wires have been disconnected, make sure the wires do not touch any metal.
- Next, remove your old doorbell and unscrew the wires and gently pull them away. Then bend the wires at a right angle, so they don’t get pulled back into the wall.
- Pull the wires through the two small holes near the top/middle of the backplate. Pull the wires until there is no longer any exposed metal and the waffle side is against the wall.
- Then open the top seal and partially tighten the top screw through the hole behind the waterproof seal. Ensure you align the backplate with your existing screw holes for easier installation.
- Install the new doorbell by tightening the top and bottom screws. Open the waterproof seal to access the bottom screw hole. Be sure to level the doorbell before you tighten the screws.
- Prepare the doorbell for wiring by loosening the two wire terminals and bend the wires into hooks. You can use the tip of the screwdriver to bend the wires into a hook shape. Bending the hooks clockwise makes them easier to secure later.
- Reconnect the wiring by directing the wire hooks behind the screw terminals and tighten them. For easier connection, face the hooks rightward. Then place the excess wiring in the holes.
- Align the doorbell to the bottom of the backplate and snap the doorbell into place. Ensure the screw peg on the backplate aligns to the hole at the bottom of the doorbell.
- Then reconnect the chime box wires and replace the cover.
- Finally, turn on the power connection as the circuit breaker box and wait for the LED indicator on your doorbell to run green. Once the camera says, “Hello, let’s get your camera set up,” and starts breathing green, press connect.
How to remove Vivint doorbell camera from the wall
Fortunately, Vivint gadgets are designed to be easy to install and uninstall. You should aim to remove the camera without damaging it. All you need is a screwdriver, and you are good to go. The process should only take a few minutes.
Steps:
- Disconnect the camera by disabling the sensing feature on the Vivint smartphone app. This prevents the doorbell alarm from going off while you are removing the camera from the wall.
- Then disconnect the power to prevent the risk of electrocution while working on it. You can do this by turning off the power at the circuit breaker box. Then disconnect the camera wires and part them while you remove the camera.
- Next, remove the doorbell panel cover. You will need a screwdriver to unscrew the cover. It is attached to the circuit with two tabs mounted on the top. Push the tab gently and pull the cover out and down. Store the panel safely to avoid damage.
- Then remove the wires from the panel. Remove the power wires using a screwdriver, the batteries wire, and the Ethernet cable.
- Detach the back plate from the wall by removing the screws.
- Then remove the power wires from the doorbell by pulling gently. You may need to remove the outlet cover before removing the wires.
- Reassemble the doorbell by placing the front cover on top of the panel. You should hear a click sound once the doorbell exterior case is closed. Then screw the pieces together to keep everything together.
- Then screw the doorbell hole cover onto the wall to prevent accumulation of dust and touching of the power wire in the doorbell outlet.
Note: The doorbell indicates the opening of the cover with the beeping sound. So do not worry if you hear the beeping alarm. It will only last a few minutes.
Vivint panel lost connection to the doorbell. How do I set it back up?
To reconnect your panel to your doorbell, follow the following steps;
- Click on the Menu icon on the bottom right of the panel.
- Then click on Devices and key in the 4-digit code that appeared in Site Manager after unlocking the Installer Toolbox.
- Click on Add new device> Doorbell Camera option.
- Click on the orange Connect button at the bottom to connect the panel to the doorbell camera. Then wait for the panel to find the camera and connect.
- Then go to your Doorbell Camera and press the Doorbell camera button and hold it for at least three seconds. Hold it until you hear a tone.
- The camera will announce it’s connecting to your Vivint system. which will take a few minutes.
- Once the connection is successful, the camera will announce it is finalizing, then ready to view.
- Then name your camera on your panel.
- You can then proceed to view your live feed.
Vivint panel lost connection to Wi-Fi.
This can be a result of different issues. Here are the most likely culprits and how to resolve the problems;
The Wi-Fi router is not connected to power.
Check to see if your Wi-Fi router is connected to power or unplugged. Then plug it into a power outlet or switch to a different power outlet if the current one is faulty. Also, check to see if the circuit breaker is tripped and replace the fuse.
Router speed is lagging.
Your internet signal may be down, and you can boost it by simply restarting your router. This helps to reboot the router causing it to load fresh memory. This may, in turn, improve the Wi-Fi connectivity.
Panel connection is lost.
Check to see if the panel has disconnected from the router and reconnect it. Ensure you have input the correct Wi-Fi password, as this may be preventing your panel from connecting to the Wi-Fi router.
Wi-Fi signal and bandwidth are too low.
Check your internet connection to ensure it is sufficient to support your doorbell. Ensure there are no distractions between the router and the doorbell. Also, ensure that you get adequate bandwidth to connect your doorbell as well as outer internet-based gadgets.
Note: if this does not work, reboot your panel to see if it is the reason for the lost connections. And if this fails, contact the Vivint support center for assistance.
How to connect Vivint panel to Wi-Fi
Follow these simple steps to connect your panel to Wi-Fi;
- Go to the home screen of your panel and click on the Menu icon in the bottom right corner. Then click on General under the Smart Home Settings and enter your PIN.
- Then click on Wi-Fi settings>Connectivity>Wi-Fi> click on the line above Info and diagnostics.
- Click on your Wi-Fi network name (SSID), then enter in your Wi-Fi password. Then wait for the panel to connect to Wi-Fi. It could take up to 5 minutes for the panel to reconnect.
- Ensure you enter the correct Wi-Fi password and your router is turned on.
Note: If the Wi-Fi network does not show up on the list, click Refresh list, then repeat step 3. If you cannot see it after refreshing, click on Join other network and manually enter your network name and password, then click OK.
If this does not work, contact Vivint support center for help.
How to connect the panel to Wi-Fi via the Mobile App
Alternatively, you can connect your Panel to your Wi-Fi using the Vivint Mobile phone app.
- Click on the Menu icon. Then tap on Device Settings.
- Then select the panel you want to connect to Wi-Fi.
- Tap on the Wi-Fi line and input the Wi-Fi password.
- Then connect your panel to Wi-Fi.
- Ensure you enter the correct Wi-Fi password and your router is turned on.
Note: If the Wi-Fi network does not show up on the list, click Refresh list, then repeat step 3. If you cannot see it after refreshing, click on Join other network and manually enter your network name and password, then click OK.
If this does not work, contact Vivint support center for help.
How to reboot your Vivint panel
Tap on the Menu icon in the bottom right corner of the panel. Then click on Devices under Smart Home Settings and enter your PIN. then click on Displays>Reboot, then click Yes to confirm the reboot.
How to reset the Vivint Panel
Your panel screen may get frozen or blackout from time to time, making it impossible to view our live feed or set your doorbell. This could be due to a software glitch, Wi-Fi connection problem, heat damage, or weather damage. When this happens, a reset is necessary to resolve the issues.
The easiest way to reset the panel is by pressing the factory reset button at the back of the panel. Press and hold the reset button for at least one minute, then release it. The panel will reset the system and activate the process again as usual.
How to do a hard reset
Alternatively, you can perform a hard reset which pretty much restores the panel to its original settings. The process takes 5-10 minutes and is easier than it seems. Here are steps to follow when resetting your Vivint panel;
- Disable the alarm before you start working on the doorbell.
- Then disconnect the power to ensure you do not get electrocuted while fixing the panel.
- Unscrew the panel from the back plate.
- Disconnect the power wires and remove the batteries if it is battery powered.
- Wait for five minutes, then rewire the panel and replace the batteries.
- Then reassemble the panel and mount it back on the wall.
- Reactivate the panel and ensure it connects to the Wi-Fi router and the doorbell.
- The panel will update software, perform error checks, and restore default settings.
- If this does not work, contact the Vivint support team for assistance.
This reset process ensures that you have completely drained the panel of its memory, enabling it to load fresh code.
How to reboot your doorbell camera
Press and hold the doorbell camera button for 10-15 seconds. Keep pressing until the doorbell camera LED indicator blinks yellow twice. Then release the button and wait for the light to turn solid white. The reboot is complete when the light turns solid white.
How to change the battery on Vivint doorbell camera
Vivint batteries can last up to five years without needing replacement. Once they run low, you will get notified to replace them. To change the battery, follow the steps below;
- Locate the door sensor and press the tab on the side to open the sensor.
- Then remove the old batteries and replace them with the new CR2032 batteries.
- Close the sensor cover and make sure that it snaps shut with no gaps.
- Safely dispose of the old batteries.
Why is my Vivint doorbell camera not recording?
Start by checking that the camera has been programmed to record when motion is triggered. To change the settings, Log into your Vivint Sky app and tap the camera icon in the bottom navigation bar. Then click on the Vivint Indoor Camera> Settings, and toggle on or off recordings for motion detection.
Next, check to see if motion detection is enabled, then adjust the settings.
- Go to your panel and click on the camera icon.
- Then tap your camera> settings and enter your PIN.
- Click on Detection settings and adjust the size and placement of the motion detection area.
- Go back to the camera settings menu to save your changes.
Note: Refer to your user manual for more clarification.
Vivint doorbell how to change Wi-Fi password
Log in to the configuration interface and go to the Basic Setup tab. Then enter the new router administration password twice to confirm it and click Save.
How to update the firmware on my Vivint doorbell camera
Your Vivint camera’s firmware will update automatically as long as the Smart Hub is connected to the internet.
Why isn’t my Vivint doorbell turning on
Check to see if the doorbell is powered or if it is running low on battery. Then turn on the power at the circuit breaker box. Replace the fuse if it is burnt. Hire a licensed electrician to fix any faulty wiring you may find. Inspect the doorbell and check to see if it is damaged. Contact Vivint help center if you need help.
Check this too: Nest Camera How to & Troubleshooting Guide
Vivint doorbell camera offline problem
If your doorbell camera is offline, you can reconnect it using the following methods;
- Reboot you panel
- Reboot your doorbell
- Restart your Wi-Fi router
- Check to see if the camera is powered.
If these methods do not work, contact Vivint support center.
Can I use the Vivint doorbell camera without service?
No. Vivint cameras cannot be used without service. You have to purchase the Smart Home Video Monitoring monthly subscription plan. Additionally, you can use up to four Vivint cameras on one subscription plan; but there is an extra cost for the third and fourth cameras. Refer to Vivint’s service and contract options for more details.
Vivint doorbell not ringing inside the house
Check to see if the power is faulty using a voltmeter to check for continuity. Then inspect your doorbell’s chime box to see if it is functioning and replace any damaged parts. Lastly, check if the speaker volume is too low, thus preventing the doorbell from producing any sound.