
Gone are the days when we would have to print photos to display on wall frames. Instead, we now have digital picture frames that can show multiple pictures simultaneously rather than one picture per Frame.
You can also add other effects such as cool transitions, music, and messages. The Photoshare Frame is one of the most popular digital picture frames in the market.
Photoshare Frame allows you to send photos to the Frame directly through the App, Google photos, web applications like Facebook, and email. However, as with any digital photo frame, Photoshare frames also come with their problems.
Most of the issues revolve around photos not displaying on the Frame. You can quickly troubleshoot these Photoshare frame problems on your own and with the help of our guide below.
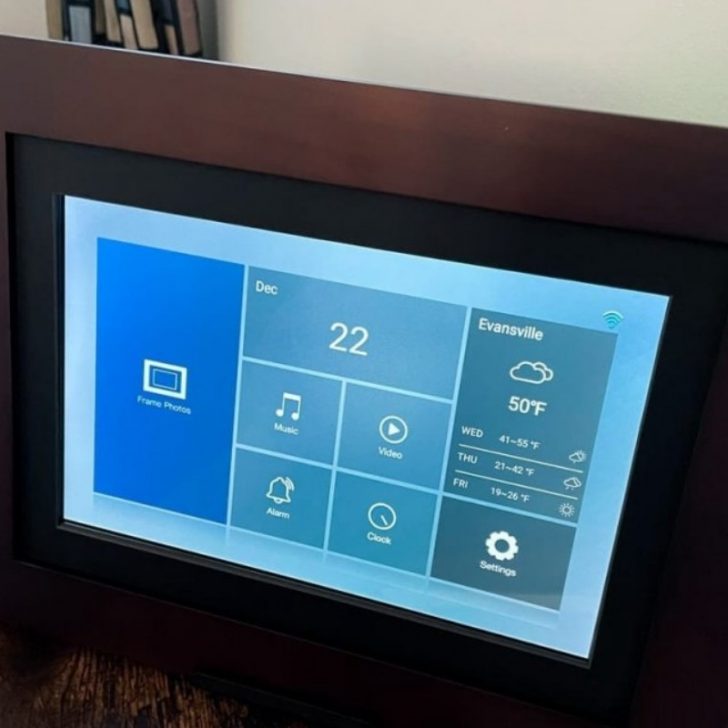
How to set up the Photoshare Frame
- Unbox the Photoshare Frame and make sure it is in good condition.
- Power up your Photoshare Frame. Plug the provided AC power adaptor into a working power outlet.
- The Frame will turn on, and you will set your time zone.
- Then select your home WiFi network. Enter your WiFi password, and the Frame ID will appear on the screen once the connection is successful. Save the Frame ID as you will need it after downloading the App.
- Download the Photoshare Frame App on your phone from the Apple Appstore or Google Playstore.
- Create a Photoshare frame account, fill in all the required fields, then press ‘Register’.
- Log into your account and press ‘OK’ to allow the App to access your photo albums.
- Enter the Frame ID you had saved earlier and then name your Frame. Upon successful registration, you will receive an email address for your Frame. Then, you and your friends can send photos to your Photoshare Frame using that specific email address.
How do you use a Photoshare frame?
After setting up your Photoshare frame, follow these tips to make the most of it.
Sharing photos – From App to Frame
- Tap on the circle in the upper right-hand corner of the thumbnail to select up to 50 photos. You can also add a message to an image by clicking on ‘Add Caption’.
- Click on the circle in the upper right-hand corner of the Frame to choose one or more Frames to share the photos. If the Frame is gray, it is offline and will not receive photos).
- Click ‘Send’ to share your selected photos.
- The photos will appear in the selected Frame automatically.
Sharing photos – From email to Frame
- Open your email and add the email address to the Frame you want to send the photos to.
- Attach the photos to the email body and click ‘Send’.
Sharing – From web application to Frame
To share photos stored on your PC:
- Open PhotoShareFrame.com and log in with your Photoshare username and password.
- Click ‘Add Photos’ and locate the folder containing the photos you’d like to share.
- Select the individual photos you would like to share, select one or more frames to send pictures to and then click ‘Send Photos’.
Sharing photos from your Facebook page.
- Browse PhotoShareFrame.com and log in with your Photohare username and password.
- Tap the Facebook icon and log in using your Facebook username and password.
- Scan your Facebook photo albums and select the photos you would like to share.
- Choose one or more frames to send photos to and then click ‘Send Photos’.
Sharing photos- From photo apps to frames
- Photoshare Frame is also compatible with other photo sharing and management apps such as Google Photos, making it easier to access photos that may not be in your mobile’s storage.
- Open your Google Photos account, locate the photos you want to share.
- Tap the ‘Share’ icon in the bottom left-hand corner.
- A list of shareable apps will appear, scan for Photoshare App. Note that each photo-sharing application has its limit on the number of photos and total file size that you can transfer. If you exceed the limit, the Photoshare App will not be an option. If you remove some of the photos from the list, Photoshare will re-appear and a destination option.
- Click on the Photoshare frame app icon and tap ‘Post’.
- Choose one or more frames to share your photos and tap ‘Send’.
To add other frames
You can link and manage more than on Photoshare frame from the same App.
- Open your Photoshare App and click on ‘Settings’.
- Go to ‘Manage user’.
- Tap ‘Add frames’
- Enter the new frame ID.
- Tap ‘Submit’.
- Choose a different name for the new Frame.
To invite friends
Photoshare allows you to invite friends and family members to share photos with your Frame by sending an invitation from the Photoshare frame app.
- Tap the ‘Settings’ icon in the top right-hand corner of the App.
- Click “Invite Friend”
- Enter your friend’s email address and choose one or more Photoshare frames from the list below.
- Tap “Invite”. Your friend will receive an email that gives them your frame ID(s) and details on installing the Photoshare frame App and creating their account.
- Once they have successfully created their Photoshare account, you will receive a request on your Frame to permit them to share photos with you.
To edit frames
- On the Photoshare frame app, open the settings.
- Tap ‘Edit frames’ and a list of all your Photoshare frames that you own.
- Select the Frame you want, and the name and ID will appear. You will also be able to change the name and also remove the Frame from your account.
How to reset the Photoshare Frame
Resetting the Frame will return the default factory settings. However, the Frame’s internal memory will remain intact. To reset your Photoshare Frame using the Settings menu, follow the steps below:
- First, turn on the digital photo frame.
- Next, press the ‘Menu’ button.
- Tap the up or down arrow buttons and select ‘Various settings’.
- Finally, press the ‘Enter’ button.
- Tap the up or down arrow button to scroll and select ‘Reset’.
- Next, press the ‘Enter’ button.
How do you delete photos from Photoshare Frame?
Follow the instructions below to remove stored photos in your Photoshare Frame.
- Remove the memory card from your Frame and turn it on.
- Press the ‘Mode’ button to select ‘Photo mode’.
- Next, click on the ‘Options’ button,
- Tap the up and down arrows to select ‘Delete’.
- Then, press the ‘Select button. Choose all the photos you want to delete and confirm the action.
Why is my Photoshare Frame not working?
Typically, your photos should start showing on the Photoshare Frame within seconds after downloading them. If your Frame is now working, follow the steps below to troubleshoot it.
- Make sure the Frame is on. Check the adapter and ensure it connects to the electrical outlet. Then check the other end of the cord and ensure it is not loose either. If the Frame does not turn on, make sure the electrical outlet is working. Check the circuit breaker and reset it if necessary.
- Check the picture format of your downloads. The Photoshare Frame only accepts pictures in JPEG format. Ensure your digital camera saves your photos in this format to avoid this issue. Check your camera manual and change the settings if necessary. If you used software like Photoshop® to change the images, confirm that you saved the photos as Baseline Standard.
- If it freezes or starts glitching while running through the photos, you should reset it. Sometimes pictures can carry bugs that can cause freezing or glitching, and resetting the Frame can clear the bugs and return your Frame to default settings.
- Ensure your Photoshare Frame connects to the home network. Your Frame has to be connected to a stable WiFi network to work consistently. Check your internet speed and connectivity. Reset your router if you must or contact your internet service provider to fix any connectivity issues.
- Confirm you have photos in your Frame. To verify this, op
- Check your Photoshare frame users. Too many users using the App simultaneously will prevent the Frame from loading pictures or working correctly.
- Try restarting your phone if you’re having loading issues. First, exit the App and restart your phone, then try loading the Frame with photos.
- The Photoshare frame app server may be down, causing a media loading issue. You can wait a few minutes and check if the problem is resolved or contact Photoshare frame customer service for further assistance.


Why is my Photoshare Frame not receiving pictures?
If your Frame is not loading pictures, follow the troubleshooting instructions below in order.
The Frame is offline
The Frame will not receive photos if it has no power. You will see the frame name or ID is grayed out on the App to indicate that it is powered down or offline. Plug the Frame into an electrical outlet and ensure it is working.
Ensure the Frame connects to WiFi
View the notifications in the App. Usually, Photoshare will alert you through the App if it has lost its internet connection. Check your internet speed, try rebooting your router to fix any connectivity issues.
Confirm the Frame is running the proper album
If your Frame is supposed to run photos from a specific album, it will not display pictures from another album. You can use ‘All Photos and Videos Playlist’ to display your photos and videos in your Photoshare Frame.
If you do not see the sent pictures in the ‘Most Recent’ album, your App is not loading the photos. Try resending them, and then check if the problem persists.
Wrong frame ID
Every Photoshare Frame has a unique ID. The frame ID generates an email address for anyone sending photos. Ensure you’re using the correct email address when sending pictures; otherwise, you will not receive the images.
To find your frame ID, tap the screen on your Frame and press the back button at the top lefthand corner of the screen. Next, check your email from Photoshare and look for an email address designated for your Frame.
Reboot the Frame and router
If none of the above tips works, you should try power cycling the Frame. Sometimes the internet connection between the frame and router stalls and needs resetting. Unplug your Frame from power and wait about 10 seconds, then plug it back in.
You can also reboot the router simultaneously. When the connections are back, look for the sent photos or try reloading them onto the App.
How to approve users on Photoshare frame
You need first to approve someone to send you photos for your Frame to receive them. Check your list of users and ensure the sender is authorized. If not, you can add them to your Frame by following the steps below:
- Open the ‘Settings’ menu of the App.
- Click on ‘Invite Friend’.
- Enter the person’s email address.
- Select one or more Photoshare frames you want to give them access.
- Tap ‘Invite’. Your friend will receive an email notification that gives them your frame ID. Next, they need to create their Photoshare frame account to share photos with you successfully.
Photoshare frame auto turns off
You set the Frame to switch off by automatically:
- Go to ‘Settings’> ‘Frame settings’> Auto on/off.
- When you activate auto turn off, you have to set the time you want it to go off.
Photoshare Frame has an approval pending
- If you have missed a guest invite and can’t see the notification, follow the steps below:
- Press ‘Settings’.
- Tap ‘Manage user’.
- You will see the friend waiting for approval.
- Tap on the friend waiting for approval to confirm the connection.
Photoshare Frame is not connecting to WiFi
If your Frame is not connecting to the internet, it will not receive photos, friends cannot connect to the Frame, and the Frame will not receive the latest software updates. To troubleshoot connectivity issues, follow the steps below.
Check your WiFi properties.
- For your Photoshare Frame to connect to your router, the network should meet specific requirements. The essential properties are security type and the network band: security type should be WPA or/and WPA2 and network band 2.4 GHz. You can change these settings yourself or contact your internet provider to adjust the settings appropriately. Then check if your Frame now connects to your WiFi.
- Check if the router firewall and MAC address filter are on. Some routers have in-built firewalls that block other devices from connecting to the network and affect the Frame’s functionality. Check these settings on the router itself. This firewall is not usually a default feature on routers but should only be concerned if you have installed extra security measures.
Fix a bad signal
Sometimes your Photoshare Frame will go offline if the internet speed goes below the minimum requirement. Here is how to fix a bad connection:
- If you changed your router recently, make sure that the SSID and network password are correct. Keep in mind that the password is case sensitive.
- Restart your router. Turn it off, wait for 30 seconds, then turn it back on.
- Move your Frame closer to your router to reduce the range.
- Disconnect unnecessary devices from the network. Often network speed will be very slow if the connection is overcrowded. Remove other devices that are currently not using WiFi networks.
- Move your Frame or router away from other electrical devices. Electrical devices can jam the WiFi signal and prevent or slow down connection with your Photoshare Frame.
- Change your router channel. If you live in an apartment with other routers, these routers can interfere with your router. Contact your internet provider to reconnect you with a different channel.
Photoshare Frame is not receiving emails
If your Frame is not receiving photos by email or shows ‘Offline’ on the App, follow the troubleshooting tips below:
- First, make sure you’re sending the pictures to the correct frame address.
- Then, confirm the Frame is connecting to WiFi and shows ‘Connected’ in the main menu.
- If the Frame is offline, then you need to check your connection. First, make sure your router is working and the Frame is within the range.
- If your internet connection is fine, restart the Frame. Unplug it from power, wait about 10 seconds, then power it up. Check if the pictures are loading or if the Frame is online.
- The Photoshare frame server may be down, and that is preventing photo-sharing. Please try logging in after few minutes.
Photoshare Frame is not updating
When Photoshare releases a new software update and your Frame does not update, it will start developing issues or stop working at all. Follow the instructions below to fix the problem.
- Check your WiFi connection and verify that it is working correctly. Your WiFi signal may be down and stop you from updating the Photoshare frame app. Restart your router and try updating again.
- Verify that you have enough storage space in your mobile device to download updates. If you don’t have enough storage space, it can be blocking the app updates. So, clear up some storage from your mobile device to allow the App to update.
Photoshare Frame ID is not loading
- If you already have a Photoshare frame account, you can find the frame ID by going to ‘Main Menu’ on the App and then ‘Settings’. The frame ID is at the top of the first Settings screen. If you have more than one Frame, open ‘Manage user’, tap on the list of frames you own, and the name and ID will appear.
- If it’s your first time opening a Photoshare frame account and the frame ID is not loading, your internet could be down. First, check your data connection, make sure it’s working correctly, and restart the setup procedure.
- If your internet is working, then the Photoshare frame servers could be temporarily down. You can contact Photoshare customer service for confirmation. Or you could wait a few minutes, then try again.
- Try restarting your mobile phone.
Photoshare Frame slideshow is not working
If you used a digital camera set to the maximum resolution to take the photos you want to display on the Photoshare Frame, the files might be too large to display in the Frame.
We recommend sending the images to an editing app like Photoshop or iPhoto and adjusting the resolution to 1600×1200, 1024×768, or 800×600.
Also, the maximum picture size should be 12 Mega Pixels. Then share the photos to the Frame, which should enable the slideshow.
How many pictures can the Photoshare Frame accommodate?
You can share up to 50 photos to your Photoshare Frame at once with the free version of the Photoshare frame app. Photoshare Frame’s internal memory will hold approximately 5,000 images.
Depending on image quality, photos are automatically re-sized down to the resolution of the Frame and then compressed.
How to add music to the Photoshare Frame
Photoshare frames have built-in stereo speakers and can play music in the MP3 format during a slideshow. Here is how you can add music to your Frame:
- First, turn off the Frame and remove the memory card.
- Insert the memory card into a USB memory card reader and connect it to your PC through a USB port.
- Open the folder to view the contents of the memory card, then minimize it.
- Ensure you have a folder with MP3 music files on your computer.
- Open the music folder and copy and paste or click and drag the music files to the memory card folder.
- Disconnect the memory card from the USB card reader and insert it into your Photoshare Frame.
- Turn on the Frame, go to setting and select the media you want to play, that is, music, photos, video. Press ‘Enter’, and the slideshow will start while playing the music.
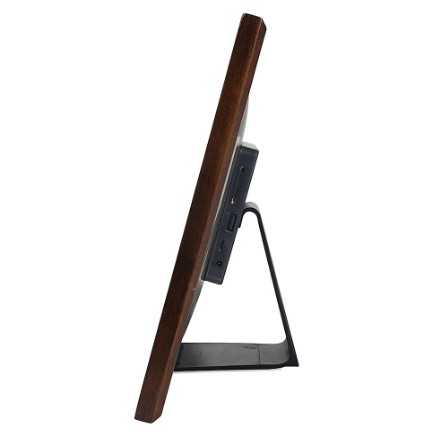
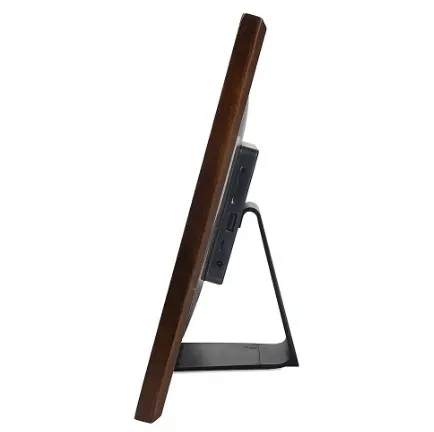
How to attach the stand to the Photoshare Frame
Here’s how you can attach the stand that comes with your Photoshare Frame to turn into a desktop frame.
- Align the stand with the holes at the back of the Frame.
- Insert the pins securely until they click into place.
- Turn the stand around for either landscape or portrait viewing.
How to assemble a Photoshare frame
The Photoshare digital frame is straightforward to assemble.
- The Photoshare frame package should have the digital frame, charger, desktop stand, and user manual.
- You can hand it on the wall or have it on a desk or a shelf.
- For a wall mount, screw in your nail onto the wall. Then hang your frame onto one of the two wall mount holes for either landscape or orientation at the back of the frame.
- Alternatively, you can make your Photoshare frame into a desktop frame by placing the stand on the table and then putting the frame on the stand in either landscape or orientation position.
- In other models, you have to insert the tabs on the stand into the slot at the back of the frame, then turn it to your desired angle.
- Attach the power cable adapter to the power slot on the side of the frame, then plug the cable into an available electrical outlet.
- Press the power button and continue with the setup.
How to copy pictures from a CD to a Kodak Photoshare digital frame
It is easy to transfer your images and videos from a CD to your Photoshare frame through your computer, memory card, or USB port. Before you begin, ensure your photos in the CD are in a universal image file format such as JPEG.
Computer
You can use a web application if you have access to the internet.
- Insert your CD into your laptop or desktop computer’s CD drive.
- Open the CD and access the photos.
- Go to PhotoShareFrame.com and log in with your Photoshare account name and password.
- Click ‘Add Photos’ and locate the files from the computer library.
- Select the images you want to add to your Photoshare frame, then click ‘Send Photos.’
Flash drive
You can use a flash drive if you have no access to the internet.
- Insert your CD into your laptop or desktop computer.
- Insert your flash drive into a USB on the computer.
- Open the CD and access the photos.
- Either copy-and-paste or drag-and-drop the images from your computer library to the flash drive.
- Eject and remove the flash drive from the computer.
- Connect the flash drive to your Photoshare digital frame, and the photos will automatically appear on the screen.
- Select the photos you want to display on the frame and click ‘Send .’The images will appear in your frame automatically.
How to set up and use a Brookstone Photoshare frame
The Brookstone Photoshare frame offers solid performance and an elegant design for displaying your digital photos and videos. The Brookstone frame package comes with an adapter, digital frame, and Media Impression TM Software CD. Follow the steps below to help your set it up and use it.
Set up the frame
- Plug the adapter into the frame and a working power outlet.
- Press and hold the power button for 5-6 seconds or until the Brookstone logo appears on the screen. The Home Screen with a memory bar will appear on the display after the frame turns on. Note that a blue fill in the memory bar indicates used memory. So if the bar is entirely blue, the memory is full.
- Press and hold the power button again for two or three seconds to turn off the Brookstone frame. Then the Brookstone logo will appear on the screen as it shuts down.
Clock and date settings
- After installing the software on your computer, set the time and date in your Brookstone frame on the Home Screen.
- Press EXIT until your get to the Home Screen, then use the back and forward button to scroll to CLOCK & SETTINGS.
- Press SELECT if there are no media in the frame, or press MENU if there are media in the Photoshare frame. Then set the current time and date by following the on-screen instructions and scrolling using the arrow buttons.
- Save your settings and press EXIT to exit Time/Date settings.
Download photos and videos onto the frame
There are several ways you can copy your photos and videos onto the Brookstone frame, and they include; a memory card, flash drive, computer.
Memory card and flash drive
- Turn on the frame by pressing the power button for about five seconds.
- Insert the memory card or flash drive into the appropriate port.
- The Home Screen with all the photos will show for about 60 seconds.
- After 60 seconds, all the media will auto-play.
- When you insert the memory card, all the media in the frame’s internal memory will not play.
- Press and hold SELECT for about two seconds to copy all photos from the memory card or flash drive into the frame. The ‘+’ symbol will appear in the lower right corner of every image to confirm the copying was successful.
- To copy a single photo;
- Press SELECT > MENU
- Press → to scroll to the ‘Copy’ menu
- Scroll up or down to ‘Select to Copy’
- Press SELECT
- Choose your photo and press SELECT
- The + symbol will appear in the lower right corner of the photo to confirm successful copying.
- Repeat the steps to select additional photos.
- Press MENU or EXIT to revert to thumbnail mode.
Computer
Install the MediaImpressions software on your computer. Otherwise, photos uploaded to the frame using a laptop without this software will not be optimized to the frame’s specifications and will probably use more memory than necessary.
For Windows:
- Insert the MediaImpression CD into your computer’s CD-ROM drive.
- Open the CD and double-click Window’s folder.
- Double click on the Setup.exe file.
- InstallShield® Wizard will open on your computer. Then follow the InstallShield® Wizard on-screen instructions to install the MediaImpression software on your computer.
- Locate MediaImpression software on your computer and double-click on its icon to open it.
For Mac:
- Insert the MediaImpression CD into your computer’s CD-ROM drive.
- Open the CD and double-click the Mac folder.
- Double-click on ‘MediaImpression Installer .’
- Then follow the on-screen directions to install the software on your computer.
- Find the software on your Mac computer and double-click on the icon to open it.
- Put one end of a USB cable into the USB port in your Photoshare frame and the other end of the USB cable into the computer’s USB port. ‘USB connected’ will appear on the frame display, and an external ‘MyLifeFrame’ drive will appear on your computer.
- Open the MediaImpression software.
- Find all the photos you want to display on your frame and select them.
- Tap the Convert icon and select ‘Resize Photos’ from the drop-down menu.
- A window will appear for choosing a file size and destination for selected photos. Choose ‘Classic Size’ of 800×600.
- Click on the Browse icon to select the frame’s external drive as the destination for the selected photos.
- Click ‘Resize’. Photos will be resized and saved onto the frame.
- Disconnect the ‘MyLifeFrame’ external drive from your computer correctly to avoid losing data.
Slide show
- Press the Quick Access Slide show button to play a slide show. You can also adjust the slide show intervals in the settings.
- Press the Quick Access Slide Show button to stop the slide show from playing, and the screen will revert to Full-Screen mode.
- Alternatively, press EXIT, and the Slide Show will stop, and the display will turn to Thumbnail mode.
Delete media from the frame
Follow the instructions below to delete any media copied to the frame’s memory.
Deleting a single photo or video
- Unplug your memory card or flash drive from the frame.
- Press back and forward arrow buttons to highlight PHOTOS or VIDEOS
- Press SELECT.
- Select the photo or video to delete.
- Press DELETE
- A prompt will appear on the screen to confirm the deletion.
Deleting all photos or videos
- Unplug your memory card or flash drive from the frame.
- Press back and forward arrow buttons to highlight PHOTOS or VIDEOS
- Press SELECT.
- Press and hold the DELETE button for about two seconds.
- A prompt will appear on the screen to confirm the deletion.
Music
- Copy your music options on the memory card, flash drive, or the frame’s memory from your computer in MP3 format.
- To play music with the slide show:
- Press MENU.
- Press the forward arrow button to scroll to ‘Slide Show Music’
- Press up or down arrow buttons to highlight ‘On.’
- Press SELECT to save your music choice.
- Press EXIT
- Press the up or down arrow buttons during the slide show to change songs.
- When the music starts playing, press the ‘Volume Up’ and ‘Volume Down’ buttons to increase and decrease volume levels, respectively. The volume graphic will appear on the screen to show the level.
How to put a Brookstone Photoshare from on its stand
The Brookstone Photoshare frame has a detachable stand that allows you to wall mount the frame or place it on a desktop. Here is how to attach the frame to the stand.
- First, align the pins on the stand with the mount holes at the back of the Photoshare frame and then insert the stand.
- Rotate the stand to either landscape position or portrait position.
How to put the Photoshare frame in single photo mode
The Photoshare digital frame does not only display a slide show of several photos or videos. You can also display a single image for viewing. Follow the steps below to view in single photo mode.
- Slot your memory card or flash drive into the Photoshare frame.
- Go to the Home Screen.
- Press the backward and forward buttons to open thumbnail mode, then highlight the desired PHOTO.
- Press SELECT.
- Use arrow buttons to find your photo.
- With the chosen image highlighted, press SELECT.
- You can press the back and forward arrow buttons to rotate 90 degrees to your desired angle.
Conclusion
Finally, our article will help you understand and fix any particular problem you may experience with the Photoshare Frame.
The Photoshare Frame operates on a very simple mechanism that makes diagnosis and troubleshooting a straightforward task.