
If you own a Kitchenaid ice maker and have run into trouble operating the unit or there is a certain issue that is preventing you from making and enjoying delicious ice cream with your family, the following is a troubleshooting guide with easy-to-follow steps on how to fix common issues with these ice cream making machines.
How to Assembe Kitchenaid Ice Cream Maker
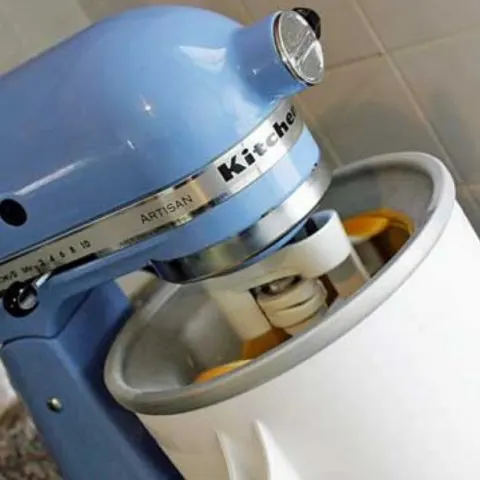
To assemble the freeze bowl and dasher (for bowl-lift mixer):
- Be sure the speed-control is OFF, mixer is unplugged, bowl-lift handle is in the down position, and the mixing bowl is removed.
- Fit the freeze bowl into place over the locating pins.
- Press down on the back of the freeze bowl until the bowl pin snaps into the spring latch.
- The freeze bowl is designed to fir all bowl-lift mixers. If the bowl pin at the back of the bowl is too short or too long to snap into the spring latch, remove and rotate the bowl so the opposite bowl pin faces the spring latch. Repeat steps 2 and 3.
- Place the dasher inside the freeze bowl.
To assemble freeze bowl and dasher (for tilt-head mixer):
- Be sure the speed-control is OFF, mixer is unplugged, motor head is tilted, and the mixing bowl is removed.
- Place the dasher inside the freeze bowl.
- Place the freeze bowl on the bowl-clamping plate.
- Turn the freeze bowl gently in the counterclockwise direction (opposite direction of mixing bowl) to secure. The freeze bowl should fit the bowl-clamping plate tightly. If it feels loose, note the following:
- Some tilt-head models will need the adapter ring to fit properly. First, attach the freeze bowl adapter ring to the bottom of the freeze bowl with a counterclockwise turn, then follow steps 3-4.
How to Use Kitchenaid Ice Cream Maker
Before you start using the ice cream maker to make ice cream, do the following:
- Set the freezer to the coldest setting.
- Store the freeze bowl in the freezer for a minimum of 15 hours.
- Prepare ice cream butter in advance.
Then follow these steps below to make ice cream:
- Assemble and engage the freeze bowl, dasher, and drive assembly.
- Set the mixer to “STIR” speed and pour the ice cream batter into the freeze bowl. Note that pouring batter into the freeze bowl before starting the mixer may cause the batter to freeze prematurely and lock the dasher.
- Mix 20-30 minutes, or to the desired consistency. Add any solid ingredients such as candies, nuts, fruits, or chocolate chips, after 12-15 minutes of the mixing process.
- Remove the dasher and the freeze bowl, and use a wooden or plastic spoon to transfer ice cream to dissert dishes or to an airtight container for storage.
Here are other things to note when making your ice cream:
- If the dasher starts to slip and make a clicking sound, this indicates that the ice cream is done.
- The ice cream attachment will create a soft-consistency ice cream. For firmer consistency, store the ice cream in a shallow airtight container in the freezer for 2-4 hours.
- Do not store ice cream in the freeze bowl in the freezer. Using metal scoops or utensils to pry hard ice cream out of the freeze bowl in the freezer may damage the freeze bowl.
Why is My Kitchenaid Ice Cream Maker Not Making Ice?
Ice cream making is a two-part process: “conversion” and “ripening”. After conversion, which is the freezing with the ice cream maker attachment, the ice cream will be a “soft-serve” consistency. The “ripening” process takes place in the freezer, where the ice cream will harden over 2-4 hours. Follow the recommended mixer speeds. Faster speeds will slow the conversion process.
- Before pouring in the ice cream mixture, you should have the ice cream bowl attached and the mixer running.
- Batter volume grows significantly during freezing. The initial batter should not exceed 46 oz. to produce 2 quarts of ice cream.
Also, consider the following:
Bowl temperature
The freeze bowl must be completely frozen to make ice cream or frozen desserts. Place the bowl on the freezer for a minimum of 15 hours. For best results, store the freeze bowl at the back of the freezer where it is the coldest. Use the freeze bowl immediately after removing it from the freezer. Even a few minutes out of the freezer before using it will affect your results.
Batter temperature
You should cool ice cream batter to refrigerator temperature before freezing in the ice cream maker attachment. “Cooked” recipes should be refrigerated at least 8 hours before freezing in the ice cream maker attachment.
Why is My Kitchenaid Ice Cream Maker Bowl Not Freezing?
The following reasons could be behind your Kitchenaid ice cream maker not freezing:
Excessive ingredients when making ice cream
Too much ingredients can hinder the functionality of the ice cream maker, and the unit won’t even freeze. Many ice cream makers are designed with a limit on how many ingredients can be added to the bowl. For this reason, you should check the manual of your Kitchenaid ice cream maker to see how many ingredients can be filled into the bowl.
Type of ingredient
Similar to the number of ingredients in the bowl, the type of ingredient you put in the ice cream maker also matters. This is because if you add warm ingredients to the unit, it will struggle to freeze.
For this reason, you should use refrigerated or room-temperature ingredients to ensure it freezes properly. Additionally, you can also make the base by grinding the ingredients and chill it in the fridge for 1-2 hours.
Water
You need to be considerate of the amount of water you add to the ice cream maker. Often, water is developed when ice from the chilled ingredients melts. If the quantity of water is too much, the unit will get warm which results in freezing issues.
Remove some water if there are more than four inches. When the water is reduced, the machine will freeze up properly.
Kitchenaid Ice Cream Maker Paddle Not Turning
If the paddle or dasher is jammed, mostly likely this problem is caused by frozen ice cream mix buildup along the edges of the canister, making it difficult for it to rotate freely. Also, excessive solidification at the edges may stop the unit from turning.
To fix a jammed paddle, follow these instructions:
- Switch off the power
- Open the canister and check if the ice cream mixture has uniformly solidified. If not, scrape off the frozen mix from the edges and thoroughly stir the ingredients, and try running the unit again.
Kitchenaid Ice Cream Maker Not Spinning
It can be frustrating when you set out to make your favorite ice cream only for the ice cream maker to fail to spin. This can happen because of the following reasons:
- A jammed paddle or dasher
- Lack of/insufficient rock salt quantity
- Unit not loaded to full capacity
- Mechanical or electrical faults
Fortunately, there are several things you can try to get it to spin so that you can finally enjoy that delicious ice cream. To get the ice cream maker working, try these instructions:
- Stir the ice cream mix thoroughly and run the machine again.
- Add some rock salt or cold water to clear the jammed ice and rock salt coolant mix around the canister.
- If doing the above does not resolve the problem, try with the unit loaded to full capacity. Also, check for stuck or damaged parts.
Why is My Kitchenaid Ice Cream Maker Not Working?
Several issues may prevent your Kitchenaid ice cream maker from working. If your stand mixer malfunctions or fails to operate, check the following:
- Check if the mixer is plugged in.
- Check to make sure the fuse in the circuit to the mixer is in working order. If you have a circuit breaker box, be sure the circuit is closed.
- Check if the stop switch is pulled out.
- If all the above do not resolve the issue, turn off the mixer for 10-15 seconds, then turn it back on. If the mixer still does not start, let it cool for 30 minutes before turning it back on.
How to Clean a Kitchenaid Ice Cream Maker
Before attempting to clean your Kitchenaid ice cream maker, first let the freeze bowl reach room temperature. Follow the instructions below to clean your Kitchenaid ice cream maker components:
Cleaning the freezer bowl:
The freezer bowl is not dishwasher safe. Never wash the freeze bowl in the dishwasher. Hand wash only in warm water with mild detergent. Rinse the freeze bowl and dry thoroughly before storing it in the freezer.
Cleaning the drive assembly:
The drive assembly is not dishwasher safe. You must wash the drive assembly by hand in warm water with mild detergent. Do not store the drive assembly in the freezer.
Cleaning the dasher:
The dasher is dishwasher safe or can be hand washed in warm soapy water.
How Long Does the Cuisinart Ice Cream Maker Take to Freeze?
The length of time needed to reach the frozen state depends on how cold your freezer is. In general, the freezing time is between 6 hours and 22 hours.
Shake the bowl to determine if it is completely frozen. If you do not hear the liquid moving, the cooling liquid is frozen.
Kitchenaid Ice Cream Maker Speed Setting
Kitchenaid stand mixers speeds have the Soft Start feature that automatically starts the Stand Mixer at a lower speed to help avoid ingredient splash-out and “flour puff” at startup, then quickly increases to the chosen speed for optimal performance.
When using the Ice Cream Maker Attachment to make ice cream, you need to set the mixer to “STIR” speed (speed 1) and pour the ice cream batter into the freeze bowl; mix 20-30 minutes, or to desired consistency. Add any solid ingredients after 15 minutes of the mixing process.
On Kitchenaid 10-speed stand mixers, speed 1 is used for stirring. It is for slow stirring, combining, mashing, and starting all mixing procedures. Use to add flour and dry ingredients to the batter, and add liquids to dry ingredients. Do not use Speed 1 to mix or knead yeast doughs. Below are other speed setting on the mixer and what they are used for:
- Speed 2- Slow mixing, kneading
- Speed 4- Mixing, beating
- Speed 6- Beating, creaming
- Speed 8-10- Fast beating, whipping, fast whipping
Kitchenaid Ice Cream Maker Cracked
Your ice cream maker is likely cracked and leaking coolant if you notice a blue liquid. It is a common problem with the kitchenaid ice cream maker. This mostly happens due to freezing/thawing and the stress of placing the bowl in the freezer.
To fix a cracked ice cream maker that is leaking the blue liquid:
- Locate the crack/leak.
- Take a heavy grit sand paper, ruff the surface at the crack and wipe it clean.
- Then, take a hot glue gun and fill the cavity with hot glue. Let it dry over night and then test the seal to check if there is no longer a leak. Instead of hot glue, you can also use epoxy putty.
Why is My Ice Cream Not Freezing in My Ice Cream Maker?
If your cream maker is not freezing, the issue may be due to a number of reasons. To troubleshoot and resolve the problem, try checking the following:
Check the type of ingredients you add to the ice cream.
The ice cream maker may struggle with freezing if any of the ingredients you add to your ice cream is warm. If your ice cream maker seems to struggle with freezing with the ingredients you use, consider combining everything together and leaving the base in the fridge for some time. An hour is usually enough to help with this can give the machine a chance at freezing your ice cream.
Check to see if you are filling the bowl too much.
Most ice cream makers have a limit on how much the bowl can hold to ensure proper freezing. If you are putting too much, this is likely the reason why the ice cream is not freezing. Check your manual to see exactly how much the bowl on your machine can hold.
Consider freezing the freeze bowl ahead of time.
It is recommended storing the freeze bowl in the freezer for a minimum of 15 hours before use.
If the above troubleshooting steps do not resolve the problem, try adding more ice and salt to encourage freezing. The ice helps to lower the temperature better, especially with large amounts of ice cream. The salt helps the ice melt and release some of the cooling you need.
Check this too: White Mountain Ice Cream Maker How to & Troubleshooting Guide
If you have tried all the options above but the problem still persists, checking the thermostat on the machine may help fix the issue. When running the machine on empty, see what temperature the thermostat gets down to. If the thermostat can get down to the recommended temperatures based on the product’s user manual, then the issue is most likely the type of ingredients you put in and their temperature.
If the machine struggles to get to the right temperature, this is a sign that your ice cream maker is broken. You can take it to a repair shop to have it fixed or consider getting a new ice cream maker.