
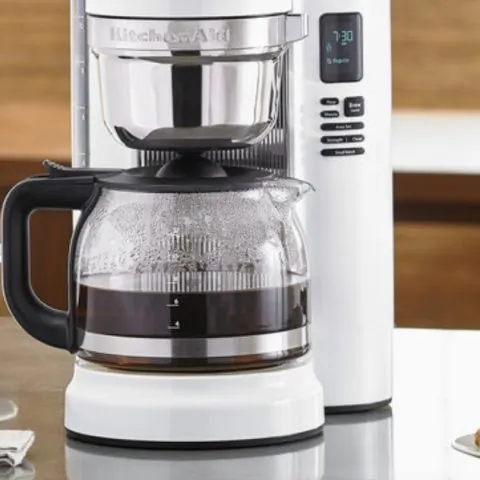
If you love a good cup of joe, then you know how essential owning a coffee maker is. It makes coffee making a breeze, especially if you rely on it to wake up. It also makes brewing the perfect cup of coffee every morning faster and efficient. But should your coffee maker break down, you are left feeling like the day just started on the wrong note.
Here are some easy tips for troubleshooting your KitchenAid coffee maker when it stops working.
Why is my KitchenAid coffee maker not working?
Check to see if your coffee maker has water. Your KitchenAid is designed to shut off if you try to brew coffee without water in the water reservoir. It will also end the brewing cycle in a minute or less if there is very little water in the water reservoir.
Next, check to see if the coffee maker is turned on and properly plugged into the power outlet. If it is connected and still not working, check to see if the circuit box in your home is working correctly. You should also check to see if the power outlet is working.
If an error code is displayed on the coffee maker, use the error code definitions below to find a solution. Finally, if you are still not able to resolve the issue, contact the KitchenAid customer service.
All KitchenAid coffee maker error codes, their meaning & fixes
Different KitchenAid coffee maker models have different error codes. Here are some standard error codes for some of the Kitchen Aid coffee makers;
Models starting with KCM5
Err1 – the coffee maker is near an outside wall in a cold climate, or the water is too cold.
Solution: Move the coffee maker to a warmer location or use slightly warmer water.
Err2 – An electrical component has been dislocated within the coffee maker.
Solution: Take it to a service center for a technician to inspect and fix.
Err3 – Control has detected that the sensor is not changing temperature during warm-keeping (it should record constantly changing temperatures). A sensor dislocating from the heater, a heater failure, or a blown thermal fuse on the heater can cause this.
Solution: Take it to a service center for a technician to inspect it.
Err4 – Stuck button.
Solution: Press and release all buttons on the coffee maker.
Model KCM111
Err1 – A button is jammed.
Solution: Unplug the coffee maker and press each button several times. Then plug the coffee maker into a grounded 3-prong outlet. If “Er1” appears again on display, repeat this procedure.
Model KCM1402
Err2 – If the brewing cycle does not complete within 15 minutes, the coffee maker will display an Err2. This means the heater is not working correctly.
Model KCM0802
Error “4” – Dry Boil [no water in the tank]
Solution: Add water to the water reservoir and resume brewing. If any other error displays, press the BREW button and try to reset. If that does not resolve the issue, contact Kitchen Aid support.
Model KCM1202
Er1 – a button is stuck
Solution: Unplug the coffee maker and press each button several times. Then plug the coffee maker into a grounded 3-prong outlet. If “Er1” appears again on display, repeat this procedure.
Model KCM0802
Error “1” – It means Motor Error
Solution: Reset the unit by unplugging and plugging it back in.
Error “2″ – It means Temperature Sensor Error
Solution: Reset the unit by unplugging and plugging it back in.
Error “4” – It means Dry Boil
Solution: Add water to the tank and resume brewing. If any other error displays or all lights are flashing, press the BREW button and try to reset.
KitchenAid coffee maker stuck on clean.
You should not unplug your coffee maker immediately after cleaning, as this will cause it to continue blinking. Letting the coffeemaker complete the entire cleaning cycle is mandatory. The cleaning cycle is complete after the completion of three brew cycles. For more cleaning cycle details, refer to your user manual.
How to clean a KitchenAid coffee maker;
Regular daily cleaning
Always clean your coffee maker daily after removing any stuck coffee grounds that may clog it and cause it to brew weird tasting coffee. The grounds can also grow mold or mildew if they get stuck in areas that are not clean.
Occasional descaling
Descaling a coffee maker from time to time is essential as the mineral buildup will make your coffee taste bitter. It also makes the brewing process slow and noisy. If your coffee maker takes more than 15 minutes to brew coffee, it is in dire need of description.
The cleaning light may also light up (in some models) if the coffee maker is overdue for a clean. And it may make gurgling noises when brewing coffee.
Descaling steps
- Remove the water filter and make sure the brew basket contains any coffee or coffee filter before starting the descaling.
- Then run the coffee maker through a complete brewing cycle using a full carafe of water mixed with the descaling solution, either commercial or homemade.
- Homemade descaling solution uses equal parts water and vinegar. Always follow descaling agent instructions when using a commercial descaling agent.
- If the Cleaning Needed Indicator light does not go off, repeat Step 2 until the Cleaning Needed Indicator no longer lights up after the brewing cycle.
- Then rinse the coffee maker. Run two brewing cycles of clean water to remove any descaling solution from the coffee maker.
- Finally, wash the brew basket and carafe using hot, soapy water and rinse until all soapy water is removed. Then reassemble the coffee maker.
KitchenAid Coffee Maker Won’t Brew
Check to see if you have accidentally pressed the “Auto-On” feature. This will prevent the coffee maker from brewing. Simply press the ON to override the feature. If this does not work, check to see if you have selected the 1-4 cup feature when you are brewing a whole coffee pot. Then cancel the selection by selecting the ON button.
Your coffee maker may also fail to brew coffee if the water reservoir is not in the correct position as it will not be able to run water through the coffee grounds. Lastly, your coffee maker may not brew coffee if mineral calcification buildup is too much.
Check this too: How to Clean a Bunn Coffee Maker
Why does my KitchenAid coffee maker leak?
There are several reasons why your coffee maker may be leaking. The leaking part of the coffee maker determines the reason for the leak. Different issues cause your coffee maker to either leak water, coffee, or a mixture of coffee, water, and coffee grounds.
Here are some of the main reasons your coffee maker leaking;
- The brew basket is open, causing coffee to overflow from the brew basket. Close the basket properly before brewing.
- You have put too much coffee in the brew basket, causing water to overflow. Remedy this by brewing recommended amount of coffee.
- You have put too much water in the water reservoir, causing water to leak from the water tank’s top. Do not exceed the Max line on the water reservoir tank.
- The carafe is leaking, causing coffee to leak onto the warming plate and needs to be replaced.
- The coffee maker pour-spout is full of ground coffee, causing coffee to leak from the brew basket instead of flowing into the cup or carafe. Clean the spout using a needle to remove coffee grounds.
- You did not place the brew basket in the coffee maker before starting the brewing cycle, causing coffee to spew instead of streaming into the carafe. Place the carafe securely on the warming plate until it locks into place.
- You have not reinstalled the carafe back into the coffee maker while using the Pause and pour feature for longer than 25 seconds, the time allotted for pausing coffee brewing. Always place the carafe back onto the coffee maker within 25-seconds when using the pause feature.
- Use of finely ground coffee, causing the brew basket to overflow due to coffee logging. Only use medium or coarse ground coffee when brewing coffee in a coffee maker.
- You used more than one coffee filter, causing a slow flow of coffee out of the brew basket.
- The drip stop is broken and is not stopping coffee brewed from dripping. Replace the drip stop or hire a professional to replace it.
If your coffee maker still leaks after troubleshooting and ensuring the cause is not above, contact KitchenAid support.
How to reset the KitchenAid coffee maker
There are two ways to reset a KitchenAid coffee maker. You can reset it by unplugging it for a few minutes then plugging it back in. The second option is to press the POWER/BREW button.