Weather stations are great for warning you when it is about to rain heavily. Having real-time weather forecast lets you plan for all your outdoor activities and plan any outdoor house makeover projects you may be planning in the future.
This comprehensive guide will help you to figure out how to use your weather station and troubleshoot any issues that may arise.
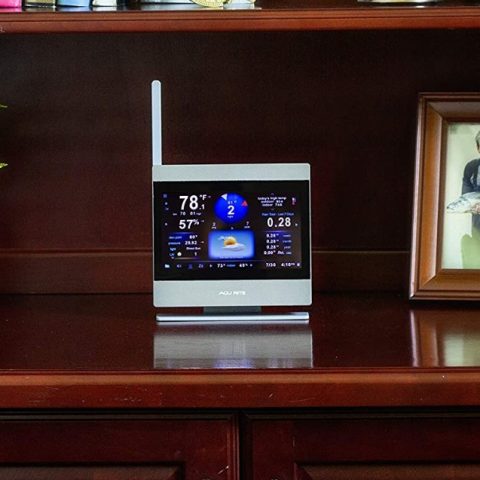
AcuRite Atlas Weather Station 101
The AcuRite Atlas weather station monitors the temperature, humidity, wind speed and direction, rain, UV, and light intensity, plus the added monitoring protection for lightning strikes (optional).
The Dashboard will update data every 5 minutes and include the last data packet received within the 5-minute interval. The details of the readings displayed are provided below.
Your Forecast and Location Details are also displayed.
Current Condition
The weather icon and text represent the current condition. In addition, the icons clearly distinguish the weather conditions such as sunny, rainy, stormy, cloudy, and more.
Temperature
Temperature refers to the measurement of air in Fahrenheit or Celsius.
Temp High – the highest recorded temperature reading in the interval of time being viewed.
Temp Low – the lowest recorded temperature reading in the interval of time being viewed.
Dew Point
Dew Point is the temperature at which the air becomes fully saturated with water vapor (i.e., 100% humidity).
Dew Point High – the highest Dew Point measurement in the interval of time being viewed.
Dew Point Low – the lowest Dew Point measurement in the interval of time being viewed.
Feels Like Temperature
The Feels Like temperature is a measurement of how hot or cold it feels outside. The Feels Like temperature is calculated and displayed when temperatures are between 40° to 80° Fahrenheit (4° to 27° Celsius).
Feels Like High – the highest Feels Like measurement in the interval of time being viewed.
Feels Like Low – the lowest Feels Like measurement in the interval of time being viewed.
Heat Index
The heat index measures how hot it feels outside and is only calculated and displayed when temperatures exceed 80° Fahrenheit (27 ° Celsius).
Heat Index High – the highest Heat Index measurement in the interval of time being viewed.
Wind Chill
Wind Chill is a measure of how cold it really feels outside and is only calculated and displayed when temperatures are below 40° Fahrenheit (4° Celsius).
Wind Chill Low – the lowest Wind Chill measurement in the interval of time being viewed.
Humidity
Humidity, or relative humidity, is the ratio of moisture in the air compared to the maximum amount of humidity the air can hold, which varies depending on the air temperature.
Humidity High – the highest recorded Humidity reading in the interval of time being viewed.
Humidity Low – the lowest recorded Humidity reading in the interval of time being viewed.
Check this too: Acurite Notos Weather Station How to & Troubleshooting Guide
Wind
Wind Speed is the measurement of the movement of air in the atmosphere.
Current Wind Speed – the latest reading of wind speed measured in mph, km/h, or knots.
Wind Direction – the direction air is blowing from in the atmosphere.
Wind Speed High – the highest Wind Speed measurement in the interval of time being viewed.
Wind Speed Average – the average of all Wind Speed measurements within the period specified.
Rain
Rainfall is the amount of rain measured.
Rain Total – the total rainfall amount recorded for the current day.
Rain High – the highest total rain measurement in the interval of time being viewed.
UV
Ultraviolet (UV) radiation is defined as the electromagnetic spectrum between X-rays and visible light.
This is measured by intensity from 0-16.
1. Low 0 – 2
2. Moderate 3-5
3. High 6-7
4. Very High 8-10
5. Extreme 11+
Light Intensity
This refers to the strength or amount of light produced by the sun and it is measured by Lux.
1. Dark/Night – 0-500 lux
2. Low Light – 501 – 5,380 lux
3. Overcast/Shade – 5,381 – 21,520 lux
4. Daylight – 21,521 – 43,050 lux
5. Direct Sun – 43,051 lux or greater
Lightning Detection
Detects lightning strikes within 25 miles (40 kilometers) and enables a lightning strike counter and estimated distance to the latest strike.
Why is my AcuRite Atlas weather station not working?
Below are some of the most common issues weather stations can have and the best solutions;
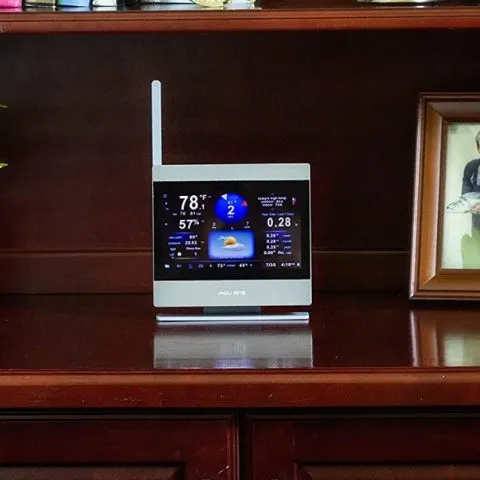
Console Issues
Weather-Station-Display
Console display becomes blank
Sometimes even when the console is switched on, it may not display anything, or the screen is extremely dark (see image on the right).
Cause: This can occur if the console is not being supplied with adequate power. The power cable might be loose.
Solution: Check the power supply and the cable connection. Make sure that the power supply is plugged securely into the power outlet. Next, ensure that the cable tip is fully inserted into the console and that the connection is tight.
If the console still displays blank, lightly wiggle the chord that connects it to the console. Leave the console plugged in for a few hours to charge the battery if the unit has a rechargeable battery. Otherwise, contact the manufacturer.
The Console Displays Dashes
At times, the screen of the console might not show any data. Instead, it might show dashes.
Cause: This is likely due to the sensor array not transmitting data to the console. Either the sensor array has run out of power, or an obstruction prevents the signal from reaching the console. It can also occur if the console itself is unable to receive the data or if the data storage capacity on the console has been exceeded.
Solution: Check the sensor unit thoroughly. Has it run out of battery life, or is there something obstructing the solar panels (if it has any)? If there are any metal objects anywhere between the sensor array and the console, remove them.
Also, make sure there are no dirt obstructions, such as mounds or hills. If there are, you’ll need to move the sensor array to a different location. Try experimenting with the position of the sensor array by moving it around. You may need to move it closer.
If the issue isn’t with the sensor array, you should check if the console has exceeded the storage.
The Console is Sluggish
Console operation becomes sluggish, and the screen might not be clear.
Cause: This is almost always because the temperature around the console is too low. The components are unable to function properly due to extreme cold. This is common if you keep your console outdoors.
Solution: A separate temperature sensor can be installed near your console to check the temperatures regularly. Make sure it’s a wireless thermometer so you can monitor it from indoors. If the temperature keeps dropping below operational level, you may just need to install the console indoors.
The Display Locks
Sometimes the console display can get locked up and won’t work even when the keys are pressed.
Cause: This is usually due to a power surge, which causes the software to malfunction and freeze.
Solution: The console needs to be reset. The batteries and the power supply need to be removed, and then the power must be restored to make the console work normally again. To avoid this problem, always use a surge protector when powering your console.
Odd Values are Displayed
This problem occurs mainly with weather stations capable of connecting to the internet or a computer network. As a result, the console might display odd values or might miss some values.
Cause: This issue may be encountered if the console gets synchronized with another weather station nearby.
Solution: The transmission and reception IDs must be changed to prevent further unnecessary synchronization.
Display’s Contrast Becomes Weak
The contrast and brightness of the console display can become weak over time.
Cause: More often than not, the batteries in the console have become weak, causing the display to malfunction.
Solution: The console batteries must be changed. If your console has a built-in rechargeable battery, check the manual to determine what type it requires. In some cases, the new battery will need to be purchased through the manufacturer.
Other defaults
Incorrect sunrise and sunset time
The console might sometimes display incorrect times of sunrise and sunset.
Cause: This usually occurs when the time settings are incorrect.
Solution: Check one or all of the ing: time zone, latitude, longitude, and daylight savings.
Wind Direction Data is Dashed
Sometimes the console is unable to display wind direction. Instead, it shows a dash sign.
Cause: If the weather station is wireless, this might be due to signal transmission failure. If the unit is cabled, then it might be due to a faulty cable. In some cases, the anemometer itself may also be the cause.
Solution: For wireless units, check the reception. If the unit is wired, then trying replacing the cable. If those steps do not work, the issue is most likely with the anemometer, and you should contact the manufacturer.
Inaccurate Heat Index Reading
The console might display a heat index reading that is too low or too high.
Cause: This may occur due to a calibration issue or problems with the temperature or humidity sensors.
Solution: Your temperature reading is also probably inaccurate—the steps above for troubleshooting the temperature sensor. Also, make sure that the humidity sensor is from any humidifiers or dehumidifiers. Recalibrate both sensors.
Inaccurate Wind Chill Reading
Sometimes the wind chill reading on the console display might be too high or too low.
Cause: The issue is with either the temperature sensor or the anemometer.
Solution: Your temperature reading may also be inaccurate—the steps above for troubleshooting the temperature sensor. Next, examine the anemometer. Is it fully intact? Check the wind speed data. If the wind speed data is also inaccurate, then you may want to contact the manufacturer to get a replacement part.
How to keep your readings accurate
- The weather station sensor suit must not be installed near metal or a heat source.
- The console should always be kept in the range of transmission of the sensor suite.
- The calibration numbers should be checked routinely.
- Batteries must be changed timely whenever necessary.
- Watch out for heat sources, cold air sources, humidifiers, and dehumidifiers.
How to reset my AcuRite Atlas weather station
If your AcuRite Atlas High Definition Display shows no outdoor temperature reading, dashes, or the outdoor temperature reading is not changing, please perform the troubleshooting steps below.
The reset below can be used if the outside temperature data is blank, showing dashes, or stuck on the same reading for an extended period.
Suppose your AcuRite Atlas High Definition Display cannot locate your AcuRite Atlas Sensor and displays the “No Sensor Found” error when attempting to add a sensor to the display. In that case, these steps may also be helpful.
You would want to ensure the following first:
- Verify that you are using a fresh set of batteries. The battery expiration date should be at least six years out. This is because batteries can lose 3% of their power or more every year in storage.
- Relocate the display unit and the AcuRite Atlas sensor. Under optimal conditions, the units can be located up to 330 ft (100 m) of each other.
- Units should be placed at least 3 feet (.9 m) away from electronics that may interfere with wireless communication, such as TVs, microwaves, computers, etc.
- Use standard alkaline batteries (or lithium batteries in the sensor when the temperature is below -4ºF/-20ºC).
- Do not use heavy-duty or rechargeable batteries.
NOTE: It may take approximately 5 minutes for the display unit and sensor to synchronize after replacing batteries.
Hard Reset:
Follow the steps to perform a hard reset.
- Bring both the sensor and display unit indoors and position them side by side.
- Remove the batteries from the sensor and change the sensor to a new ABC channel.
- Go to the main menu by tapping the “MENU” button.
- The “MENU” button is the three white horizontal lines in the upper left-hand corner of the display or the center button with two dots depending on which model of display unit you have.
- Select the “Sensor” or “Connections” option from the menu.
- Select “Remove A Sensor.” If the display shows you a picture of the AcuRite Atlas sensor, Tap “Done” or “Yes” (If the screen does not change when you select Remove a Sensor, skip down to step 7).
- It may ask you to confirm removing the sensor. Select “Yes.”
- The display will revert to the previous screen.
- Tap the back arrow in the upper left-hand corner of the display or select Main Menu to return to the main menu.
- Select the “Factory Reset.”
- You will receive a prompt asking if you want to reset to factory settings. Select “Yes.”
- It will ask you, “Are you sure?”, Select “Yes.” Then, the display will reset itself and go to the main AcuRite logo screen.
- Once the AcuRite logo screen appears, please unplug the display and remove the backup batteries, if applicable, for five minutes to allow the unit to power down entirely before restoring power.
- After power is restored, you will now set up the display by ing the on-screen prompts.
- Then put the batteries back into the sensor directly. ( these troubleshooting steps are without the use of a battery pack and power adapter.)
- Go to the main menu by tapping the “MENU” button. The “MENU” button is the three white horizontal lines in the upper left-hand corner of the display or the center button with two dots depending on which model of display unit you have.
- Select the “Sensor” or “Connections” option from the menu.
- Select “Add A Sensor.”
- The display will look for your sensor and show a picture of it when it is found, asking if you would like to add it.
- Ensure that the designation in the description matches the channel that you set your sensor on.
- Select “Add This Sensor.”
- The display will revert to the previous screen.
- Tap the back arrow in the upper left-hand corner of the display twice to return to the main screen if needed.
- Let both sensor and display sit side by side to establish a connection.
- After a connection has been established, the sensor can be placed outdoors.
Note: Leaving the units side-by-side for 30 minutes will allow you to verify accuracy by comparing the indoor and outdoor readings shown on display. If you are still experiencing concerns, contact the manufacturer.
How do I reset my AcuRite Atlas weather station sensors?
Suppose a section on your multi-sensor display is not receiving a signal from the sensor, or the temperature is flashing, showing dashes, or is not updating. In that case, the unit may be experiencing wireless interference. Perform a hard reset to gain a strong connection between the units.
This hard reset procedure is for AcuRite multi-sensor station models #06043M and #02059M.
- Verify that each sensor has a different channel selected by checking the switch position in the battery compartment.
- Bring both the sensor and display together and position them side by side.
- Remove all batteries from the sensor (or sensors).
- Remove all batteries from the display, then press and hold the reset button for 20 seconds if applicable.
- Wait 1 minute to ensure that any remaining battery power has been discharged from both units.
- Reinstall batteries in the outdoor sensor (or sensors) first.
- Reinstall batteries in the display last and immediately press and hold the reset button again for 20 seconds if applicable.
- Let units sit within a couple of feet of each other for a few minutes to ensure a wireless signal is received. *The display should receive the signal within several minutes.
- After a connection has been established, you may place the sensor (or sensors) in their intended locations.
NOTE: If you have multiple sensors connected to the Multi-Sensor Digital Thermometer and are unsure which sensor is experiencing interference, bring all sensors together with the display.
The A-B-C switch positions must differ between each sensor if you are pairing more than one temperature sensor with the display. If the signal connection fails after the units are separated, try a new location for the display, the sensor, or both.
How to calibrate AcuRite Atlas weather station sensors
This calibration procedure can be used if the rainfall measurements produced by the AcuRite Atlas sensor are inaccurate. This procedure does not need to be performed upon receiving the AcuRite Atlas sensor. It is calibrated during the manufacturing process.
To calibrate the rain gauge on the AcuRite Atlas sensor, follow these steps;
- First, make sure the AcuRite Atlas sensor is perfectly level using the built-in bubble level.
- Place the display unit close by so you can monitor it during the calibration process.
- Make a pinhole in the bottom of a plastic cup.
- Hold the cup over the rain gauge and fill it with exactly 1 cup (8 oz.) of water, allowing the water to drip into the rain gauge slowly.
- You should hear the internal buckets tip and see the water drain through the rain gauge.
- A few seconds after each bucket tip, the display console will display rainfall as approximately 0.01″ or more increments.
- The cup of water should take more than 20 minutes to empty; a quicker period will result in an inaccurate calibration. (We’re trying to simulate an average steady rainfall.)
- When the cup is empty of water, the display console should register 0.61.”
- If the rain gauge doesn’t register close to 0.61″ after the cup is empty of water, then you should make an equal adjustment to the two calibration screws beneath the tipping lever.
- Be sure to adjust both screws to the same amount.
- Turning screws clockwise will decrease the rainfall amount.
- Turning the screw counter-clockwise will increase the rainfall amount.
Adjustment:
- To adjust the rainfall reading by 2.5%, turn both screws 1/4 of a turn.
- To adjust the rainfall reading by 5%, turn both screws 1/2 of a turn.
- To adjust the rainfall reading by 7.5%, turn both screws 3/4 of a turn.
- To adjust the rainfall reading by 10%, turn both screws one complete turn.
There should be nearly an equal number of water drops between bucket tips. If not, adjust the calibration screws beneath the tipping lever until an equal number of water drops are tipping the buckets. Then, restart the calibration procedure.
If you don’t hear the buckets tipping and see water dripping alternately out of each drain, there may be an issue with the rain gauge or its adjustment.
Why is my AcuRite weather station flashing?
Flashing of the outdoor temperature is an indication of wireless interference.
Follow these steps to resolve the issue;
- Bring both the sensor and display unit indoors and remove batteries/power adapter from both.
- Make sure the A-B-C switch on both units’ matches.
- Reinstall batteries in the outdoor sensor.
- Reconnect the AC adapter and reinstall batteries in the display unit.
- Let the units sit within a couple of feet of each other for about 20 minutes to gain a strong connection.
AcuRite Atlas outdoor sensors not working
Here are some reasons why your sensors are not working;
Battery Issues
The most straightforward approach to figuring out why the unit won’t read outdoor temperatures is to consider swapping out the batteries in the sensor for new batteries. The sensor has trouble relaying info to the unit as battery power fades since the data has to “travel” through doors and windows.
The weather also affects the batteries. Extreme cold or below zero temps over a duration has a draining effect on batteries. Use two AA lithium batteries, which are resistant to extreme cold.
Setup
If you swap out the batteries in the sensor, don’t forget to reset the unit by pressing the “Channel” button on the rear face of the display unit. You need to hold it down for at least three seconds to reset the sensors.
You’ll need to press the “TX” button for the display unit to search for and find the sensor’s signal. Then press the “Mode” button three times; press it once, and it gives you the humidity and temp reading, twice reads only the humidity, and three displays the temperature only.
Sensor Placement
The placement of both the sensor and the display unit plays a large part inaccurate outdoor readings. The display unit needs to be placed ideally near a window to allow for more accessible reception.
Concrete or metal paneling tends to disrupt the flow of the signal, so you want to place the unit and the sensor in such a way that the signal path encounters the least resistance.
Place the sensor up high on an outside wall, away from any electrical interference from satellite receivers and the like. Then, try a few different locations until you find the right spot that picks up the signal.
Damaged Sensor
If fresh batteries don’t do the trick, the sensor may have become damaged. In addition, while the sensors are manufactured to be resistant to high heat and precipitation, realize they aren’t weatherproof. That rainwater may have seeped into the unit and corroded some internal components.
If you suspect this may be the case, you’ll need to purchase a replacement unit from the manufacturer and follow the instructions to configure the new sensor to the wall display.
AcuRite Atlas weather station searching for a sensor
Do the following to reconnect the sensor;
• Relocate the display unit and the outdoor sensor. The units must be within 330 ft (100 m) of each other.
• Make sure both units are placed at least 3 feet (.9 m) away from electronics that may interfere with the wireless communication, such as TVs, microwaves, computers, etc.
• Use standard alkaline batteries (or lithium batteries in the sensor when the temperature is below -4ºF/-20ºC). Do not use heavy-duty or rechargeable batteries.
NOTE: The display unit and sensor may take up to 20 minutes to synchronize after batteries are replaced.
How to update your AcuRite Atlas weather station
The AcuRite Atlas weather station is designed to update its firmware over Wi-Fi automatically.
How to Setup Wi-Fi for the Weather Station
If your display unit has the Direct to Wi-Fi capability to stream its data to both My AcuRite® and Weather Underground, the following procedure can be used to set up this connection.
These steps are designed for use with AcuRite Iris™ display model #06100M (Bundle #01544M) and AcuRite Atlas display model #06099M (Bundle #01001M). Please follow the steps carefully, as the order is crucial to the success of the Wi-Fi setup.
Before you begin:
- Pair the sensor and the display per the manual’s instruction. Confirm the display is maintaining 4 bars of signal strength and is receiving current data.
- Make sure that the display unit is plugged in with the included power adapter. Unfortunately, this feature is not available when only using backup batteries.
- If applicable, please make sure that you have backup batteries installed.
- Find a suitable place to mount the outdoor sensor. Once the sensor is mounted, remove the rain gauge stabilizer from the sensor.
- Make sure DHCP is enabled on your router. Most routers have DHCP enabled by default.
- Ensure your router is broadcasting a 2.4 GHz network.
- The weather station display is equipped with a Wi-Fi module that only supports 2.4 GHz wireless networks.
- These products support the following security protocols on a 2.4 GHz network: WPA-TKIP, WPA2-AES-PassPhrase, WPA2-AES-PSK, Combo-WPA-TKIP, and Validation-OPEN.
- If neither of these options is available, look for one that says something like WPA Personal.
- Input your Wi-Fi network’s SSID (name) and Password.
- Lastly, open an internet browser and type 192.168.4.1 in the URL – DO NOT PRESS ENTER
To connect your display to your Wi-Fi:
From a computer, open the network tab and click on the AcuRite Wi-Fi Display Model Number. Of course, you can also use a smartphone or tablet, but the Wi-Fi connection setup works best from a laptop or desktop computer.
- If you do not see the display under your network tab, press the gear button on the AcuRite Iris™ display.
- Or go to Connections in the Main Menu of the AcuRite Atlas display and select Wi-Fi Setup.
- These actions reactivate the Wi-Fi feature of the displays for an additional 30 minutes and allow the display to appear on the network to reconnect.
- Click the box to connect automatically.
- Press the connect button for the network that includes the Display Model Number.
- This will disconnect your computer/device from your internet, and the display’s network may also say No Internet.
- After 20 seconds, type 192.168.4.1 t into the browser and press enter.
- Once the AcuRite Wi-Fi display settings website (splash page) is open, select your Wi-Fi network’s SSID from the dropdown (if you have a 2.4 GHz and a 5 GHz, be sure to choose the 2.4 GHz), enter your Password, Station ID, and Station Key, then click save.
- Your device will automatically reconnect to your Wi-Fi network.
- If you cannot open the AcuRite Wi-Fi display settings website after connecting to the display, disconnect from the display under the network tab.
- Open a different internet browser, enter The IP address 192.168.4.1 into the URL but DO NOT PRESS ENTER.
- Connect to the display under the network tab and wait 20 seconds before entering the internet browser with the IP address entered.
NOTE: If you receive an error stating that “This site can’t be reached,” please make sure that you are still connected to the AcuRite network and not your home Wi-Fi network.
How to Add a Connection Device to My AcuRite
To access the internal splash page to make any changes to the network credentials, press and release the gear button on the front of the AcuRite Iris™ display or go to Connections in the Main Menu of the AcuRite Atlas display and select Wi-Fi Setup.
This will reactivate the Wi-Fi feature for an additional 30 minutes and allow the display to appear on the network to reconnect.
AcuRite Atlas weather station speed not working
We have found that the wind cups can shift out of place during shipping. Please pull the wind cups down, away from the wind vane until they click into place. The wind speed should register within 1-2 minutes. You may need to perform the hard reset at the bottom of this article if the wind speed does not update right away.
Confirm the connectors are secure. Please perform the troubleshooting steps below;
- Remove the batteries from the sensor and remove the wind assembly as shown above.
- Unplug the connectors, as shown above, for 1-2 minutes.
- Reconnect the connectors.
- Reinstall the wind assembly.
- Reinsert the batteries into the sensor, battery pack, or plug in the power adapter.
- Confirm the red light near the AcuRite Atlas sensor’s battery compartment flashes once every 10 seconds.
- If the light flashes rapidly for 5 seconds once powered on, the wind assembly connectors may not have a secure fit.
- The wind speed should update in 1-2 minutes. However, you may also need to perform the hard reset below using the AcuRite Atlas display model 06061M.
If the wind speed readings are inaccurate:
Check the sensor’s location and ensure it’s mounted a minimum of 5-feet in the air with no obstructions around it (within several feet). Also, ensure the wind cups are spinning freely. If they hesitate or stop, try lubricating with graphite powder or spray lubricant.
The National Weather Service recommends mounting the sensor 33 feet above the ground with no obstructions within 100 feet for the most accurate wind speeds. You should also confirm the connectors are secure before you troubleshoot the sensor.
Follow these steps to remedy the wind reading variance;
- Remove the batteries from the sensor and remove the winding assembly as shown above.
- Unplug the connectors, as shown above, for 1-2 minutes.
- Reconnect the connectors.
- Reinstall the wind assembly.
- Reinsert the batteries into the sensor, battery pack, or plug in the power adapter. Confirm the red light near the AcuRite Atlas sensor’s battery compartment flashes once every 10 seconds.
- If the light flashes rapidly for 5 seconds once powered on, the wind assembly connectors may not have a secure fit.
- The wind speed should update in 1-2 minutes.
- You may also need to perform the hard reset below using the AcuRite Atlas display unit.
Note: Pro weather stations are typically mounted at 33-feet or higher. Make sure to compare data using a sensor positioned at the same mounting height.