
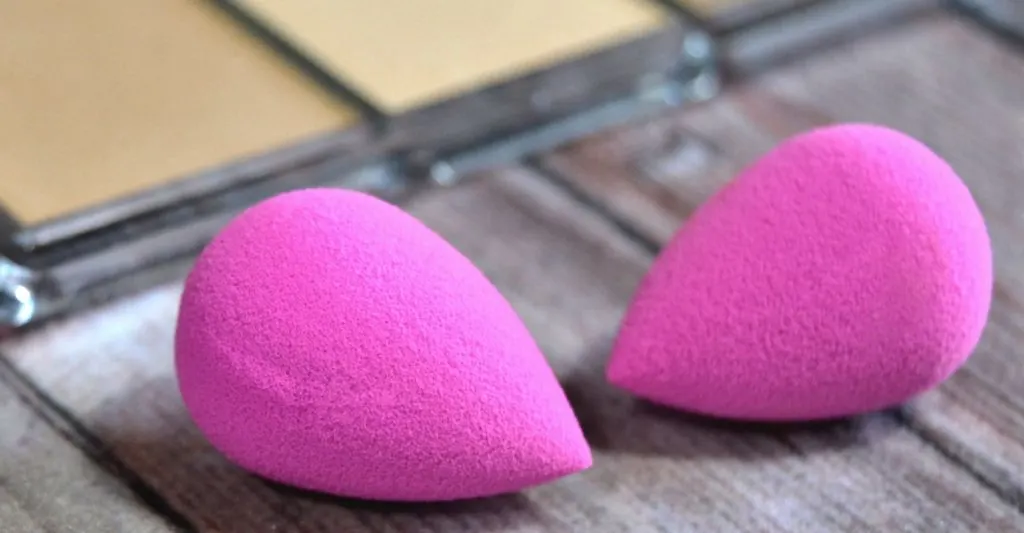
Applying foundation using a brush or with your fingers can result in streaks; however, you can use the Beautyblender to apply foundation, tinted moisturizer, and other makeup without fearing streaks. It’s no doubt that the Beautyblender has changed the makeup game forever.
If you love makeup, you probably use the Beautyblender daily and have incorporated it into your entire makeup routine. However, there is a lot that you should know when using this useful sponge.
Here is what you should know to help you properly use a Beautyblender:
What Is the Purpose of a Beautyblender?
The Beautyblender is a handy makeup sponge that you can use for practically anything in your makeup bag including, applying foundation, concealer, bb cream, etc. However, if you want to get the most from your Beautyblender, it’s advisable to follow these steps:
Wet
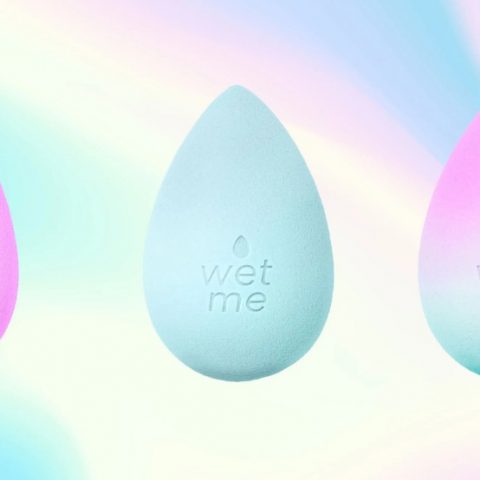
You might be surprised that the Beautyblender is meant to be used when wet. Before using the sponge, be sure to run it under your tap until it’s thoroughly soaked. You will notice that the Beautyblender will almost double in size when thoroughly wet.
Do not worry because this is supposed to happen because the unique aqua-activated foam material in the sponge absorbs the water rather than absorbing your product. More of your makeup will remain on your skin when this process occurs without the sponge soaking it up.
Squeeze
Once you’ve thoroughly soaked your Beautyblender, it’s time to squeeze it out. The purpose of this step is to help you apply your makeup with a damp blender; therefore, it’s best to wring out all of the excess water.
Once you’ve wrung out all the excess water, your Beautyblender should be at the ideal dampness to start dipping into your product. It’s worth noting that you aren’t wasting your product because it’s simply bouncing off of your sponge without getting soaked into it.
Bounce
This step involves bouncing powder, bb cream, liquid foundation, or concealer across your skin to achieve a flawless finish. It’s best not to drag the blender across your face for excellent results. Bouncing helps you to achieve seamless coverage without lines and streaks.
It’s best to bounce the pointed tip of the Beautyblender in hard-to-reach areas such as under the nose and eyes and bounce the broader end on larger surfaces, such as chin, forehead, and cheeks.
What Is the Difference Between a Beautyblender and a Makeup Sponge?
There are several differences between a Beautyblender and a makeup sponge. Here are some of the differences that you should know:
The Beautyblender Absorbs Water
Unlike a makeup sponge, using a Beautyblender entails soaking it in water first to help the sponge absorb less foundation, giving your makeup an airbrushed and poreless look.
In addition, Beautyblender’s hydrophilic sponge is designed to absorb water, leaving less room for the sponge to absorb your foundation; hence, it helps in reducing product wastage.
Lifespan
Makeup sponges usually have a shorter lifespan than the Beautyblender. Additionally, you can use the Beautyblender for at least three months before disposing of them, especially if you clean them appropriately.
Price
The Beautyblender is pricey than other makeup sponges; however, according to various makeup artists, these expensive versions are very soft on most people’s skins and are least likely to irritate, unlike makeup sponges.
The Beautyblender holds up pretty well to washing, unlike cheaper makeup sponges. However, it’s advisable always to wash your applicator sponge after every use; therefore, you need a material that can withstand this constant washing.
However, it’s prudent to clean and change your sponges as often as possible because there are several risks associated with using older brands, despite their brand.
When you fail to change or clean your sponges, bacteria can proliferate in them, leading to infections. Additionally, dust and dirt that builds up in an old sponge can increase skin sensitivity, causing contact dermatitis.
Do You Really Need a Beautyblender?
Using a Beautyblender to apply and blend foundation and concealer makeup is a complete game-changer. Beauty blenders make the foundation application almost foolproof.
Not only does the Beautyblender make it easier to reach awkward places that many brushes cannot, such as under the eyes and around the nostrils, but it also helps to blend makeup seamlessly.
Additionally, if you’re trying to master the no-makeup look, using the Beautyblender and your favorite foundation or concealer might be your new technique. When trying to achieve this look, always work with a damp Beautyblender because it helps a face go from “made-up” to “flawless skin.”
For example, you can dot foundation on the back of your hand after dampening the sponge and then tapping the Beautyblender into your favorite product to absorb. Proceed by stippling the product onto the skin, starting in the center of your face, blending into the jawline.
A Beautyblender is also great for applying your favorite skincare products, such as serums and moisturizers. The Beautyblender will not absorb them, and there’s less mess on your fingertips, and you’re most likely to achieve an even application.
Additionally, some makeup artists believe that, unlike other makeup sponges, the Beautyblender creates a more poreless finish due to the sponge’s hydrophilic material, which is in place to absorb water. As a result, the water leaves less room for the sponge to absorb your foundation, reducing product waste.
Beauty blenders are also rounded; therefore, you don’t get any lines or marks left from edges like you might when using a triangular wedge sponge. You can use the Beautyblender by patting it against the skin instead of rubbing it across the surface to spread it. Following this procedure helps avoid streaking and makes your makeup look more natural.
How to Use a Beautyblender
The Beautyblender sponges promise a flawless-looking application; however, part of getting the perfect look entails knowing how to use the item. Here is how you can use a Beautyblender sponge to achieve a perfect look:
Prep Your Skin
Professional makeup artists advise that the perfect way of getting flawless skin while using a Beautyblender begins before you even start using the sponge. Then, you can get flawless skin with adequate preparation and the proper care.
Some products might not interact well with others chemically or aren’t a good fit for the skin types; therefore, this aspect can hinder flawless skin. Consequently, it’s best to take care of your skin before you start using the Beautyblender.
Clean the Beautyblender Before and After Every Use
The Beautyblender comes in direct contact with your face, and you often use it when wet; therefore, it’s pretty easy to harbor bacteria and other germs. Consequently, you must wash your Beautyblender, ideally after each use.
Cleaning your Beautyblender after each use will help you be able to hold onto it for at least two or three months without much trouble.
Giving your sponge a haphazard rinse will not suffice; therefore, you should clean it properly with an appropriate Beautyblender cleanser to make it look as good as new. First, however, ensure that you’re using the correct soap because some soaps foam too much or not as much, which can affect the sponge’s elasticity.
Several soaps and cleansing methods can cut through the excess makeup on the Beautyblender, depending on its severity.
For example, you can use fragrance-free dishwashing soap or specific cleaners from Beautyblender.
Wet the Beautyblender
You should always use your Beautyblender when it’s damp to ensure that it blends seamlessly. Therefore, the golden rule of Beautyblenders is wet, squeeze, and bounce.
The Beautyblender is hydrophilic; hence, it’s designed to absorb water, and when it’s wet, it’s also too full to absorb your foundation. The hydrophilic science means the pre-soak before makeup application allows it to blend seamlessly and not wastefully absorb all your great products.
Bounce It
The best technique for applying makeup with the Beautyblender is using a stippling or bouncing motion instead of sweeping or wiping. You can press the Beautyblender slightly when bouncing so that you’re effectively blending, but not too hard to pull up your makeup.
It doesn’t matter if you choose to apply makeup to your face or the Beautyblender first. For example, you can swipe some foundation on your face with your fingers before going in with the Beautyblender. Then, you can blend in the foundation all over your face using the sponge’s broader side to help speed up the process.
Flip the Beautyblender and Use Both Sides
The teardrop shape of the Beautyblender is no accident; it was shaped to give different levels of coverage. You can use the Beautyblender’s end (the widest part) to apply foundation if you want full range. On the other hand, if you wish for more sheer coverage, you can use the side and roll and bounce it onto the skin.
You can use Beautyblenders for foundation applications. However, if you apply a bit too much product on your first dab and have a heavy splotch of the product on the sponge, it’s best to avoid using the same side to blend it out.
Check this too: How to Get Permanent Marker Off Wood
Using the same side means that you’ll be adding even more product; instead, flip the sponge, buff, and thin out the product using the clean side, and then continue.
Don’t Drag the Beautyblender
It’s best never to drag your Beautyblender when blending your makeup. Instead, always use a dabbing, bouncing, or patting motion if you want to achieve the perfect airbrushed results.
Use the Beautyblender to Smooth Streaks
If you still want to use your makeup brush, you can use it and use the Beautyblender to remove any streak marks left over by the brush.
Use the Beautyblender for Skin Care Too
You’re underutilizing your Beautyblender if you’re using it for your makeup only. You can use it for all the skincare steps, foundation, powder, contours, and cream blush. A Beautyblender is perfect for applying skincare products because it presses everything in nicely and distributes serums evenly.
Air Dry the Beautyblender Every Time
Beauty blenders expand when they soak up water; therefore, it’s advisable to wash them often and frequently and air dry them thoroughly. Bacteria and mildew breed in trapped moisture, and you can reactivate them when you rewet the Beautyblender for use.
If you’re traveling, avoid putting a wet or damp Beautyblender in an airtight makeup bag unless it has mesh or has enough air circulation to allow the sponge to dry thoroughly.
Beautyblender’s Secret Uses
It’s no doubt that Beautyblender is beneficial in so many ways. Here are some other ways that you can use the Beautyblender:
Eyeshadow Application
You can use your Beautyblender to apply eyeshadow. You can create an easy, pulled-together, monochromatic look using the Micro Mini Beautyblender by following these steps:
- Get your favorite three-in-one cream product and use the rounded end of a damp Micro Mini Beautyblender to apply a sheer layer of color to your eyelids.
- Concentrate on placing the cream close to the lash line, and then use the other side of your Beautyblender to diffuse the color towards the crease.
Use Your Beautyblender as a Nail Sponge
Before throwing it out, you can turn your used Beautyblender into a nail sponge. Then, after painting your nails, use the pointed end at a 450 angle with a contrasting nail polish shade to add a pop of color to the tip of your nails. You can also use it all over to create two-tone nails.
Create Monochromatic Cheeks and Lips
You can use the rounded end of the Micro Mini Beautyblender to apply the product to the apples of your cheeks. You can then finish the look by using the pointed end to add color to your lips.
Touch-up Your Roots
You can also use Beautyblender with matte shadow to touch up roots if you’re in a bind.
How to Wet a Beautyblender
The Beautyblender was always designed to be used when wet; however, how wet you make your Beautyblender can determine the finish of your foundation.
For example, if you want a light, sheer, and natural finish from your foundation, you can use the sponge when it’s damp. On the other hand, if you’d like a lighter base, consider running the Beautyblender under a tap before using each time and then squeeze out the excess water to ensure that you have a damp and plump sponge before dipping it into your product.

This method ensures that the Beautyblender doesn’t soak up any excess product and instead transfers your foundation seamlessly and smoothly to the skin.
If you’re wondering whether you should wet your Beautyblender with cold or warm water, the decision is up to you because either can work. However, a great hack is to use warm water in the winter to help melt products beautifully into the skin and make it more supple. You can also use cool water to refresh and invigorate the skin in the summer.
Do You Use a Beautyblender Wet or Dry?
It’s crucial to avoid using a dry Beautyblender because it will eat up your makeup product. Instead, you can dampen the Beautyblender under water and squeeze out any excess liquid. Also, if you love makeup, consider investing in a few sponges so that you always have a few ready and not wait on your favorite one to dry before using it.
Do You Wet a Beautyblender for Powder?
Yes. You have to wet it. You can use the Beautyblender for any type of makeup application, including powdered bronzer, cream primer, and foundation. The Beautyblender is meant to be used wet, never dry, because the moisture transforms cake-y looks into luminous, dewy finishes.
Beautyblender Versus Brush: Which Should I Use?
When applying makeup, you might be confused if you should use a Beautyblender or makeup brush. The information around the functionality of the two items can leave you pretty confused. Here is what you should know about using a makeup brush or a Beautyblender:
Beautyblender
The Beautyblender is the updated version of a makeup sponge. It allows your foundation to be effectively pressed onto your skin, and into your skin, for a more flawless natural look. Beauty blenders do not usually leave blend lines and streaks.
Additionally, Beautyblenders transfer the product to your skin effectively, allowing you to use less foundation and get full coverage.
You can use a Beautyblender if you have dry skin because the bristles of a makeup brush can irritate your skin, making it look flaky. The smooth, soft surface of a Beautyblender is gentler on the skin and can help you achieve a flawless look without leaving you with a cake face.
On the other hand, applying makeup using a Beautyblender involves stippling it in brief patting motions. Therefore, using a Beautyblender can be pretty time-consuming, and it might be best to avoid it if you aren’t ready to spend time stippling on your makeup to achieve a perfect look.
Additionally, a Beautyblender uses lesser product, and due to this, it might not work too well with light coverage foundations. As a result, you might end up using a lot more foundation and end up spending more.
If you also don’t have the patience or time to clean the Beautyblender, you should avoid it because it’s best to clean it after every use.
Makeup Brushes
A makeup brush is your best bet if you’re looking for an airbrushed look. Makeup brushes are also perfect if you prefer powder to liquid foundation. Brushes are also a lot more bendable and can be pretty precise for foundation application. Additionally, it’s also way easier to build coverage with a makeup brush.
While you don’t have to clean your makeup brushes as often as your Beautyblender, a makeup brush still needs to be cleaned and might require a unique cleanser, which is quite expensive.
Additionally, there’s always the risk of a makeup brush leaving your face looking streaked. The brush can also leave your face looking streaked and make your blend lines visible, making your look unnatural.
Can You Wet Your Beautyblender With Setting Spray?
Most makeup artists agree that using a dry Beautyblender is the most common mistake you’re making because if you use the Beautyblender dry, it won’t blend the makeup well. Before using your Beautyblender, you can soak it in water to ensure it expands and is completely saturated.
You can also soak the Beautyblender in setting spray or rose water to ensure that your skin stays hydrated and your makeup doesn’t budge throughout the day.
How to Use a Beautyblender for Concealer
If you want to lighten dark circles and cover up acne-like experts do, you should know their secrets about using concealers. Here is how to do it like a pro using the Beautyblender:
Don’t Be in a Hurry
The biggest mistake people make when applying concealer is forgetting to moisturize first. If your skin isn’t well hydrated, concealer will not glide on smoothly. However, gliding is essential when it comes to the sensitive skin under the eyes where there is discoloration or darkness.
Apply Foundation First
Most people apply concealer first before applying foundation. However, you should apply foundation first due to the following reasons:
- First, it helps even out discoloration.
- Second, it gives a base to blend with your concealer using your Beautyblender Micro Mini.
- Third, it hides imperfections and darkness.
Using foundation first might solve some of the problems you would address with concealer; therefore, you’ll use less. Less makeup means more money for you.
Lighten Up- A Little
Lightening up a little is considered a good thing; however, that’s not always the case when it comes to concealer. For example, some people often choose an extra light color to cover dark circles. However, this practice only focuses on problem areas instead of covering them up.
You need a color closer to the rest of your skin and only a bit lighter than your natural color for a base. After this, you can go back with a brightener if there’s a need.
Be Twice As Shady
Most makeup artists know that it’s pretty rare for the same concealer to work well all over your face. Using a concealer to cover bags under your eyes is somewhat different from using it to spot-treat acne; therefore, you might need two in your makeup bag.
You can try a concealer for dark spots and blemishes and another one for under-eye circles.
Apply Yourself
It’s best to use a suitable concealer applicator, and you’ll probably use less of it. If you’re dealing with dark spots and blemishes, you might need a dual-sided applicator that’s targeted to help you dab and blend outwardly into your foundation.
A dual-sided applicator has been challenging to find in the past; however, you can use a Beautyblender to work magic. Here is what it does:
- The flat side deals with broad strokes under the eyes.
- The egg-shaped side tackles spots over the brows
- The pointed tip draws exact lines for covering blemishes and contouring.
Don’t Smear Concealer All Over Your Face
Don’t smear concealer all over your face because you should only use it to spot the target. However, before you start spot treatment, it’s best to narrow down which specific problem you’re trying to address.
Circle Back
When you’re dealing with dark circles, it’s best to follow these three basic steps:
- Dab on a peach-toned concealer to help balance out the blue.
- Blend and go over that with the concealer that you’ll use on the rest of your face.
- Finally, smooth out creases and use a dampened Beautyblender Micro Mini to pick up extra concealer.
It’s best not to skip the last step because your concealer might get cakey if you do. Cakey makeup is not appealing at all.
Set and Forget
Using a concealer is an excellent first step to balance out problem areas such as the nose, which is prone to redness; however, concealer will not get the entire job done. It’s best to use an oil-absorbing setting powder to prevent the makeup from wearing off quickly.
What Is the Best Way to Clean a Beautyblender?
As mentioned before, it’s advisable to clean your Beautyblender after every use to get rid of makeup, skin gunk and grime, bacteria, and skin oils. However, even if your Beautyblender is “antimicrobial,” it doesn’t mean that it will stay clean magically.
The antimicrobial properties are only meant to create a less hospitable environment for bacteria to grow; however, they don’t help with the buildups that might lead to breakouts, irritation, and inflammation.
The best thing is that cleaning your Beautyblender and other makeup sponges is not time–consuming. Additionally, several effective cleaners and YouTube tutorials can guide you through the cleaning process.
Here is how you can clean your Beautyblenders:
Use Soap and Water
Using soap and water is the easiest method of cleaning your Beautyblender because it only requires those two primary items. It doesn’t matter if you opt for a bar or liquid cleanser because either will leave your Beautyblender looking brand new. Here is how to do it:
Wet Beautyblender
Hold your Beautyblender under running water until it expands in size.
Work in The Soap
If you opt for liquid soap, squeeze some directly on the Beautyblender and work it in by massaging with your fingers or up against the palm of your hand to break up makeup. Rub the Beautyblender directly on the soap to create lather if you’re using bar soap.
Using dish soap will also give you great results.
Rinse
Rinse your Beautyblender out under running water after it’s nice and soapy. Ensure that you gently squeeze it while rinsing to ensure no soap gets stuck inside.
Soak Your Beautyblender
It might be best to soak your Beautyblender for a little longer if it’s filthy. For example, you can tell if your sponge is dirty if you can’t remember its original color. Here is how to do it:
Prepare Your Soap Bath
You can prepare your soap bath either in a small bowl or a clean sink and proceed to mix up some water and liquid soap. If you’re worried about killing bacteria, you could boil some water and use it with liquid soap.
Soak
Place your Beautyblender in the mixture and let it sit for a few minutes to loosen and break up the makeup.
Spot Clean and Dry
After time lapses, you can give your sponge a few squeezes to squish the soap solution through. Next, you can add a little more soap to areas that require extra attention and massage it on your palm. Finally, rinse the Beautyblender thoroughly under warm running water.
Clean Your Beautyblenders in the Washing Machine
Tossing your Beautyblenders in the washing machine is an easier way of cleaning them if you have several of them. However, this method is only reasonable if you have enough Beautyblenders to make it worthwhile. Here is how to do it:
Gather Materials
Gather all your Beautyblenders and put them in a net lingerie bag, and then toss the bag in your empty washing machine.
Run the Wash
You can add a combination of laundry detergent and Beautyblender liquid cleanser before running your washer on gently, with an extra rinse cycle. Then, remove the Beautyblenders from the washing machine and keep them in the bag to hang dry.
Cleaning a Beautyblender in a Microwave
If you want to take the extra precaution of killing bacteria without going the washing machine route, you could try the microwave method. Here is how to do it to avoid creating a melted mess:
Mix Soap and Water
Mix water and a few squirts of soap in a microwave-safe cup. You don’t have to do precise measurements; however, ensure that your Beautyblender can be fully submerged. Wet your Beautyblender in clean water, and then put it in the soap mixture.
You can consider adding some olive oil to the mixture for extra cleansing.
Heat it Up
Microwave the cup for about a minute, and then let it cool before grabbing it. Your Beautyblender should be nice and clean at this point, and the soap and water solution should be full of foundation.
Rinse and Squeeze
Give your Beautyblender a final rinse under clean running water before squeezing out any foundation remnants, and then set it aside to air-dry it.
How Often Should You Clean a Beautyblender?
It’s best to clean your Beautyblender after every use to avoid the spread of germs and bacteria. Your Beautyblender needs a little more love and care than your regular makeup brushes. You can use any of the techniques above to ensure that you have a clean Beautyblender.
How to Dry a Beautyblender
Caring for your Beautyblender entails cleaning it and allowing it to dry well. After cleaning your Beautyblender, ensure that you remove all suds from it. You can squeeze it gently and then lay it on a fresh paper towel. You can get rid of the excess water by hand and then roll it into paper towels to eliminate any excess water.
However, you might find that your Beautyblender still feels damp even after using paper towels to blot out the water. In such cases, it’s best to allow it to air dry completely before your subsequent use.
If air drying your Beautyblenders takes long, you can also try these methods to hasten the process:
Use a Towel
You can use a clean, dry towel to hasten your Beautyblender’s drying speed. As soon as you squeeze the excess water out of the Beautyblender, you can wrap it up in a towel and squeeze it some more. However, avoid leaving your Beautyblender in the towel because doing so might prevent it from drying. After this, air dry the Beautyblender to ensure that you don’t store it when it’s damp.
Use a Blow Dryer
If you need to use your Beautyblender urgently, you can use a blow dryer to dry it up faster. However, be careful when using this method because Beautyblenders don’t handle high heat very well. Also, you can hold your hairdryer further from your Beautyblender and keep it on a low setting because putting it too close to the Beautyblender could ruin its material.
A Fan Could Help
Hairdryers are great because they’re blowing air; however, the air is too hot and could ruin your Beautyblender if you fail to take the necessary precautions. If your hairdryer has the cool blast option, you should switch it to that to avoid damaging your Beautyblender.
If you want to avoid heat damage altogether, you could try to place your Beautyblender in the direct path of a desk fan. Then, be sure to angle the fan’s head to help it blow directly onto your Beautyblender.
This technique allows your Beautyblender to dry out much faster without worrying about heat damage. Then, you can leave the fan blowing all day while completing other tasks and have a dry Beautyblender.
Although using a fan is great for drying your Beautyblender, you should never forget to squeeze out excess water and use paper towels or a clean, dry towel to absorb up any excess water. This procedure ensures that your Beautyblender dries up as fast as possible.
Place Your Beautyblender by the Window Where the Sun Hits
If you live in a warmer climate, you could let the sun help you dry out your Beautyblender. In addition to helping you dry the Beautyblender, sunshine also helps kill off mold and bacteria.
All you have to do is wash the Beautyblender, rinse it, squeeze out any excess water, use paper towels to remove lingering dampness, and then place it in the sunshine.
If you have a brightly-colored Beautyblender, you might be concerned about fading color; however, you shouldn’t worry much about it if it will be clean and completely dry.
Use the Radiator
You could use the radiator to dry your Beautyblender during the colder months. However, it’s best not to put it directly on the radiator because you could ruin it. Instead, put it near the radiator to take advantage of the drying effects.
What to Avoid When Drying a Beautyblender
There are numerous places where you could dry your Beautyblender; however, the bathroom isn’t one of them. The bathroom’s steamy environment could lead to mold growth on your Beautyblender; therefore, be sure to move it out of the bathroom to let it dry.
It would help if you also considered moving your beauty products from the bathroom because the steam could damage them.
How Often Should You Replace Your Beautyblender?
Washing your Beautyblender after every use is crucial because it helps you avoid dirt and bacteria that might clog your pores. Additionally, regular washing enables you to avoid product buildup inside the sponge.
However, when your Beautyblender starts to feel hard and resistant when you squeeze it even after a thorough wash, it might mean that there’s too much old product built up deep inside, which you won’t be able to break up or get removed. It might be time to throw the Beautyblender away in such a situation.
Additionally, if your Beautyblender begins to crack or crumble, it’s best to replace it because there is no use in trying to use it. After all, it won’t give you a uniform product application.
You should also consider replacing your Beautyblenders if you used them when you had a bad cold, virus, break out, or virus because it isn’t worth risking reinfection.
A good rule of thumb is to replace your Beautyblender every three to six months, just like your mascara and toothbrush. If you’ve been cleaning your Beautyblender after every use, you shouldn’t have a problem making it to that mark.
What Can I Use Instead of a Beautyblender?
The Beautyblender is a great sponge that blends everything to perfection. However, other blending tools can get the job done just as well. Here are some of them:
The Artis Oval Brush
Although the Artis Oval Brush is pretty pricey, it has become a staple to beauty bloggers who swear by it. It has a unique shape, soft and fine bristles that allow the brush to blend to perfection.
BlendSmart Brush
The BlendSmart Automated Foundation Brush rotates to help you get the best coverage possible with the least amount of work.
Kabuki Brush
The Kabuki Brush is perfect for liquid or powder foundation and helps your makeup sink into every crease and cranny, leaving you with a flawless finish. Additionally, the brush is portable.
Tarte Airbuki Powder Foundation Brush
This brush is perfect if you’re a powder foundation user.
Bare Minerals Perfecting Face Brush
The Bare Minerals Perfecting Face Brush is great for blending and is cost-effective.
A Beautyblender can simplify your makeup and skincare routine; therefore, it’s best to take care of yours, clean it after every use, and ensure that it dries well to prevent mold from growing on it.