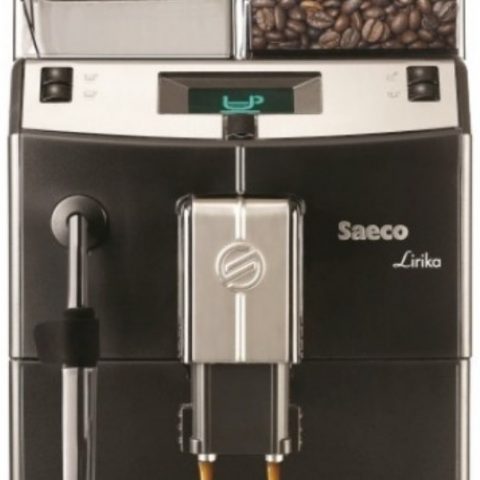
Saeco espresso machines are not only reliable, but they are also durable and efficient to boot. They make brewing a cup of coffee easy while saving money by making your favorite cup of coffee at home instead of buying coffee, which adds on purchases that can be pretty expensive in the long run.
But for your espresso maker to serve you well, you will need to take good care of it by fixing any issues and maintaining it regularly. Here is a comprehensive guide to help you remedy any problems it may have.
How to use a Saeco espresso machine
So you just got a new Saeco, and you need to set it to before use. Not to worry, here are the steps need to get your espresso machine up and running. And to program your personal preferences for your perfect cup of coffee.
These steps apply fully automatic to Exprelia, Incanto, Intelia, Intuit, GranBaristo, Minuto, Synthia, Xelsis, Xsmall, and PicoBaristo Saeco machines.
- Fill the water tank and coffee bean hopper
Remove the water tank and fill it with fresh water up to the ‘Max’ level indication. Then fill the coffee bean hopper with espresso beans of your choice. Use pure coffee beans to prevent imparting a permanent flavour to the machine.
- Turn your espresso machine on
Plugin the espresso machine into the electric outlet. The plug is located on the back of your espresso machine. Then turn the main switch to ‘I’ (if located on the machine).
- Place a cup and press the standby button.
Place a cup under the hot water spout/steam wand to collect water dispensed during priming. Then press the ‘Standby’ button to turn on your Saeco espresso machine.
- Prime the water circuit
The espresso machine display will show the circuit priming icon at this point. Select ‘OK’ to start the priming process. Then, the espresso machine will begin dispensing water. For more information, refer to the user manual.
- Prepare, install and activate the AquaClean filter
Saeco espresso machines compatible with the AquaClean filter will show the text ‘Install or Activate AquaClean Filter?’. Shake the AquaClean filter for 5-seconds and immerse it upside down in a jug with cold water and wait until no air bubbles come out.
Then place the filter into the water tank and start the installation. After a correct installation, the ‘AquaClean 100%’ icon will be visible in the display.
- Then adjust the machine to your preference
Adjust the grind settings using the knob inside the bean container. You can choose a fine grind for a full-bodied espresso or a coarse grind for a lighter coffee flavour. To adjust the coffee strength, use the ‘Memo’ function to program the amount of beans used to brew your coffee depending on the cup size.
Press and hold the button you want to adjust until the display shows the ‘Memo’ icon. Your machine will enter the programming phase and start to brew the selected coffee. Stop the process by pressing the ‘OK’ button or the button you are programming. Steps may vary depending on your espresso machine model.
What does it mean to prime an espresso machine?
Priming an espresso machine is prepping it before you start using it. This is because the espresso machine has no water right off the bat, and the heating element may get damaged if you turn it on due to overheating. The priming is also necessary if the machine is not used for a while or after steaming milk.
How do you prime a Saeco espresso machine?
Follow these steps to prime your Saeco espresso machine;
- Fill your espresso machine’s water reservoir with cold water. And plug the machine, then turn it on.
- Ensure the intake hoses are submerged into the water reservoir and their tips are close to the bottom. And make sure that there are no kinks or blockages in the hoses.
- Then turn the steam knob, so it is open. Finally, place an empty container under the steam wand to collect any liquid from your espresso machine during the priming process.
- Turn on the espresso machine and set it to the “coffee/brew” setting or the hot water setting, depending on the model of your espresso machine.
- Close the steam valve once the water starts to flow out. Once water flows out of the brew head, turn off the coffee/brew switch or the hot water switch.
- Continue to run about a cup of water through the boiler to flush the system thoroughly. This is especially important before the first use.
Note:
If you use your espresso machine to make hot chocolate or tea, you may need to prime your machine often. Additionally, if no water is pulled through the steam wand after 30 seconds, turn off your espresso machine immediately. Then check for blockages in the hoses, and wait ten minutes. Then repeat the steps above.
How do I reset my Saeco espresso machine?
The reset procedure may vary depending on the model of the espresso machine;
- To reset a Saeco Intelia coffee maker, press the Aroma button until Water Filter ON/OFF/RESET is displayed. Then Select RESET and confirm with the Aroma button. Then press the ON/OFF button to exit the menu.
- To reset the Saeco Minuto, press the Menu button on the right side of the switch panel. Then select the “factory settings”, which is indicated by a factory icon. Finally, select “Yes” to start the Reset.
Refer to your Saeco espresso machine user manual for the exact instructions for your specific model.
How to maintain a Saeco espresso machine?
Regular maintenance of your electronics not only keeps them clean it also helps to prolong their lifespan. For example, by ensuring the espresso machine is not busted by coffee grounds or coffee drips.
Weekly Maintenance
- Disconnect the brew unit.
- Rinse thoroughly with warm water. Use no soap or solvents.
- Air dries the brew unit before re-inserting it into the machine.
- Wipe away any excess grinds from the area beneath the brew unit.
Quarterly or 500 cups maintenance:
- Rinse the brew unit thoroughly under running warm water.
- Locate a tub that is large enough to accommodate the brew unit. Add 1 to 2 tablespoons Puro Powder, followed by enough warm water to soak the brew unit.
- Soak the brew unit for 1–2 hours.
- Rinse the brew unit under warm water and brush away any remaining lubricant and coffee grinds.
- Allow time for the brew unit to dry.
How long will my Saeco espresso machine last?
An espresso machine can last between five and 15 years on average. This, of course, depends on how you maintain it. And how frequently you use it. An adequately maintained coffee maker will outlast a frequently used and rarely maintained espresso machine.
Saeco espresso machine not pumping water
If there is no water being drawn from the water tank of your Philips/Saeco espresso machine, chances are there is air is trapped in the machine, and it is blocking the water supply. Here are the possible causes and solutions.
- The water tank is not fully inserted
Check to see if the water tank is placed correctly in the espresso machine. For example, if your espresso machine has a water tank on the front, ensure that the water tank is pushed fully to the back to make sure it is well inserted.
And if your espresso machine has a water tank on top of the machine, ensure that the area under the water tank is free from dirt, particles or coffee beans.
- The hot water spout is clogged (machines with a Panarello/Classic Milk Frother)
Remove the outer part of the Panarello/classic milk frother and check if the spout is clogged with limescale. If there is a build-up of limescale, use some descaling solution to remove it.
How to remove the trapped air
Follow the steps below to remove trapped air for your espresso machine:
- Switch OFF the machine
- Empty the water tank and remove the AquaClean (or any other water filter) water filter
- Fill the water tank with water and place it back in position
- Switch the machine back ON. When the machine is heated up, select hot water and dispense 2-3 cups of hot water
If you use an AquaClean water filter, follow these extra steps to make sure the filter is prepared and correct installed for use:
- Shake the AquaClean water filter for 5 seconds
- Hold the filter upside down in a container/bowl with water until no more air bubbles come out
- Place back the filter into the water tank and fill the water tank with water
- Restart the machine and switch it off and back on
- Select hot water and dispense 2-3 cups of hot water
Note: Replace the filter if you have been using the AquaClean water filter for more than three months as it might be clogged.
If these solutions do not solve the issue, contact the manufacturer for further assistance.
Saeco coffee machine no power
If your espresso machine is not turning on, the causes could be one of the two listed below. Follow the steps below to find the issue and remedy it;
- The main switch on the back is not set to ON
Check to see if the ON/OFF switch located at the back of the machine is turned on.
- The power cord is not well connected
Then check to see if the power cord is inserted correctly into the machine and the power outlet. If this is still not working, try another power outlet.
If these solutions do not solve the issue, contact the manufacturer for further assistance.
How to clean my Saeco brewing unit
Ideally, you should clean your expresso immediately after use, especially if you use milk. Regular cleaning ensures optimal performance of the machine and prevents taste adulteration. Follow the steps below to clean your Saeco espresso machine;
Cleaning the brew group
- Weekly cleaning: Rinse the machine’s brew group using lukewarm water
- Monthly cleaning: Use the Coffee oil remover tablets CA6704 to remove oil from the filter on the brew group
Lubricating the brew group
It is essential to lubricate the brew group regularly so that the mechanical parts in your espresso machine continue to move smoothly. Therefore, ensure you lubricate the brew group every two months.
- Apply a thin layer of grease on the piston of the brew group
- Apply a thin layer of grease around the shaft located on the bottom of the brew group
- Apply a thin layer of grease to the rails on both sides.
Cleaning the drip tray, coffee grounds container and water tank
- Drip tray: Empty it daily or as soon as the red indicator pops up through the tray
- Coffee grounds container: Clean it weekly and empty the coffee grounds container when prompted by the machine
- Water tank: Clean and rinse it weekly under tap water
Cleaning LatteGo
Rinse the LatteGo under tap water or clean the two parts in the dishwasher after each use.
Cleaning the classic milk frother
- Daily clean: Remove the external part of the classic milk frother and rinse it with water. Make sure you also clean the tiny hole. If it looks clogged, enter a needle in it to unclog it.
- Monthly clean: Use Philips milk circuit cleaner (CA6705) to prevent the milk circuit from clogging.
- For the classic milk frother with a knob, make sure to remove the knob when cleaning under the tap and dry the parts before assembly.
Cleaning the internal cappuccinatore
- Daily: Perform the ‘HYGIESTEAM’ program in the cleaning menu.
- Weekly: Remove and disassemble the internal cappuccinatore.
- Rinse all parts under the tap with some washing-up liquid.
- Monthly: Perform the ‘DEEP MILK CLEAN’ procedure in the cleaning menu and use the Philips (CA6705) milk circuit cleaner.
Cleaning the milk carafe
- After each use: Most machines show a cleaning icon for a while on display after brewing.
- Place an empty cup under the milk spout and follow the instructions on display.
- Daily: Rinse the tube and the top part of the milk carafe with lukewarm water.
- Weekly: Disassemble the milk carafe and clean all parts in lukewarm water.
- Monthly: Use Philips milk circuit cleaner (CA6705) to prevent the milk circuit from clogging.
How to descale a Saeco brewing unit
Descaling your Saeco espresso machine ensures that you always get great tasting coffee. You should descale your espresso machine when the Calc/Clean light starts flashing. Only use the Philips Descaling solution CA6700.
The descaling instructions may differ depending on the Saeco espresso machine model. For more accurate step-by-step instructions, refer to the user manual or visit the Saeco Coffee Care webpage.
Note: The descaling process can take up to 30 minutes to complete. And the process cannot be interrupted once it has started.
Descaling Philips Espresso 4300 and 5400 Series
- Touch the “clean” icon on the user interface and select “Descaling” in the menu.
- Follow the instructions on the screen.
- If attached, remove LatteGo or the milk frother.
- Remove the drip tray and the coffee grounds container, empty them and put them back into place.
- Remove the water tank and empty it. Then remove the AquaClean water filter.
- Pour the whole bottle of Philips descaler into the water tank and fill it with water up to the Calc / Clean indication. Then place it back into the machine.
- Place a large container (1.5 l) under the coffee dispensing spout and the water spout.
- Press the start/stop button to start the descaling procedure. The descaling procedure lasts for approximately 30 minutes and consists of a descaling cycle and a rinsing cycle.
- Wait until the machine stops dispensing water. Then, refill the water tank when the message appears on display. The descaling procedure is finished when the machine stops dispensing water.
- Install and activate a new AquaClean water filter in the water tank.
- When the descaling procedure is finished, the machine reminds you to install the new AquaClean filter. Using the AquaClean filter reduces the need for descaling.
Descaling Philips 1200/2200/3200 series
- Empty the drip tray and reinsert it
- If present, remove the classic milk frother or LatteGo from the machine
- If an AquaClean filter is present, remove it from the water tank
- Empty the water tank and pour the entire bottle of Philips descaler solution into it. Add water to the descaling solution in the water tank to the Calc / Clean indication and place it back.
- Place a large container or bowl (1.5 L) under the coffee and water spout
- Switch ON the machine
- Press and hold the Calc / Clean icon for 3 seconds and then press the start/stop button to start the descaling procedure
- During the descaling cycle, the Calc / Clean light will flash to show that descaling is in progress
- The machine will start dispensing small amounts of water through the coffee and hot water spout 10. Let the machine dispense the descaling solution until the water tank is empty. The empty water tank light icon will light up
- Remove the bowl
- Remove the water tank and give it a rinse with fresh water
- Fill up the water tank with fresh water up to the Calc / Clean indicator and place it back into the machine
- Place the emptied bowl back under the coffee and water spout and continue with the rinsing procedure below.
Rinsing procedure:
- Press the start/stop button to start the rinsing cycle. This process will take about 3 minutes
- During this process, the lights on the control panel will turn on and off to indicate that the rinsing cycle is in progress
- Once the machine stops dispensing water, the descaling process is complete
- The machine will heat up automatically
- When the lights in the drink icons light up continuously, the machine is ready for use again
- The AquaClean light will flash for a while to remind you to install a new AquaClean water filter
- Install and activate a new AquaClean water filter in the water tank
Descaling Philips 4000 and 3100 series
- Select ‘Start Calc Clean’ from the menu
- Press the Cappuccino button to select the descaling procedure
- The machine reminds you to insert the water-filled milk carafe and pull out the milk carafe dispenser to the right.
- The descaler symbol appears on display.
- Pour the entire bottle of Philips descaling solution into the water tank.
- Fill the water tank up to the calc clean level.
- Place the water tank back into the machine.
- Place a bowl underneath the milk frother and coffee spout
- Press the cappuccino button to start the descaling cycle.
- The display will show the descaling progress. You can pause the descaling cycle by pressing the Espresso button. Then, press the cappuccino button to resume the descaling procedure.
Rinsing procedure:
- After finishing, rinse the water tank and fill it with fresh water up to the maximum level and place it back
- The start rinsing symbol appears on display.
- Fill the milk carafe with water up to the minimum level and place it back
- Pull out the milk carafe dispenser to the right.
- Put the bowl back.
- Press the cappuccino button to start the rinsing cycle.
- The rinsing cycle is finished when the ‘Calc Clean OK’ symbol appears on display. Next, press the cappuccino button to exit the descaling procedure.
Note: If the water tank symbol appears on the display instead of the ‘Calc Clean OK’ symbol, refill the water tank up to maximum level and perform another rinsing cycle.
How to use the Philips/Saeco Coffee Oil remover tablets
A buildup of oil from coffee beans will alter the taste of your coffee and give it a rancid taste depending on the amount of oil deposits in the espresso machine. You can use the Philips/Saeco Coffee oil remover tablets (CA6704).
The tablets can be bought from the Philips online store.
Note: You cannot use the Coffee oil remover tablets to descale your espresso machine.
Instructions for espresso machines with pre-ground coffee function
- Switch ON the machine
- Fill the water tank with tap water to the max indication and place a cup under the coffee spout
- Put one coffee oil remover tablet in the pre-ground coffee compartment
- Select the pre-ground coffee function
- Select coffee and start brewing. When half a cup of water has been brewed, unplug the machine
- Let the coffee oil remover solution act for at least 15 minutes. Then, insert the mains plug back into a wall socket and switch on the machine. The machine will start heating up and perform an automatic rinse.
- Open the service door and remove the brew group.
- Rinse the brew group thoroughly under the tap water
- Place the brew group back into the machine and put a cup under the coffee spout
- Select the pre-ground coffee function again and do not add any pre-ground coffee
- Select coffee and start brewing. The machine will dispense some water. Repeat this step twice.
Instructions for espresso machines without pre-ground coffee function
- Open the service door and remove the brew group
- Put one coffee oil remover tablet in a cup and fill the cup with 150 ml hot water. Wait until the tablet is completely dissolved
- Use the coffee oil remover solution to clean the filter of the brew group. Then, use a soft sponge or brush to clean the filter.
- After cleaning, let the solution act for 15 minutes
- After 15 minutes, rinse the brew group thoroughly under the tap with water
- Place back the brew group into the machine.
Instructions for espresso machines with Clean menu buttons
- Switch ON the machine.
- Tap the “Clean” icon and use the up and down arrows to select “Brew group clean”.
- Tap “OK” and follow the instructions that appear on the screen.
Saeco coffee machine warning lights and their meaning
Saeco espresso machines use a Warning/Exclamation light to tell you when something is wrong with the machine. The light can be steady on, blinking, or is lighted in combination with other lights. All the combinations have different meanings and solutions.
Here are the different warning lights you can expect to see on your Saeco espresso machine and what they mean;
The on/off button (green) flashes slowly.
Meaning: The machine is warming up.
The orange service indicator light lights up continuously.
Meaning: Your machine needs to be descaled.
Solution: Descale the machine.
The orange service indicator light flashes slowly.
Meaning: The water tank is empty
Solution:
- Fill the water tank with fresh water up to the MAX indication, make sure there is no capsule in the machine.
- Press the yellow Lungo button.
- The internal water circuit is now filled with water, and the service indicator light goes out
All lights light up continuously.
Meaning: The machine is ready for use.
The WARNING LIGHT lights up continuously, and the ON/OFF button light is out
Meaning: The coffee grounds container is full or emptied while the machine was switched OFF.
Solution: Empty the coffee grounds container while the machine is ON. Make sure that the warning light flashes before you reinsert the coffee grounds container.
The WARNING flashes slowly
Meaning: The brewing unit is not correctly inserted, the coffee grounds container is not inserted, the service door is open, or the control dial is not in the correct position.
Solution: Ensure the brewing unit, and coffee grounds container are inserted correctly, the service door is closed, and the control dial is in the correct position. If you cannot take out the brewing unit or place it back, switch the machine off and back on again.
The WARNING and ON/OFF button lights light up continuously
Meaning: The coffee bean container is empty.
Solution: Refill the coffee bean container
ALL 4 lights on the machine are flashing simultaneously
Identify which of the four lights started to flicker and try the corresponding solutions below;
All lights switch on directly after the machine has been switched on
Meaning: the espresso machine is clogged.
Solution:
- Switch OFF the machine.
- Remove the water tank and remove any coffee beans located on the bottom of the water tank compartment.
- Check if the steam wand is clogged. Remove scale/dirt of the steam wand with a needle
- Switch the machine back ON and dispense 2-3 cups of hot water.
All lights switch on during brewing
Meaning: The brew group need to be cleaned.
Solution:
- Switch the machine OFF.
- Clean and grease the brew group
- Change the grind setting to a courser grind setting (higher number)
All lights switch on directly after or during descaling**
Meaning: Parts of limescale are blocking the system.
Solution: Switch off the machine for one hour. If the message disappears, descale another time the machine
Should I leave my Saeco espresso machine on all the time?
It’s best to turn a machine off when not in use. This saves you money over time and reduces the wear and tear of the espresso machine. When you turn off the machine after use, the heating and cooling are gradual enough to cause issues.
Why did my Saeco espresso machine explode?
Espresso machines are pretty much a pressure system with a steam boiler and a pressure relief valve. An espresso machine requires 130 PSI to produce steam with enough pressure to make a cup of espresso.
If the machine has a malfunctioning steam boiler, it may produce excessive pressurized steam. Additionally, a faulty pressure relief valve might not let the steam escape to release the built-up pressure. The excess pressure will ultimately cause the espresso machine to explode.
How to prevent espresso machines from exploding
- Service your espresso machine every three months using these steps:
- Replace group gaskets.
- Replace shower screens
- Test group flow rates, temperature, and all switches.
- Test group head and boiler water quality
- Service your espresso machine annually using these steps:
- Replace your pressure safety valve and the Portafilter baskets.
- Replace the waste pipe (if needed) and sight glass.
- Replace the capacitor on the pump motor and before solenoids.
- Replace or servicing your non-return valve.
- Check for steam or water leaks.
Other Saeco Problems and their fixes
| Problem | Possible cause | Solution |
| The machine needs a long time to warm up. | The machine is clogged with scale. | Descale the machine (see chapter ‘Descaling the machine’) |
| The pump makes a lot of noise. | There is not enough water in the water tank. | Fill the water tank with fresh tap water up to the MAX indication. |
| The water tank is not placed correctly. | Place the water tank correctly and push it downwards. | |
| I cannot close the capsule compartment lever completely. | The used capsule drawer is full. | Empty the used capsule drawer and insert the capsule again. |
| The capsule is not inserted correctly. | Insert the capsule again and check if it is inserted correctly. | |
| The capsule is stuck. | Open and close the lever a few times with moderate force to remove the capsule. | |
| The lever does not open completely. | The used capsule drawer is full. | Empty the used capsule drawer. |
| The machine does not dispense coffee or only dispenses drops of coffee. | There is not enough water in the water tank. | Fill the water tank with fresh tap water up to the MAX indication. |
| Lime-scale has built up inside the machine. | Descale the machine | |
| The machine suddenly stops brewing coffee. | There is not enough water in the water tank. | Fill the water tank with fresh tap water up to the MAX indication. Then, press the button of the selected coffee variety again to continue brewing. When the cup is complete, press the same button again to stop the brewing process. |
| Coffee grounds end up in the cup of coffee. | A small amount of ground coffee will always end up on the bottom of the cup. | This is normal. |
| After the rinsing cycle, the orange service indicator light continues to flash, and the yellow lungo button lights up continuously. | The internal circuit has not been rinsed sufficiently. | Repeat steps 13-17 in chapter ‘Descaling the machine’, section ‘Descaling procedure’ once more. Make sure the water tank is filled up to the MAX indication. |
| The service indicator light lights up continuously. | The machine is clogged with scale. | Descale the machine (see chapter ‘Descaling the machine’) |
| The service indicator light flashes slowly. | The internal water circuit is empty. | Fill the water tank with fresh tap water up to the MAX indication. Next, press the lungo button to fill the internal circuit. |
| Why do I find water in the wastewater drawer? | The used capsule drawer andwastewater drawer catch theresidual water released afterbrewing coffee. | This is normal. |
Saeco Vienna plus sup 018M
| Problems | Causes | Solutions |
| The machine does not turn on | The machine is not connected to the power supply. | Connect the machine to the power supply. |
| The service door is open. | Close the service door. | |
| Coffee is not hot enough | The cups are cold. | Warm the cups. |
| No hot water or steam is dispensed | The hole of the steam spout is clogged. | Clean the hole of the steam spout using a pin. |
| Coffee has little foam | The coffee blend is unsuitable, the coffee is not freshly roasted or the grind is too coarse. | Change coffee blend or adjust the grind. Increase the dose. |
| The machine takes a long time to warm up or the amount of water dispensed from the spout is too little. | The machine’s circuit is obstructed by limescale. | Descale the machine. |
| The Brew Group does not come out. | The Brew Group is out of place. | Turn on the machine. Close the service door. The Brew Group is automatically placed in the correct position. |
| Problems | Causes | Solutions |
| The grounds drawer is inserted. | Remove the grounds drawer before removing the Brew Group. | |
| Coffee is not brewed | There is no water. | Fill the water tank and prime the circuit again. |
| The Brew Group is dirty. | Clean the Brew Group. | |
| The dose setting is high. | Decrease the dose setting. | |
| The circuit is not primed. | Prime the circuit again. | |
| Coffee is brewed slowly | The dose setting is high. | Decrease the dose setting. |
| The coffee is too fine. | Change coffee blend or adjust the grind. Decrease the dose setting. | |
| The circuit is not primed. | Prime the circuit again. | |
| The Brew Group is dirty. | Clean the Brew Group. | |
| Coffee leaks out of the dispensing spout | The dispensing spout is in a wrong position. | Replace the dispensing spout in its correct position. |
| The dispensing spout is clogged. | Clean the dispensing spout and its holes. |
Saeco V’spresso
| PROBLEMS | CAUSES | REMEDIES |
| The brewing cycle does not start | No coffee beans / | Refill bean hopper and press desired coffee button. |
| “Cof Beans Empty”. | ||
| No water / “Fill | Fill water tank. Make sure float is in position and held in place | |
| watertank”. | by the cap. Message will clear. | |
| Dredge drawer / | Remove waste box while machine is on. Leave out for 5-10 | |
| waste box is full / | seconds and put back in machine. Message will clear. | |
| “Dredgedrawer full”. | ||
| Brew group missing / | Remove drip tray, waste box and brew group. Put brew group | |
| Brew Unit Miss. | back in machine until securely locks in place, put waste box in, | |
| shut service door and put drip tray back in place. | ||
| Coffee flows too quickly. | Grind is too coarse. | Adjust the grinder to a finer grind, ex. from 5 to 3. Adjust only |
| while grinder is grinding and only a maximum of 2 settings at a | ||
| time. It will take 3-4 cups to see results. | ||
| Dose needs to be | Turn doser towards + sign. | |
| increased. | ||
| Coffee flows too slowly. | Grind is too fine. | Adjust the grinder to a coarser grind, ex. from 5 to 7. Adjust |
| only while grinder is grinding and only a maximum of 2 | ||
| settings at a time. It will take 34 cups to see results. | ||
| Dose needs to be | Turn doser towards – sign. | |
| decreased. | ||
| Filter screen in brew | Clean the filter screen using the key provided. | |
| group is clogged. | ||
| The machine does not turn on. | The machine is not | Move the main switch to ON (T position). Check the plug and |
| connected to the | the power outlet. | |
| power supply. | ||
| The coffee is not hot enough. | The cups are cold. | Warm up the cups on cup warmer or by dispensing a little hot |
| water into the cup and letting it sit for a few seconds. | ||
| A low temperature | Set the machine to a higher temperature. | |
| has been set. | ||
| Only water is dispensed when you | No pre-ground coffee | Select Pre-ground coffee button, put pre-ground coffee into the |
| select “pre-ground coffee’. | has been put into the | chute and press the desired coffee button. |
| pre-ground chute. | ||
| Too much pre-ground | Put one level scoop of espresso coffee. Max. 1 cup at a time. | |
| coffee put in chute. | ||
| No hot water or steam is dispensed. | The steam wand is | Clear it with a thin needle or pin. During this operation, the |
| dogged. | must be closed and the machine must be off. Then run water | |
| through steam wand to make sure unclogged. | ||
| Reduced amount of coffee, water and | Lime scale / mineral | Descale the machine. If not done for a long period of time, we |
| steam coming out of the machine; the | build up in machine. | recommend doing 2 cycles. |
| machine takes longer to heat. | ||
| Unable to dear Descale message. | Need to reset | Go into programming mode, ‘Sign. Decal.” and reset message. |
| message. |
| The brew group cannot be removed. | The brew group is out of alignment. | Put waste box in position, close door and put drip tray in position. Switch machine on; the brew group will reset into original position. |
| Ventilate | Machine needs to be primed. | Dispense 3-4 oz of water through the steam wand. |
| Steam wand clogged. | Clear steam wand and prime machine. | |
| Limescale / mineral build up in machine. | Descale the machine. If not done for a long period of time, we recommend doing 2 cycles. |
Saeco Nina, Aroma, Armonia, Via Veneto, Via Venezia, ABC
| FAULT | POSSIBLE CAUSES | SOLUTION |
| The machine does | No power supply | Check the electrical circuit |
| not | ||
| switch on | ||
| The machine does not | The thermostats have intervened | Replace the thermostats (if of the One shot |
| warm | The power supply does not reach the boiler | type) |
| up | If they are manual, reset them | |
| If they are automatic, they are reset | ||
| automatically | ||
| Check the electrical connections | ||
| The pump is very | There is no water in the tank | Fill the tank |
| noisy | The pump has disengaged from the supports | Insert the pump into the supports once again |
| The silicone pipe that carries the water from the | Check the water circuit | |
| tank to the pump is | ||
| pinched or blocked | ||
| The coffee is too cold | The filter holder is not inserted for the pre-heating | Run hot water through the filter holder |
| process | Pre-heat the cups with hot water | |
| The cups are cold | ||
| The milk does not | The milk is not suitable (powdered or skimmed | Use whole milk |
| froth | milk) | Carefully clean the nozzle or the cappuccino |
| Dirty nozzle or Cappuccino maker | maker with water | |
| The coffee flows too | Little coffee in the filter holder | Increase the quantity |
| quickly | Grinding level too coarse | Use a different mixture |
| and does not form the | There is a missing component in the filter holder | Verify that all the components are in place and |
| cream | installed correctly | |
| The coffee does not | Grinding level too fine | Use a different mixture |
| flow or | The coffee is pressed too much in the filter holder | Agitate the coffee |
| it flows in drops | Too much coffee in the filter holder | Reduce the amount of coffee |
| Blocked water channels | Descale the machine | |
| Blocked filter in the filter holder | Carefully clean the filter | |
| The coffee does not | The filter holder has been inserted incorrectly into | Insert the filter holder correctly |
| flow from | the coffee | Clean the edges of the fiter holder |
| the edges | dispensing unit | Clean or replace the seal |
| The upper border of the filter holder is dirty | Reduce the amount of coffee | |
| The seal of the boiler is dirty or worn | ||
| Too much coffee in the filter holder |
All Saeco error codes, their meaning and how to fix them
If your Saeco espresso machine runs into an error, a red display will appear with an icon image. There will also be a code number, such as 01, 03, 04, 05, 11, 14 or 19. Below are the different error codes you can expect;
Error Code 01: Coffee grinder cannot work properly
When the E01 code appears, it indicates that the coffee grinder cannot function properly because of a blocked coffee funnel with ground coffee.
Follow the steps below to clean the funnel:
- Switch the machine OFF and wait until it is completely off and does not make any more noises (this takes about 15-20 seconds)
- Remove the brew group
- Open the lid of the pre-ground coffee funnel and place the spoon handle into the funnel. If there is no pre-ground coffee funnel, insert the spoon handle into the coffee funnel from below.
- Move the handle up and down until the clogged ground coffee falls. Some force may be required.
- Remove all fallen ground coffee with a vacuum cleaner
- Then put the vacuum cleaner on the outlet of the coffee funnel and cover the pre-ground coffee funnel with your hand. Or visa versa put the vacuum cleaner on the top and cover the bottom.
- Place back the brew group, switch the machine back ON and brew espresso.
- After brewing, check if the funnel is still free from ground coffee. If not, repeat the unblocking procedure.
Note: To prevent the coffee funnel from getting blocked, do not pour/spill any water into the coffee bean container and clean the coffee funnel weekly.
Error Code 03: Brew group is dirty
When the E03 code appears, the brew group contains too much dirt and cannot work well. Rinse the brew group to solve the issue.
- Switch OFF the machine and wait until it is completely off and does not make any more noises (this takes about 15-20 seconds).
- Open the service door and remove the brew group by pressing the “PUSH” button to the right side, hold it, and pull it towards you.
- Rinse the brew group thoroughly with lukewarm water and let it air-dry before placing it back.
Error Code 04: Brew group is not well inserted
When the E04 code appears, the brew group is not in place. Open the service door of the machine and push the brew group into place. When it is well in place, you will hear a click.
Error Code 05: Air is trapped in the water circuit
To release the air from the machine, follow the steps below:
- Switch OFF the machine
- Empty the water tank and remove the AquaClean or any other water filter
- Fill the water tank with water and place it back in position
- Switch the machine back ON. When the machine is heated up, select hot water and dispense 2-3 cups of hot water
If you use an AquaClean water filter, follow these extra steps to make sure the filter is prepared and correct installed for use:
- Shake the AquaClean water filter for 5 seconds
- Hold the filter upside down in a container/bowl with water until no more air bubbles come out
- Place back the filter into the water tank and fill the water tank with water
- Restart the machine and switch it off and back on
- Select hot water and dispense 2-3 cups of hot water
Error Code 14: The Machine is overheated
When error code 14 appears, it indicates that the espresso machine is overheated. To fix this, switch the machine OFF and leave it for 30 minutes until it cools down.
Error Code 11 or 19: Machine needs to adjust to room temperature
When error code 11 or 19 appears, allow some time for the machine to adjust from transport/outdoor temperature to room temperature. This mostly happens during the winter period. Especially when it is cold, and the outdoor temperatures are around zero degrees.
Check this too: Breville Espresso Machine How-to & Troubleshooting Guide
Please switch OFF the machine and wait at least 30 minutes, then switch it on again.
Note: If your espresso machine shows any other error codes not mentioned above or the errors are not resolved, contact Phillips customer care center for further assistance as your espresso machine needs immediate attention.