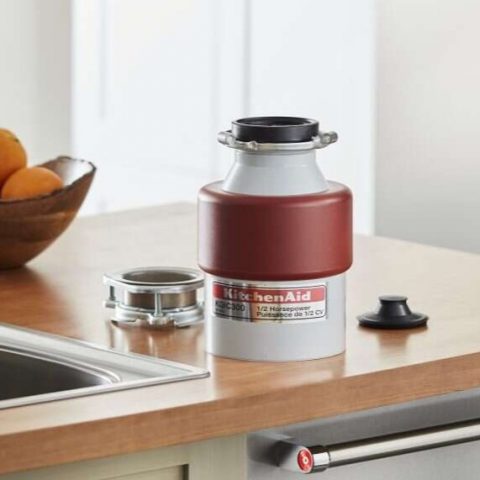
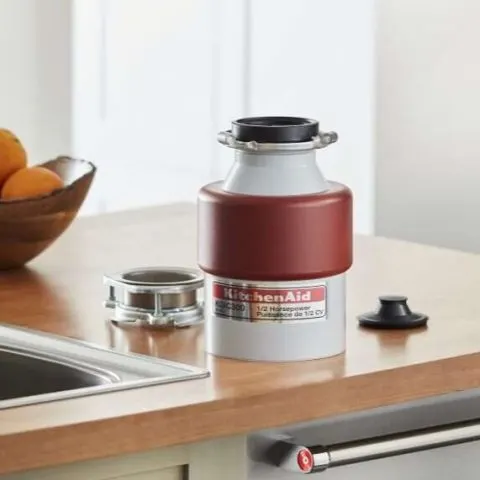
Kitchenaid has been making garbage disposals before any other company in the market. Kitchenaid garbage disposals rank high when it comes to high-quality disposal units that are also reasonably priced. Despite the reputation of highly performing garbage disposals, these units will develop some problems.
Due to Kitchenaid garbage disposals’ simple construction, you can effortlessly diagnose and fix most problems without contacting a technician. Most disposal problems are usually caused by clogging and leaking, which can be fixed by easily unclogging or tightening some connections. The following is a set-up and troubleshooting guide to get you through installation and some problems you may encounter.
How to set up your Kitchenaid garbage disposal
Installing the Kitchenaid garbage disposal is an easy task that you can do yourself with a few simple tools and this guide.
Things You’ll Need
- Hammer
- Screwdriver
- Adjustable wrench
- Size 54 wire nuts
- Dishwasher drain connector (optional)
- Plumber’s patty
- Strain relief
Directions
- Carefully open the package, set it near the sink, check that there are no signs of damage on the unit. The package comes with:
- Mounting assembly with three screws
- Sink flange
- Two rubber gaskets
- Back-up ring
- Snap ring
- Jam breaker wrench
- Waste line pipe with screws, gaskets, and flange
- Place a large pan and towel under the sink to catch any water that might spill during the installation process.
- Use a wrench to loosen the nut at the top of the P-trap to disconnect the existing P-trap and drain basket assembly under the sink.
- Loosen the nut at the base of the sink strainer. Place a flathead screwdriver at the nut’s edge and gently tap the screwdriver with a hammer to disconnect the strainer assembly.
- Unscrew the nut from underneath by hand and pull the strainer assembly from the top of the sinkhole.
- Clean the sinkhole to give the new strainer assembly a clean surface to attach.
- Loosen the screws on the mounting assembly, then pry the snap ring off and take apart the assembly parts. Please take note of the order of the parts as you’ll insert them back in reverse.
- Take some plumber’s putty in your hands and roll it into a coil long enough to go round the gasket. Place the putty evenly on the underside of the gasket. Some models may come with a rubber seal, but the putty maintains the seal and prevents leaking.
- Position the flange through the sinkhole from the top of the sink and press it very hard using a heavy object until the putty spills off from the edges. Remove the extra putty around the edges before it dries.
- Leave a heavy object on top of the sink flange to prevent it from lifting when connecting the underside’s mounting assembly.
- Connect the mounting assembly to the sink’s underside, with the rubber gasket first, followed by the metal back-up ring. Fasten the screw slightly just enough to hold the upper-parts in position, and then place the metal mounting ring onto the mounting assembly sleeve. Secure the screws tightly against the sink surface until the mounting assembly positions evenly around the sink drain to avoid leakage.
- If you have a dishwasher, you also need to connect it to the garbage disposal. Position the disposal unit on its side, place a screwdriver inside the dishwasher drainer, and hit the plastic plug with a hammer to pop it off. Remove the plastic plug from the inside of the disposal unit. If you do not have a dishwasher, you can skip this step.
- To connect the electrical supply to the disposal unit, make sure there is a 20-ampere, 115 volts, 63 Hz wall socket conveniently close for only the disposal unit.
- Place the disposal unit upside down and open the panel cover on the unit’s underside to access the disposal’s wiring; two wires on the inside, black and white, and a green grounding screw on the side.
- Insert the strain relief into the hole next to the panel and insert the power supply cord through the strain relief until it comes out through the open panel.
- Splice the black and white cable wires, connect them to the disposal’s wires with electrical wire nuts and then put them inside the unit. The ribbed cable is white, while the smooth cable is black.
- Find the green wire among the three wires from the power cord, splice about an inch of it, run it around the green ground screw, and then tighten it and close the panel cover.
- Tighten the screws of the strain relief with the power cable lying flat.
- Make sure there is nothing inside the disposal unit chamber, and then place a bucket upside down under the sink to help lift the disposal unit as it may be a bit heavy and you need free hands to connect it securely.
- Align the three groves at the top of the disposal unit with the mounting assembly under the sink. Lift the disposal unit and apply some pressure, then rotate the disposal unit. Take the disposal wrench and turn the lower mounting ring on the disposal unit until it locks in place.
- Attach the dishwasher hose to the garbage disposal and then screw it tightly.
- Attach the waste line to the garbage disposal. Insert flange and the gasket at the end of the waste line pipe, then connect it to the disposal unit and secure it with the screws. If the waste line tube is too long, you can measure the length needed, saw it off, and then connect it.
- Open the tap and allow water to pass through the garbage disposal system to check for leakages. If there is a leak, tighten the connection. Put a stopper in the sink, connect the three-prong cable to a wall socket conveniently near the garbage disposal and turn it on.
How do I reset my Kitchenaid garbage disposal?
The Kitchenaid garbage disposal has an overload button that resets the device. The overload button activates and automatically switches off the disposal when the device has been running for too long, if the disposal drainage gets clogged, and if the disposal overheats. The overload button drops downwards when activated, and you will have to reset it using the following instructions to get the disposal working again.
- Switch off the disposal on the wall socket.
- Locate the red button on the bottom side of the disposal
- Gently push the button inwards; if it doesn’t retract on its own, give it about 10 minutes and then press it again.
- Turn the tap on and then switch the power on; the disposal should start running again.
- If the reset button keeps activating, then you will need to replace the disposal.
Common Kitchenaid garbage disposal problems and solutions
Garbage disposals are very straightforward machines, but they develop a few issues when in use. To successfully fix any problem with the disposal, you need first to identify the problem. Fortunately, most common problems with the disposal are easy to diagnose and repair without any particular expertise. Read more on how you can troubleshoot your Kitchenaid garbage disposal.
Check this too: Badger 5 Garbage Disposal How to & Troubleshooting Guide
Why is my disposal humming and not working
If the garbage disposal is not working but producing a humming sound, objections or food could be jamming the shredder plate, or the motor could be defective; here is how to go about troubleshooting it.
- Switch off the garbage disposal.
- Use a disposal wrench on the hole on the bottom of the disposal. Insert the wrench and try to wiggle it until it makes a complete revolution.
- If you do not have the right wrench, insert a broomstick through the sinkhole and try to turn the grinding plate.
- If the disposer is still humming, the motor may be faulty. The garbage disposal motor is not replaceable; you will have to replace the entire garbage disposal unit.
Why did my garbage disposal suddenly stop working
If your garbage disposal stops working:
- Connect the disposal power cord to the power source. Sometimes the power plug can come loose when cleaning under the kitchen sink.
- Check the wall socket for a blown-out fuse. Use a multimeter to test the socket for continuity. If there is the socket is not getting any power, you have to replace the whole wall socket.
- Check the disposal switch. The most current Kitchenaid disposal models have a stopper switch that activates the start switch to start the disposer motor. If the start switch trips, the disposer may suddenly turn off. Use a multimeter to test the starter switch for current. If there is no continuity, replace the starter switch.
- If there are no electrical issues, a jammed grinding plate can activate the safety switch, which switches the disposer off to protect the motor from further damage when the grinding plate gets jammed. When the safety switch is on, it will pop out slightly downward. Press the reset button at the bottom of the disposer to reset the disposal.
- If resetting doesn’t work, then something hard to crush may be jamming the grinding plate, which you have to manually.
- Switch off the disposal’s main switch, use a flashlight to check for obstructions, and pull them out with pliers or tongs.
- If nothing works, then the motor may have a shot circuit, and you will need to get a garbage disposal replacement.
Never put your hand and fingers down a garbage disposal even if the disposal unit is off. The disposal has dull grinders, but there is still of risk of being injured by the blades.
Why is my Kitchenaid garbage disposal not leaking?
There are several ways you can fix a leaking garbage disposal, depending on the location of the leakage. Here is how to troubleshoot a leaking garbage disposal
Leaking sink flange
The vibrations from the disposal unit can shake the connection at the sink loose over time. If you notice water leaking from the sink flange, you should:
- Turn off the disposal at the wall socket.
- Underneath the sink at the mounting ring, turn the disposal counterclockwise to loosen it and disconnect the disposal unit from the mounting assembly.
- Tighten the screws that hold the mounting flange in place.
- If the screws are tight enough, the leakage could be coming from through the plumbing putty. Remove the screws from the flange, disconnect it by pushing it upwards.
- Clean off the old putty, clean the sinkhole, then apply some new putty to the sunk flange.
- Position the sink flange through the sinkhole and put pressure on it with your hands. Reconnect the mounting assembly, secure it in place, then clean off the excess plumbing putty.
- Attach the install to the mounting assembly and tighten the screw to avoiding more leaking.
- Run the water through the sink and check for any leaking.
Leaking dishwasher connection
- Inspect the hose clamp connecting the dishwasher tube to the disposal and tighten then if loose.
- Replace the hose if the tightening doesn’t work.
Leaking discharge drainage pipe
The gasket on the drainage pipe can wear out over time; here is how to fix it.
- Tighten the bolts holding the drainage pipe to the disposal.
- Remove the bolts and the pipe, then replace the gasket, which seals the connection between the drainage pipe and the disposal unit.
- Reinstall the bolts and screw them tight.
Where is the Kitchenaid garbage disposal drain hole
The drain hole is on the disposal chamber’s side, below the dishwasher connector that connects to the waste line pipe.
If you have a jammed disposal drain hole, here is how to troubleshoot it:
- Switch off the disposal from the power socket.
- Check underneath the disposal unit, and you will see the hex-shaped hole. Take the quarter-inch wrench that comes with the disposal package and insert it in the hole.
- Twist the wrench back and forth with some force until the impellers become loose in complete circles in both directions.
- If you do not have the hex wrench, take a thin broomstick, put it into the disposal unit through the sink drain, and try rotating the impeller back and forth.
- Wait for the disposal motor to cool for about 5-8 minutes, check the overload protector on the bottom of the disposal; a small square red button. When the overload protector is activated, it drops about a quarter inches down.
- Gently press the red button, and if it doesn’t stay up, wait for about 10 minutes and repeat to reset the disposal.
- With the disposal still turned off, use a flashlight to check for anything that may be jamming the disposal from draining. Use tongs to pull the material out but avoid using your hands.
Why is my Kitchenaid garbage disposal?
Slow drainage is usually caused by clogging in the disposal drainage. To fix any clogging, follow the steps below:
- Switch off the power to the disposal.
- Disconnect the discharge pipe on the side of the disposal chamber and remove it altogether.
- Check for any obstructions, remove them and clean the drain pipe.
- If there is no clog in the drainpipe, then the clog could be further up in the sinkhole or further down in the drain line.
- To unclog a blocked sink drain hole, you can use a sink drain plunge and pump several times to clear the obstruction. You can also use a sink drill to break through the clog, then pour some degreaser to melt any fats and grease.
Kitchenaid garbage disposal maintenance tips
Here are some basic preventive maintenance practices that will help avoid frequent breakdowns, keep the disposal clean, and preserve your garbage disposal’s longevity.
- Always use cold water when running the garbage disposal and also allow the water to run for about 15 seconds after using the sink. Hot water may damage the blades or clog the blades with fats. Coldwater also prevents the disposal from overheating.
- Occasionally pour some ice cubes into the disposal to clean the blades.
- Use a commercial degreaser to remove any grease from the disposal passage that may cause clogging.
- You can grind some lemon peels and vinegar to remove any odor from the disposal.
- Do not use water hotter than 175 F as it can soften some types of PVC pipes.
- Do not pour bleach or harsh chemicals like drain cleaners into the disposal.
- Do not put fibrous materials into the unit, such as banana peels, coffee grounds, seafood shells, and large bones.
- When not using the sink, always leave the sink drain covered to avoid objects falling into the disposal.
Conclusion
This detailed Kitchenaid garbage disposal troubleshooting guide will help you quickly diagnose and repair any problem. Proper maintenance will help you avoid frequent issues, but if the motor or grinding blades are damaged, it is more cost-effective to replace the entire garbage disposal than individual parts.