The instant pot is one of the greatest kitchen gadgets ever invented. Not only is it a multi-cooker designed to hasten and simplify all your cooking, but it also doubles as a fermentation pot, a steamer, and the most crucial function of all, a pressure cooker. This article offers comprehensive guidance on how to best use and fix your instant pot’s problems.
How to use an instant pot for the first time
So you just received your new instant pot and are not sure where to begin. Not to worry, by the time you finish reading this article, you will be an Instant Pot pro.
What’s in the Box?
Items included varying depending on the model of Instant Pot. However, these are the items generally found in most instant pot boxes;
- A User manual
- A Recipe booklet.
- A pressure cooker lid and a glass lid.
- A silicone gasket that fits in a ring under the pressure lid.
- The Instant Pot shell
- A detachable power cord
- The internal stainless steel pot
- A translucent plastic drip catcher for collecting condensation. (depending on the model)
- A rice paddle.
- A plastic ladle.
- A plastic measuring cup. I gave this to my kid to play within the tub.
- And finally, a metal steaming rack.
Assembling your Instant pot
Ensure you check to see if your Instant Pot comes with all the items listed above. The box should have a list of items included inside. Contact the manufacturer immediately if your box is missing some items. Once you have done that, you can now start putting the instant pot together.
- Wash and dry the lid, gasket, and metal insert.
- Then insert the drip catcher into the allotted spot at the back of the cooker. Installing the catcher is mandatory as it catches steam condensation and prevents it from pooling on your kitchen counter.
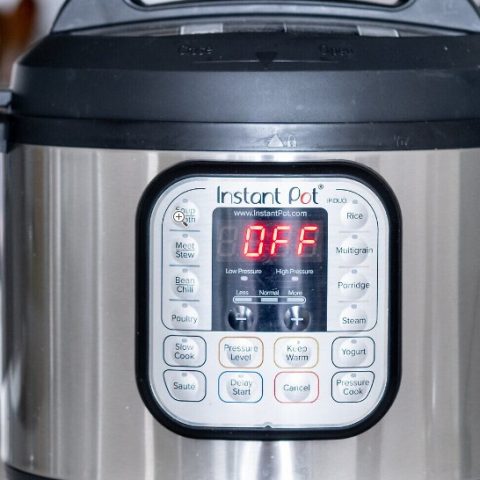
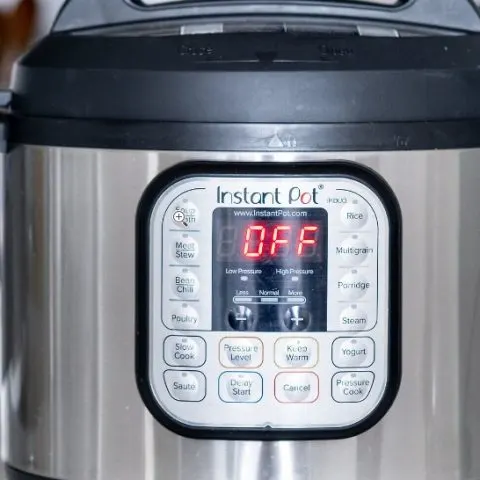
- Then place the metal pot inside the pressure cooker and plug the power cord into the wall outlet. The digital display panel should read “OFF.,” Indicating that your cooker is now in standby mode.
- Insert the rubber gasket ring under the metal lid used to seal the pot and pressurize it. The gasket should snap into place inside the bracket.
- Ensure your pressure lid has a small metal cage on the underside of the lid. It should be round or rectangular, depending on the Instant Pot model. The cage helps to keep the valve from getting clogged with bits of food. The cage is removable, so you can clean it if needed.
- Line up the lid with the arrows at the top of the lid and side of the cooker. If the cooker is plugged in, it will bleep cheerfully when you open and close the lid. Refer to the manual for clarification.
- Locate the steam release valve on the lid with a little black knob sticking up. It is removable for cleaning purposes. The valve helps to release pressure when the cooker is done pressure cooking.
- The pressure lid should have a pressure indicator next to the steam release valve. Right next to it, there should be a tiny metal cylinder that the steam pushes up. It goes up when the pot is pressurized and drops when the pressure is released.
- Once the pot is fully assembled, it is time to test it.
Testing the Instant Pot
For the test run, use water to make sure the pot can pressurize as needed and work correctly. It also helps you familiarize yourself with electric pressure cooking without potentially ruining your meal. Here are the steps for using your Instant Pot;
- Ensure the gasket is correctly installed in the pressure lid.
- Then put 2 cups of water in the metal insert pot. The pot has markings inside with measurements.
- Lock the lid as per the user manual. You should hear a cheerful sound when the lid is locked correctly.’
- Check the steam release valve to see if it’s in the “Sealing” position. The cooker won’t pressurize if the valve is in the “Venting” position.
- Depending on the cooker model, press the Manual or Pressure Cook button. The display panel will show 30:00, which is the default programming cook time on high pressure. The cooker will beep three times and display “On” on the display panel.
- The water will first heat up before the pot can pressurize using the steam from the boiling water. It will take roughly 7 minutes for the water to start boiling.
- When the instant pot starts hissing and clicking intermittently, this is a sign that the pot has begun pressurizing.
- The pressure indicator will increase once the pot is fully pressurized, and the instant pot will beep thrice. The hissing should also stop at this point.
- The display panel will also read “On.” after a minute. Then the cooker will start counting down from thirty, for which was the selected pressure cooking time chosen.
- When the pressure cooking time is up, the cooker will beep three times. Then the panel will display “LO:00.” The Instant Pot will automatically switch to its “Keep Warm” setting. And the timer will start counting up.
Releasing pressure once the pot is done pressure cooking
At the end of the cooking time, you will need to release pressure before opening your instant pot. There are two methods for releasing pressure.
• Natural release
That means waiting for the pot to release pressure naturally. The time it takes to release pressure naturally depends on the amount of food in the instant pot. It can take as long as thirty minutes. Do not attempt to open your instant pot before the pressure pin drops.
• Quick release
This method entails turning the pressure valve to venting, so the steam is released rapidly. Beware of the hot steam the will start shooting out immediately you turn the valve. The quick-release time also depends on the amount of food in the instant pot.
Use a long-handled spoon to push the steam release valve to the venting position. The test above will take roughly 40 seconds to release pressure from two cups of water.
Note: do not place your Instant Pot under your wooden kitchen cabinets. Steam condensation will damage the cabinets over time. You can place a towel tent over the valve as it releases steam to muddle the steam.
How to time pressure cooking time for different foods
The instant post manual and recipe book will guide you on the correct pressure cooking time for different foods. The time also varies depending on the amount of food being prepared. Follow recipes when you initially start pressure cooking with your instant pot. Until you master different pressure cooking times for different foods and recipes.
Remember, the instant pot takes time to pressurize when setting time taken to cook food. For example, if the pressure cooking time is 30 minutes, the total time from start to finish will be 45-minutes or more.
What types of food should you cook in your Instant Pot?
Pressure cooking is water-based as steam is needed to create pressure. No liquid equals no pressure. As such, you can only pressure cook food with liquid. You can only use your instant pot pressure cooking function for boiling, steaming, and braising.
Boiling foods include beans, soups, pasta, grains, stocks, and broths. While steaming foods include vegetables, seafood, and custards. Finally, braising foods include meat stews and curries.
How to Clean and Store Your Instant Pot
Always clean your gasket after cooking as condensation builds up in the gasket. Trapped food bits can also become moldy if you fail to clean the lid regularly. Store your cooker with the lid upside down and the sealing ring on its own. If you have to close the cooker, ensure the lid is cleaned and completely dry.
How to keep safe when using an instant pot
Now that you understand how to use your Instant Pot, you must learn Instant Pot safety. And with the electric version, the reason for caution is amplified. A pressure cooker requires utmost care to prevent steam burn and potentially an explosion.
Here are some tips to help you stay safe while using your Instant pot;
Never Fill to the Max for Pressure Cooking
The Max Line on the Instant Pot’s inner pot is not meant for pressure cooking. The maximum level for pressure cooking is 2/3 full for meats and a 1/2 full for foods that expand during cooking, such as grains, beans, oatmeal, and dried vegetables.
Don’t Deep Fry using your Instant Pot.
The Instant Pot is not designed for pressure frying, and you should never attempt to do it. The instant pot is too small for pressure frying. Boiling dues to the space limitation can lead to grease burns. It may also damage the instant pot in the process.
Steam is your enemy
When quick releasing, do not under any circumstance pass your hand over the steam valve. The steam is scalding and will burn you. You should also place the pot over an open counter to prevent steam diversion from top shelves that may be detrimental.
When venting or opening the instant pot, use an oven mitt or glove to protect your hands. You should also open the lid facing away from you to ensure the escaping steam does not burn your face and hands.
Use at least One Cup of Liquid.
Steam equals pressure when it comes to pressure cooking. And as such, you cannot use your pot without liquid in the pot. You can use plain water, wine, soup, stock, or liquid of your choice to boil your food.
The amount should not be lower than one cup as this is the recommended minimum amount. You can always thicken the leftover liquid or simmer it down once you are done pressure cooking. Also, avoid using a thick slurry or thickened soup to pressure cook as it may burn and stick to the bottom of the pot.
Don’t Leave the Pot Alone when it is on high pressure
The high-pressure setting on the instant pot produces roughly 11.6 extremely dangerous psi. This may cause an accident should the pot not be adequately sealed. As such, you should not leave your pot when using the higher setting. This way, you can turn it off immediately you notice any issues.
Replace the Sealing Ring regularly
The sealing ring is the lifeline of the pressure cooker. Without it, the pot will not be adequately sealed. You should replace the Silicone Sealing Ring every 18-24 months, sooner if you use it frequently. You should also have an extra one around.
Always clean it and ensure food is not suck on it before use as it may create a gap for steam to escape.do not buy third-party sealing rings as they may be sub-standard and not perform like an original Instant Pot sealing ring. Instant Pot advises against the use of generic sealing rinds for safety reasons.
Note: (adapted from the instant pot Manual)
- Inspect the sealing ring before using the pot to ensure it is well seated in the lid.
- Also, ensure the anti-block shield is mounted correctly on the steam release pipe.
- Never insert the sealing ring into the lid by force, as the pulling may cause deformation and affecting its ability to seal the pot.
- Do not use the sealing ring if it has cracks, cuts, or other damages.
How do I know if my instant pot is pressurizing?
When the Instant Pot is pressurized, the pressure valve will rise and become flush with the level of the lid. It will also start counting down the pressure cooking time once pressurization happens. Additionally, the pot will stop hissing.
What do I do if my instant pot doesn’t pressurize?
Here are the main Reasons your instant pot is not pressurizing and how to remedy the issues;
Too little liquid in the pot
If you use less than 1 cup of liquid in your instant pot, the steam will not be enough to pressurize the instant pot. As a rule of thumb, you should always use 1-1.5 cups of liquid in the instant pot depending on your pressure cooking and whether you use the high or low-pressure setting.
To remedy this issue, release the steam built up and add another cup or half a cup of liquid to the pot. Do not stir the liquid when you add the extra fluid. Then close the lid and let the pot pressurize. When you stir, the liquid pools in the middle and may fail to pressurize due to uneven steam distribution in the pot.
When cooking grains, beans, or pasta, ensure they are under the cooking liquid as they expand and absorb all the liquid. An extra inch over the food is necessary since these foods will absorb fluid. Also, remember that the pot should not be more than two-thirds full when accounting for the additional liquid or the expanding food.
There are Ingredients Stuck to The Bottom of the Pot.
Stuck food bits in the Instant pot can limit liquid circulation, preventing even steam distribution necessary for pressurization. As such, you should always deglaze the inner pot after searing to ensure the bottom is clear of food bits. Also, ensure the base is completely covered in liquid.
The Sauce is Too Thick.
A thick sauce will cause the instant pot to display a “BURN” signal and ultimately shut down. The thick sauce may also cause the pot not to pressurize due to lack of steam production. You can remedy this issue by thinning your sauce using water, wine, or broth.
Once the food is ready, you can then thicken it using a corn starch slurry. Or by simmering it down. All you have to do is remove the lid after the steam has finished releasing and switch to the sauté mode on the instant pot.
The Sealing Ring does not fit properly.
If your instant pot is not sealed correctly, it will not pressurize as the steam cannot build up in the pot. The gaps in the sealing ring will cause steam to escape. To remedy this issue, open the instant pot lid and insert the sealing ring properly.
Adjust it to ensure it sits in its allotted spot snugly. Also, check to see if any scraps of food may be causing it not to fit correctly. You can also switch it out with your extra sealing ring if you cannot insert it securely.
Steam is escaping from the Pot.
As the point above states escaping steam prevents the pot from pressurizing. If the sealing ring is fitted correctly and the pot is still losing steam, check to see if the pressure release valve is the culprit.
Ensure the Instant pot is in the SEALED position for pressure cooking. If not, adjust it as needed. Use a wooden spoon to avoid getting burned by the escaping steam.
The Instant Pot is too full.
An overfilled instant pot cannot become pressurized as its inbuilt features will prevent it from pressurizing. It will also cause your liquid to overflow as it starts to boil. Ensure you only fill the pot up to the maximum recommended section for pressure cooking. Be sure to account for expanding foods and boiling liquids.
Why is my instant pot not turning on?
Electrical problems mainly cause this issue. However, it can also be due to personal error. Here are some culprits to look out for if your Instant pot does not turn on;
Check to see if you have inserted the power cord into the instant pot port
You may have removed the power cord from the instant pot by mistake. Check to see if this is the reason the pot is not turning on and fix it.
Inspect the power cord
In some cases, the power cord may stop working due to wear and tear. Check the power cable for any visible damaged and buy a replacement if it has any damaged wires.
Try another power outlet.
You should check if the power outlet you are using is working correctly. If the outlet is not working, use a different outlet. Then hire a licensed electrician to fix the damaged power outlet. It is advisable not to plug the instant pot on an extension cable as the power output may not be enough to power the instant pot.
Check for a blown fuse.
Check the circuit broker to ensure the fuse to the power outlet in question is not blown. You can use a multimeter to test for continuity. Then replace the fuse if needed. Or hire an electrician to fix the issue.
The Instant Pot may have a blown fuse.
If all of the above issues have been tackled and the instant pot is still not turning on, the problem may relate to the instant pot’s internal electrical circuit. It may have a blown fuse. To remedy this situation, you will need to visit a manufacturer-approved repair shop or contact the manufacturer directly.
Note: do not tinker with your instant pot when it stops working; you may end up damaging it when all it needs is a minor repair. Additionally, depending on the amount of damage, you may need to get a replacement instant pot.
Instant pot quick release is not working.
Check to see if there is food stuck in the valve, preventing it from working. And use a toothpick to dislodge the food. If this does not work, the valve may be broken and needs to be replaced. Ensure you clean the valve after each use.
Instant pot buttons not working
The buttons could stop working as a result of different issues. These include;
Damaged panel
If the display panel is malfunctioning, then you will not be able to use the buttons. Contact the instant pot customer care regarding this issue. Only use an approved instant pot repair professional to prevent warranty voiding.
Error code
If your instant pot is displaying an error code, you will not input any new commands until the issue is resolved. Refer to the user manual to remedy the error in question. Then turn off the instant pot to reset it and then use it.
Damaged press sensor
In some cases, the issue may be the sensors beneath the buttons. This may be preventing the button commands from activating a prompt. Troubleshooting this issue is complex and can only be ascertained by the manufacturer or an instant pot repair professional.
Pot not plugged in
This may be a mundane reason, but it is the most common culprit. Check to see if your instant pot is plugged into the power outlet. You may be able to tell if it is not plugged in by looking at the instant pot display. It should say On, which implies it is on standby and ready for use.
Steam is coming out of the instant pot in a sealing position
Check to see if the sealing ring is installed correctly. You should also check to see if it is damaged and replace it as needed. Lastly, ensure there are no food bits stuck under the ring, creating a gap, thus allowing the steam to escape.
Note: release steam first before attempting to open the instant pot.
Why is my instant pot-burning food?
The burn notice on your instant is usually a result of overheating. When the inner pot gets too hot, it automatically dials down the temperature to prevent the food from burning. Press Cancel to turn the pot off and allow any steam to release.
Check this too: Can I Use Cast Iron on a Glass Top Stove?
Then open the lid and stir the food to ensure it is not stuck to the bottom of the inner pot. Scrape up and remove any burnt food from the pot. Then add more liquid to prevent food from getting stuck to the bottom. Then close the pot back up.