
Cleaning and maintaining your headphones regularly benefits your health and extends your lifespan. It also makes them look and smell good; therefore, you can enjoy your music without feeling uneasy.
Read on to learn how to clean your headphones, including cleaning dirty ear cups:
Why Should You Clean Headphones?
It would help if you didn’t debate about cleaning headphones because it’s best to maintain the highest hygiene possible when using them.
As a biological process, our ears create earwax; therefore, you can end up with an infection if the wax mixes with dust, dirt, and moisture.
You mostly put headphones anywhere you can reach easily, such as pockets and bags, which are dirt nests. Therefore, failure to clean your headphones might send you knocking to a doctor’s office.
How to Clean Headphones
Cleaning headphones can be tricky because the process involves cleaning more delicate parts, such as foam or leather ear pads, which can tear easily. Therefore, it’s best to proceed gently if you want to avoid buying new headphones.
Here’s how you can clean your headphones:
What You Need:
- Small clean or microfiber cloth
- Q-tips or cotton buds
- Rubbing Alcohol or hand sanitizer
- Soapy water
Procedure:
- Remove the ear pads and wipe the headphones’ exterior using a cloth dampened with soap and warm water.
- Wipe dry with some paper towels and leave to air dry completely.
How to Clean Ear Cups
Cleaning ear pads is slightly more challenging; however, it’s doable. You can follow these steps to clean ear pads:
- Dampen a small cloth with hand sanitizer or rubbing alcohol and gently wipe down the exterior of the ear pads.
- Soak a cotton bud or Q-tip in hand sanitizer and use it to clean the nooks and crevices of the ear pads.
- Dab some alcohol or hand sanitizer over the surface of the foam mesh and gently rub both the right and left sides together. Doing so will kill any bacteria that reside in the ear pads. Rubbing gently should also help to dislodge any grime or dirt.
- Let the ear pads dry completely on paper towels before reattaching them.
- Use a leather conditioner on your leather pads to prevent any cracking or damage to the headphones. Additionally, the conditioner will extend the ear pads’ lifespan and keep them fresh.
Remember that some headphones require specific maintenance processes that might differ from what’s discussed above. For example, cleaning the AirPods Max requires you to detach the ear pads and cups from the headband. Therefore, checking your manufacturer’s guide before cleaning is always best.
Advanced Cleaning Method
If you’re looking for that straight out of the factory cleanliness, you’ll need a more intense option; therefore, you can get a hearing aid vacuum. It utilizes small vacuum pumps to eliminate dirt, earwax, debris, and moisture in electronic devices and instruments.
How to Restore Fake Leather Ear Cups
Fake leather, also known as protein leather, vegan, or pleather, is the most common material in ear pads. High-quality ones are durable and pleasant to the touch.
Cheaper pleather ear cups feel like plastic, are harder to the touch, and often crack after some time. However, you can prolong the life of your fake leather ear cups by doing the following:
- Try to wipe your ear pads after every use by quickly brushing them against your shirt.
- Keep your headphones from extreme temperatures. For example, please don’t leave them in direct sunlight or exposed to heat or humidity.
- If you use your headphones sparingly, storing them in a box or pouch might be a good idea to slow down ear pad degradation.
If you’re dealing with old and worn-out ear cups, you might be tempted to use a leather conditioner to restore them. However, using regular leather conditioner on your fake leather ear cups is out of the question because it might lead to hardening and cracking.
You can follow these steps if you want to restore your fake leather ear cups and get their sheen back:
- Remove your ear pads first because oil can be hard to clean off the headphones if you accidentally go over, especially on matte headphones or those with an intricate finish or design.
- Get a lint-free microfiber cloth and dab it into a teaspoon of coconut oil.
- Hold the cloth firmly and gently work the oil into the pleather on the pads’ face, outer rim, and underside.
Following the above procedure will make your pads look new. Additionally, your pleather will regain the silky feeling and feel much smoother.
How to Clean Genuine Leather Ear Cups
Real leather is mostly reserved for luxurious products, where you pay for the sound and experience.
Some people like real leather just because of its “leathery” smell; however, it also has advantages. With proper maintenance, it can last longer than a synthetic counterpart.
You can maintain your leather ear pads by doing the following:
- First, wipe the ear pads after every use to eliminate excess moisture and sweat.
- Once a year, apply leather conditioner on-ear pads to avoid surface cracks.
- Finally, don’t expose your headphones to extreme temperatures, like leaving them in the sun.
Unlike pleather, genuine leather is porous and absorbs everything that stays on its surface for too long, including sweat. Therefore, you should always brush your ear pads against your shirt every time the listening session is over.
If sweat finds its way into the leather, it will eventually start to smell. Therefore, if you want a better effect, wipe the ear pads more thoroughly with a moist cloth at least once a week.
If you want to avoid cracks on the leather ear pads, you can use a leather conditioner for car seats or sofas. You can use the leather conditioner every year or so. However, keep it simple because if you moisturize leather too often, you can speed up the rotting process.
When Should You Change Ear Pads?
Maintaining and cleaning your ear pads will ensure they’re in great condition. However, it would help if you changed them under the following conditions:
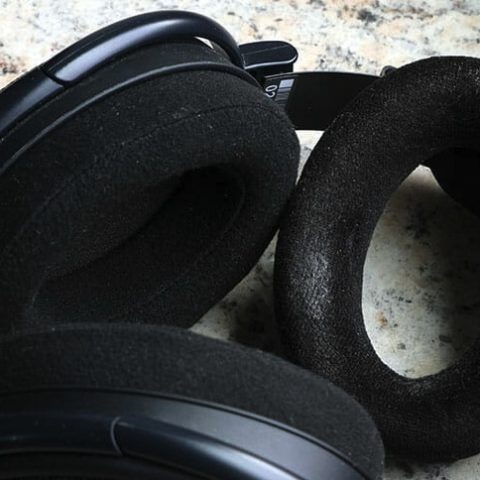
- When ear pads start losing their shape and audio characteristics, the memory foam inside will often become stiff and uncomfortable, and the outer material gets dirty.
- Ear pads start to rot and stink.
- The leather starts to crack or even peel off.
In addition to the above signs, changing your ear pads will depend on how serious you are about the optimal performance of your headphones. Generally, with proper care, your ear pads can last very long.
If you don’t use your headphones that much, you should change them every two to three years or when you start seeing the wear and tear signs discussed above.
However, if you use your headphones for professional work, you should change the head pads every six to eight months. On the other hand, if you use them daily, the foam inside gets stiffer much sooner, which changes the quality of the audio and perceived details in the mix. Therefore, you should consider changing them earlier than six months.