
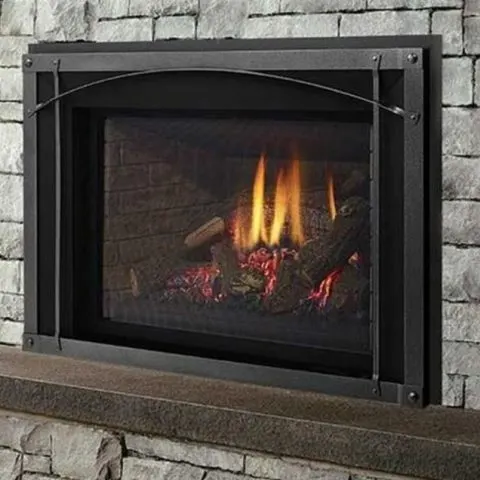
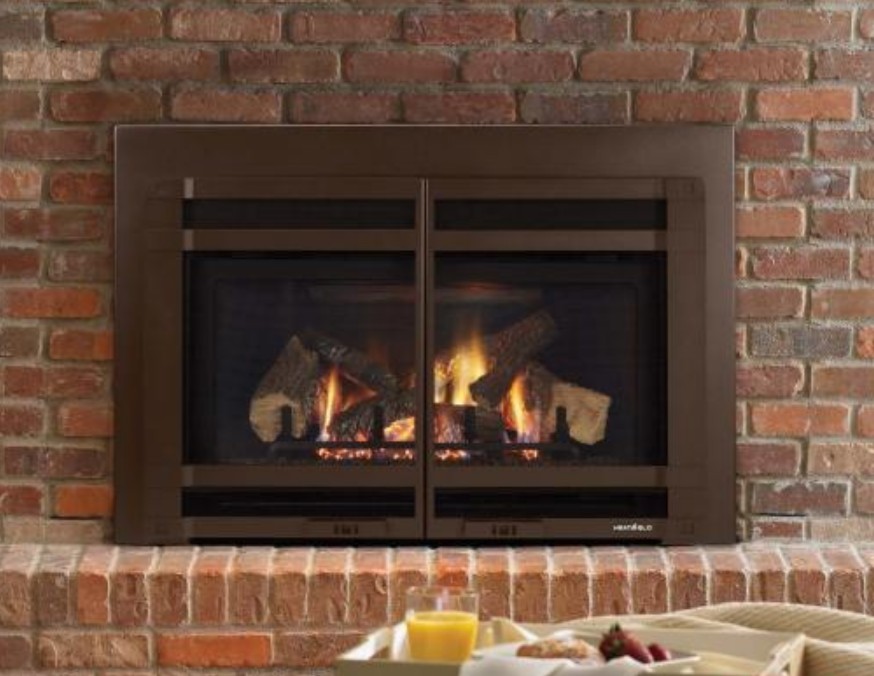
Gas fireplaces come in three types namely; inserts, built-ins, and log sets. Whichever gas fireplace you have installed in your home, knowing how to troubleshoot these heat producers can help you save on costly repair expenses while ensuring you make the most out of your fireplace.
A number of issues with gas fireplaces are simple DIYs that can quickly be resolved. Read on to learn how to troubleshoot some common gas fireplace problems.
Gas fireplace flame goes out
If the pilot and main burner extinguish while in operation, it could be because of the following reasons:
- No LP in the tank.
- Improper gas inlet pressure.
- Inner vent pipe leaking exhaust gases back into the system.
- Glass installed improperly.
- Improper vent cap installation.
- The high limit switch has been automatically activated.
To troubleshoot, follow these instructions:
- Check the LP (propane) tank. Refill the fuel tank.
- Verify the gas inlet pressure with a manometer. Natural gas should read 5-14 inches w.c. LP should read 10-14 inches w.c.
- Check venting system for damage. Repair/replace improperly assembled pipe sections.
- Check to ensure the glass is installed properly. Replace glass panel assembly if you need to.
- Check to ensure the vent cap is properly installed and is free from debris or blockage.
- The appliance may be equipped with an auto-reset high limit switch which will shut down the appliance if it spills under flue blockage or excessive negative pressure conditions. Shut off the appliance and the gas supply. Don’t try to operate the appliance until it has been examined by a qualified service technician.
Gas fireplace troubleshooting low flame
Typically low flame height indicates either you have low gas pressure at the fireplace or you need to restrict the venting to slow down the draft.
To fix low flame:
- Verify pressure with a manometer. Natural gas should be 5-7 in. w.c. LP should be 11-14 in. w.c.
- Depending on how the fireplace is installed you may need to put a restrictor in the venting or restrict the venting. When you restrict venting you are slowing down the draft, so you are not bringing in as much fresh air. The more air being pulled into the fireplace will lower your flame height. But, don’t restrict too much as it can lead to a sooty flame.
- Close the air shutter just a bit. The air shutter determines how much air mixes with the gas at the burner orifice.
Gas fireplace igniter not sparking
If the gas fireplace igniter is not sparking, try these troubleshooting tips to resolve the issue:
- There could be no gas or there is low gas pressure. Check the remote shut-off valves from the appliance. Usually, there is a valve near the gas main. There can be more than one valve between the appliance and the main.
- Check the LP (propane) tank. You may be out of fuel.
- Check the spark at the electrode and pilot. If no spark and electrode wire is properly connected, replace the igniter. Verify that there is no short in electrode wire.
- Using a match, light the pilot. If the pilot lights, turn off the pilot and trigger the piezo igniter again. If the pilot lights and improper gas/air mixture cause the bad lighting and a longer purge period is recommended. If the pilot will not light, ensure the gap at the electrode and pilot is 1/8 inch to have a strong spark. If the gas is fine, replace the pilot.
Why is my gas fireplace not turning on?
There could be several reasons why your gas fireplace isn’t turning on:
- The gas control knob is not turned to “ON”.
- ON/OFF switch is not turned on.
- Remote, wall switch, or thermostat is not turned “ON”.
- Plugged main burner orifice.
- Remote, wall switch, thermostat, or ON/OFF switch wires are defective.
What to do when your gas fireplace won’t light
If your gas fireplace pilot sparks but the pilot will not light, here is what you need to do to fix the problem:
- Verify that the incoming gas line ball valve is “open”. Verify that the inlet pressure reading is within acceptable limits.
- Verify that the spark gap from the igniter to the pilot hood is .17 in. or 1/8 in (3mm).
- Verify module is securely grounded to the metal chassis of the appliance.
- Verify battery voltage is at least 2.7 volts. Replace batteries if the voltage is below 2.7 volts.
If the pilot won’t light, the igniter/module makes noise but no spark:
- Verify “S” wire (white) for the sensor and “I” wire (orange) for igniter is connected to correct terminals on the module and pilot assembly.
- Verify no loose connections or electrical shorts in wiring from module to pilot assembly.
- Verify connections underneath the pilot assembly are tight.
- Verify connections are not grounding out to metal chassis, pilot burner, pilot enclosure, mesh screen if present, or any other metal object.
- Verify gap of the igniter to the right side of the pilot hood. The gap should be approximately .17 inch or 1/8 in. (3mm).
- If the above steps to resolve, the issue could be the module. Turn ON/OFF rocker switch or wall switch to OFF position. Remove igniter wire “I” from the module. Place grounded wire about 3/16 in. (5mm) away from “I” terminal on the module. Place ON/OFF rocker switch or wall switch in ON position. If there is no spark at “I” terminal, replace the module. If there is a spark at “I” terminal, the module is fine. Inspect pilot assembly for shorted sparker wire or cracked insulator around the electrode. Replace pilot if necessary.
If the pilot won’t light, there is no noise or spark
- Verify that transformer is installed and plugged into the module. Check the voltage of transformer under load at spade connection on the module with ON/OFF switch in ON position. Acceptable readings of a good transformer are between 3.2 and 2.8 volts AC.
- Remove and re-install the wiring harness that plugs into the module. Verify there is a tight fit. Verify pilot assembly wiring module. Remove and verify the continuity of each wiring harness. Replace any damaged components.
- Verify that 110/VAC power is “ON” to the junction box.
- Verify black ground wire from the module wire harness is grounded to the metal chassis of the appliance.
- If the above steps to resolve, the issue could be the module. Turn ON/OFF rocker switch or wall switch to OFF position. Remove igniter wire “I” from the module. Place ON/OFF rocker switch or wall switch in ON position. If there is no spark at “I” terminal, replace the module. If there is a spark at “I” terminal, the module is fine. Inspect pilot assembly for shorted sparker wire or cracked insulator around the electrode.
Can a gas fireplace make you sick?
Yes, gas fireplaces are a potential cause of carbon monoxide poisoning. While burning natural gas doesn’t produce the clouds of smoke that burning wood does, gas fires still produce by-products as they burn.
Another by-product is sulfur dioxide, which is a respiratory irritant that causes symptoms like difficulty breathing, coughing, and wheezing.
Check this too: Types of Gas Grill Burners
Gas fireplace pilot won’t stay lit
If the pilot won’t stay lit after carefully following the lighting instructions, it may be due to the following possible causes:
-
Thermocouple
To troubleshoot:
- Check that the pilot flame impinges on the thermocouple. Adjust the pilot for proper flame impingement.
- Ensure that the thermocouple connection at the gas valve is fully inserted and tight (hand tightens plus 1/4 turn).
- Verify proper voltage output from the thermocouple to the valve. Place one millivolt meter lead wire on the thermocouple copper lead. Place the second lead wire on the solder button on the back of the valve (blue wire). Start the pilot and hold the valve knob in. The millivolt reading should read between 8-16 millivolts. Replace the thermocouple if the reading is less than 8 millivolts.
-
Improper gas
inlet pressure
- Natural gas should be 5-7 in. w.c. LP should be 11-14 in. w.c. Verify pressure with a manometer.
-
Valve
- If the thermocouple is producing 8-16 millivolts, replace the control valve.

Gas fireplace making noise when off
Whistling gas fireplaces are often a result of copper or aluminum tubing that isn’t smooth on the inside. Movement through the tubing is not streamlined, so they put off the noise.
Follow these steps to fix whistling:
- Turn off the gas before any gas fireplace repairs.
- Find the fuel line tubing. It can be located by looking for metal tubes that end near the pilot light. The tubes feed gas into the pilot light that starts the flame which feeds the fireplace.
- Make sure the fittings of the fuel line are attached securely. If they are okay, then the problem is in the tubing. Twist the fittings off.
- Take out the tubing.
- Purchase copper or aluminum tubing of similar size and replace them.
- Turn the gas back on to see if everything is working fine.
How to adjust pilot light on gas fireplace
- Turn the screw on the control panel to adjust the size of the flame. Use a screwdriver. A clockwise turn will make the flame smaller and the counterclockwise turn will increase it.
- If your fireplace has a lo-hi button, use it. It is designed to adjust the flame size.
Gas fireplace shuts off after 30 minutes
A gas fireplace shutting off after 30 minutes is likely triggered by the safety feature/sensor. Different makes and models have different safety devices. Some have only a thermocouple, and some have an oxypilot (an atmospheric vitiation sensing device).
If you get dust in the pilot assembly and the pilot needs to be cleaned out, it produces a “lazy” flame, which will be disturbed by the draught of the burners. The flame lifts away from the thermocouple and causes a temperature drop on the tip of the thermocouple. This, in turn, makes the gas valve shut off.
To fix a faulty gas fireplace:
- Between the pilot supply pipe and the burner, there is a brass tail or connector. There is a small hole on one side. Ensure there is no dust blocking this hole. Clean it if needed.
- Then, place a bit of tubing over each pilot hole. Blow down the straw to clean it out.
Gas fireplace control valve troubleshooting
For valves with thermocouple only:
- Check connection from the thermocouple to the valve. Clean the threads of the connecting nut with a pencil eraser and re-tighten.
- Check pilot hood and flame direction. The pilot should heat the top 7/8” of the thermocouple with a clean blue flame. If the flame hits the thermocouple too low, it can cause the unit to go out or not generate enough millivolts for valve operation. The pilot hood and orifice should also be cleaned from soot which could block the pilot flame.
- Many of these valves have an adjustment screw to adjust the pilot flame. A pilot that is too short may allow the pilot to stay lit after ignition, but may not create enough heat to allow the burner to ignite.
Thermocouple and Thermopile valve:
This valve is similar to the thermocouple only valve, but it has a pilot that heats up both a thermocouple and a thermopile. Since there is both a thermocouple and thermopile in this type of valve, it is important to find where the problem may be.
If the pilot can be lit and stay on after the knob is released, then the problem is probably with the thermopile side of the valve.
Check this too: How to Clean Fireplace Smoke off Walls
Here is how to troubleshoot some common problems:
- If the pilot does not light or stay lit after the knob is released, check to ensure that gas to the appliance is on and that the valve is in the correct (pilot) position and fully depressed when lighting. If the pilot ignites but does not stay lit after the knob is released, then the problem is with the thermocouple not generating enough voltage for the valve. The thermocouple may need to be replaced. The thermocouple may also not be heated fully by the pilot flame, or there could be soot or another blockage in the pilot tube, orifice, or hood which is reducing the size of the pilot.
- If the pilot stays lit but the appliance will not turn on,
- Check the thermopile it is producing enough millivolts to power the control circuit. Check the millivolts using a voltmeter and adjust with the pilot adjustment screw.
- Check for loose or poor connections or circuits to your appliance switch, thermostat, or remote transceiver.
If all the above checks out, and the valve is still not working properly then you may have a defective gas valve in the appliance.
Gas fireplace flame ghosting
Flame ghosting happens due to lack of combustion air. A wispy, transparent blue flame lifts off the burner and floats through the firebox looking for oxygen. If the pilot flame comes into contact with the gas logs it causes glass sooting.
Gas sooting is caused by:
- Flame impingement
- Improper air shutter setting.
- Debris around air shutter.
To fix the problem:
- Adjust the log set so that the flame does not excessively impinge on it.
- Ensure that set point is correct for appliance/gas type. If your unit has adjustable shutter, it may be necessary to increase shutter opening.
- Inspect the opening at the base of the burner. No material should be placed in this opening.
Gas fireplace won’t turn off
If the pilot flame is always on or will not turn off, ensure the continuous pilot icon is not present on the LCD screen. If the icon is present press “PILOT” button. This will de-activate the continuous pilot feature and the icon will disappear from the screen.
How to Clean and Maintain a Gas Fireplace
One of the coolest things you can boast about during the chilly-biting days is a clean and efficient natural gas fireplace. A well-installed fireplace will make your home look cozy and sleek in addition to that feel of natural warmth.
Gas fireplaces have proven to be a better option as you don’t have to worry about firewood and cleaning the ashes. They also offer a great stylish touch for your home ranging from realistic, rustic logs to sleek, modern minimalist.
An efficient gas fireplace comes along with proper cleaning and maintenance routines. A poorly maintained fireplace can be a big risk as it can be a source of deadly carbon monoxide in your home.
It is highly recommended that you have a professional technician in natural gas installation and maintenance inspect the gaskets and wiring once every year.
Cleaning the fireplace once every month ensures that your favorite source of warmth is not only free from that grimy, foggy look but also free from harmful micro-organisms, dirt, and dusty.
It also gives you a chance to inspect your gas fireplace for damages and schedule timely repairs.
Below are additional tips for maintaining your gas fireplace for safety and efficiency.
- Call a professional technician to inspect the fireplace if it has not been utilized for some years before lighting it.
- Turn off the gas channel immediately you smell gas and call 911 or your gas company.
- Observe the appearance of the flame regularly and subsequently soot on other components in the fireplace. The normal should be a blue flame with a yellow tiny tip.
- If the color has changed and there is soot in the fireplace you will need to call your gas supply company to inspect the gas line.
You will need the following supplies and tools to carry out a thorough cleaning procedure.
- Fireplace glass cleaner
- Clean rags
- Warm water
- Vacuum with hose attachment
- Cheesecloth/nylon net
- Hand broom/new paintbrush
Below is a 10 step guide for cleaning a gas fireplace
- Turn off the gas at the valve, usually located on the wall adjacent to the fireplace before doing anything. This allows all the gas remaining in the piping to be safely released.
- Allow all the fireplace components to cool before you start cleaning if the fireplace has been utilized recently to avoid burn accidents.
- Carefully disassemble the fireplace components for easier cleaning. Your fireplace design will determine how you go about this step. Bring out all parts which could be a metal screen, glass door or a mesh curtain, logs, and the burner component. Consider taking them outside for cleaning to avoid spreading soot and dust in the living room. You must note the order in which you remove the components as you will fit them back in the same way. Taking pictures on your phone is a practical hack if you are not sure to remember each step.
- Clean the logs and the burner unit using a hand brush or a paintbrush with soft bristles. Brush away dust and debris from each component and remember not to use any cleaning agents and water on the gas fireplace parts.
- Inspect each piece of the logs for holes, excess marks of burning, or cracks. Carefully inspect each vent hole on the burner unit for any clogging that would interfere with gas flow.
- Clean the glass stones or lava stones using a vacuum with a hose attachment. The rocks are notorious for accumulating a lot of dust and will require you to take some time to clean all the sides of each rock. Attach the cheesecloth to the end of the hose and fasten it with a rubber band in the case of small stones that could be sucked away by the vacuum.
- After cleaning the rocks, it is time to clean the fireplace box. Remove all dust, debris, and cobwebs from all corners using the vacuum and wipe down the light and gas line using a piece of cloth.
- Spruce up your gas fireplace by giving the glass door some good cleaning therapy. Note that most glass doors will look cloudy due to the particles produced from the combustion process thus important to clean them regularly to avoid permanent staining on the glass. You can only use a fireplace glass cleaner and not an oven or window cleaner. Clean by spraying the fireplace glass cleaner and let it sit for some minutes then wipe the glass with a soft microfiber cloth until it is clear.
Metal door and mesh curtains will be properly cleaned using the upholstery brush for the vacuum.
Wipe all the edges of the door (glass, metal, or mesh) with a wet cloth to get rid of dust and debris.
Carefully inspect the gaskets on glass doors and check for cracking or any signs of deterioration. Replace them if you notice any damage.
- Clean the hearth and mantle by wiping out dust and soot using a soft cloth. Be careful to follow your local guidelines on soot removal.
- At this point, the cleaning job is all done and is time to reassemble your gas fireplace. Replace the burner, followed by logs and stones then the door or curtain. You can turn the gas valve on. Finally check the exterior vents in the case of outside vented gas fireplace to clear nests and leaf blockages.